- Creative ideas for renovation without changing the table top
- Paint and glass
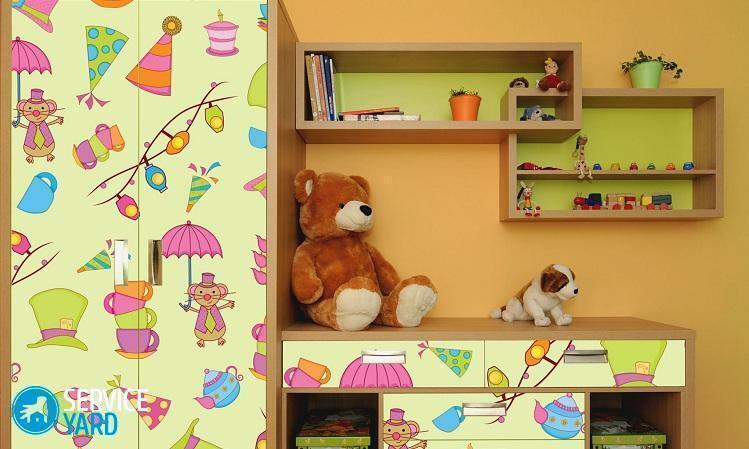
- Film is a quick way to update the look of your kitchen unit
- Photo wall as a way of updating
- Pouring the countertop with concrete
- Just paint or varnish
- We give your table top uniqueness
Over time,and reliable furniture loses its attractive appearance. But since the set or a separate table can be quite good, especially if made of natural wood, do not want to send them to scrap. How to give a new look to the countertop in the kitchen with your own hands?- This question can interest all those who are familiar with the current prices for kitchen furniture. To give a completely new look to your old countertop comes out much cheaper than buying a new one. In this article, we will reveal a couple of ways and provide ideas, than paint the countertop in the kitchen, as it can be updated.
to the content ↑Creative ideas for updating without changing the table top
There are many ways to restore the appearance of the countertop with your own hands. And now we will introduce you to several of the ways how you can give a completely new look to your old countertop.
We will consider those options that have met the expectations of many domestic craftsmen and enjoy constant popularity. For example:
- staining;
- decoration with glass;
- tile decoration;
- wallpaper trim;
- self-adhesive film restoration.
Paint and glass
To renew the countertop, you can use tempered glass. To do this, it must first be cleaned, degreased and covered with paint.
To make it look even more beautiful, you can put any drawing.
Important! Do not worry, even if you did not finish art school, and you never could draw, you can always use stencils designed specifically for this, and thus give your countertop an unusual look.
After the table top has dried from the paint, a sheet of tempered glass is attached to it from above. Everything, the table top is ready!
It will look exquisite and expensive. Glass will give your table strength. A wet cleaning will take even less time.
Important! There is one nuance: if you make a similar redesign to your table, then do not put it directly next to the stove.
Which paint should I use?
Depending on the expected result, different types of paints can be used. For example, the options for coloring the countertop in the kitchen can be:
- Alkyd enamels. They stay on the surface for a long time, they are not toxic, they dry up pretty quickly.
- Water-based acrylic paints are perhaps the best option. These paints for a long time retain their original shade, the strength of the coating, and literally dries out within an hour. Solutions are not toxic, which is very important for kitchen furniture, which is constantly in contact with food.
- If the worktop is made of natural wood, it is better not to use any paint at all, but to stain with stain, or to impart a more pronounced texture to the oil. This option is the safest in terms of hygiene.
Important! In general, the question is, is it possible to paint the countertop in the kitchen, the answer is not straightforward. On the good - it is better not worth it, because even the safest mortar is chemistry, which will end up in your body. On the other hand - if you protect the surface with glass, then why not?
to content ↑The film is a quick way to update the look of your
kitchen headset. This option of updating the kitchen set will not make you spend a lot, because it's quite easy to get a self-adhesive film, and it will cost very cheaply.
Important! At this time, the film can imitate absolutely different types of materials - leather, wood or stone. Therefore, to understand the appropriate design, even with the most original idea will not be very difficult.
The only thing that is worth noting is - do not buy very cheap films, because the material must be high-quality and practical. One of the best options for choosing a film is vinyl, as it is resistant to moisture, sudden changes in temperature, and can also retain its appearance for a long time and not spoil it.
So, to update the tabletop with the help of a film you will need:
- Directly the film itself;
- Knife;
- Ruler and pencil;
- Centimeter( measuring tape);
- Rubber scraper.
Well, let's get started!
- The first step is to find out the size of the headset that you want to replace, and if it is required - smooth out any irregularities on the table. This is necessary because the film has a property that you should not forget about - it exactly repeats the surface to which it is applied. Therefore, it is worthwhile to seriously approach the surface preparation process.
- After you have learned all the necessary dimensions, on the underside of the film you need to make marks, on them we will cut the canvases into the pieces we need.
Important! If you use a film with a pattern, then it's worth watching that the pattern coincides, otherwise it will be ugly.
- With a stationery knife and ruler, try to cut as much as possible even pieces of film. The more equal, the better.
- Next, using a rubber scraper, which will help us in smoothing the irregularities, glue the film on the prepared surface of the table.
All, congratulations, your table top has acquired a new beautiful view!
to content ↑Wall-papers as a way of updating
Wall-papers are now very much in demand for arrangement of bedrooms or children's rooms, but it is much more interesting to use them to update the tabletop of a kitchen table.
Important! The only nuance in this case - you need to glue them on the paint, which means that before that it is necessary to paint your headset.
To make everything neat and really interesting, take note of these tips:
- For wallpapering, you also need to use a meter to measure and cut even pieces of wallpaper and paste them on the surface of the countertop.
- To make the wallpaper last longer, it's better to choose a vinyl self-adhesive wallpaper.
- But if you chose traditional wallpaper, then remember that after their labeling, you should apply a few layers of varnish to the surface. It is necessary that the surface retains its appearance longer.
Pouring the countertop with concrete
This way of updating the countertop in the kitchen is more time consuming, and occurs in several stages. But with a careful step-by-step execution, all your works will pay off with a vengeance of the original surface design and its strength.
We make the frame
As the tabletop made of concrete will be quite heavy, we need to make a new strong frame for it:
- The frames of the frame will be made of large bars, and the joints between them from the bars 50x40 mm.
- The frame should be stable, in connection with this, make holes of 8 mm in the rack, which will adjoin directly to the wall.
- In the wall at the same level, make empty holes, and fix it all with bolts.
- Racks from above and from below will be interconnected by crosspieces.
- On the floor we will mount the frame with solid iron corners.
Important! The smoothness of the frame should be determined by the building level.
- Next we need to do the manufacturing of formwork. Its bottom can be made non-removable by placing it on the frame and fixing the boards on it. We cover them with polyethylene.
- The side boards are assembled from the boards so that their height corresponds to the required thickness of the countertop.
Important! The horizontal formwork is also worth checking with the building level.
- The inner walls of the formwork should be sanded and painted.
Important! On the side where the table top meets the wall, the rim is not necessary, as instead you can install an aluminum beacon - it can not rust, respectively - do not worry that rust will appear on the table.
We make the bottom
The demountable bottom is made as follows:
- On the inner side of the upper jumpers, horizontal slats are screwed.
- On them we put boards of particleboard, plywood or OSB.
- From the outside to the frame we attach boards, the width of which will be the same width of your countertop.
- We attach them to the sides. Cover the form with polyethylene.
- After the work done, the reinforcement is inserted into the formwork to form a grid with cells 50x50 mm. It is recommended to connect the reinforcement with wire or plastic clips.
Important! The lattice of the reinforcement must not lie on the very bottom of the formwork. This can be done simply by placing under the grid the pruning of rods.
- Then set the beacon for the level that we need.
Now, after we have strengthened our countertop, we can begin pouring concrete.
Preparation of mortar
Concrete for pouring should not be too liquid, but not too thick so that it can evenly distribute along the entire grid of rods.
Mixture can be produced in 2 ways:
- For preparation, cement M-500 can be used as a finished dry mixture or a liquid solution. In this case, the age of the cement should not be more than one month.
- If you decide to make a solution yourself, you need cement, sand and crushed stone in a ratio of 1: 2: 3.
When mixing yourself, follow these rules:
- Water is gradually added after the other components have been mixed.
- With water it is also worth introducing plasticizer.
- Together with it it is possible to introduce pigment into concrete so that later the artificial stone takes the form of granite or stone of another breed, in general, what your heart desires.
Important! Do not pour dry stains - it is best to dilute it with water before adding. So the color of the finished material will be uniform.
Fill concrete:
- Fill the formwork with concrete at a time to prevent cracking of the tile in the future.
- The leveling of the mortar follows the rule, which is based on the beacon profile and the side edge parallel to it.
- The final grouting of the surface is done by a float.
- After pouring concrete should be covered with a plastic film.
Important! Every day during the first week, the surface of the countertop must be moistened, sprinkling with water from the spray gun. After 7 days, you can disassemble the formwork.
Update the countertop you managed! We hope you are satisfied with the result. And how to decorate such a surface, we will describe below.
Facing with tiles and polishing "under the granite"
These 2 options look very decent in terms of aesthetics, so they also take place among the interesting ideas used to update the countertop in the kitchen.
Make tiles
Ceramic tiles will look very organic on the table top of the kitchen table, because most often the walls and floor of this room are decorated with tiles. When choosing a material, be sure to relate the design of these surfaces to the intended decor of the table, so that everything looks harmonious.
The work itself is done in this way:
- Spread the adhesive evenly around the table.
- The tiles should be laid from the noticeable edge of the table, that is, from the front edge of the table top.
- Between the tiles you can install crosses so that the seams are the same and at the end the surface looks attractive.
- It is worth checking the level of the building level.
- Cut off parts of the tile better to glue near the wall.
- At the end, the joints between the tiles are treated with grout.
Important! The visible part of the table should be covered with a facing profile, which can be fastened to tile glue or liquid nails. You may also need to use grout for the seam between them.
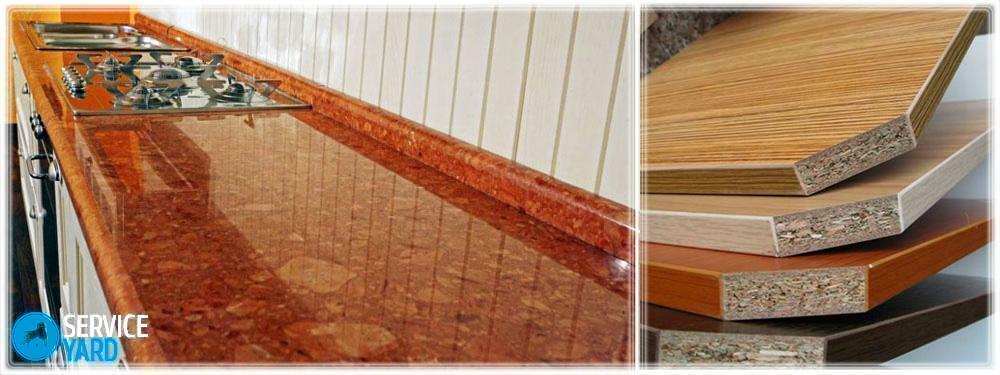
We polish the countertop "under the granite"
In order to polish the countertop "under the granite", it is worth using the grinding machine intended for this. The progress of the work, so that the countertop looks like granite, is as follows:
- First of all, we process concrete with a coarse nozzle to a perfectly flat surface. It is necessary to remove absolutely all irregularities. Only after this, start working on the table with a small abrasive.
- Then, using a vacuum cleaner, remove all the dust.
- By means of a special filler for concrete we create a waterproof film on the surface of an unprepared countertop.
- The finishing touches are applied by polishing with a suede nozzle at low speed.
Just paint or varnish
Can I paint the kitchen countertop with paint, without any glass, concrete and other? Yes, and now we will tell you how.
This method is the easiest and cheapest, and does not require any kind of super strength. Just for this you need:
- to make the surface of the countertop as smooth as possible with a grinder;
- if there are cracks, then they must be corrected by using putty or putty;
- apply the alkyd paint on the first primer coat;
Next - give vent to your imagination and make from your countertop an incredibly beautiful and unique product.
to the contents ↑We give your table top the uniqueness of the
To give your desk an unusual and unique style, you can use stencils or simply draw what your heart desires, well, or apply the old technique of decoupage. The meaning of this technique is that you glue beautiful table napkins to the surface of the table and cover everything with varnish. Although in any case, it is desirable to treat the surface with varnish to increase the life of your countertop.
In this article we have shared with you interesting ideas for giving an excellent appearance to your worktops. The main thing is to approach everything with a creative, and then the result will not disappoint you exactly.