If you find a leak in the drain tank, then you must definitely determine the cause of the malfunction. Such a breakdown can bring a lot of problems if you just ignore it. Repair of the drain tank can be done with your own hands, if you know exactly what and how to do. Today, in our review, we will study the most common causes of breakdowns and tell you how to eliminate them.
Read in the article
- 1 The device and principle of operation of the drain tank
- 1.1 Lever drain options
- 1.2 Button Models
- 2 How to disassemble a toilet for repair
- 3 How to Troubleshoot Continuous Fills and Leaks
- 3.1 Skewed float or drain valve
- 3.2 Leaky float
- 3.3 Feed valve failure
- 3.4 Leaky fit of the drain valve to the seat
- 4 How to troubleshoot other cistern problems
- 4.1 No water enters the drain tank
- 4.2 The tank fills noisily
- 4.3 Water leaks onto the floor
The device and principle of operation of the drain tank
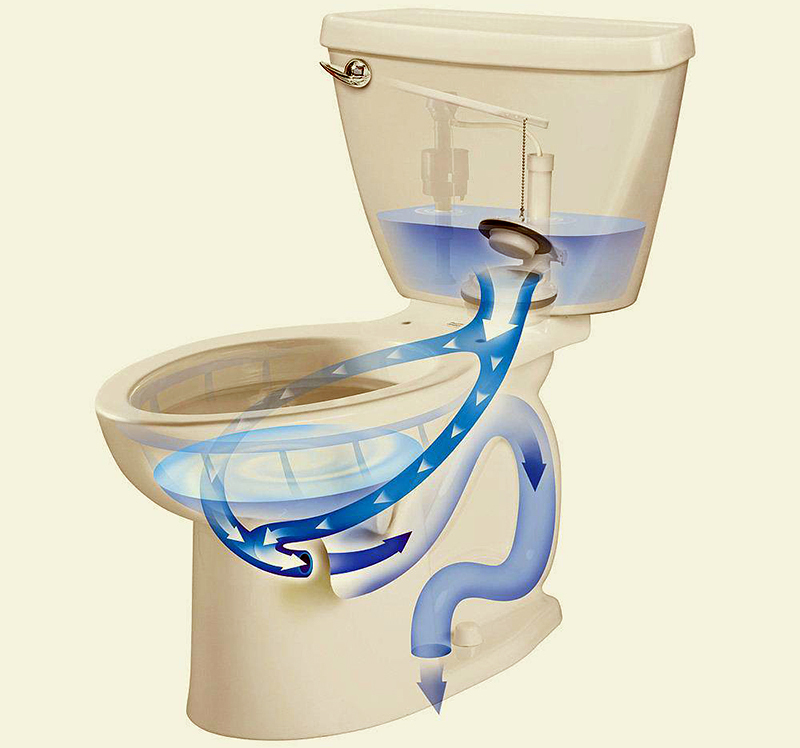
The drain tank is a fairly simple design. It has two most important systems - a filling valve and a drain column. Through the filling valve, water enters the flush tank and the drain column - the latter ensures the flow of water into the toilet and controls the flush.
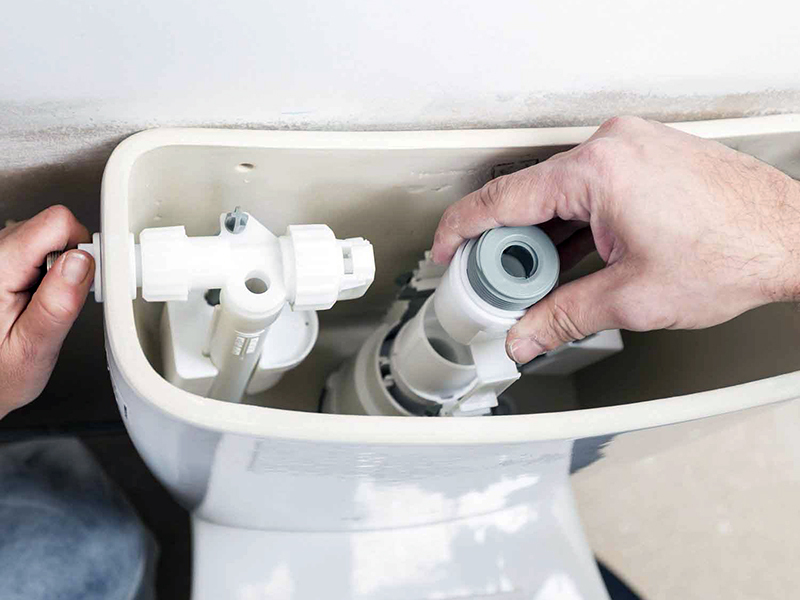
There are several varieties of drain tank, consider the main ones.
Lever drain options
This is an outdated version of the flush design, which is now almost nowhere to be found. It is assumed that in this case the tank and the bowl are separated. The drain tank itself is located at a great distance (most often on a hill) from the toilet bowl. It is known that the higher the tank, the stronger the water pressure. The elements are connected by a pressure pipe.
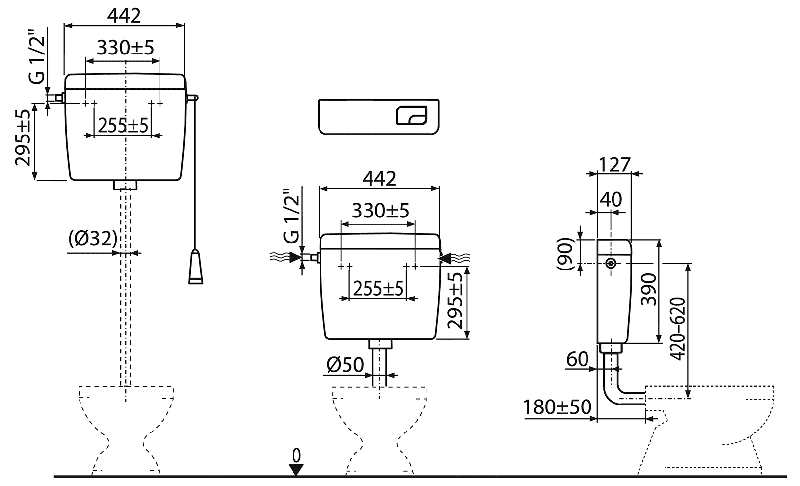
More modern versions of such structures are hanging tanks hidden for installation.
Button Models
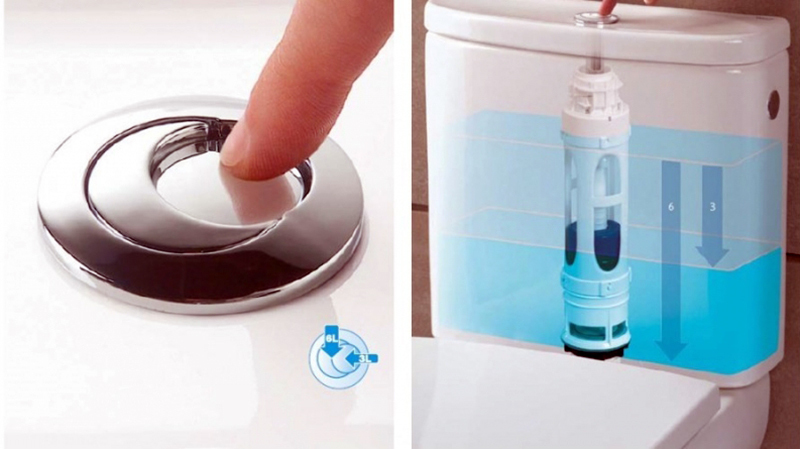
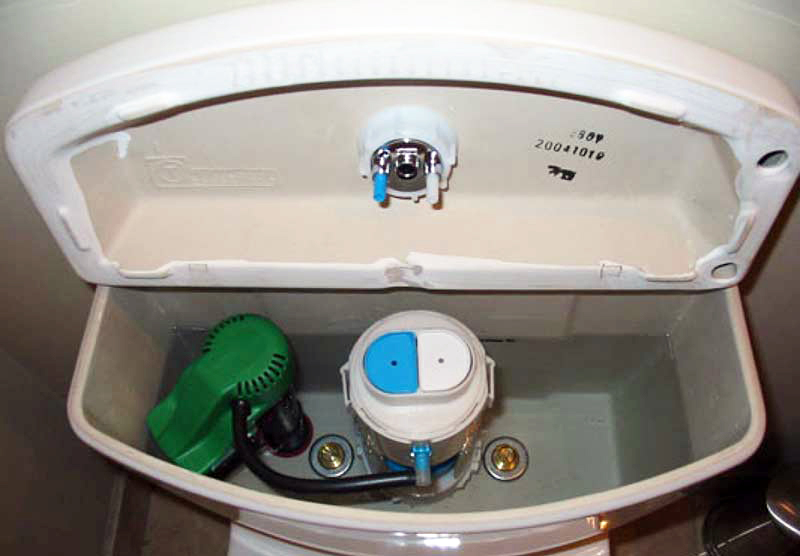
Push-button models are one of the most common in modern bathrooms. Moreover, there may be models with a single or double button. Such models can be used for economical flushing. By pressing one half, you wash away only part of the water.
How to disassemble a toilet for repair
All work begins with shutting off the water at the inlet to the tank or the entire water supply line. After that, it is necessary to flush the water in the tank into the toilet.
First you need to dismantle the button. There are different mounting options. Sometimes the button is attached to the tank lid. If you remove the button without dismantling along with the cover, then proceed to the next step.
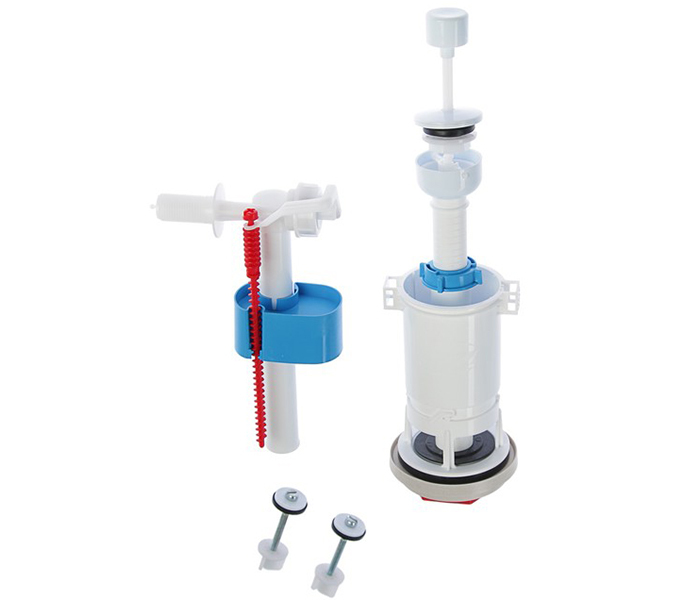
After removing the cover, we see the drain column in the shutter position. Side fill valve. If the length of the supply hose is sufficient to remove the tank and put it on top of the toilet, then proceed to the next step. Otherwise, turn off the eyeliner. The drain column is collapsible - consists of two parts. To make it easier to carry out work, we dismantle the upper part. To do this, turn it 90 ° (it will detach from the bottom with a snap).
Next, we release the platform from the sealing gasket. If outwardly there is no damage to the tank, then the cause of the leak may be a shifted tank and a slipped sealing gum.
We replace the rubber gasket and start the assembly in the reverse order. Often the cause of water loss is a poor-quality reinforcement system, which does not fit tightly to the place of water discharge. The most common causes of leakage: breakage of the float or drain column, contamination of parts, thinning of the rubber seal.
How to Troubleshoot Continuous Fills and Leaks
To do this, completely shut off the water supply to the tank. Examine the integrity of all locking systems and fittings. It is likely that the problem of leakage is in the misalignment of the fittings or the drain system.
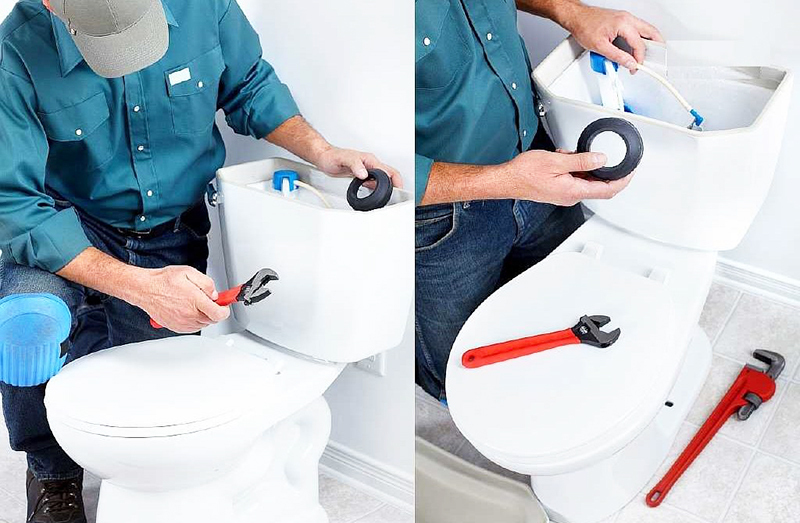
When the drain valve does not completely shut off the water, a leak occurs. The reason for this may be a breakdown of the device or its blockage.
Skewed float or drain valve
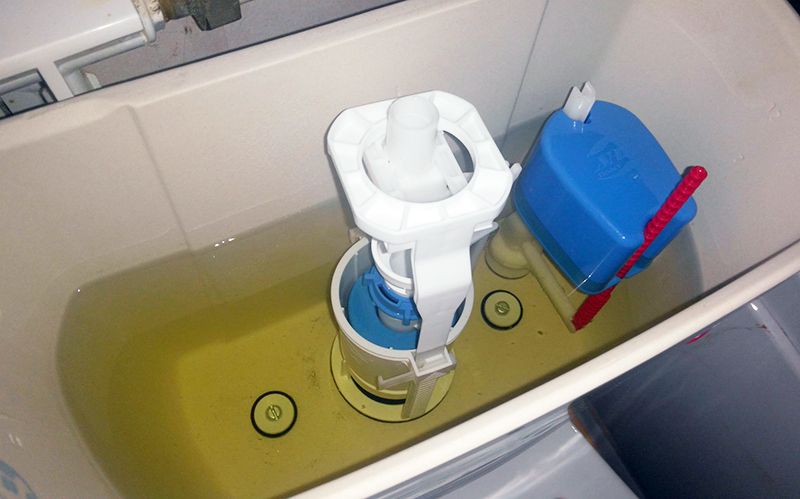
In this case, the water will constantly leak. It is enough to correct the “pear”, check its tight fit to the saddle in order to eliminate the problem of water leakage. A skewed float prevents the supply valve from closing. The tank is constantly filled with water, which flows into the toilet bowl through the overflow tube.
Leaky float
Very often, a plastic float can lose its tightness. Because of this, water penetrates into its body and it ceases to perform its functions, to float to the surface. In this case, the lever remains in the "closed" position.
There are two options for solving the problem:
- purchase and installation of a similar or similar float;
- repair of a worn float using sealant, glue, heated plastic and other improvised materials.
After repair or replacement of the float, the filling level of the tank should be adjusted.
Feed valve failure
Very often, the cause of a malfunctioning toilet drain is a malfunction of the supply valve. Check the operation of the valve by artificially pressing it to the bottom. If this action does not stop the water supply, the float mechanism must be replaced. The inlet bottom valve adjusting screw is unscrewed to the limit in order to raise the float as much as possible.
Leaky fit of the drain valve to the seat
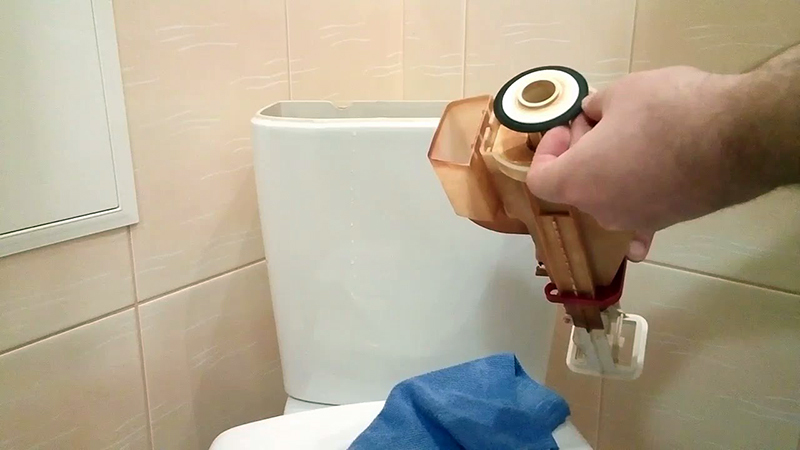
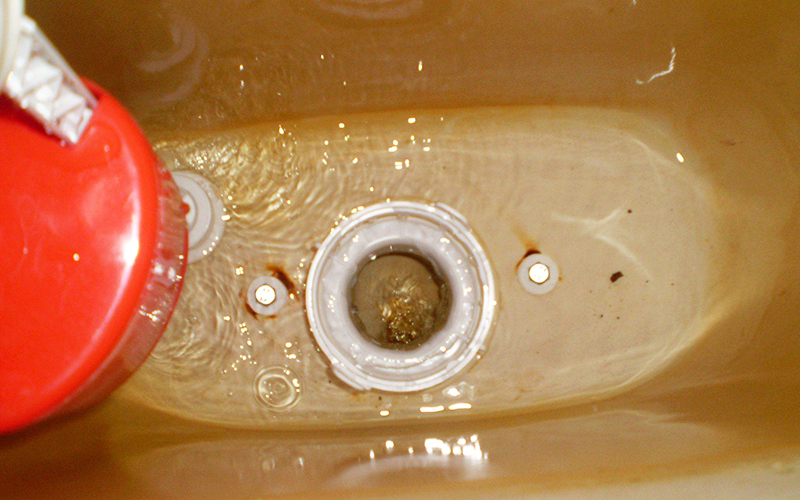
Very often, the flush tank cannot hold water due to the deformation of the sealing ring. It can deform, move, burst. We talked in detail about how to choose and replace the gasket between the tank and the toilet in one of our articles.
To fix the problem, you need:
- turn off the water and empty the container;
- dismantle the tank;
- unscrew the fixing nut and remove the drain mechanism;
- remove the sealing gasket, clean it of dirt, grind the grooves to smoothness with fine-grained sandpaper, if they appeared during operation;
- rinse the tank and drain mechanism, install everything in place.
As we have already said, the seal should be chosen depending on the manufacturer, the size of the toilet bowl, the shape of the gum.
How to troubleshoot other cistern problems
Sometimes (in fact, quite rarely), cracks in the body can be the cause of a toilet leak. They can occur due to the inadvertent fall of a heavy object on plumbing. It is important to know how to repair the cistern or the toilet itself if there are cracks in the body. Leaked water can cause a flood, so if you find a problem, you should act immediately. Glue for ceramics will help to close the crack, but in the near future the plumbing will have to be replaced.
A leak can also occur in the following cases.
The nuts on the bolts with which the tank is attached to the toilet pan have loosened. Fasteners must be carefully tightened with a wrench. If it is necessary to replace the seals, the tank will have to be dismantled and reinstalled.
The connecting cuff between the tank and the toilet shelf is deformed or damaged. It must be replaced, but as a temporary measure, the resulting gaps can be sealed with silicone sealant.
No water enters the drain tank
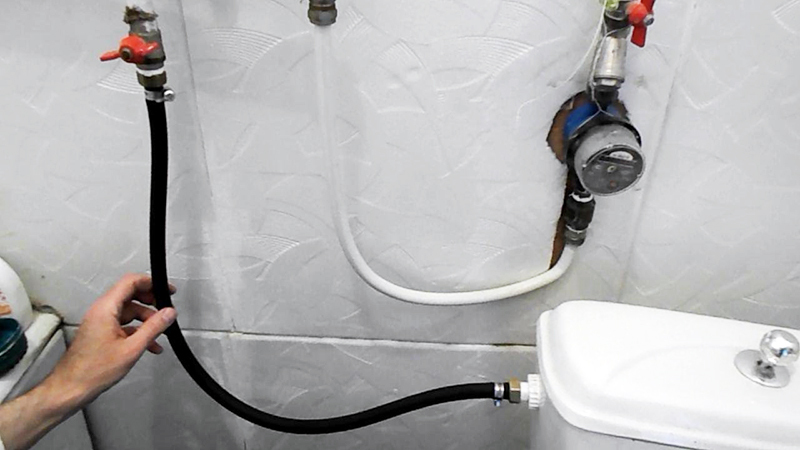
Usually in this case, a blockage in the supply hose is diagnosed. To check if there really is a blockage, the hose is disconnected from the tank and the water is drained into a basin. If after opening the tap the water does not go, the problem is really clogged.
The draining process starts only after repeatedly pressing the button
Often the problem with button sticking occurs due to accidental displacement of the pressing rod. Excessive force when pressing the button can also provoke a shift in the adjustment mechanism. If the cistern button has failed, it may be necessary to adjust the height of the drain device (flush valve). This breakdown is especially typical for tanks with a double button.
The tank fills noisily
This problem is typical for tanks of all drain systems. As a rule, noise is created in the first minutes after the tank is empty, while topping up a new batch. It is difficult to get rid of noise, because this is a design feature of the model. However, some craftsmen offer different solutions. To reduce the noise of water intake, a small piece of rubber or plastic tube is put on the nozzle of the locking mechanism.
The length should be such that the tube reaches the bottom of the container. After that, the tank will make much less noise.
Water leaks onto the floor
If an external leak appears, you can repair the toilet bowl with your own hands and not call the master. Most often, the cause of a leak is a shift or failure of the gasket between the tank and the toilet, a burst pipe for supplying water to the tank, or a leaky installation. All these problems can be easily dealt with.
If there is a leak in the place of the connecting screws, then they need to be unscrewed and the rubber seals changed. To do this, it is not even necessary to remove the tank itself. When choosing new seals, it is better to give preference to cone-shaped rather than flat ones. They adhere much more closely to surfaces.
When attaching plumbing, do not use excessive force. Bolts that are too tight during use can cause cracks. Avoid distortion when installing plumbing. Usually all the bolts are tightened in turn, one and a half turns are carried out. To avoid problems associated with leaks, with excessive use of water constantly flowing into the bowl toilet bowl from the tank, it is important to know the device of the flush tank, be able to adjust and repair mechanisms. To avoid flooding neighbors and leaks, regularly inspect the connections of the tank and the base of the toilet.
Preventive measures allow you to extend the life of the mechanisms. Do not neglect the rules of operation and maintenance. Use only "native" fasteners and constipation of all mechanisms that are responsible for the water supply. The most common causes of leakage: breakage of the float or drain column, contamination of parts, thinning of the rubber seal. Knowing how to fix the drain tank, you can fix or adjust the water supply mechanism, return functionality of the drain device, completely replace the fittings or replace damaged elements, including seals.
If the toilet bowl is leaking, repairs can be done without the help of a master, with your own hands. To do this, you need to study the design of the tank and disassemble it, replacing broken parts. The HouseChief editors recommend that all elements be thoroughly cleaned, and then the purchase of new fittings may not be required.
Everything will be if you purchase electrical appliances for 12 volts.
There are 4 panels in the country house and that's enough for everything.
What are these blocks you have so rotten? Never had a problem with gas silicate blocks...
We saved up for a long time, we had to severely limit ourselves in the usual things, until we found out ...
In general, as far as I understand, this is done differently in different regions. Yes, looking at...
I have such a question if I have a central gas pipe that runs right next to the house p ...
Especially with the insulting hint that not new yarn was used in my product, but ...
Hello. It is very unpleasant that you use other people's photos in articles without asking ...
With my own hands, I can't build very well. My wife and I decided to buy a bath from the tower ...
Partly, I liked the interior, I was impressed by the estate, I started to smile, only …
In my opinion, going to the village is too much, if there are no plans to take care of the household. Could…
It looks more like Lerchek bartered furniture, renovations, décor, and clothing. And there h...
When Buryatia was included in the Far Eastern Federal District, housing prices jumped more than 2 times due to this ...
It's a pity we don't have such a program as in the Far East. I had to buy a country ...
I've been looking at buying a sauna for a long time. I recently found exactly that one at an exhibition in Zyablikovo ...


