- General characteristics of skirting boards made of polyurethane
- Recommendations for preparation for installation
- How to cut the skirting board correctly?
- Skirting boards
- Finishing the plinth
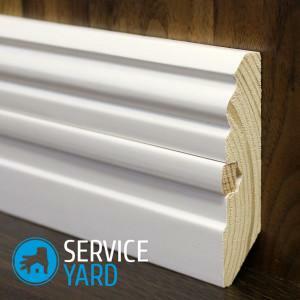
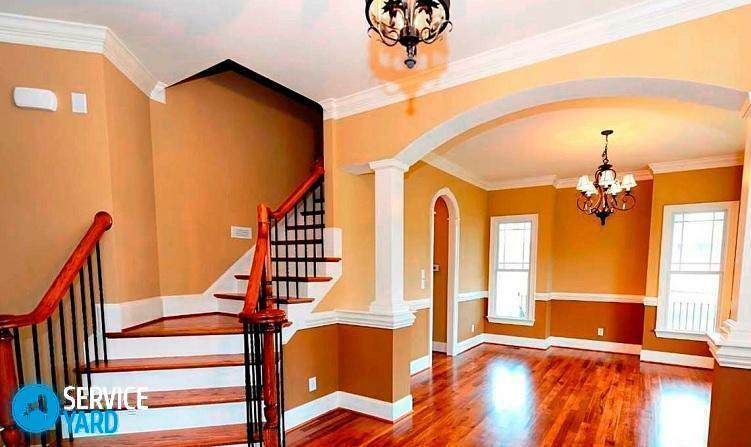
Despite the use of the best coatings for walls, ceilings and floors, it is sometimes difficult to achieve perfection in the interior without having installed the polyurethane skirting. With this decorative strip the joints between the surfaces are closed, and the room itself acquires a complete look. Today, such framing for the ceiling and floor is made of different materials, and also come in different colors, which makes it possible to choose a decor for absolutely any cover. One of them is polyurethane plinth. You will learn about its varieties, advantages and features of installation from this article.
to the table of contents ↑General description of skirting boards made of polyurethane
Foamed plastic( polyurethane foam) was invented in the twentieth century. In architecture, this material has been used since the 70s. This was the beginning of a new era in the development of interior design. The use of decorative elements made of foamed plastic( moldings, columns, plinths, pilasters, cornices) created new opportunities for performing different styles of decoration of premises.
Polyurethane skirting boards, due to their affordable price and performance, have become universal elements for decoration. In comparison with other materials, their advantages include:
- A wide range of patterns, the possibility of additional finishing( painting, applying gilding).
- Environmentally friendly.
- Good performance.
- Easy to clean.
- Ease of installation.
- Strength, stiffness and lightness.
- Variety of sizes and shapes.
Important! In comparison with other baguettes, there are not so many shortcomings in polyurethane products. These include the fear of mechanical damage and temperature changes. In addition, ceiling wide skirting boards are relatively heavy, which can create certain difficulties when installing a ceiling skirting from polyurethane.
Plinth made of polyurethane foam for the purpose can be divided into:
- Ceiling.
- Floor.
And for the color design they are:
- Fully painted and ready for installation.
- Prepared for painting( white primer is applied).
Recommendations for the preparation for the installation of
Before starting the installation of polyurethane ceiling skirting boards, it is necessary to prepare the tools that work:
- A suitable container for the preparation of putty.
- Mounting knife.
- Spatula.
- Glue gun.
- Hacksaw for metal.
There are further nuances.
Baguette dimensions
It is necessary to determine in advance the type of plinth made of polyurethane. Consider the fact that wide skirting boards will visually reduce the length of the room. Therefore, for placing a small area, narrow models are more appropriate.
Quantity
Before going to the store, you need to calculate how much material you need to finish your room. To do this, you need to define its perimeter. For example, if the length of the room is 5 meters, and the width is 4 meters, then its perimeter is 18 meters. Standard skirting boards for ceilings have a length of 2 meters. To determine the exact number of products, you should divide the perimeter of the room by the length of the plinth.
In this example, it turns out that you need to buy 9 skirting boards. In addition, one product is better to buy for stock.
Transportation
Care should be taken when transporting skirting boards. On the surface of the products there should be no dents, bends and other defects.
Important! Before you begin the installation of a ceiling skirting of polyurethane, leave it in a room in which it will be installed for about a day. This will allow the material to adapt to environmental conditions.

Surface preparation
The skirting board can only be installed on a dry, level and pre-cleaned surface. By this time, it is necessary to complete the finishing of the walls, ceiling and floor.
Important! As a rule, wallpaper does not stick to the ceiling. That's exactly this gap and hide the skirting.
Layout
After finishing the preparation of the surfaces for the installation of skirting boards, the material should be marked out:
- First, take the plinth, place it along the wall, measure with a tape measure and make notes where the product will need to be shortened.
- To avoid errors in the process of marking, take a piece of skirting and as much as possible tightly attach it to the ceiling and the wall.
- Next, take a pencil and draw a line near the corner on the wall and ceiling, so that the intersection of this line and the line from the adjacent skirting board at the required angle. As a rule, this angle is 90 degrees.
- Then you will need to take a paint knife, or in its absence a pencil, and make a notch on the products for sawing the required angle. Place the marks in strict accordance with the previously made markings. Do them on top and bottom of the product, otherwise - the junction will be uneven.
How to cut the skirting board correctly?
In some rooms there are not only internal, but also external corners. It is these corners that can bring major inconveniences, as well as difficulties in installing polyurethane ceiling skirting.
Important! You can purchase special corners that are fixed to the corners of the room. This method of installation is the simplest, since it will save you from having to saw corners.
If you are not looking for easy ways, then you can use one of the existing ways of cutting a skirting board:
- For this it is desirable to use a miter saw to get a beautiful and smooth cut.
Important! If you do not have such a saw, then you can use a carpenter's chair with a set of stencils.
- Next, you need to take the plinth and insert it into the stool. It should be inserted exactly where the product will be mounted in the wall, and then cut the desired angle according to previously made marks.
Important! In the case of using a product of complex shape, it will be more convenient to work with the help of a two-plane chair.
- Carefully sand the place of sawing with fine-grained emery.
Important! Often, inexperienced workers make one mistake - they calculate the length incorrectly, first cut the length of the polyurethane skirting, and only then the angle. As a result, the length of the resulting segment will be insufficient. In order to avoid such an error, remember the rule: first cut the corner, and only then the length.
to the contents ↑Editing the skirting board
After cutting, you can proceed with the installation of a skirting board made of polyurethane:
- The product is fixed to the ceiling with glue. It should be used such a mixture, on the packaging of which a white-white color is indicated.
Important! Those glue mixtures, which contain a solvent, are not suitable for these purposes.
- To prevent the appearance of cracks, the joints should be treated with a special docking adhesive. This ensures uniform distribution of load on the plinth when shrinkage, minimizes the possibility of rupturing joints at the joints.
- Installation starts from the corner of the room. On the back of the product there are special grooves( shelves) for glue. Spread the joints and shelves with glue, and then firmly press the plinth.
Important! It is necessary to hold it until the glue mixture is seized( about 20 minutes).As a rule, glue completely dries up somewhere in a day.
- To make the polyurethane product as flat as possible, try to pin it down with something heavy. In the process of installing ceiling skirting this, of course, is problematic, but when installing the floor it is quite possible.
If there are irregularities on the surface, they will show themselves as slits that form between the surface and the skirting board. To fix this defect:
- Should be nailed to the wall with cloves, but not until it stops.
- After complete drying of the glutinous mixture of cloves need to be carefully pulled out, and holes fill with a fine-grained filler.
- You can also additionally nail the top corners at the joints. With this, the clutch will be improved.
- Surplus glues are removed using a wet sponge or spatula. It is important to ensure that when removing excess glue, the spatula does not come in contact with the wall or with the ceiling, otherwise the film will appear.
- After installing all the slats you will notice a small gap between them. They must be sealed with a white silicone sealant. Gently treat all joints with acrylic putty.
Finishing of skirting boards
Polyurethane strips can be painted. It is best to do this before the installation of the polyurethane ceiling skirting is done. In this case, the staining will be more qualitative, and the walls will not be contaminated.
Important! In the process of choosing a paint, you should consider that it should be the same color as the ceiling or one tone darker. In this case, consider the color of the platbands and the door leaf so that the room looks harmonious. If the walls are pasted with wallpaper with ornaments, it is best to choose a skirting board without any drawings.
For these purposes:
- Acrylic and water-based paint is suitable.
- Different compositions for artistic painting can also be used.
- Excellent glazes - tonic compositions, with which you can give the products a variety of textures - gold, wood, stone, etc.
- Today on sale there are all kinds of decorative coatings in the form of an aerosol. They are very convenient to use.
Important! Already glued products can also be painted, but before that you should wait at least a day. Before applying a decorative color coating, the material should be coated with a dispersion waterproof paint that is one tone lighter.
Useful advices:
- Before painting already fixed skirting, it is necessary to paste around it with paint tape or wax paper about 30-40 cm so as not to stain the walls.
- For such work, it is most convenient to use a spray gun.
- The coating can be applied in one or several layers. This will depend on the manufacturer's recommendations, so be sure to read the instructions carefully before painting.
Now you know how to install a ceiling skirting from polyurethane. Such products are a reliable, practical and simple solution for masking the joints of walls with floor and ceiling. There are no special difficulties with the installation, so you can do it yourself, even without special skills and great experience in the construction business.


