
- 3 basic ways to upgrade the sliding door wardrobe:
- Which paint to choose?
- Master-class No. 1. Painting for a stencil
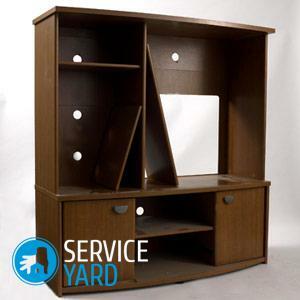
- Master-class № 2. Upgrading a cabinet from a chipboard
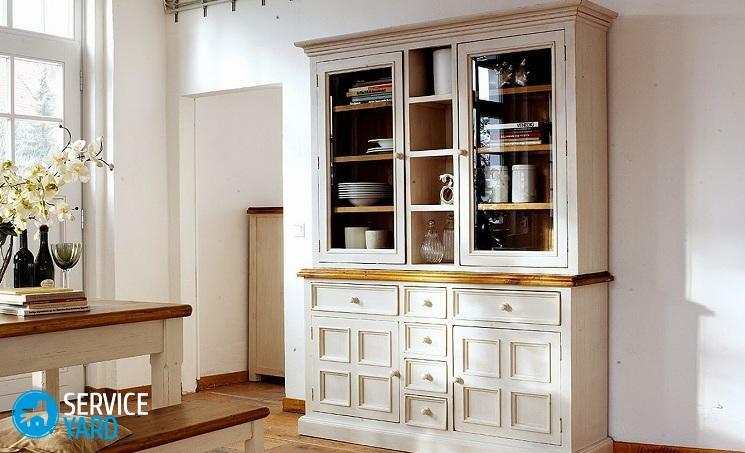
- Master-class No. 3. Painting a polished cabinet
- Updating with wallpaper
- Updating with the help of mirrors
Nowadays, you can find in stores an infinitea lot of all kinds of cabinets, chests of drawers, hanging shelves, shelves, multifunctional boxes for personal things and clothes. However, if you decide not to go into a long search, and follow your fantasy, then thanks to the following tips and workshops you will learn how to update an old wardrobe that has lost its appearance so that it will still delight your eye for a long time.
to the contents ↑There are 3 basic ways to update the sliding door wardrobe:
- Painting is the most safe method.
- Wallpaper, decoupage, self-adhesive film - when choosing this method, do not forget that it is short-lived. Decor with nails or a fabric hanger.
Important! The best way to upgrade any wooden cabinet or from the particleboard is painting. It's not as expensive as it might seem at first glance and it's pretty simple to perform.
to the contents ↑Which paint to choose?
To implement this idea, you need to thoroughly prepare for the process. Let's get started.
For the processing of chipboard and wood, you can use:
- Acrylic or alkyd, conventional or aerosol paint on wood;
- for more deep staining - varnishes, however, acrylic paints are more often preferred.
Acrylic paints are non-toxic, dry at room temperature, which is very good if the home furniture is painted. In shops these paints are presented in a wide range and they can be colored - diluted with white paint to get the desired color. In addition, such colors are with the effect of mother-of-pearl, so that you can realize any fantasy.
Important! Aerosol acrylic paint will be better than usual, as it lays on the surface creating a beautiful, smooth, uniformly colored structure. With it, it's easy to work for both professionals and beginners.
to the contents ↑Master-class No. 1. Painting for the stencil
What can be done from the old cabinet? Yes, anything - everything depends on your imagination. One of the wonderful ways to transform furniture is painting under the stencil.
Tools and materials:
- Prefabricated cabinet;
- White paint;
- Thinner;
- Brushes;
- Stencil.
Walkthrough:
- First you need to remove all the accessories from the cabinet: pens, locks, etc. Prepare the cabinet for painting.
- We spread newspapers or a large piece of polyethylene on the work surface( on the floor) so as not to spoil the other furniture in the room.
- Take white enamel and thinner. In a small plastic jar, dilute the paint and solvent according to the instructions that you will find on the paint jar.
Important! On the bank should be indicated paint consumption - it is better to use the information provided and dilute the right amount at once. If you dissolve a little paint, then next time you can get a different shade.
- Make a drawing background - apply the first coat of paint. Leave until completely dry.
- If the color you like, then take the stencil, put it on your closet. Gently glue it on the front side, the side walls so that no bubbles form.
- Shake the spray carefully and spray it on the stencil. One layer of paint will be enough for an even layer.
- As the paint dries, paint the accessories that were previously removed from the cabinet in the gold leaf.
- After the parts have dried, screw them into place.
- Carefully remove the stencil from the cabinet - it is no longer needed.
Master class No. 2. Upgrade of the
If your closet looks simple and cheap, because it was made from a simple chipboard, you can update it with an ornament from the children's room, and it will fit perfectly even in the interior of the Modern or High-tech.
Materials and tools:
- Prefabricated cabinet;
- White paint;
- Painting tape;
- Pencil;
- Sponge brush;
- Construction level;
- Knife;
- In addition: protective paint( enamel).
Walkthrough:
- Prepare furniture by peeling surfaces off chips, roughness and cracks with a primer and putty.
- After using special tools, allow the surface to dry completely.
- Take the painting tape and paste it on the front side of the dresser according to your idea.
- Make combinations of triangles on the bottom and top edges, rhombs in the middle, rectangles in the bottom and top. Cut the strips and make shapes out of them.
- Make a diamond by cutting the same strips, place them perpendicular to each other.
- To make rectangles, glue the tape firstly, parallel to the section of the chest, and using the pencil and the building level, mark equal gaps. Cut through one.
Important! Watch for placement relative to the figure( locks, pens) and the cracks between the boxes - it's better to be symmetrical than straight.
- Following the instructions on the paint jar, take a sponge-brush and rub the paint in a thin layer to create an effect of antiquity. Allow the layer to dry.
- After the first coat has completely dried, apply a second one. Then the color will be saturated and contrasting in comparison with the background.
- When the paint is completely dry and you see that you have achieved the desired color, gently, at an angle of 45 degrees, remove the paint tape( tape).
- The final step is to apply a protective enamel. It will be able to extend the life of the cabinet from the chipboard and protect it from small mechanical influences such as dust and moisture.
Thus, it is not difficult to make a modern, beautiful and fashionable wardrobe from an old wardrobe and will not take much time.
to the table of contents ↑Workshop No. 3. Painting of the polished cabinet
Someone may not believe, but from an old polished cabinet you can make a very beautiful wardrobe in a vintage style yourself, without losing functionality.
Materials and tools:
- Polished cabinet;
- Acetone or white spirit;
- Vintage paint( acrylic matte);
- Gold handles for drawers;
- Brushes;
- Grinder or sandpaper.
Paint process:
- Although we will create a vintage effect, the real shabby closet is useless. Therefore, to begin with, carefully prepare the dresser for painting. To do this, remove all old hardware and treat the whole surface of the cabinet with a grinder. First, use a large sandpaper, then fine grained paper.
- Puttying and priming is not necessary, except for strong chips on the surface.
- Degrease the surface with acetone or mineral spirits and allow to dry.
Important! Since the paint will be applied in several layers, it is necessary that it is well absorbed into the tree.
- The first coat of paint is very thin.
- After drying, rub the first layer with fine-grained sandpaper. Clean the dresser from the dust, but do not use wet sponges and rags - you can dry a lint-free cotton rag.
- Apply a second coat of paint, also rubbing it. Leave to dry, and then dry again a little.
- So repeat until the color is smooth and a bit rough.
Important! For this method, apply a matte paint with a vintage effect. After a few days, the paint will completely absorb and begin to turn yellow - carefully read the instructions on the packaging, so that you do not have to re-paint everything afterwards.
If you purchased new handles, check if they fit in color, and screw them into place.
Important! To an aged white chest of draw brass carved handles with patterns of golden color.
to the content ↑Updating with wallpaper
Updating the old closet using wallpaper is one of the simplest and cheapest options for restoring such furniture. For these purposes, you can use absolutely any wallpaper that you like or that will suit the design of your room.
Important! Often use non-woven or vinyl wallpaper, because they have high strength.
With this method, you can update the design of the old cabinet in full or in separate parts. Partial gluing of the bookcase with wallpaper is an interesting creative solution that many famous designers use to create an unusual image.
You will need:
- Roller or brush for applying glue;
- Adhesive( preferably PVA)
- Construction knife;
- Wallpaper.
Important! If you do not know how to update your old wardrobe with glue and wallpaper, then you can buy self-adhesive wallpaper, thanks to which you will be much easier to carry out your plans.
To transform an item, you should:
- measure the length of the cabinet;
- cut off suitable strips of wallpaper;
- apply glue on the surface of the cabinet itself;
- gently apply the wallpaper to the adhesive surface;
- then align the wallpaper so that bubbles do not form, and allow them to dry well.
Refresh with mirrors
One of the most extravagant ways to update furniture is to use mirrors.
Important! They can not only hide all the disadvantages of the cabinet, but also expand the space of the small room, while making it more light. The original mirrors look like a sandblasted drawing.
You will need:
- Pre-prepared furniture;
- Mirror cloth;
- Special fasteners or "liquid nails".
How to proceed:
- To begin with, you need to measure the surface of furniture that needs to be updated.
- Then you should go to the workshop, which is engaged in the manufacture of mirrors - there you will make them the right size.
- Next, you must apply "liquid nails" to the mirrors and attach them to the surface of the cabinet.
Important! This method assumes that each of the mirror cloths will be fixed in position horizontally. Therefore, you either need to turn the cabinet over or disassemble it.
- You can also put temporary fasteners, which will be removed after the drying of "liquid nails".
This concludes our review of possible options for updating the old cabinet. We hope that the ideas you proposed are useful to you, and you have already tried them out, having received an excellent result and a lot of fun!


