
- What is decoupage technology?
- What is needed for napkin decoupage bottles?
- Step-by-step instruction on decontaminating a bottle with napkins
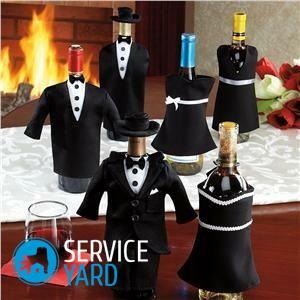
If you like to do handicrafts and are always looking for some new ideas and techniques, then you definitely will like such an uncomplicated and fascinating creative direction as decoupage of bottles. Use for work can be any container from cognac, wine, champagne, and even open containers with drinks, the main thing - that the shape was suitable. You can create real works of art with your own hands, capable of pleasantly surprise and please your relatives and friends. The most common variant of such works is decoupage of bottles with napkins. Agree, what could be better than a presentation made by own hands, in which you put your love and warmth?
to the contents ↑What is decoupage technique?
Decoupage is a word having a French origin, which is literally translated as "carving".This is a decorative modern technique, a little closer to the application and collage, consisting in cutting out pictures of wood, paper, leather and various materials, which then glued or pasted on dishes, furniture, textiles and other surfaces.
More often pictures are first printed in a polygraphic way, and then they already use vases, flower pots, kitchen boards, bottles, books, cups and even candles to decorate. Even the most ordinary plate can be turned into a real panel that will decorate the wall of your kitchen.
To decorate a bottle with napkins with your own hands is not difficult, the main thing is to choose the right material: it's better if it's three-layer table napkins with the original coloring. The most important advantage of this unique technique is that it can be mastered by any person who does not have special skills and special materials. The most important thing is the desire to create, unlimited creative and very little free time.
to the contents ↑What is needed for napkin decapping of bottles?
So that there are no problems in the course of the work and do not have to buy anything, you should prepare the following set of tools and details in advance:
- A clean glass bottle that will be suitable for decoupage. Therefore, you need to carefully consider it, so that its surface is perfectly even, without any protuberances and dents.
- Several three-layer napkins with a correctly selected pattern. By the way, if you first encounter decoupage, then it is better to stock up a lot of napkins, so as not to worry again if they are damaged.
- Maps for decoupage, printed images or clippings from magazines.
- Any means to degrease the surface of the bottle, for example, acetone, alcohol, nail polish remover or solvent.
- Acrylic paint for priming glass surfaces.
- PVA glue or special adhesive for decoupage.
- Brushes of different thicknesses - it is better if among them there will be both flat and thick. But most importantly - they must be synthetic, because natural products leave hairs on the surface.
- Acrylic paints of several shades.
- Acrylic lacquer, which has a milky white color, but after completely drying it becomes completely transparent.
- Decorative items, such as bows, sequins, ribbons, beads or rhinestones.
- If you are planning to artificially age the product, you still need to purchase a one-step or two-step lacquer varnish.
- Scissors for cutting out the desired fragments.
- Painting tape, which is useful for sealing those places, which you do not plan to paint.
- A small piece of foam rubber or a whole roller.
- Trays for the dilution of varnishes and paints, or disposable plates.
- Clean rags.
- Sandpaper.
Step-by-step instruction for decapping a bottle with napkins
And now we will learn in detail how to decorate a bottle with napkins with your own hands. The whole process is divided into five main stages.
The first stage - surface preparation
First remove all the excess from the bottle, any labels or badges, and it can be done easily if:
- soak it for a while in soapy water;
- then rub slightly with sandpaper.
Important! This method allows you to completely clean the glass from traces of glue and paper debris.
Then, with a solvent, alcohol, acetone or lacquer, degrease the surface. 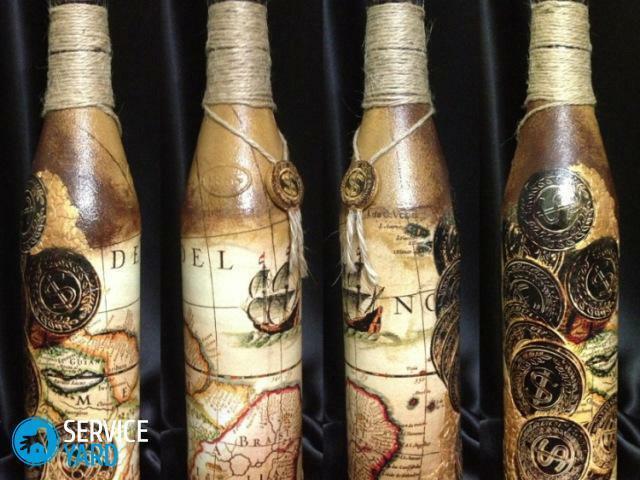
The second stage - priming the surface
In principle, do this procedure is not necessary, but if you still decide on it, the background of the composition will turn out to be more complete and complete, and the fragments of the pictures will look clearer and brighter.
Important! The background is done either on the whole surface, or partially, specifically in those places where you want to place your motives. The tone of the background should be chosen taking into account the hue prevailing in the selected picture. The base should be slightly lighter than the color of the napkins.
How to perform this work:
- In a bowl or plate, pour a little acrylic paint of the desired color.
- If necessary, dilute with water to obtain a medium consistency of the liquid.
- With a foam wheel or roller, it applies a primer to the glass surface, preferably in several layers, to get a saturated color.
The third stage - cutting out pictures or motifs for decorating
This is one of the most interesting moments of decoupling bottles with napkins. But it requires carefulness and care, and also - the impulse of your imagination:
- Take a napkin and scissors and gently carve out the vending motif.
- In principle, you can not cut out the picture, but just snatch it, but you need to do it carefully - due to this, the picture will go better in the background, because it will not have clear boundaries.
- For gluing the top layer of a napkin is necessary, therefore it is necessary to separate it.
- You can use not only wipes, but also magazine cuttings.
Important! To attach a too thick paper, you must first apply an acrylic lacquer in the layer in several layers. If everything is done correctly, the picture will look like it's drawn.
The fourth stage - pasting bottles with decorations
And now we learn how to glue a napkin onto a bottle:
- Take for this purpose a water-diluted PVA glue or a special adhesive for decoupage.
- It is necessary to soak the picture in warm water and then dry it properly.
- On a completely dry surface, apply a dry napkin and, starting from the middle to the edges, spread with a brush dipped in the glue. In this case, you need to remove all wrinkles and vesicles.
Important! If desired, you can use several motifs at the same time, if the width of the bottle allows this.
The fifth stage - fix the result with a varnish:
- We wait for all the pictures to dry up and cover them on top with several layers of acrylic lacquer to thereby protect the surface.
- Before applying the second and third coat of varnish, wait until the previous layer has completely dried.
- If you plan to use this bottle at home, then at least three layers of varnish will be required.
This concludes the work.
As you can see, there is nothing complicated and impossible here. And if you master the basics, you can create more complex works in the future, fantasizing and experimenting with different materials and decoration techniques.

