Metal products during welding are the main objects for versatile processing. According to statistics, among them, the most common type is pipe cutting with a grinder. The variety of attachments allows for sanding and polishing. They are a secondary job that follows cutting.
Varieties of devices
Grinder attachments differ in the functions they can perform:
- smooth cutting;
- grinding;
- cutting rods and pipes (diameter within 50-125 mm);
- cleaning and peeling of obsolete surface layers;
- polishing;
- use as a chain saw;
- dust collection during the process.
Cutting discs are the most popular among devices for high-quality pipe cutting with a grinder. This type of product is produced by numerous domestic and foreign developers. We should also mention the universal Japanese attachments of the Hitachi brand.
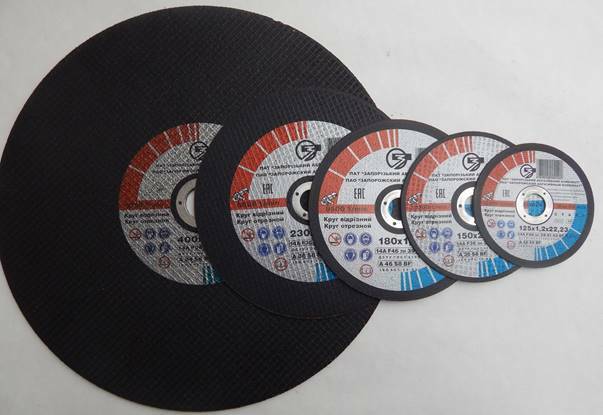
How to make a pipe cutting device with a grinder with your own hands
It is not difficult to purchase a ready-made machine. But this option involves a lot of ensuing problems during further work, since most structures do not have a sufficient degree of rigidity. This is caused by the material used - duralumin. This factor forces the owners to either create new, more durable and accurate designs for cutting pipes with a grinder, or improve the current ones.
In fact, it turns out that making your own rigid base, auxiliary for future work, is much more convenient. It is more difficult to remake products previously developed by someone. In addition, this approach often has a number of limitations due to design features.
Cutting pipes of various diameters and thicknesses with a grinder is possible by creating two types of stationary cutting machines:
- A simple option is to attach the tool to the workbench using additional materials.
- The complex option includes the previous layout, as well as a number of additional steps to create more rigidity of the tool during translational movements. For this reason, it takes longer, but allows for better accuracy.
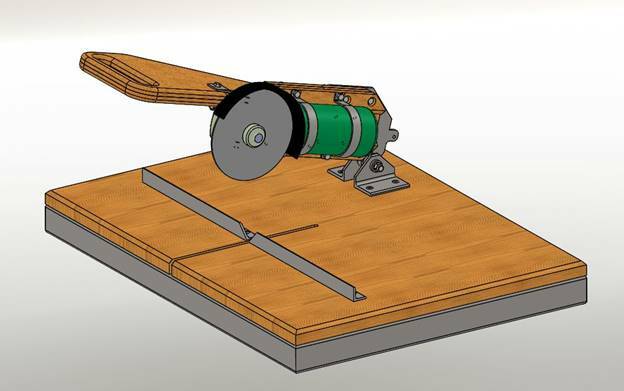
Basic moments
Cutting shaped pipes is a simple process. But it is she who requires high accuracy, which consists in the accuracy and evenness of the final cut. Therefore, the organization of the future process must be thought out and requires the development of a home-made or purchased machine. To do this, you will need tools in the form of an electric drill and a welding machine. In addition to them, you will need a set of the following consumables:
- metal plates,
- profiles,
- standard list of fasteners (nuts, bolts, washers).
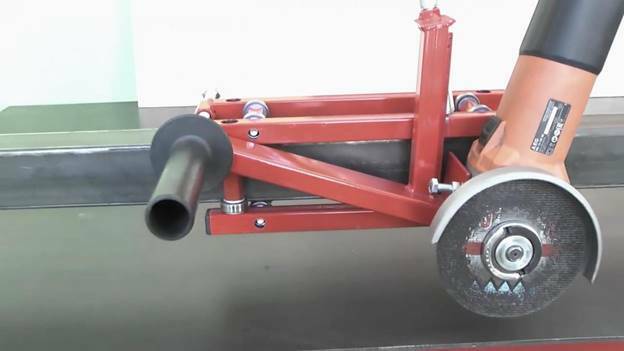
Making simple devices for efficient pipe cutting with a grinder can be done in a few hours. In this case, the frame will be a long metal tube, which will play the role of a handle and a frame at the same time. A transverse bar is welded to one of the ends. It should have two holes for the subsequent fastening of the grinder.
Important! For an even more reliable device, it should be attached to one of the ends of the pipe to an angle with a movable shaft. The corner is fastened to the table top or to the floor. The spring is fixed on the opposite side of the fastener. It helps to ensure the return movement of the entire structure during operation.
The final stage is the fixing of the grinder itself. The machine options described in short are suitable for simple types of work. Details on the required parts and consumables, as well as the creation of a high-precision machine for using the grinder when cutting pipes of different diameters and thicknesses, are indicated below.
Cut-off machine (simple option)
A simple implementation consists of fabricating a base, onto which stable connectors are subsequently attached to accommodate the movable plate. The list of works on the creation of a cutting machine:
- For the procedure, you should select a plate with a thickness of at least 2 mm and dimensions of 15 by 15 or 10 by 10 mm. A short one will be needed if you have an iron workbench.
- Next, two rectangular plates are welded at a distance of 5-8 cm between them. The dimensions of the elements along the length will be about 8-10 cm, depending on the features of the power tool.
- Straight holes are made at the base of the plates. Connecting bolts are installed in them.
- Then a plate of steel about 20-30 cm is taken. The width should be less than the distance between the previous plates.
- An elongated sleeve is welded onto the reverse side of the movable element. Subsequently, a bolt is placed in it for connection.
- The tool is attached to the movable plate using ties, clamps or methods identical to them. The number must be strictly more than 2.
- Attaching the tool to the workbench.
- Testing work.
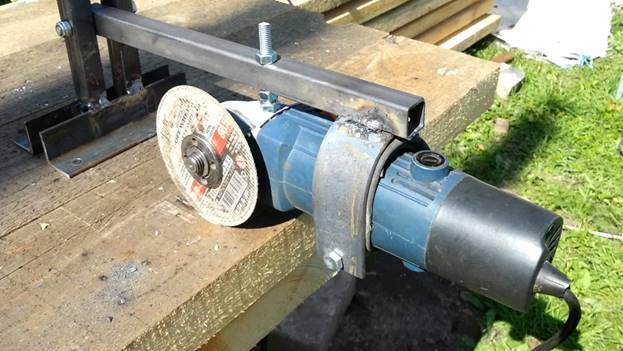
Sometimes, in some cases, the handle is welded and an auto-return spring is installed. The latter will allow you to move the grinder up as needed. In general, the simplicity of the option allows you to use a minimum number of structural parts and at the same time fully organize the cutting process.
Cutting machine for precision work
To carry out work with a high degree of accuracy, a more complex version of creating a unit is used. The basic list will include the following details:
- Metal profiles (15-20 cm);
- Metal sheet (thickness - 2-3 mm);
- Sleeve (10-15 cm);
- Metal corner;
- Hairpin (length - 20 cm);
- Washer set.
Stages of creating a high-precision cutting machine:
- Cutting the stud and placing the sleeve inside it. Tighten the nuts on both sides. It is better to tighten two nuts, which will create a lock nut effect.
- The nuts are not screwed in completely to avoid contact with the sleeve.
- Welding the structure to the steel sheet ensuring free movement of the sleeve.
- The fasteners are made on the basis of metal profiles. They are cut to the required size and washers are welded to them. 2 or 3 mounts recommended.
- The handles are attached to the threaded holes to the base of the movable type using the brackets obtained in the previous step. Fastening is carried out by bolting.
- The opposite ends of each of the profiles are welded to the sleeve.
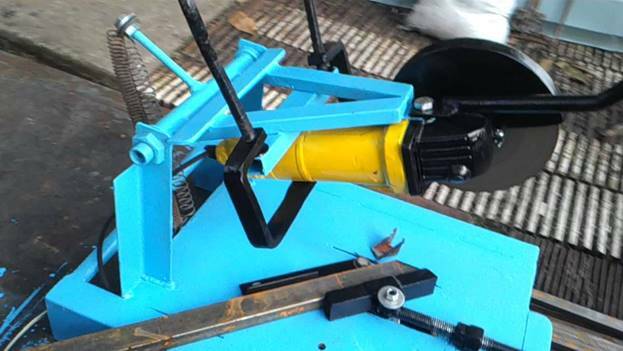
It is worth noting that the corner is structurally necessary as a guide. It makes it possible to center the cutting materials. If you make a straight hole in the sheet, an even higher level of precision will be provided during cutting. For this reason, such designs are often referred to as pendulum saws.
Milling machine
At the heart of a milling machine is a driving element - a milling cutter. With its help, flat and shaped surfaces are processed. In the case of using a grinder, the machine can be made in two variations:
- With a movable angle grinder (angle grinder), the tool mount is located in a vertical plane in relation to a special frame. With its help, the grinder moves along the workpiece to be milled.
- With a rigidly fixed angle grinder, the grinder is stationary, and the workpiece moves in the intended direction.
To make a milling machine, you will need the following list of materials:
- Angle grinder;
- welding machine;
- a set of fasteners;
- screwdriver;
- level;
- electric drill;
- square;
- Chipboard or plywood sheet;
- wrenches and hex keys;
- jigsaw;
- metal corners;
- punch;
- file;
- sandpaper.
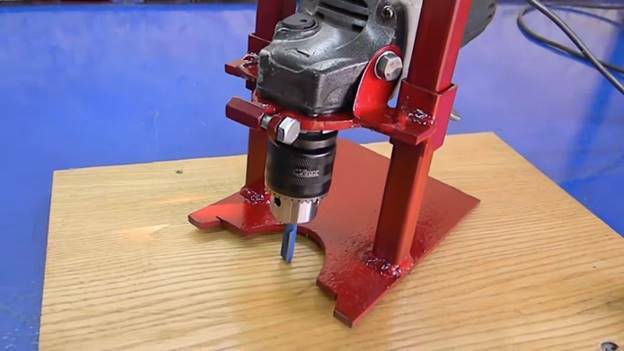
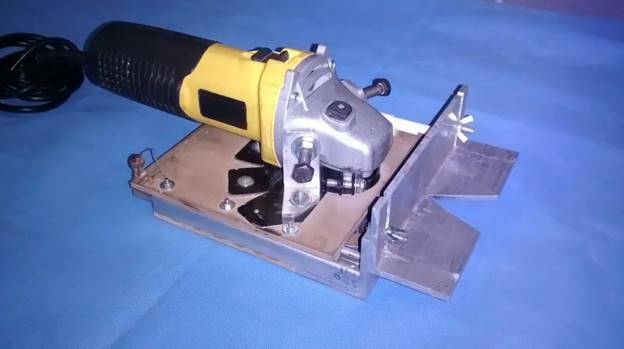
A stationary milling machine assumes a structure consisting of a stable base, a movable or fixed tabletop with a rail (as a ruler) and a drive. For horizontal cutting, fix the angle grinder to the plate, install the guides and fix the workpiece to be processed on the working surface. Processing is carried out with a movable product.
With a stationary grinder, a mobile work surface is required. For this, the tabletop itself is moved. Guides for fixing are designed on it. In this case, the angle grinder itself is mounted on a vertical-type bed on the side in relation to the workbench.
Particular attention should be paid to the caps of the self-tapping screws. They must be completely recessed, must not protrude above the work surfaces. Before carrying out all the processes, you should purchase cutters that will serve as attachments for the grinder.
The cutters may look like cut-off wheels or keyways. The former will simply replace the grinding disc and will be attached to the shaft with a clamping nut. For the second, you will additionally need a special adapter.
Precautionary measures
Working with a grinder implies the presence of a certain danger, therefore, separate operating rules must necessarily apply to this type of work:
- the angle grinder attachment must necessarily correspond to the material for subsequent processing;
- it is prohibited to remove the protective casing;
- the speed of the angle grinder must correspond to the minimum;
- the grinder must correspond to the power loads of the employee using it (it can break out of the hands);
- the fastening of the tool must be rigid;
- work must be done with protective gloves;
- the surface of the workpiece must be checked for homogeneity (especially for metal parts);
- all actions can be performed only within one plane;
- distortions during work are prohibited;
- in operating mode, the button cannot be locked;
- Power must be disconnected from the power tool when replacing discs and attachments.


