A New Year's atmosphere can be created with simple decorations. The traditional symbols of the holiday are Christmas trees, tangerines and snowflakes, which can be made together with the whole family.
Content
- What is needed
- Instructions
- Option for creating snowflakes with a thermal gun
What is needed
Decorations can be made with your own hands from scrap materials that can always be found in the house. And depending on the type of glue, you must use:
For creativity with regular glue:
- PVA glue with a spout;
- glitter or semolina, or even nail polish;
- file (preferably matte with a rough surface, which provides better glue adhesion) or parchment with a small amount of any oil;
- stencils of snowflakes on paper (you can draw them yourself);
- threads (if we hang on a Christmas tree or other place to which it is impossible to attach in another way).
For hot glue art (for gun owners):
- glue stick gun;
- glitter (the same sparkles), or paints;
- some glitter-fixing glue;
- sample;
- paper (more precisely, parchment for baking), which must be greased with oil or cream;
- threads.
Instructions
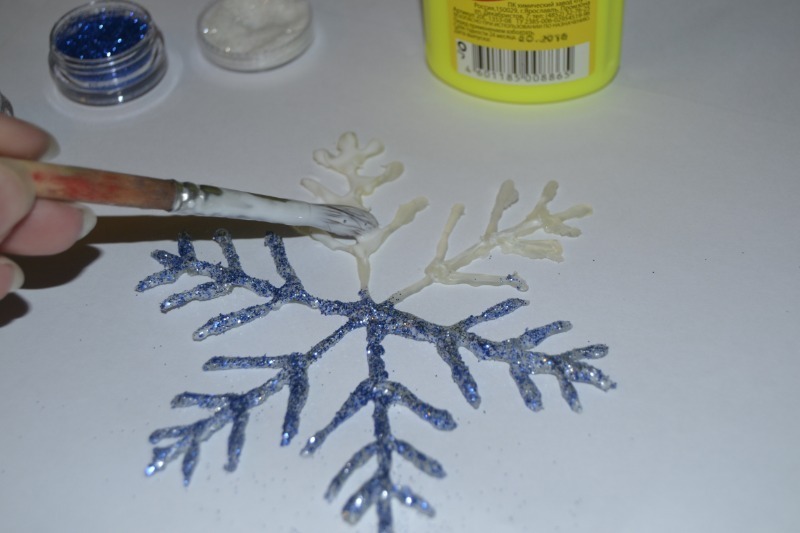
First, prepare all the materials you need. You can create a template for decor yourself or download and print from the Internet.
- Put the finished template in the middle of the file or cover it with parchment paper oiled or greasy cream.
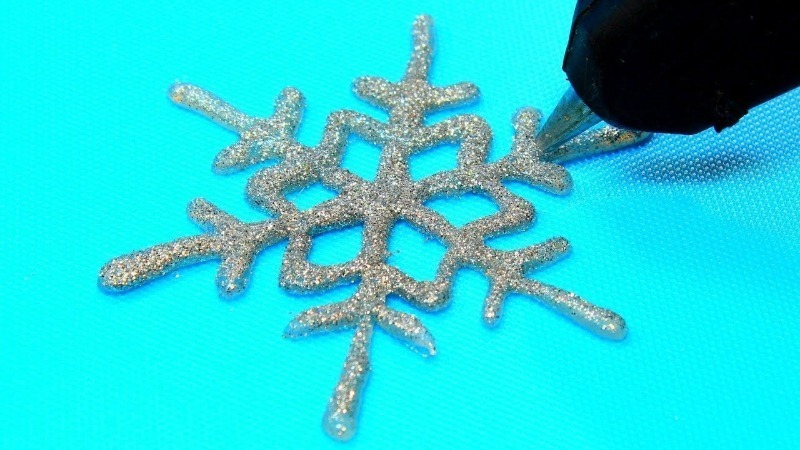
- Now carefully apply a thick layer to the borders of the snowflakes with glue and paint over according to the template. It is better to use glue that has a spout for application. At the time of applying the glue, a thread is also added, if necessary.
- Until the glue has set, generously sprinkle it with glitter or semolina. If nail polish is chosen for decoration, then you should wait until the glue dries. In this case, you can also use paints, the best option of which is acrylic.
- Take your time to shoot the snowflake. Leave it to dry in a warm place for 2-3 hours. Use a match or toothpick to test the snowflake for readiness. It should be firm, with no traces of stretching when removed.
- You can remove the product from a file or paper with a knife.
- The finished snowflake is easy to attach to the surface. To do this, you just need to moisten the side that is not covered with anything with water and boldly attach it to the surface to be decorated.
Option for creating snowflakes with a thermal gun
This process is no different from working with conventional glue, but it has its own characteristics. Hot glue is also applied to a file or parchment. In order for the surface of the created product to shine, you need to apply sparkles after hardening, smearing it with PVA glue, otherwise the sparkles will go down under the glue layer. These snowflakes harden within a few minutes.
Unique DIY snowflakes will create a unique atmosphere in any home or work. In this way, large paintings can be created on windows or glass surfaces. In this case, the plot and decorations can be very diverse. The flight of fantasy will best unite both the family and the work team during the holidays.

