The gardening season is just around the corner, and, as they say, the sleigh needs to be prepared in the summer, and the cart in the winter. So it's time to think about how to mechanize and improve work on a suburban area. Many things can be done with your own hands and from scrap materials. Even small improvements to conventional technology can make work much easier. Take, for example, a garden watering hose. Everyone knows that it is not easy to store and use. After watering, it gets dirty and you have to get your hands dirty by winding it up in rings. It is also difficult to store this bundle, it constantly gets confused, the hose is tied in knots. Is there any way to solve this problem? Sure! An elegant and ingenious version was prepared for you by the author of the YouTube channel Workshop Diy. He suggests making a special hose case with a folding mechanism from an old canister.
Read in the article
1 What is required for the case, and how to prepare it
2 Assembling the twisting mechanism
3 Final assembly and practice
What is required for the case, and how to prepare it
As it is already clear from the introduction, for the case you will need a metal canister with a volume of 20 liters. In principle, you can use a plastic canister for the same purpose, and maybe it will be even more convenient, because such a case will be lighter, and it will be easier to work with it, since the plastic is cut with a conventional assembly with a knife.
PHOTO: YouTube.comThe author nevertheless used a metal canister, which, judging by its appearance, has long been out of work. Tightness in this case is not essential.
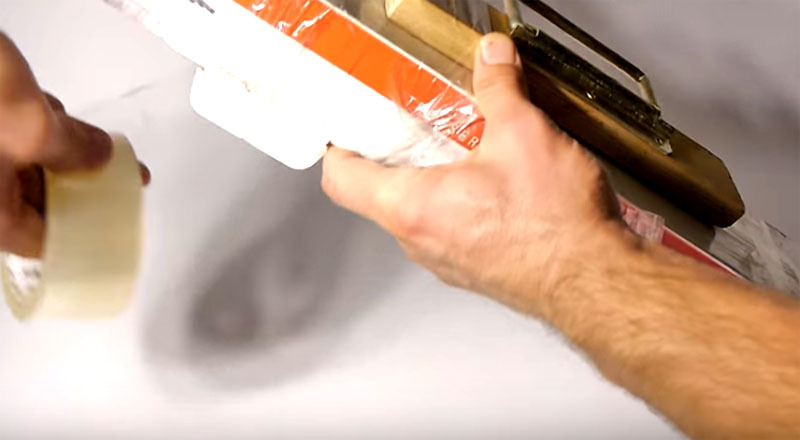
PHOTO: YouTube.comTo make the base look decent, it will need to be cleaned of rust and old paint. Use a metal brush, or even better, a grinder with a nozzlePHOTO: YouTube.comExactly in the center of the canister on both sides you need to make a markPHOTO: YouTube.comIn the marked place, you need to cut two holes with a diameter of 160 mm. The holes must be located strictly opposite each other.PHOTO: YouTube.comThe edges of the cut metal must be sanded so that there are no sharp edges and burrsPHOTO: YouTube.comThe final stage of preparing the canister is painting it. Use primer and paint in aerosol cansPHOTO: YouTube.comOf the materials, you also need pieces of a sewer pipe of the corresponding hole diameter, O-rings and a plug
Assembling the twisting mechanism
In order for the hose to be easily removed into the canister and just as easily removed from it, you need to prepare a coil that will fold it into a neat roll.
PHOTO: YouTube.comFor the coil, you need to put a piece of pipe on the plug. The width of the piece should be 2 cm wider than the canisterPHOTO: YouTube.comIf you had to sew a seam on a spool, fill it with hot melt glue. It is also useful for firmly fixing the plug.PHOTO: YouTube.comTo rotate the mechanism, use a part from the grinder's disc. Drill it in two places, the holes should be opposite each otherPHOTO: YouTube.comUse a strip of metal approximately 30 cm long to make the handle of the movement.PHOTO: YouTube.comThree holes need to be made on the metal strip: one at the end for fixing the handle and two for fastening to the disc with a size equal to the distance between the holes on the discPHOTO: YouTube.comThe grips need to be curved as shown.PHOTO: YouTube.comSecure the disc and handle to the spool plug with long bolts.PHOTO: YouTube.comYou need to make another hole in the spool so that a hose can be threaded through it.PHOTO: YouTube.comThe final stage of assembling the mechanism is the installation of the handle. It can be made from pieces of plastic pipes or just from a piece of wood.
Final assembly and practice
Now you can assemble the case and load the hose into it.
PHOTO: YouTube.comPlace the coil in the through hole in the canister. If you have calculated the dimensions correctly, everything will turn out effortlessly.PHOTO: YouTube.comOn the opposite side of the handle, secure the coil with O-rings. Check that the mechanism rotates freelyPHOTO: YouTube.comSecure the O-rings with small self-tapping screws right through the plasticPHOTO: YouTube.comLoad the end of the hose into the canister drain and thread it through the hole in the spool. Pull out the end about 50cm longPHOTO: YouTube.comWind the rest of the hose onto the reel by turning the handle. The hose will hide in a canister, there will be only a sprinkler outsidePHOTO: YouTube.comThe other end of the hose, the one that sticks out of the coil itself, will connect to the water supply. Use special attachments for fixing on the tap, this is both convenient and reliablePHOTO: YouTube.comA hose packaged in this way will not take up much space in your change house or closet. The design looks very neat, the hose does not get confused and does not deteriorate from the sun, frost or rodents
This solution is very practical, and besides, you did not use any expensive materials, they were literally at your fingertips. Exactly according to the same principle, but already from a canister of a smaller volume, you can make a case for an extension cord.
Try this hose storage option and write in the comments what you get. Send your designs with photos and descriptions to our editorial office, we will certainly publish the most interesting ideas!


 PHOTO: YouTube.com
 PHOTO: YouTube.com
 PHOTO: YouTube.com
 PHOTO: YouTube.com
 PHOTO: YouTube.com
 PHOTO: YouTube.com
 PHOTO: YouTube.com
 PHOTO: YouTube.com
 PHOTO: YouTube.com
 PHOTO: YouTube.com
 PHOTO: YouTube.com
 PHOTO: YouTube.com
 PHOTO: YouTube.com
 PHOTO: YouTube.com
 PHOTO: YouTube.com
 PHOTO: YouTube.com
 PHOTO: YouTube.com
 PHOTO: YouTube.com
 PHOTO: YouTube.com
 PHOTO: YouTube.com
 PHOTO: YouTube.com