Electronic photographs have become an integral part of our life. We post them on social networks, send them to friends and relatives. But this does not mean at all that the good old photo albums have sunk into oblivion, and the tradition of collecting paper photographs has been irretrievably lost.
Perhaps for some time at the very beginning of the era of craze for electronic images it was so, but today everything is back to square one. True, faceless store photo albums now will surprise no one. It is much more pleasant to pick up an original work of authorship, in which the soul and imagination of the master is invested. If you want to know how to make a DIY photo album, keep reading this article.
Content
- Features of creating do-it-yourself photo albums
- Design ideas and themes
- Album for a newborn
- Wedding album
- Family album
- Birthday photo album
- School or Graduation Photo Album
- Journey
- Create a photo album with a thick spine
- Required materials and tools
- Preparing and cutting paper
- Creasing of sheets for a photo album
- Formation of notebooks
- How to sew notebooks into a block correctly
- Stitching notebooks
- Bonding the spine of the future photo album
- Weaving captal
- Making a binding cover
- Creating a felt cover
- We connect the cover with the block
- Creating a photo album using scrapbooking technique
- Technique and performance features
- How to choose a plot and stylistic direction
- Required materials and tools
- Project creation
- Preparing and assembling pages
- Decoration and page layout
- We make binding
- How to attach photos inside a photo album
Features of creating do-it-yourself photo albums
There are no special rules for the design of photo albums. Here you need to rely only on your own imagination and taste. Use any decor you can find in the house for decoration. Scraps of ribbons and leftovers of wallpaper, packaging for flowers, small pieces of textiles, buttons, paper clips, flowers from hairpins, beads, strings - any little thing can come in handy in this matter. For the production of the cover, you can use plywood boards, beautifully brushed, fired, painted or varnished, decorated with carvings.
Design ideas and themes
Albums can be filled with diverse photographs - without hesitation. But it is much more interesting to leaf through a product designed in a specific theme. Such a product will send us to this or that event, bringing up pleasant memories in our memory. It is not difficult to find an idea for the album design. You just need to choose some bright significant event from your life.
Most popular options
- Birth of a child.
- The first year of your baby's life.
- Graduation holidays at the end of kindergarten or school.
- Wedding celebration.
- Anniversary or birthday.
- Journey.
- Gift to a colleague or boss
- Favorite city.
- Pet life.
As you can see, life itself often dictates themes for photo albums.
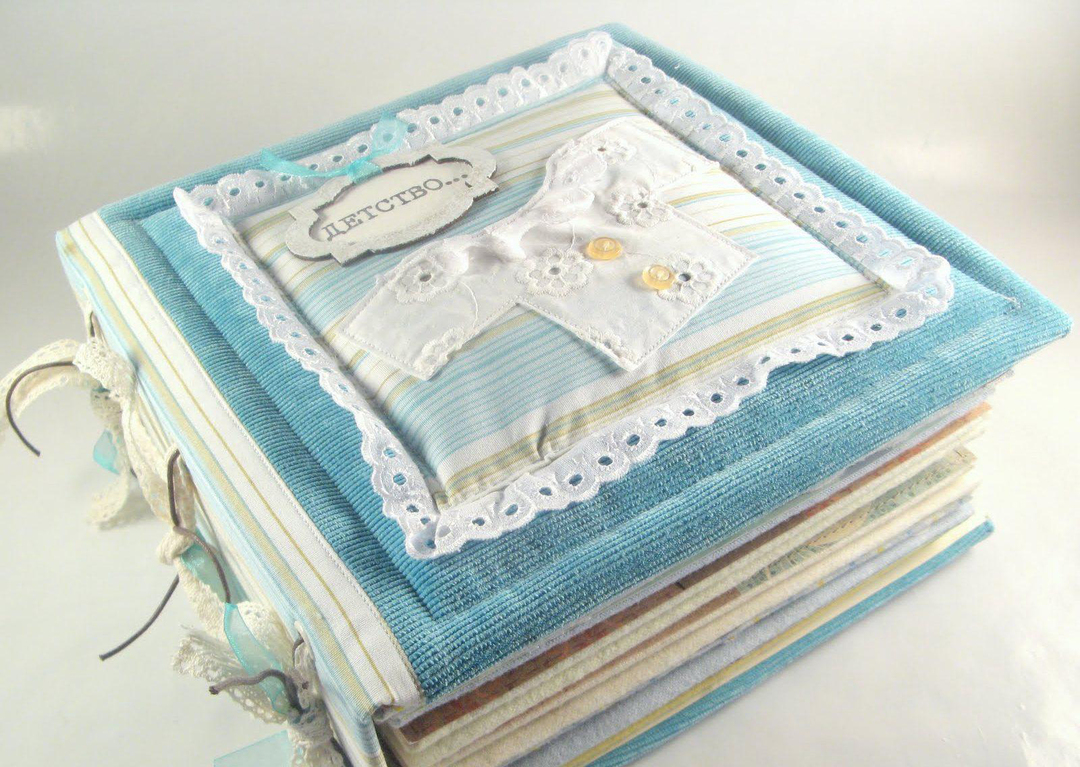
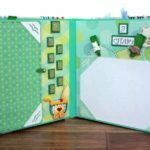
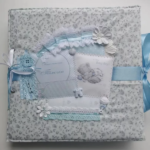
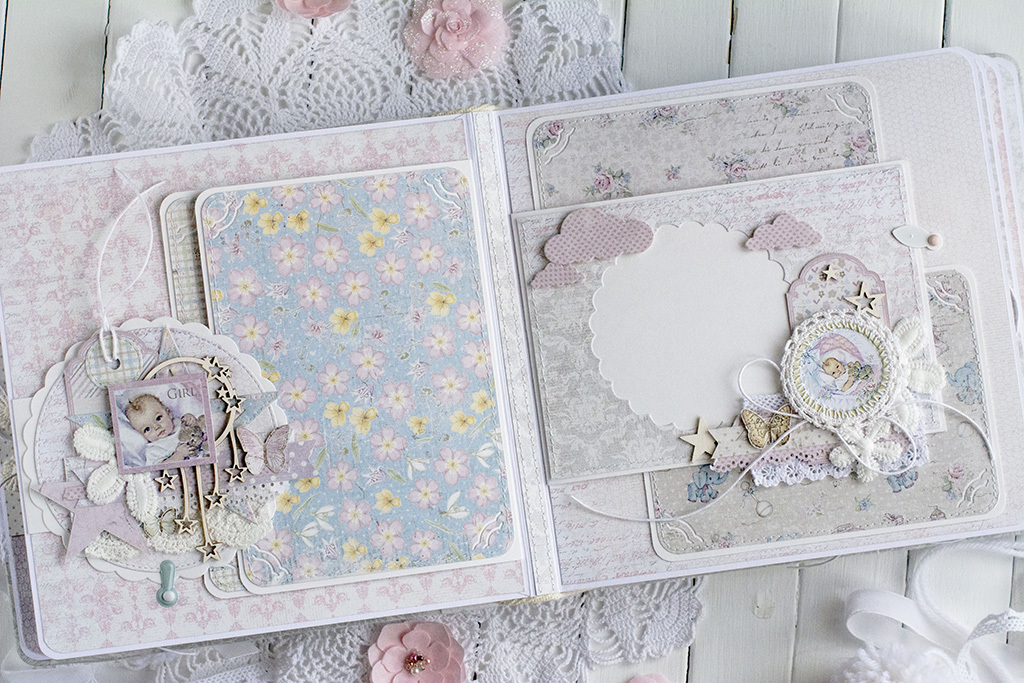
Album for a newborn
The birth of a child is one of the most popular reasons for creating a thematic album. For its design, you can come up with a huge variety of options. Albums of an unusual shape look very interesting - in the form of a favorite toy - a toy car, a boat or a bunny - for a boy, a tumbler or a carriage for a girl. On each page, you can place cards on which it will be very convenient to mark all the changes that occur with the growing baby.
You can print such cards yourself or purchase a ready-made kit. On them it will be possible to mark the indicators of height and weight, the appearance of each tooth, the day when the baby smiled for the first time, took a rattle in the handle, sat down, took the first steps, breaking away from the hands of adults.
On the first pages of the album, it is worth placing a photo with images of mom and dad in anticipation of a happy moment, an ultrasound scan, preferably three-dimensional, a meeting of a mother with a baby in her arms at the time of discharge from the hospital. After that, it remains only to fill in the following pages as the child grows up. It is better to do this every month, celebrating all the changes and new achievements of the baby. Do not forget to take pictures of his stroller, favorite toy, first sandals. Decorate the pages with stickers and cute little things in accordance with the chosen theme.
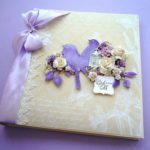
Wedding album
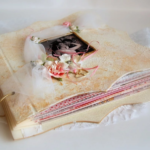
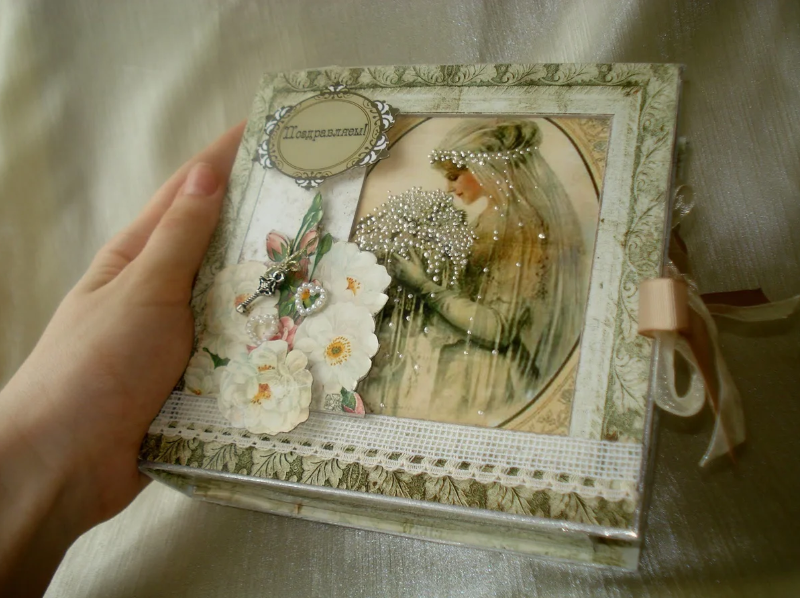
This album is dedicated to the most significant day for every family. A story about him in photographs will make him unforgettable. Any wedding accessories are suitable for decoration - bride's gloves, images of connected wedding rings, flower arches, doves, wedding cake, glasses with the names of the bride and groom and the date of the wedding, bouquets, volumetric flowers. For decoration, lace, tulle, ready-made flowers and butterflies from organza, white crepe satin, pearls, satin ribbons are suitable.
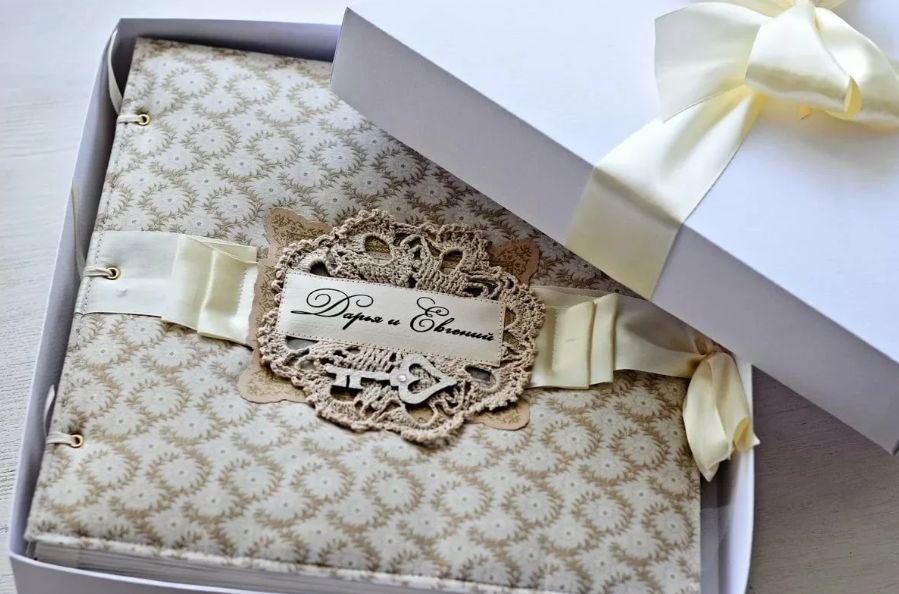

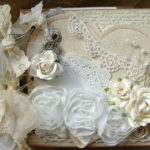
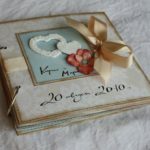
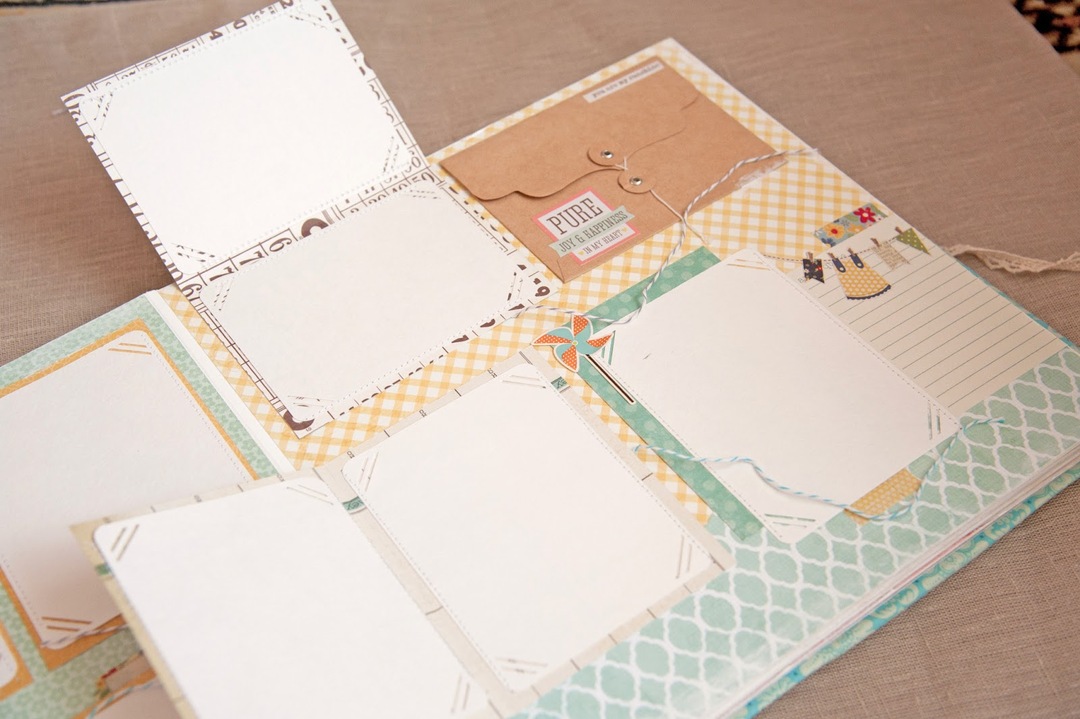
In the center of the cover, attach a sign with the words "Our Wedding" or "Wedding Album". If there are too many good pictures, and you do not want to part with any of them, provide the album with folding pockets. This way you can place several photos on one page at once. In the album, you can also organize a place to store a disc with a video of the celebration. To do this, you need to glue a beautiful CD sleeve onto the flyleaf of the cover.
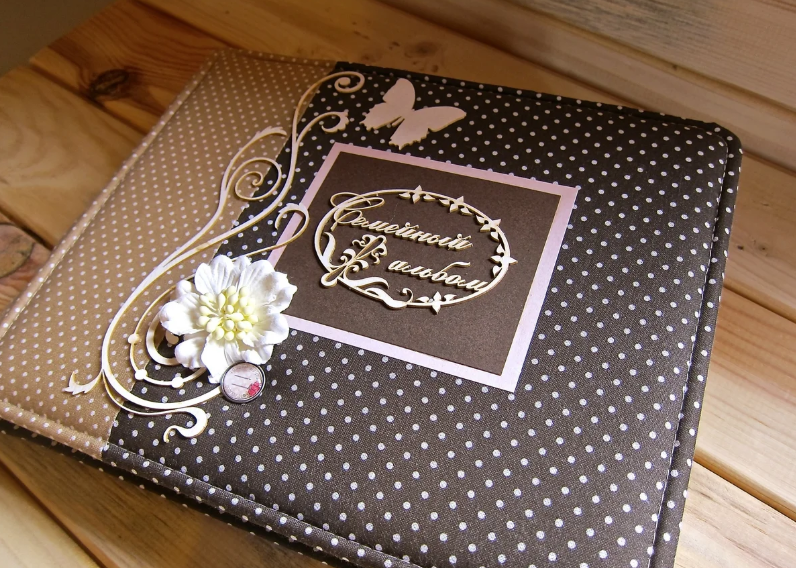
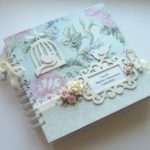
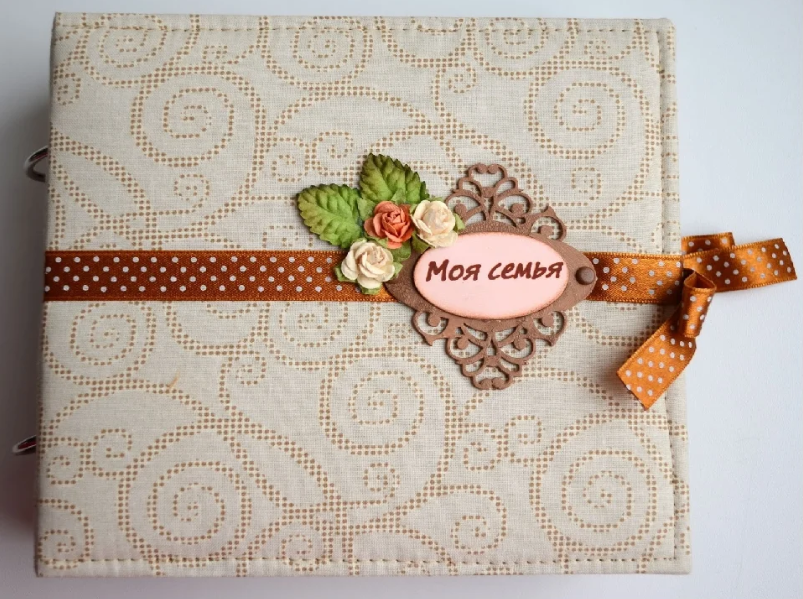
Family album
Over the years of family life, a lot of photographs have been accumulated. They reflect the entire history of an individual family. In the pile of photographs and the very beginning of the path - wedding photographs, and joyful events throughout life, and photographs of children and numerous relatives. People keep family archives not only to feel nostalgic for times gone by, but also to tell about the life of the family in its various periods.
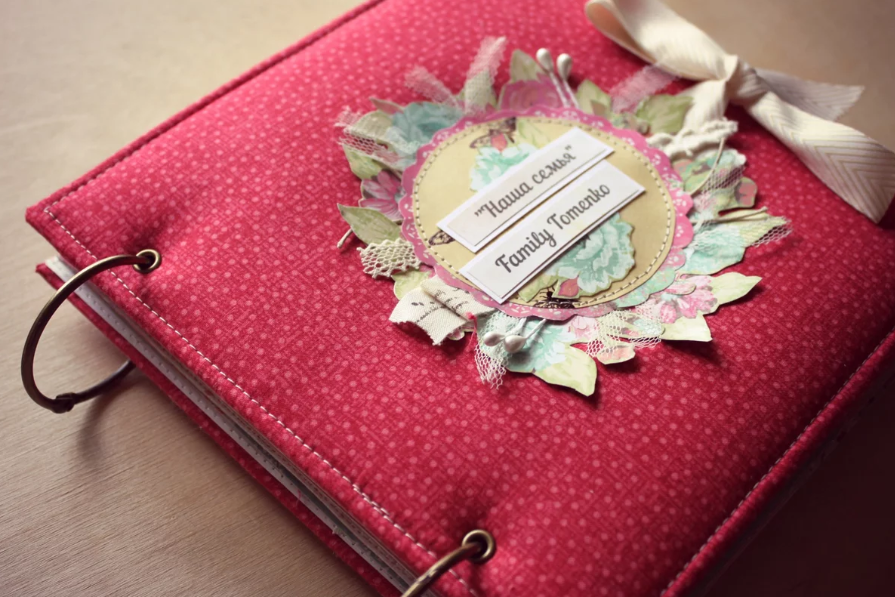
It is necessary to start keeping the album from the first days of family life. And what could be the best decoration for the cover of such a product, if not a wedding photo. If it is made as a gift for a married couple, the image of the spouses celebrating another wedding anniversary will do. It is not superfluous to write on the cover a title that matches the meaning of its content.
Each life period that the couple lived together can be assigned a separate U-turn. Recover the chronology of events from the time of acquaintance to the present day. People often keep various souvenirs, love notes, tickets from joint visits to events in secluded corners. All these little things should not be forgotten when making a family photo chronicle.
The most important milestones in the life of every family are weddings, expectation and birth of children, birthdays of relatives and friends, joint travel and events, buying a shared home, calendar holidays, marriages of children and births grandchildren. It is also very important to preserve amateur photos that tell about everyday life. A family tree will look logical on the flyleaf.
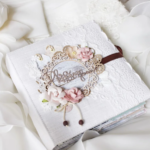
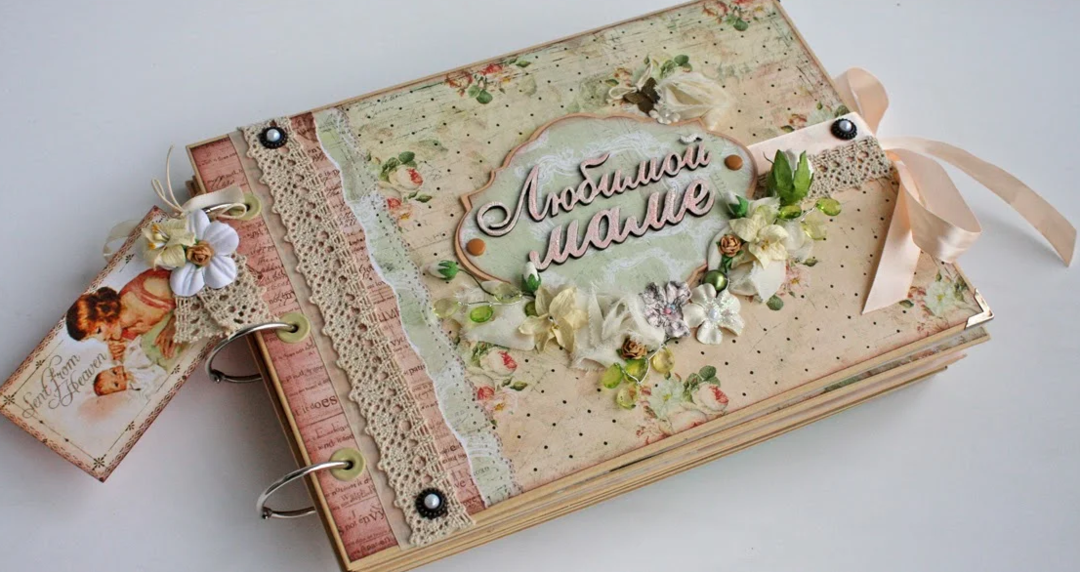
Birthday photo album
A photo album can be a great gift for a loved one. In this case, the choice of page design and cover will depend on his personal interests and hobbies. Do not forget to take into account the profession and marital status of the person. Since your relative or acquaintance will add the pictures himself, it is better to make pockets or envelopes for photos of different calibers.
During the manufacture of a gift item, you will have to tinker a lot, but the result will allow you not only to please your relatives, friends or colleagues, but also give you a reason to be proud of yourself. And if everyone around will know about your skill, guess who they will want to order a gift album from next time.
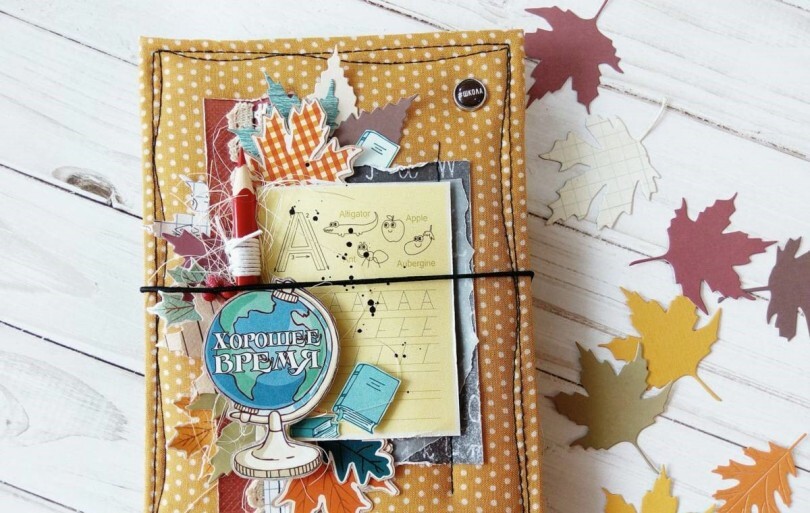
School or Graduation Photo Album
School photos allow you to refresh the memory of the images of classmates and teachers. The album must certainly contain the classic general options - when the whole class is filmed at the same time in the assembly hall, in the classroom, in the schoolyard.
Individual pictures of your child are no less relevant. Nowadays, when each of the children has a smartphone with excellent shooting quality at hand, it will not be difficult for anyone to take a self-portrait right in the classroom during a lesson or a break.

Photos from the prom can be the final chord of the school version or live in a separate cardboard "apartment". On the cover, you must indicate the class number, school and year of graduation. A self-made album with original design is a great gift for yesterday's "chicks" who are so eager to quickly flee into adulthood. Looking into it a few years later, they will easily remember the joyful events from school time.
Sometimes it takes time for your gift to be appreciated. But in a couple of years, the guys will longingly remember the carefree school life. And the photos from the album you donated will allow them to return to their childhood and experience unusually warm feelings at the sight of their classmates and teachers.
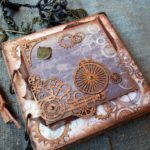
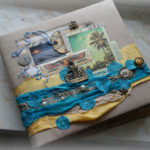
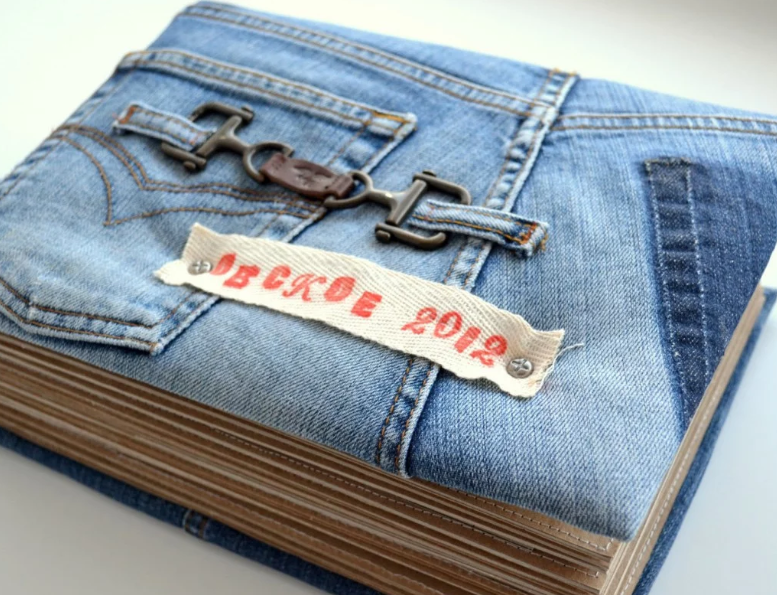
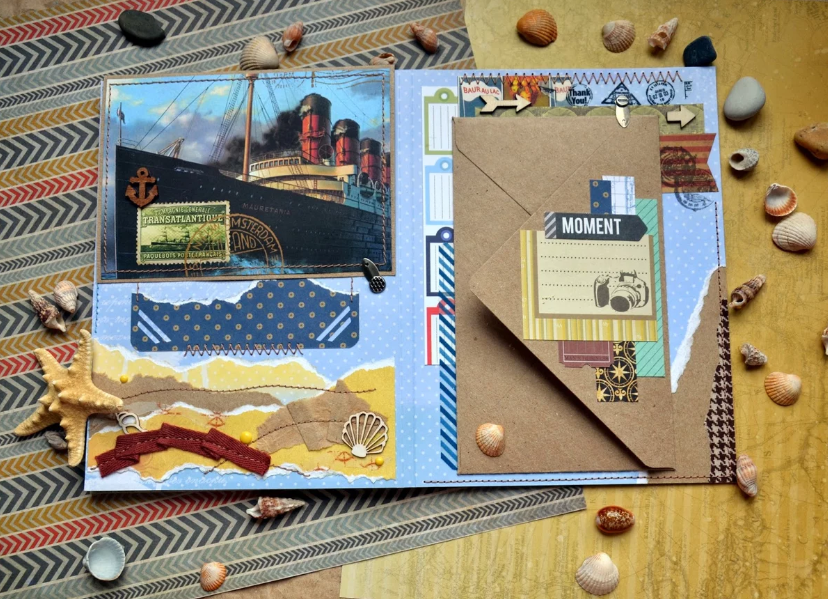
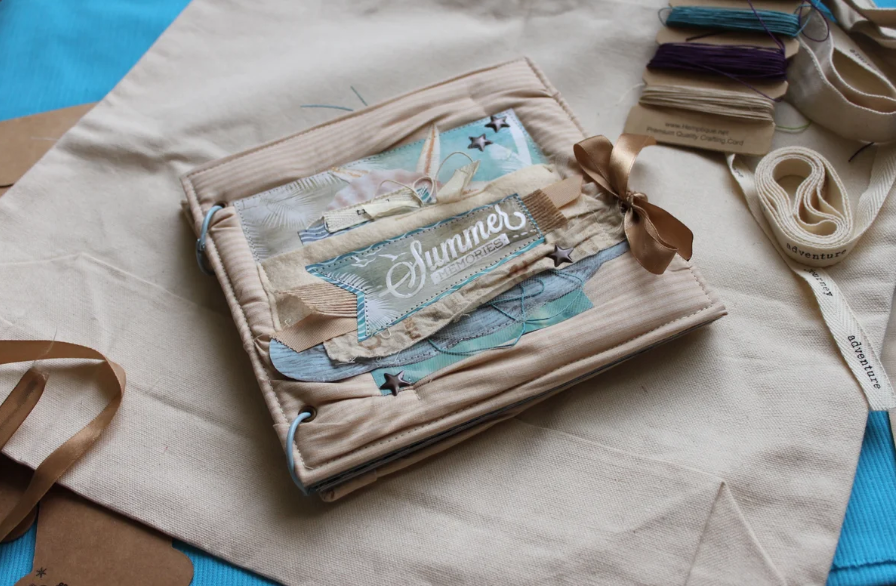
Journey
With the proliferation of digital media, it has become out of fashion to print photographs. Thousands of snapshots fill up hard and virtual disk space. People take a myriad of pictures while traveling, but the trouble is that almost no one sees them except for a small selection posted on a social network.
Guests and relatives who come to the house are simply not able to view such a huge number of similar photographs. It is much more pleasant to offer your loved ones a small album with the best pictures and interesting design.
Leafing through such a product is much more pleasant than reviewing gigabytes of images on a monitor. In addition, old pictures on the computer and on the pages of social media. networks have to be searched for a long time. But in a self-made album, they will always be at hand.
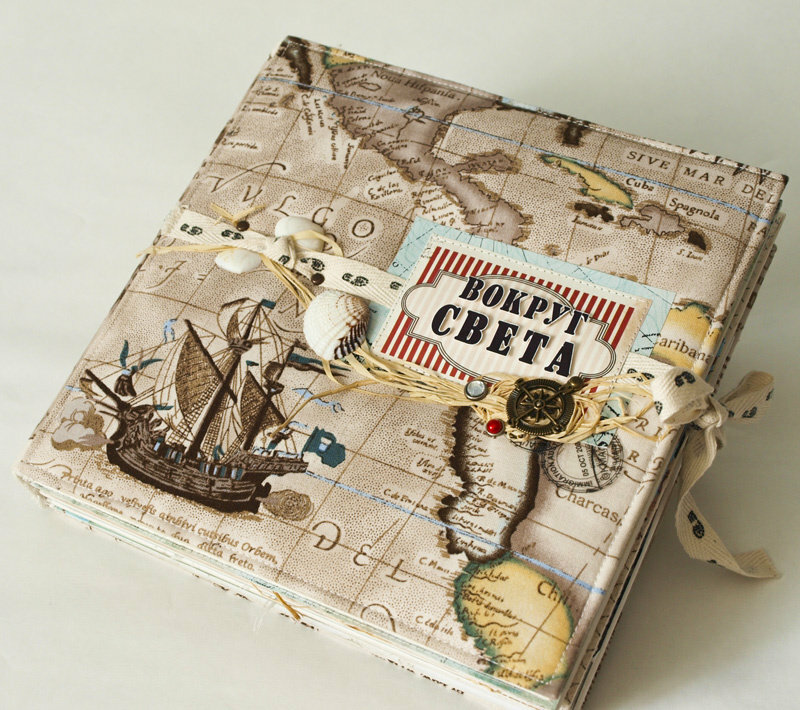
For registration, you can use any items that fell into your hands during the trip. These are the symbols of the visited country, postcards depicting attractions, as well as all sorts of little things - tickets, boarding pass roots, dried exotic plants, small shells, a bar of hotel soap, labels from products. Very often we store such gizmos only for the first time, and then throw them away during the next raid to "litter".
Together with them, we throw away most of the memories. To prevent this from happening, add the brought little things to the album design. Every time you take this product in your hands, you will be covered with a warm wave of joy mixed with a slight touch of sadness.
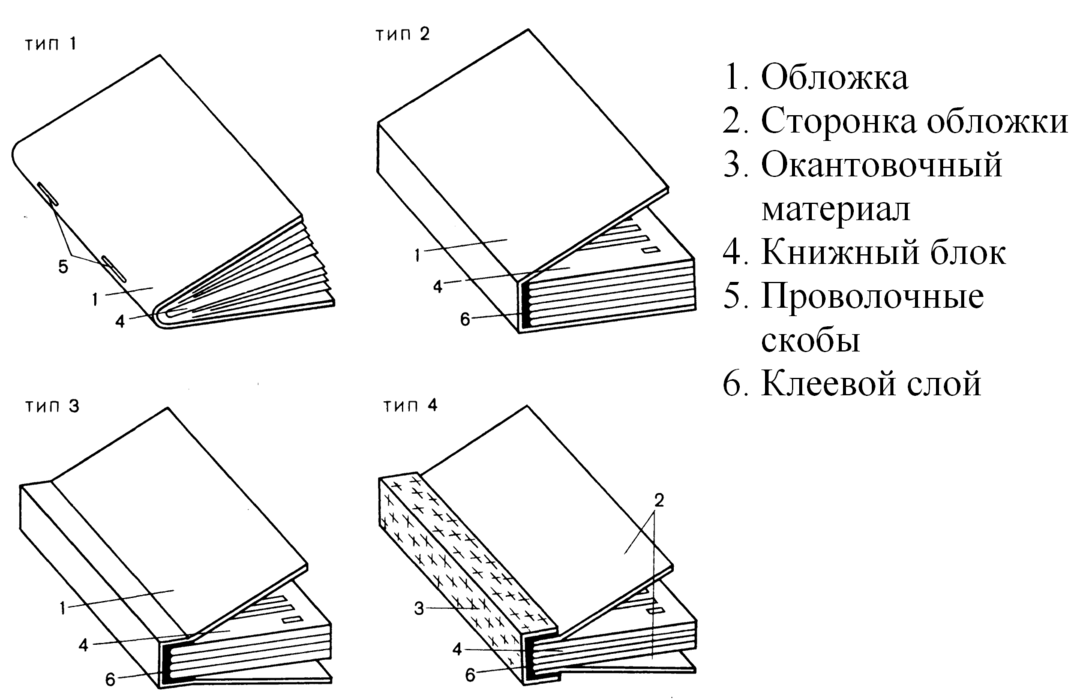
Create a photo album with a thick spine
We present a master class on creating a photo album with a reinforced spine. It allows you to compensate for the thickness of photographs and prevents the product from swelling.
Required materials and tools
To create such an album, you will have to stock up on:
- design paper of high density. It will take 24 sheets with dimensions of 19x20 cm;
- special paper for scrapbooking - you will need two sheets to make endpapers;
- 2 sheets of cardboard for bindings with a format of 20x18 and a thickness of 2mm;
- 2 sheets of similar material with a size of 19x10 cm
- thin paper to create a binding cover with a weight of 100 grams per square meter;
- thicker paper to create a spine - 140-200 g / m2;
- 2 sheets of felt of the desired color. The thickness of the fabric should be in the range from 1 to 1.5 mm, the size of the first cut - 23.5x43 cm, the second - 12x12 cm;
- cotton yarn, close in color to felt, for crocheting - "Iris" or "Snowflake";
- 2 gypsy needles;
- cotton ribbons;
- a cord with a round section of 1.5 mm and a length of 15 cm;
- stationery clips 51 mm;
- a needle file;
- instant glue;
- narrow double-sided tape, masking tape;
- universal glue, you can use UHU Twist & Glue;
- glue in the form of a pencil;
- silicone sealant;
- a special bone for scoring, a knitting needle or a handle with an empty core;
- soft and voluminous material to create a binding cover, you can use the remains of fleece;
- flat, thin and wide brushes with a hard bristle;
- scissors;
- metal ruler;
- sponge;
- meter-long suede cord, juniper beads.
Let's discuss some of the nuances. The master class will describe the process of creating an album with dimensions of 19x18 cm, consisting of 24 sheets. If you plan to change the number of pages upwards, the 51 mm clothespins may not withstand the stress and break. When creating a product larger than 21 cm, 3 binding ribbons will not be enough. Better to take 4 right away.
Preparing and cutting paper
Regardless of the selected album size, when cutting sheets into a certain format, you need to take into account that the sheets should be 2 cm wider than the planned width of the finished product. This surplus is necessary to create a fold, due to which a thickening of the root is formed.
The fold lines and the height of the future album should go in the same direction as the longitudinal ebb line of the paper. This will make the paper easier to fold. On the longitudinal cut, you can see the gloss, this is especially evident when the paper is in a pile. The longitudinal edge moistened with water will warp, go in waves. But, as a rule, complex tests are not needed, and already when folding the paper, it becomes clear which side to make the height of the album. Observing the direction of the ebb will help to extend the life of the product.
Creasing of sheets for a photo album
In order for the folds to be neat, it is necessary to crease the sheets. This operation consists in applying straight grooves to the paper, which are necessary for folding thick sheets - more than 175 g / m².
To create grooves, you can use a special board, a creasing bone, a knitting needle with a diameter of 3.5-4 mm or a handle with an empty core. It is better not to use the latter option, since the quality and width of the line formed by them is not sufficient for working with thick paper. Since not every home has professional tools, you will have to limit yourself to a metal ruler and a knitting needle. First, you need to attach a ruler and put down invisible marks two cm from the edge. Then push through the line with a knitting needle, not allowing the ruler to go away from the marks.
If you have stocked up with a special mat for cutting paper and a creasing bone, you can speed up the process by marking on the mat with a bone and a metal ruler.
Apply enough force to form a groove, but do not tear through the paper. Fold the paper back along the formed line and iron the fold with a crease bone.
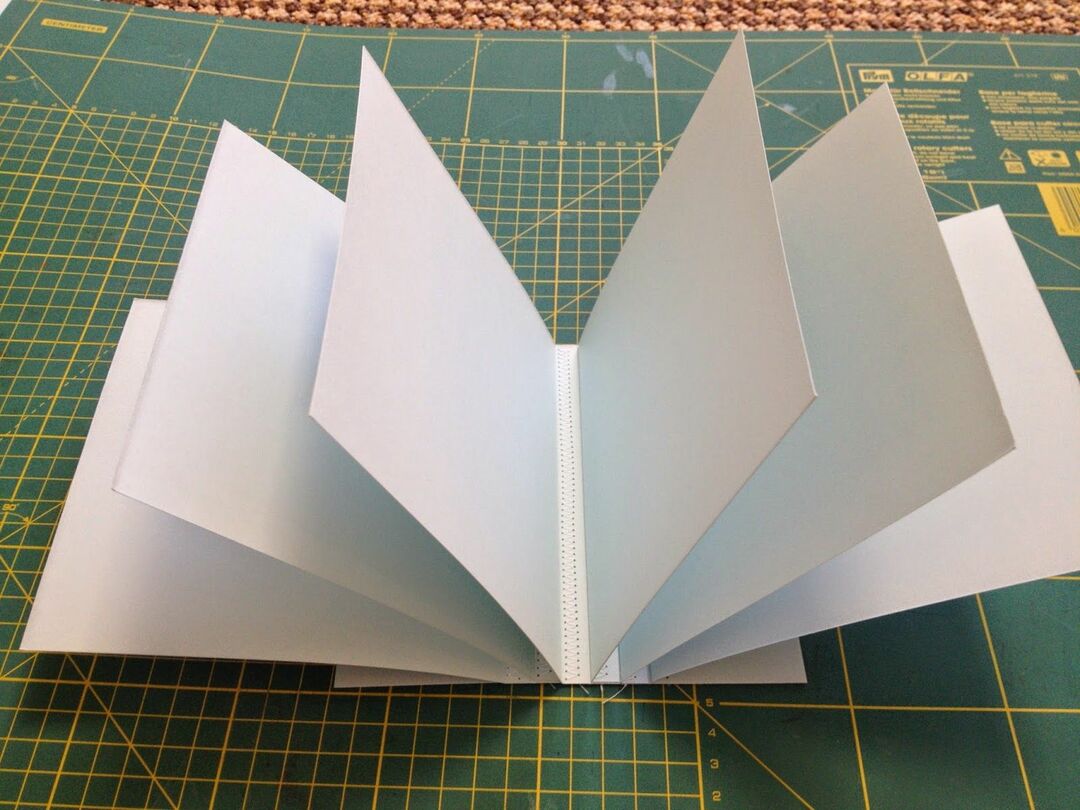
Formation of notebooks
With a sheet prepared with the help of creasing, you need to wrap even paper - you get a notebook. During this work, try to align the slices as carefully as possible. Repeat this procedure 9 more times. You will have 10 notebooks. The two remaining sheets will come in handy for combining with endpapers. When cutting out the latter, take into account the direction of the print on the sheets of scrap paper. Remember to keep the fold on one endpaper on the right side and the fold on the other on the left.
Form a stack of notebooks and tap them on the table on three open sides to align the sheets of paper as much as possible. Next, we fix the future album with clamps, having previously placed on both sides thick cardboard for binding with a size of 19x18 cm, so as not to damage the paper and leave no traces on it. We leave the workpiece until the morning. During this time, she will have time to pack well. Thanks to this, it will be much easier for you to stitch the notebooks into a single whole, and the finished work will look much more neat.
How to sew notebooks into a block correctly
Use prepared tapes to staple the album. The tapes should be made of not too smooth fabric, moderately thin and not too loose. For work, 3 tapes will be enough. For the production of the album presented in this master class, cotton two-centimeter ribbons with a length of 15 cm are suitable. It is these products that are optimal for a given number of notebooks. They are long enough and at the same time do not interfere with stitching.
The width of the tapes of 2 cm was chosen as a result of the following calculations:
- we retreat from each edge of a 19 cm album by 1.5 cm - it remains to divide 16 cm;
- with a tape width of 2 cm, the remaining free areas will be 2.5 cm in size.
Calculations can and differ depending on the height of the album and tapes of a certain width. The main thing is to step back from the edges by 1-1.5 cm and prepare the required number of ribbons.
The order in our case is as follows - 1.5-2.5-2-2.5-2-2.5-2-2.5-1.5. It is necessary to mark the cardboard in which the notebooks were kept at night, according to this formula. When joining cardboard to a stack of formed notebooks to form cuts, you need to make sure that the sides on which you started to mark are pointing in the same direction. This is very important when using imperfectly cut cardboard, when a shift of even 0.5 mm interferes with making even perpendicular cuts relative to the spine length.
After that, you need to make shallow cuts along the applied markings. Additional alignment of notebooks before starting this procedure will not be superfluous. Cover the stack with cardboard on both sides, fix with clamps along the short edges closer to the spine, and proceed with the cuts. This operation requires a file that allows the formation of a wedge-shaped depression. With a knife, such a cut cannot be made.
Do not cut too deeply into the paper - pages with such indentations look untidy, glue can flow through the holes. The hole for the thread is too large, in which it will not fit snugly. If the holes are too small, it will be inconvenient to sew the notebooks. It is necessary to saw through the spine enough to completely pierce the fold of the first sheet and only slightly touch the second. After completing the procedure, the clamps and cardboard can be removed.
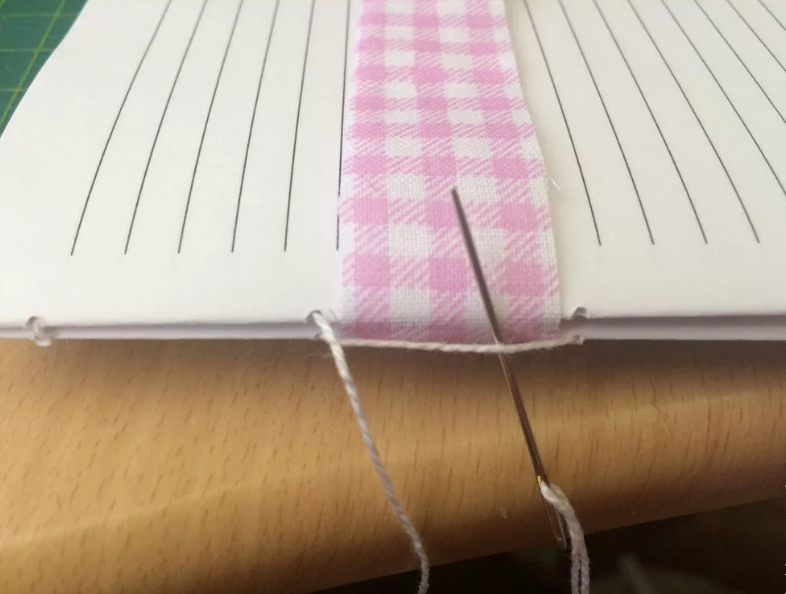
Stitching notebooks
Lay the stack back side up. Insert cotton thread up to 1 m long in one fold into a thick needle with a large eye. You do not need to tie a knot. With such a length, the thread is convenient to sew, it does not get tangled and does not tie into knots.
Place the top notebook with the flyleaf on the table with the prepared ribbons. In the hole on the right side, move the needle from the outside to the inside and pull the thread, leaving a tail 5-7 cm long.
Take the upper notebook and turn it over so that the endpaper touches the surface of the table (first place the ribbons under the notebook). From the outside to the inside, thread the needle through the right hole, leaving a tail of 5-7 centimeters.
It will be more convenient to work if the notebooks are placed on a raised platform.
We pass the needle with a snake alternately into all the holes. When the needle comes out of the last hole, pull up the thread and at the same time hold the tail.
We take the second notebook, turn it over and do the same steps in the opposite direction. In places where the spine is covered with ribbons, the thread must be wound under the previous stitch. After sewing the second row, tie the tail with the working thread with several knots.
We put the third notebook and stitch it, reaching the tape, we start the thread only under the previous stitch. We squeeze the notebooks with our fingers in the area of the last hole and insert the needle between the first two notebooks just behind the cross stitch. We pass the needle into the formed loop and tighten the thread. We continue working in this way until the thread becomes too short. We bring the needle out and free it from the thread. We tie a knot in such a place that it falls into the gap on the spine, covered with ribbons. We insert a new thread into the needle, make a loop on it, throw it over the knot and tighten it tightly so that the new knot does not slip off at the moment of tension. We continue to sew notebooks.
What mistakes can you make?
- to pull the thread too weakly or too tightly while sewing - in the first case, gaps are formed between the elements of the album, in the second, the thread tears holes, and the spine is rounded;
- do not align the sheets in height every time you start stitching a new notebook;
- allow the formation of knots and loops on the inside in case an excessively long thread was cut.
After all the notebooks are sewn, you need to pack the stack in cardboard and form a semicircular spine. To do this, you need to move the notebooks so that they line up with a ladder from the edge to the center of the block. It is enough to make a slight smooth shift. If everything works, place the clip on the finished half and round off the other side of the spine. We also fix it with a clamp.
Bonding the spine of the future photo album
For gluing the spine, you can use printing glue or silicone sealant, which provides flexibility to the dried layer.
We close the ends of the block with masking tape next to the spine. Apply a small layer of sealant to the spine and distribute it over the entire surface. Next, we apply a second, thicker layer and free the extreme holes from the glue. We clamp the product and leave it for 6 hours.
Weaving captal
Cut off the ribbons and fix the ends on the endpapers with a glue stick. We remove the masking tape, cut off the excess glue and start weaving the captal. It will hold the sides of the block together and hide the gap between the cover and spine.
We take two needles with a large eye and insert a thread into each of them in one addition with a length of 60 mm. We connect the threads using a common knot.
We install the block with the spine facing us and fix the lace on top. Holding it with your left hand, we pierce with one of the needles a hole in the last notebook on the right side exactly in the middle. We tighten the thread, until the knot stops in the spine, we braid the cord with a needle and tighten the loop. After that, we wrap the cord on the other side. When the last ring is near the center of the second notebook, move on to braiding with the second needle. We carry out the required number of turns to reach the middle of the third notebook. We alternate the needles until we finish the work, after which we tie both into a knot and hide them in the sealant. We weave the captal from the other edge of the spine in the same way.
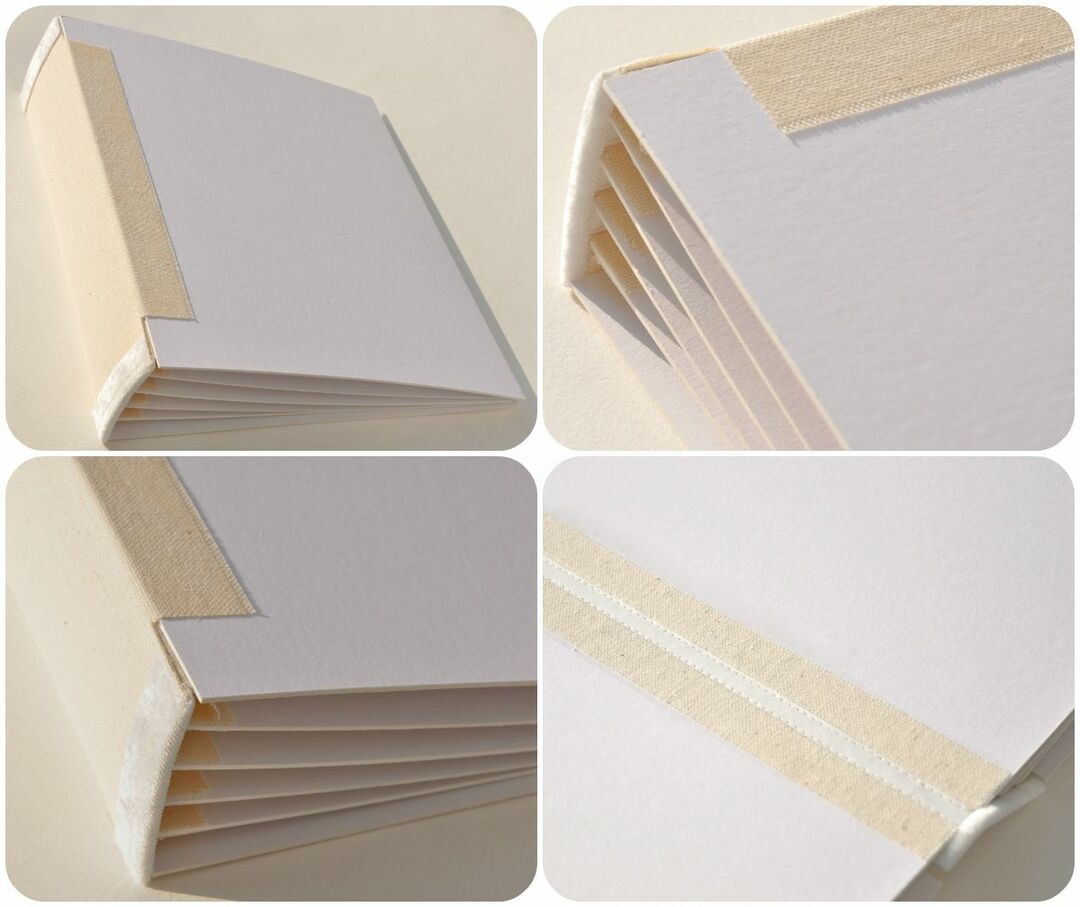
Making a binding cover
Before you start creating the cover, you need to figure out the size of each of its sections.
- The height of the binding cardboard is 19.6 cm - it is equal to the height of the block with 3 mm increments at the top and bottom.
- The width of the cardboard is made up of the width of the block - 18 cm, + 4 mm on one side. Fleece must be glued to both parts.
- The spine width is measured and marked on thick paper with a height of 19.6 cm. Draw big lines for smooth rounding of the spine. We cut off the spine in accordance with the markings.
- Leave a small distance equal to the thickness of the cardboard together with the fleece, multiplied by 2, between the spine and the inner edges of the binding material.
- We carry out guides with thin paper, in accordance with which the cover parts will be glued.
- We collect all the parts using universal glue, pressing them with a creasing bone, and leave them to dry.
We try on the made frame, and if it fits well, proceed to gluing the cover.
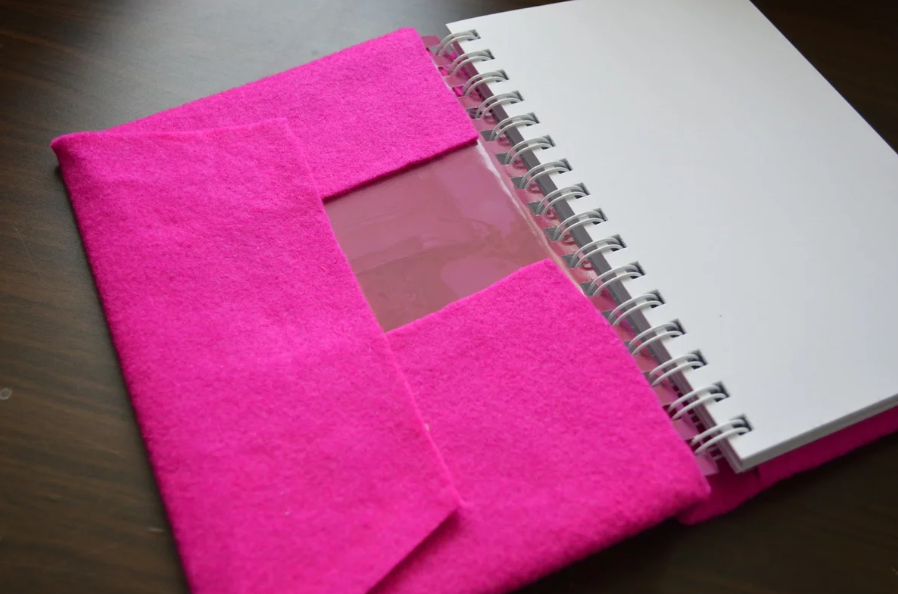
Creating a felt cover
We mark the felt with a non-waterproof marker. Set aside on the right side 2 cm on the hem. Set aside 2 cm from the bottom. We place the lid exactly along the marked lines. Apply a 2 cm wide strip of glue to the long side of the structure. We wrap the edge with felt, do the same with the bottom. Cut the felt at a 45-degree angle to form a corner from the vertical and horizontal flap. We wrap the cover in fleece and form the rest of the corners.
We connect the cover with the block
The first step is to glue the back endpaper. Apply glue and apply paper in such a way that 3 mm protrudes from three sides. We straighten the paper carefully, expelling air from under it. Fix the front endpaper in the same way. It remains to add decorative details, and the process can be considered complete.
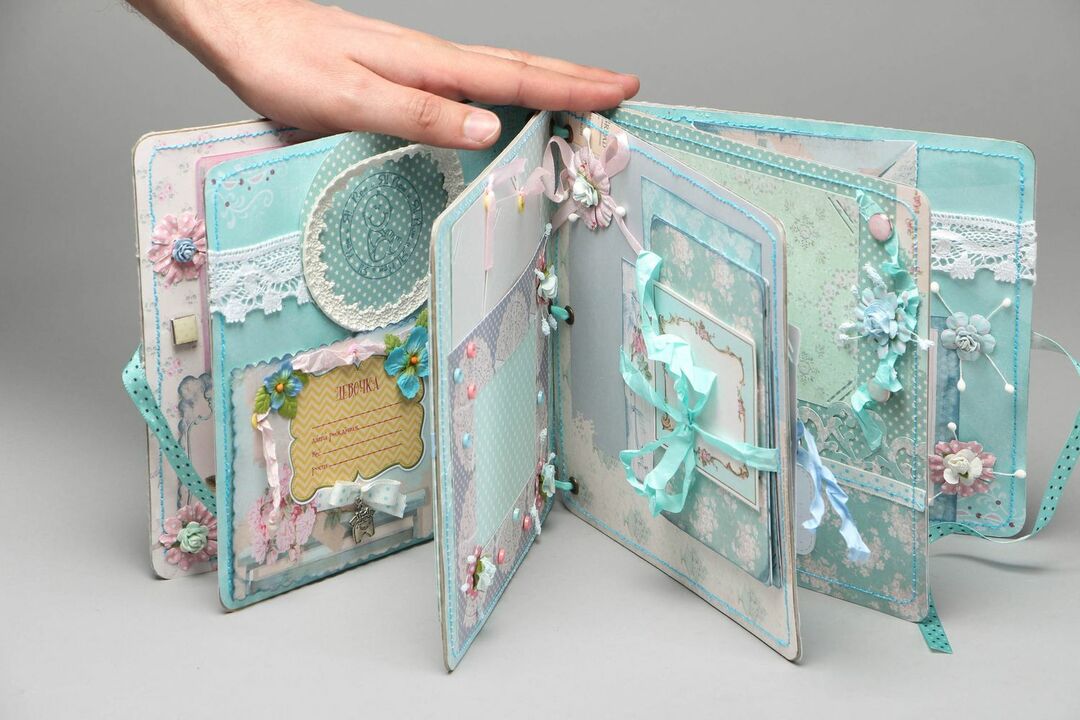
Creating a photo album using scrapbooking technique
When planning to create an album using this technique, you need to first select a plot for your future creation, think over a composition, choose a style and technique for its production.
Technique and performance features
A homemade album can be decorated using the following technique:
- stamping - characterized by the use of applicators and all kinds of stamps;
- cropping - the work goes directly with the photo - they crop out insignificant fragments, leaving only key points;
- distressing - based on the use of artificially aged paper;
- decoupage - ornaments and plot pictures are used in decoration;
- journaling - pictures are accompanied by original explanations.
These are not the only techniques you can use to create great photo albums. We have given as an example the simplest of the existing ones.
How to choose a plot and stylistic direction
The plot is the main source of ideas for the design of the photo album, which is determined by the chosen theme. Albums can be divided into:
- family - dedicated to events occurring in the family;
- gift - created for a specific event - for a friend's anniversary, for Teacher's Day.
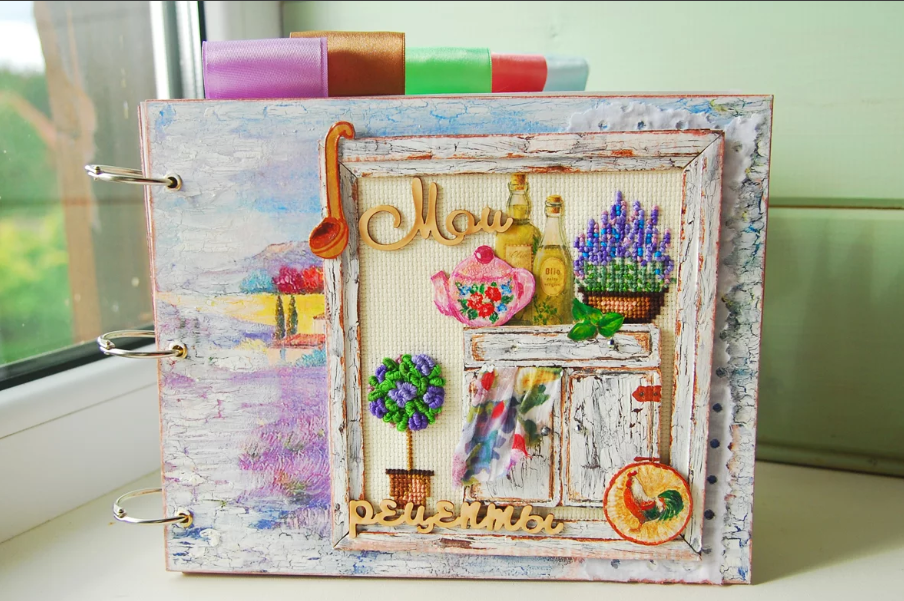
Everyone chooses a stylistic direction according to their taste. If the album is intended for a lover of antiquity - choose a vintage design, if you like luxury and splendor - give preference for the American style, for adherents of minimalism, the European style and design in the style of "clean and simple ". Use the style that is most pleasing to the future owner of the finished product.
Required materials and tools
For work you will need:
- scrapbooking paper;
- cardboard with a density of 500gr / m2;
- notebook;
- adhesive material;
- tapes;
- synthetic winterizer;
- awl;
- ruler;
- pencil;
- breadboard knife;
- needle.

Project creation
We start developing the project, using a suitable plot and idea for its design. The main thing is to clearly understand the result of your work. This is where the notebook comes in handy. It is better if it matches the size of its prototype. We will use it as a template. On the pages of the notebook, you can "try on" the existing decor, make several options for the layout of photos. The most successful option needs to be fixed and guided by it when designing a product.
Preparing and assembling pages
Assembly stages
- Putting together the spine for the pages. We cut strips with a length equal to the height of sheets of less thick cardboard. The width of the stripes is most often no more than 3 cm.
- Using a ruler, determine the middle of the narrow part and set aside 2 mm from it in both directions. If the pages are not planned to be decorated with a convex decor, it will be enough to set aside 1 mm each. We connect the marks using a line drawn with a knitting needle or pen, in which the ink has run out. These grooves will help us create neat folds.
- We cut off the corners of the workpiece, lay sheets in them and fasten them with glue.
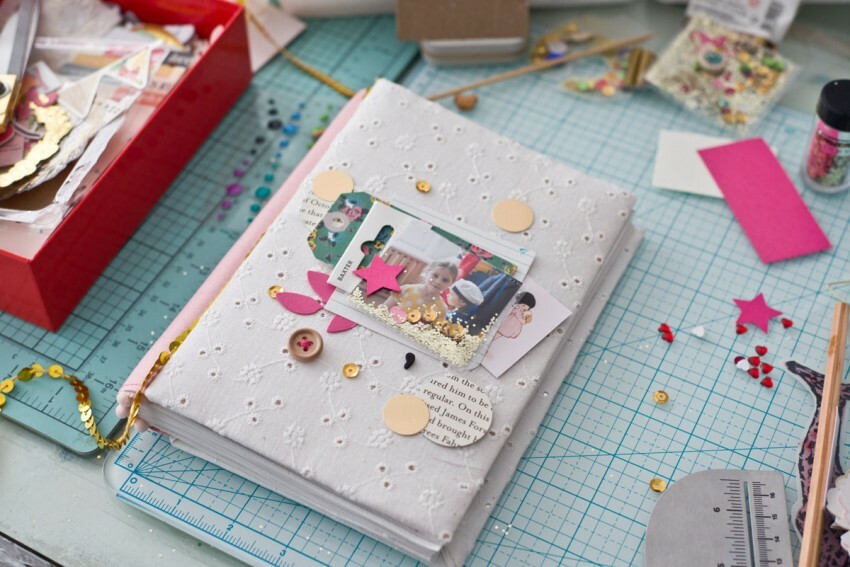
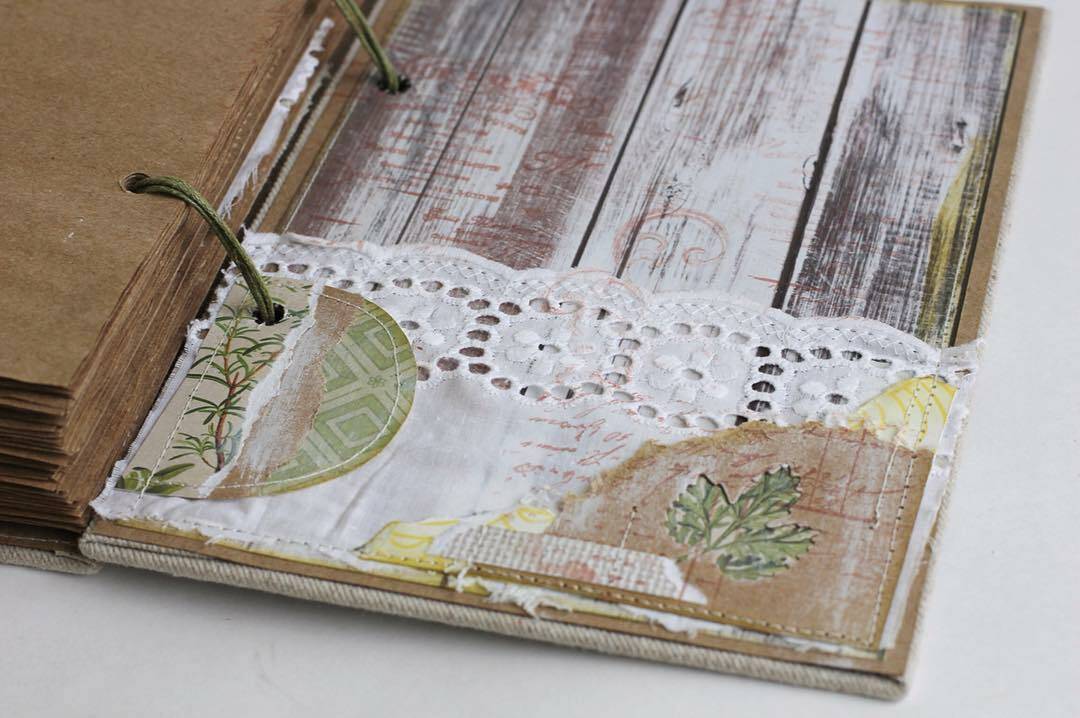
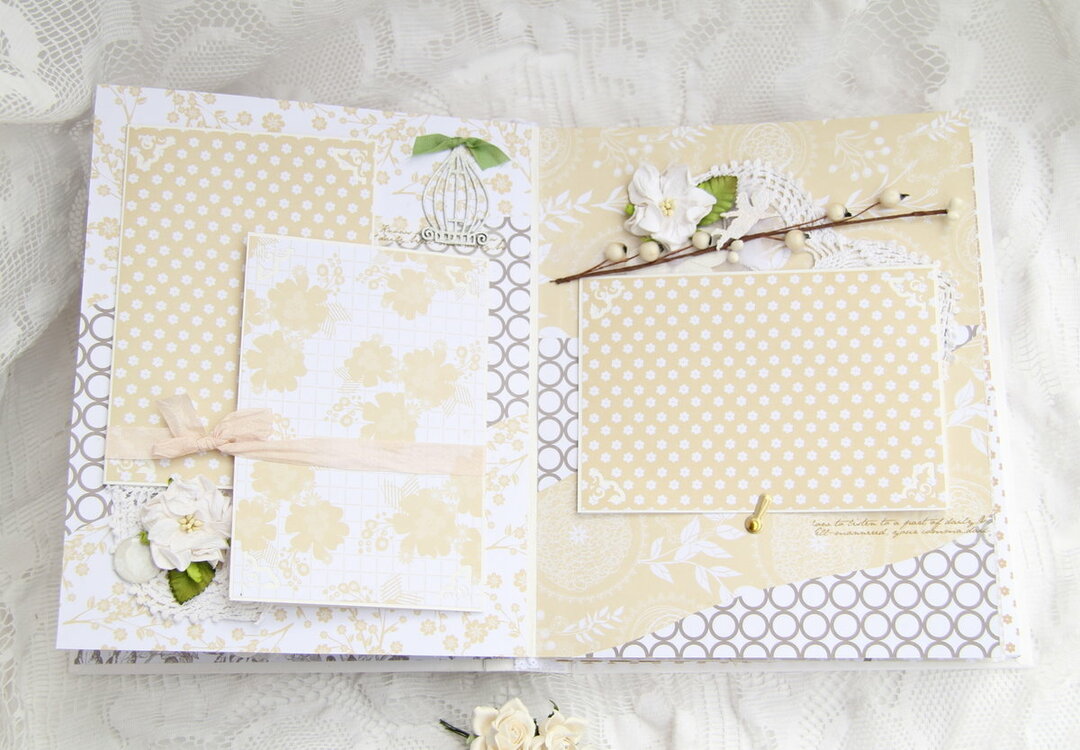
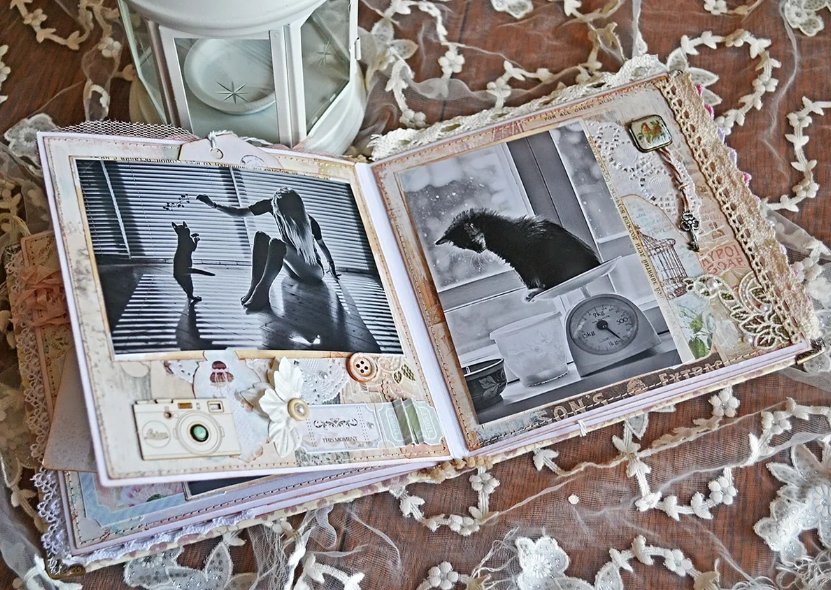
Decoration and page layout
Let's start decorating the pages with scrap paper. It is necessary to choose the shades corresponding to the theme and create the main background, which we will subsequently decorate with other elements.
You can use as decorations:
- vinyl stickers;
- satin and nylon ribbons;
- lace;
- beads;
- rhinestones.
Do not limit your imagination and use any materials at hand, just try to evenly arrange the volumetric decor on the pages. This will avoid deformation of the sheets and loss of the original shape of the album.
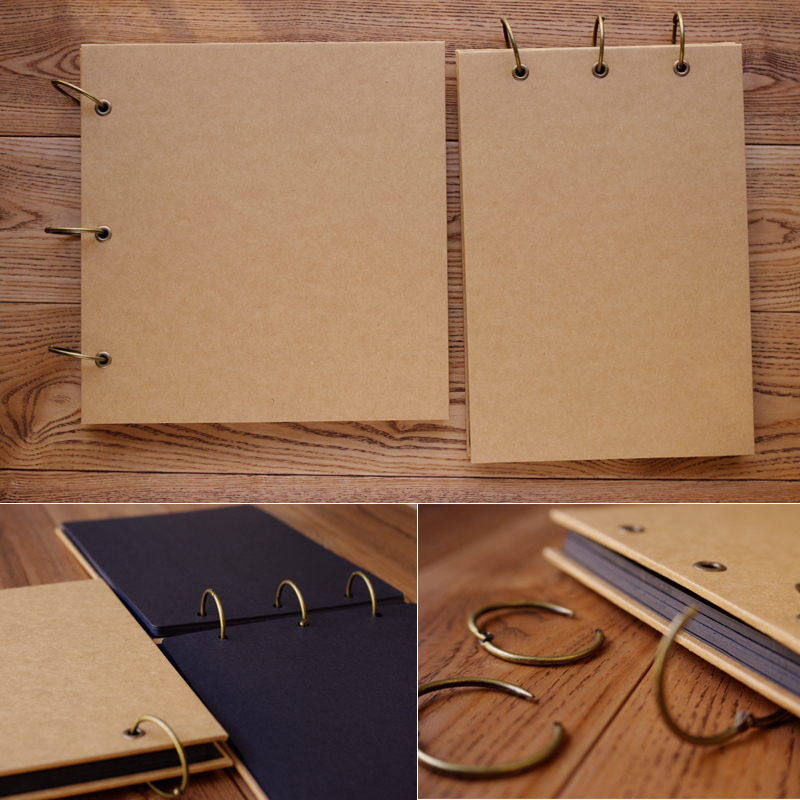
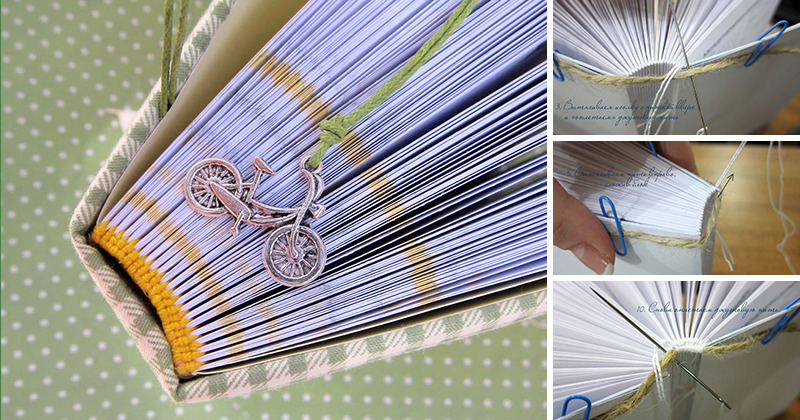
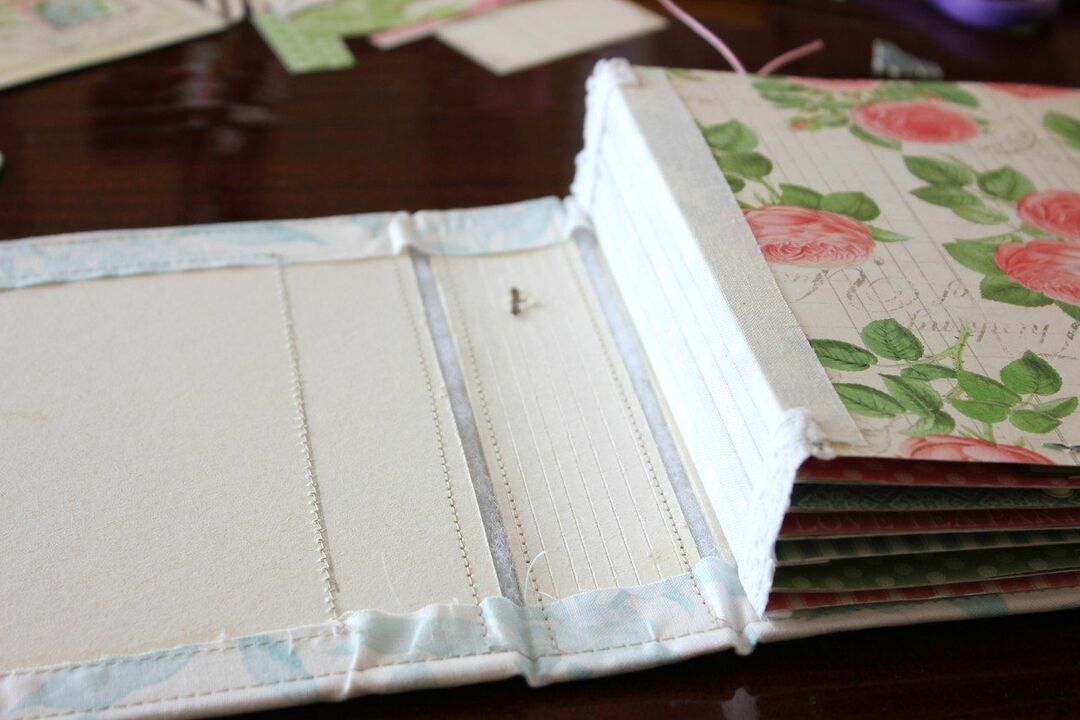
We make binding
Step-by-step instruction
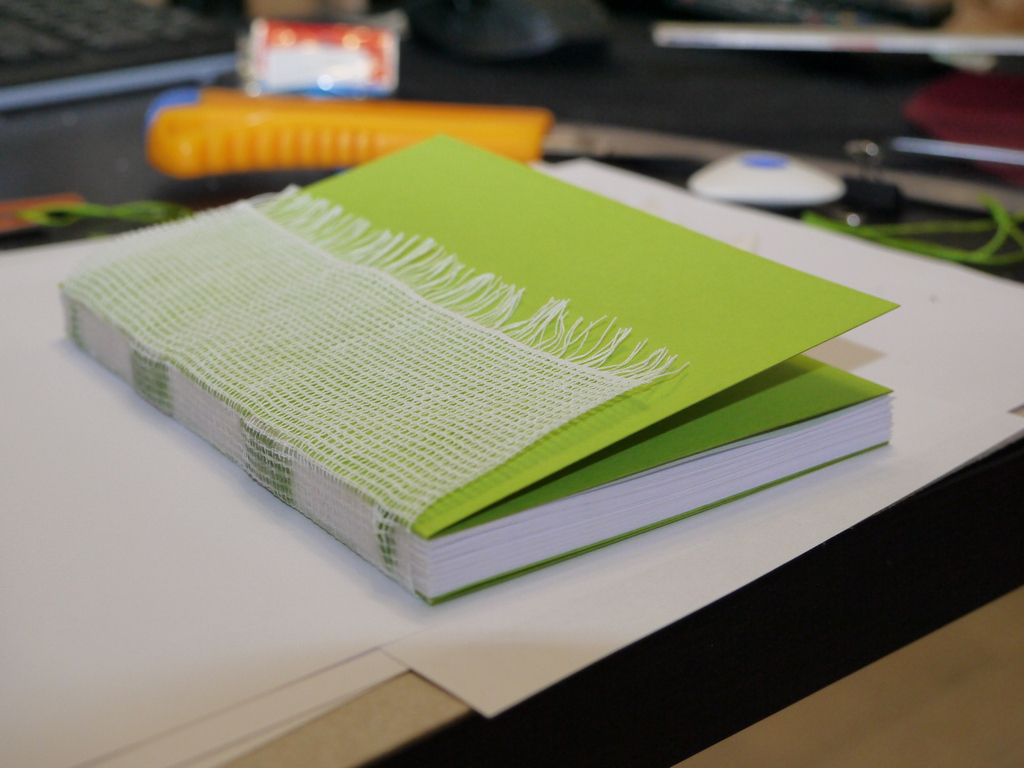
- We collect the prepared sheets with the roots into a single whole. We strengthen the roots by gluing them with a strip of gauze, bandage or non-woven fabric, leaving 1.5 cm of protruding fabric along the edges of the binding.
- Cut out two strips from the cotton tape with a length equal to the width of the binding.
- We fold over the rest of the gauze and fix them along the edge. So we will simultaneously hide the flaws in the assembly of the binding end and additionally fix the sheets, which will not allow them to fly off.
- We make a spine for binding. If the paper weight is light, the part can be assembled from several strips. One of them must clearly correspond to the size of the binding, the other must be provided with a width allowance of 3 cm. We glue the parts in such a way that equal allowances remain on all sides of the smaller one.
- An overly thick spine can make it difficult to open the album. In this case, you need to make longitudinal grooves with an interval of 1 cm. Thanks to this, the part will acquire the ability to bend smoothly.
- The prepared spine is attached to the cover - it cannot be glued to the binding.
- After the glue dries, the sheets are placed in the structure, collected on gauze.
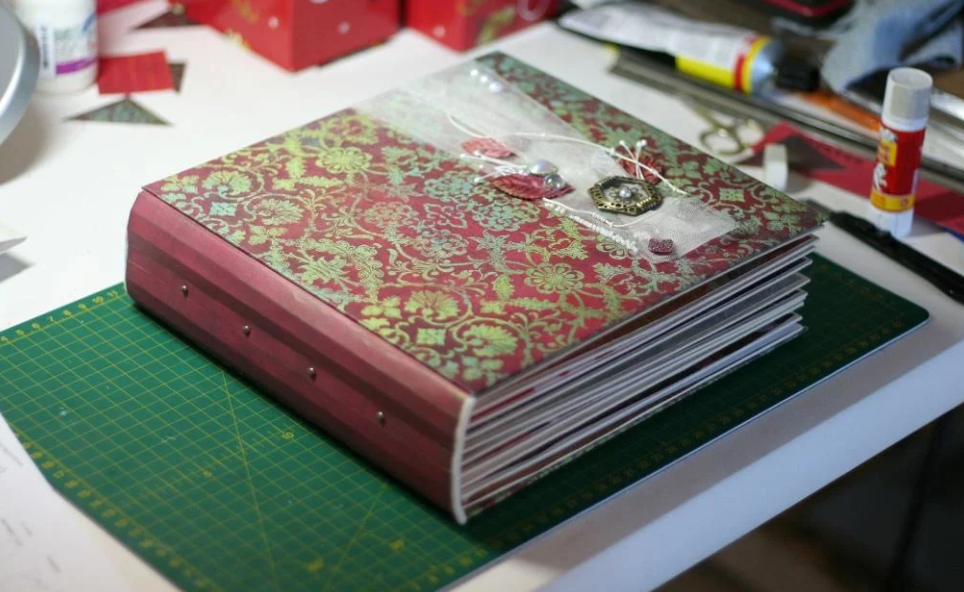
- On the inner side of the cover we fix it with transparent glue. Moment the free edges of the material and part of the spine. We glue the endpapers, and proceed to decorate the album and fill it with photographs.
How to attach photos inside a photo album
There are different ways of capturing pictures on the pages of a manufactured folder using:
- Special glue. You can use a background under the photo. It is recommended to use adhesives with a special mark that they are intended for photographs;
- double-sided tape;
- sewing stitch - regular or zigzag;
- special hole punches - we form slots in the corners of the substrate, glue or sew it to the page and insert a photo into it;
- small corners;
- frames of various sizes and shapes;
- corners of ribbons, scrap paper.
Now you know how to make a unique do-it-yourself photo album. And if you still have questions, watch the video with the step-by-step process of making it.