Varieties of needlework set, but in recent years a huge popular embroidery. In turn-based embroidery ribbons instructions for beginners is described technique of stitches, there are schemes. Learn how to create simple drawings, we can try to make the product more difficult.

Content
- Materials and tools
- basic elements
- simple scheme
- Bouquet of roses satin
Materials and tools
Before proceeding to the study of the art of embroidery ribbons for beginners, it is worth to prepare the materials and tools you'll need for needlework. You also need to know a few secrets nice and neat sewing:

- Feeds used in crafts, may be of any length and width. But for convenience recommended purchase strip whose width varies from 7 to 25 cm. Most interesting images are obtained from satin, satin and silk.
- When choosing a canvas should give preference to materials with higher density. In this case, the stitches will lay down evenly and securely. Inexperienced craftswomen is better to start with a special canvas that already has a scheme or drawing.
- The hoop is best to choose wooden or plastic. These devices are used to stretch the fabric, on a flat and dense canvas embroidery is much more convenient.
- Needle women with little experience better use of special needles. They are a little different from the classic products, as they have a great ear, in which easily pass a ribbon. Tools should be smooth, with no signs of rust. Also pay attention to the fact that the needles for embroidery should not be sharp, so that the fabric is not torn, and Spreading.
This is a list of basic tools that are required for the embroidery, there are still more - a pair of scissors, tailor's awl, ploskozubtsy and matches. In addition, the process may need special markers with which the pattern is applied to the fabric. Their peculiarity is that they disappear on their own after two days.
basic elements
Once purchased everything necessary for doing crafts, you can start the process. First you need to take one strip and cut off the ends, moreover, on the one hand, the cut must be straight, and on the other - at an angle. The first end is necessary to cauterize and the second insert in the ear and a little stretch it. After that you want to enter a needle in a pulled out a piece of tape and pull. As a result, should form a knot. Now you can begin to learn the art of embroidery ribbons for beginners.
The process of performing basic stitches as follows:
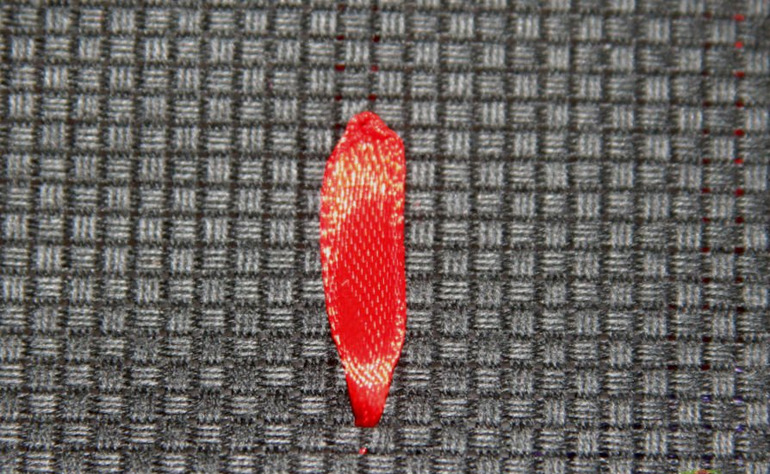
- straight line - take a needle tucked ribbon to thread it from the inside out and put back, holding the strip so that it is not twisted;
- Japanese - the needle is displayed on the front side, followed by spread the tape on the fabric, and then enter the first needle in a strip center, and after - in her corner;
- twisted - with underside outputted needle invert it so that twisting the ribbon, and then return inside the needle;
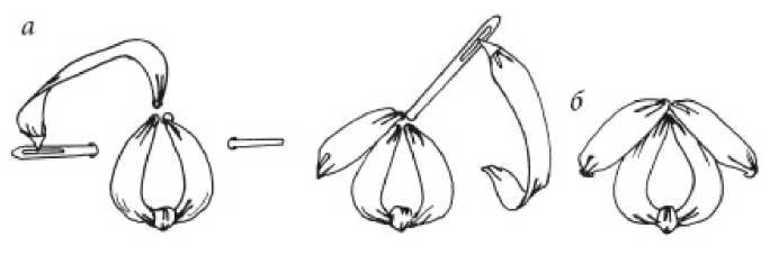
- french knot - displays the needle on the front side, a ribbon wrapped around it and return the instrument to its original position, a puncture is made near the place of exit;
- Overhead loop - the needle withdrawn from the wrong side, placed under the tape pencil or pen, encircle the member and return back needle;
- loop with prikrepkoy - done in the same way that the stitch and the air, but is placed in the center of the additional element in the form of beads, beads or French node.
To start craftswomen recommended practice on simple screeds. Once the technique is mastered, little steps will be smooth and neat, you can start making the whole picture, but should pick up on this point, the scheme easier.
simple scheme
Needle women with no experience is better to start with the most simple circuits, for example, to try to embroider simple daisy flower. To make a beautiful surround bud will need:

- white, yellow satin tape, the width of the strips should be greater than 10 mm; canvas blue;
- needle with a wide eyelet;
- scissors;
- the hoop;
- marker for printing, it can be replaced by a simple pencil.
Once all the materials and tools ready, you can proceed directly to work. Step by step technique of embroidery ribbons as follows:

- To get started is to draw on plain paper drawing a sketch, which is scheduled to embroider, and then gently put it on the fabric. This can be done using a marker or a pencil.
- Now, choose a comfortable place, with him, and will begin embroidery. Skilled craftsmen recommend starting with a bud. Insert material in the hoop and can begin.
- Embroidery begins with a core bud, this needle is inserted from the wrong side, which vdet white satin ribbon, and stretch it. Then it is necessary to form a tab, moving from the core to the edge, though the strip should lie freely, otherwise the fabric is wrinkled. Moving round, embroider all the other petals, eventually must remain empty core.
- Next, start to embroider a flower core, it is done in the technique of the French knot. To do this, you need to take a needle and wrap it twice with a yellow ribbon and pull the needle through the fabric. Do these nodules as long as the core is not completely full.
Bulk daisy ready. You can do several buds or to collect a whole bunch. Now you need to place the embroidery in a beautiful frame, it will be a great gift to friends or relatives. Having trained for such a simple circuit, you can try to embroider more complex composition.
Bouquet of roses satin
A bouquet of roses to perform a little bit harder to the previous scheme. To this composition is necessary to prepare the following:

- pink and green ribbons of satin;
- needle with a long and wide eye;
- the hoop;
- scissors.
If the material is prepared, then begin embroidering roses. Embroidery satin colors is performed in the following sequence:


- Start with preparation of the material, the ribbon take about 70 cm and the cut produced at the tip at an angle of 45 degrees in length. At the other end of the need to burn the edge of the tape matches or a lighter.
- Now take a wide eye needle, the tip is inserted therein satin strip, which is cut at an angle. Lightly stretch the ribbon, then threaded through a needle into it and tighten the knot on the end.
- After moving to the main assembly embroidery needle is inserted from the inner side of the fabric and is outputted from the front, is a simple loosely stitch. From what size will move depends on the size of future buds. If you want to make a big flower, then stitch should be accordingly.
- To form the bud is required to produce such three stitches that extend from a single point, but pointing in different directions. As a result, should be formed ray of three - is the foundation of the future roses. For convenience, you can raschertit circle around these rays, then embroider the flowers will be much more convenient, it is especially important for beginners masters.
- Needle with satin ribbon is displayed in the center of the beam and extends through the outermost ray. Once the strip is held under the stitch, it is returned to the center of the circle and bring to the wrong side. The base of the rose is considered ready.
- Begin to bud embroidery. Again the needle is displayed on the front side through the center of the flower, and then you need to draw a circle to tie stitches, being careful not to pull the strip at the same time. The needle is directed counterclockwise, after the stitches came to the ray of, you need to change the direction of the needles, though at first under the beam, and then at him. According to this scheme continue to embroidery, do not forget to alternate destinations.
- Embroidery ends only after the traced circle is completely hidden under the ribbons. After which the strip is required to fix a bundle, cut, neatly and discreetly hidden under an embroidered flower bud.
- Continue to embroider the required number of buds in the same technique.
It remains to form flower stalks. To do this, insert a needle satin ribbon of green, and then embroider straight stitch simple: insert the needle into the fabric, and output there, it turns thin and smooth stalk. In this embroidery is finished.
As you can see, nothing complicated in the process there is, above all, ensure that the strip went smoothly, do not twist or twist. With a little practice, and you can try to embroider the real picture, which is a perfect gift.