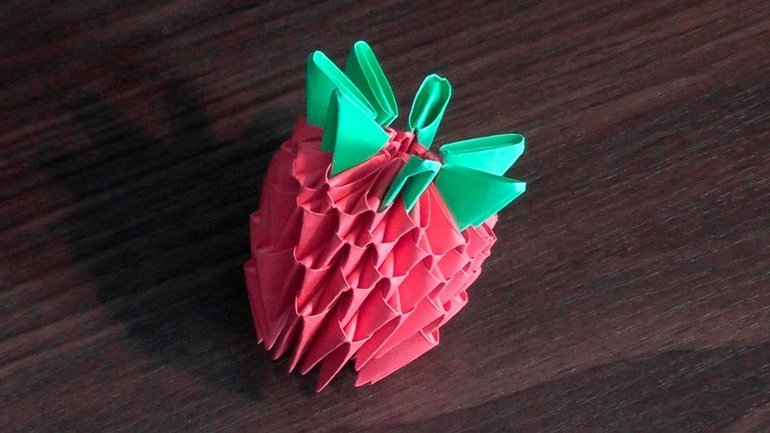
Skill in minutes to turn an ordinary piece of paper into a figure reminiscent of the magic. For this hobby is not large material costs are necessary. Origami paper for beginners - it's a great opportunity to create a whole world, not having special abilities. Over time, the young handyman subject to different techniques and trends, and you can start with simple figures.

Content
- Overview
- the necessary tools
- the right stuff
- kinds of techniques
- Examples of articles for beginners
- Tulip in bud
- Rose of offset paper
- Dog and panda
- Crane Origami
- Box with lid
Overview
origami art for beginners and professionals involves folding the various figures out of white or colored paper, without the use of glue and scissors. It first appeared in Japan in the year 610. Monks first to master origami, making ornaments for temples and ceremonies. This kind of arts and crafts is firmly entrenched in the culture of the Japanese aristocracy.
This hobby promotes spatial imagination, fine motor skills, attention, communication and gaming abilities, memories, creative skills. Today, there are many examples of how to make origami paper. Schemes for beginners make it easy to produce the original toy or gift.
the necessary tools
Hands and a piece of paper - it's everything you need to create a simple crafts. But for a deeper study of the art of origami does not hurt to get a few useful tools. These include:
- Clay (PVA or "pencil"). He needed to adhere to the crafts of decorative elements, as well as to make the strength of the product, if, for example, you need to prepare it for exhibition. Some artists prefer to use spray adhesive due to its ability to create interesting color and texture combinations when bonding two sheets of paper over the entire area.
- Paints. They need to paint the finished crafts, if the white paper was used. The most popular colors in cans, but the watercolor for this activity is not recommended because of excess water can deform the paper figure.
- Scissors. Optimal to have a few tools of different sizes. Nail scissors will be convenient to cut the tiny details, but will have to resort to this very rarely, because schemes origami paper for beginners do not provide cutting process.
- Stationery knife (well-sharpened) - as an alternative scissors.
- Acute simple pencil. They can mark up the paper and lightly tighten up the details.
- Line, triangle, compass, protractor. These tools are useful for creating products which are important precision work and symmetry.
the right stuff
Paper quality has a direct impact on the appearance and strength of the product to be made. When it is selected it is worth considerings some moments, thanks to which will look perfect hack:

- Optimal use office and offset paper for the printer. It is quite dense, tough and inexpensive.
- Of colored office paper as convenient to create figurines, as well as from white. But in the process of bonding parts on hand-made article may appear spots.
- Professionals in the art modular origami stickers successfully used as a base material.
- Colored school paper is better not to buy origami - it is too thin and keeps its shape.
- A good option for complicated circuits and manufacturing models is foil.
- Beautiful figures obtained from the old magazine pages. This paper is a thick, it is obedient to the bending and holds its shape well.
- For true fans of the hobby kits produce special paper for easy origami. Its main disadvantage - the high price.
kinds of techniques
Origami - a great way to be interesting and useful to spend time an adult, making something beautiful with their hands. Child activity will help to develop new skills and abilities. Make an original gift, a flower or a toy can be in different techniques:
- Simple origami. Optimally for beginners craftsmen. circuit assembly includes folding the figures of themselves, and do bends toward you. Crane is a classic example of this technique.
- Modular origami. Hack assembled from identical elements. Each of them consists of a sheet of paper according to the classical scheme. Modules inserting bonded to each other, and the construction itself keeps occurring due to a friction force.
- Kusudama (origami three-dimensional). Here, elements are inserted into one another and fixed with adhesive or thread. Often the product is carried out in the form of a ball.
- Wet-folding. Products made of paper soaked look expressive and hard, and the lines seem smoother. The technique is used to create crafts animals or flowers, and the optimal material is a paper with a water-soluble adhesive in the composition.
- Aerogami. This method is convenient tinkering aircraft.
- Kirigami. Using this technique, often make cards. Here, use scissors to create figures.
Examples of articles for beginners
Those who have recently become acquainted with the art of origami, start with simple figures performed by the classical scheme. With detailed step by step instructions, you can learn how to make origami flower (violet, tulip, lily, rose) or animal. Here are a few simple examples.
Tulip in bud
With a simple model of this flower under her mother's guidance to handle even a three-year kid.
As they get older the child is able to use more sophisticated schemes for the assembly of a tulip to the voluminous look and dissolve.
To create the flower should be guided by the following steps diagram:

- Square piece of paper red bend on the same diagonal, then unbend and folded in a second.
- We formed a triangle to fold the corners of the center line and bend the pointed lower tip of the bud. Formed flower bud.
- In a square of green paper sheet to be bent corners towards the square diagonally.
- The resulting figure folded in half in the form of a green triangle. Now you need to bend the bottom corner of the figure, to get the stem.
- The last step is necessary to connect with a stem bud on the basis of thick paper.
I get the original hand-made article from a paper, which the child can present the mother or grandmother.
Rose of offset paper
This model is one of the basic Japanese art, it is the most popular among girls. Step by step origami flower diagram of the paper for beginners is:
- Colored sheet of paper folded in half, then again to form a square.
- To open the top layer and slightly flatten the top of the next flower, and then turn it in the other direction, perelistnuv square.
- Repeat step with the top layer.
- Next we take two bend angle and to the upper. The resultant triangle folded in half, having a fold line.
- Slightly flattened triangle, pulling down of the tips.
- The obtained pouches gently bend downward.
- Next, repeat steps 4-6 on the back side.
- Now you need to bend the corners at the top and open bottom.
- Put a pattern on the reverse side and lift up the triangle.
- Right square in the bottom of the bend downwards on a diagonal line.
- Crafts pivoted 180 degrees and repeat.
- It remains to shift the workpiece in the left hand and rotate around the circle until you get a rose. Shape petals attach hands.
Dog and panda
Hide dog origami easy. To fold a square of paper on a diagonal to the right angle of the resulting triangle points downwards. Further, forming the lugs by bending down the two upper corners. To get a muzzle puppy, you need to bend up the bottom corner of the product. In the final stage you can offer your child to draw a doggie eyes and nose and paint it to your liking.
Make panda by using white paper and black pencil or pen. To start envisage bend line equilateral double folded sheet diagonally and by bending forward left and right corners.
The resulting angle above add up to the other side, and then reduce the resultant muzzle panda with edges. Now follows bend forward angle from below. Spout get wrapped down the top corner. It remains to draw the muzzle.
Crane Origami
To create one of the most basic models will need scissors and paper. In Japan, there is a perception that if a person will roll 1 thousand. Cranes then fulfilled his dream. Step by step instructions includes:

- Folding diagonally offset paper sheet.
- Cutting off all the excess with scissors to get a triangle.
- Careful execution of another fold.
- The formation of the square of the triangle by means of straightening angle on both sides.
- Accurate and smooth addition of the edges to the center.
- Bending the triangle formed from the top.
- Folding the bottom corner horizontally, pulling both edges to the center to get a diamond. Repetition of the steps on the other side.
- Bending over to the inner loop, to get the neck. In the same sequence should collect tail.
- A neat bend the neck to form a beak.
- Bending angle formed wings.
White crane can be more original, to decorate it.
Box with lid
This hack Origami - a very useful thing, which is suitable for home use and as a gift. Collect it, you can very quickly with the help of a pair of sheets of colored paper. Important point before assembly - the substrate must be less than the cap. Top box can be decorated using ribbon with New Year prints, buttons, or other objects.
The work begins with the separation of the sheet features two diagonally and bending all corners to the center. Then, two of them should be bend back and the remaining folded in half parallel with the center line (see photo).

Similar procedures are subjecting the other two angles. Obtained preform, which is necessary to make cuts and fold angle 2 to the central point. Now it is necessary to lay down, as in the photo.


The base of the box ready. Under the same scheme to do the cover, adding up to 5 millimeters on each side. It remains to draw a box to your liking.
Origami art of exciting and varied. As they get older the child and the development of their new crafts techniques will become more complex and beautiful.


