- How to calculate the required number of tiles?
- What tools will you need to lay the apron?
- Preparation of the surface of the wall for laying
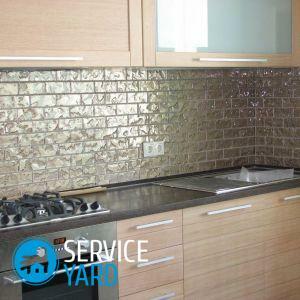
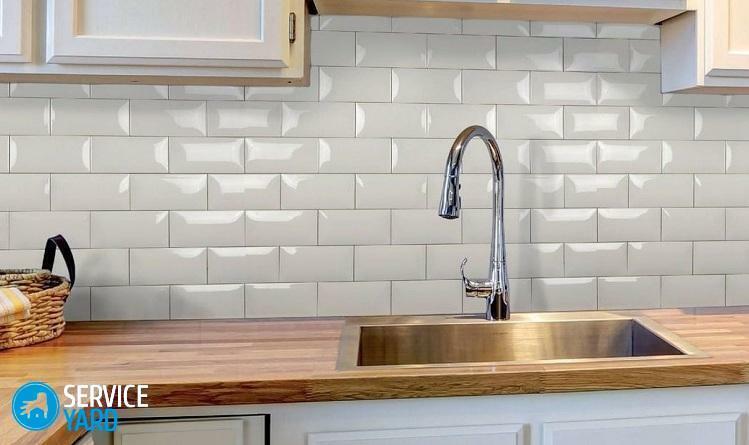
- Features of laying an apron from the tile
For sure, every person at least once in his life came across repairmen who, instead of doing their job well, spoiled everything. Such situations now increasingly force us to do repair work ourselves, especially when reliability and accuracy play a huge role in this process. For example, when you need to decorate an apron from a tile in the kitchen, many are afraid to take it on your own, but if you prepare well, study the necessary information and view several master classes, you can try to do it yourself. In fact, it is not difficult to understand how to make an apron in a kitchen from a tile, if, in addition, it is clear what to do at each stage.
to the contents ↑How to calculate the required number of tiles?
Naturally, in the first place, it is necessary to correctly calculate how much material is required to form a kitchen apron from the tiles with your own hands. To do this, you need:
- It's clear to know what size the apron will have. What indicators need to be taken into account? For example, it's better to take a kitchen of the standard size. In such rooms, the height of the apron from the countertop is usually 50-74 cm. In principle, the working area can be larger and reach the floor. That is, it is possible to lay out only the work surface or the entire wall with the tiles. Much depends on how the lower pedestals are located.
- Consider that for the countertop tiles will go 20 cm. Why? So that dirt and water do not accumulate in the joints. That is, the height of the apron will be 70-95 cm.
- Take into account the dimensions and location of the hood. As a rule, it is located at a height of 60-70 cm from the surface of the plate. This indicates that the apron will not be more than 75 cm.
- The size of the apron horizontally will be equal to the length of the entire wall. Tiles can be finished only part of the wall, for example, near the stove and the sink. So - the material will need less.
Now it will be appropriate to calculate the total area of the apron. Determine the height, width, and you will get the size of the future design.
Important! Naturally, you will have to calculate the number of tiles. It all depends on the way of laying and material:
- Much faster and easier will lay squares in size 20 to 20 or rectangles 27 to 40, but keep in mind that they will not be expensive.
- The most practical option is the model, where the height and width are 15 cm.
How much material to buy? It is better to be a little cautious and take a little more, so that in the event of an unforeseen situation, it's urgent not to run to the store.
to the contents ↑What tools will be needed to lay the apron?
So, you have already calculated how much material you need to lay an apron from the tiles to the kitchen with your own hands, bought it and are ready to go. Do not rush, now you need to prepare all the tools. They will need you to clean the walls of the old tile and install a new one.
You can not do without this kit:
- Punch. It will help to remove the old cover without problems.
- Screwdriver with a mixer. With its help, the adhesive composition will be prepared.
- Buckets. It is better, if there are two, with a capacity of at least 10 liters.
- Spatula. It is desirable that one - was rubber, and the second - narrow with denticles.
- Two building levels. Long and short to measure separately each tile and completely the entire wall.
- The device for cutting tiles.
- A bar of abrasive and wire cutters. They will help in case of need to correct the areas that split.
- Rubber hammer. With it, check how tight the apron is against the wall.
- Crosses for adjusting the thickness of seams.
- Pencil and ruler.
- Cord.
The apron in the kitchen will be laid with your own hands using a special adhesive compound. To buy it better together with the tile. But you do not need to prepare it in advance.
to content ↑Wall surface preparation for laying
Perhaps, once you have already done the repair yourself, and you know how to remove the old coating, prepare the adhesive composition and clean the walls. If you do not know how to properly lay out an apron from the tiles in the kitchen with your own hands, how to generally prepare a wall, then follow the recommendations below.
Important! How long will the training take? It will be enough for a day to apply the putty and eliminate any defects.
Getting Started:
- Removing the old cover. If there was a tile on the wall before, it must be removed with a perforator. Then you need to clean it from the plaster layer. Use a spatula and water to remove the wallpaper. You can clean the paint even with your hands, but it is better to buy a special solvent.
- Check the density of the plaster layer. She should not leave the wall. In the presence of holes, tubercles and irregularities, they should be leveled using putty. It is applied to the wall with a narrow spatula.
- Pay attention to the corners. If you plan that the apron will smoothly move from one wall to another, then take care that the angle is perfectly even.
- Drawing notches on the wall. Do this after the final drying of putty. They are needed in order that the glue clamped as high as possible.
Important! When the old coating is removed, it is necessary to check the surface of the plaster for the presence of fungus and mold spots. Before laying the tiles, it is necessary to treat the wall with a fungicide to prevent further spread of mold.
to the table of contents ↑Features of apron laying out of tiles
In this section we will gradually consider how to properly make an apron in the kitchen yourself. Step-by-step work looks like this.
Marking the wall
As we already know what size an apron will have, you need to make the appropriate tags. Do not forget that its height will depend on the location of the hood. But the width can vary.
So:
- Place the tags in the places where the top and bottom edge of the apron will be. Now the size and scope of future work will be visible.
- Next, take the wooden beam and make a horizontal level, so that the tile does not move from the bottom.
- Also do the level vertically, and for this you can take a lace with a weights, fix it on the ceiling and lower it.
Thanks to these levels, you lay the tile clearly and smoothly.
Preparation of adhesive solution
If, after calculating the size of the apron, you understand that it will be quite high, then the glue is better to knead with the parts. Pour water into the bucket and pour dry solution into the bucket and mix everything with a screwdriver.
Important! Do not even try to glue the tile with a dry compound, because it just does not grasp.
Determining the location of the first tile
It can be laid in the center or start from the corner. How is it better?
- If you have a corner kitchen, and the edges of the tile will protrude, then start better with the corner. In this way, you will close the cut off sections.
- If the kitchen set covers the corners, then you can start from the center.
Application of adhesive
This is done with a narrow spatula, and its distribution - a notched trowel on the surface. As a result, you will have grooves.
Tile laying by means of a uniform pressure
Fix the tile with a rubber hammer to adhere the glue. If the first tile will be on the edge, then it is better to install a corner.
Horizontal control with the level
This must be done to lay exactly the bottom row of the apron.
Important! Remember, the smaller the tiles, the more often you will have to perform this action.
You do not need to hurry to finish the whole wall at once, otherwise - reliable masonry will not work. The most important moment is the first row. It should dry properly during the day.
With the help of a tile cutter, we process the latest row of the apron.
Finishing:
- Now you need to tap the entire area with a hammer. If somewhere you hear a deaf sound, it means - there the material is not stuck, it will be necessary to reinforce it again.
- After checking the entire wall, you can wipe the seams between the tiles with a rubber spatula and remove the crosses.
- Then you need to clean everything from dirt and dust.
If you follow all the tips and advice on how to lay out your apron from the tiles in the kitchen with your own hands, then you definitely will be satisfied with your work. In addition, careful treatment and proper care will significantly extend the life of this coating.