- What is the danger of building dust?
- Prevent dust spread
- How to clean the apartment after repair?
- Useful advices:
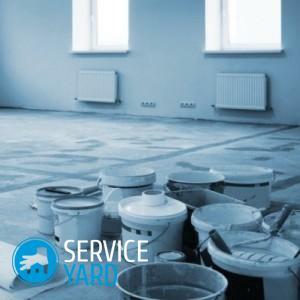
Renovation of the apartment always brings with it a lot of trouble. But how much pleasure delivers viewing already completed picture. However, not removing all the building dust, it is difficult to imagine a new look of the room or the whole apartment. Therefore, the natural question arises, how to remove building dust after repair? We will try to answer this in our article.
to the contents ↑What is the danger of building dust?
Sometimes people do not hurry to clean dust after repairs, having decided to leave the spring cleaning "for later".But this is extremely dangerous for health:
- When it enters the lungs, it settles on the mucous membrane of the bronchi, and this leads to a complication of breathing and even asthma.
- Getting into the eyes, building dust irritates the fragile structure of proteins, and sometimes can lead to conjunctivitis, so it is very important to carry out construction work in special glasses.
- On the skin, dust also causes irritation and, in rare cases, allergies.
Consequences are not the most pleasant, therefore it is necessary to remove the apartment as soon as possible after repairs. It is not so difficult to do, and health is always much longer and harder to restore.
to the contents ↑Preventing the spread of dust
If you want less cleaning after repair, you need to take care in time to prevent building dust from spreading throughout the house. To do this:
- Separate the working area from the rest. To prevent dust from spreading all over the apartment, fence off the room in which the repairs are carried out, from the rest. Special temporary building doors can help you in this. They are a piece of cellophane in the size of the door with a zipper in the middle. And walking comfortably, and the dust does not leave the room. If you can not get such a miracle, you can just close all the slots of your interior door with wet cloths.
- Cover all things with cosmetic repairs. If the room in which the repair is planned is residential, but you only need to paste new wallpapers, you must pack all the things in advance so that the dust does not settle on them. To do this, you just need to wrap everything with cellophane, and fix the ends with adhesive tape to accurately leave all the furniture clean. This simple advice will allow you to reduce the cleaning time of the apartment after repair.
- Pay attention to household appliances. Of course, all the equipment is desirable to take out before repair, but if this is not possible, carefully wrap it with a construction film in several layers. Dust is a very fine crumb, so it easily passes into the smallest cracks or holes. This, in turn, can lead to breakage of equipment.
Such precautions will allow to remove building dust after repair very quickly and without much difficulty.
to the contents ↑How to clean the apartment after repair?
First you need to stock up:
- with a lot of construction bags and rags - preferably from microfiber, they absorb the building dust better;
- overalls;
- points for repair;
- respirator.
Important! It is also desirable to have a special vacuum cleaner for repairs. This technique is quite expensive, but it can be rented. Conventional household appliances quickly fail when in contact with a large amount of construction debris.
So, how to clean an apartment after repair?- The step-by-step instruction will look like this:
- First you need to remove all the large garbage. Pieces of foam plastic, cement, assembly foam and all other repair waste go to construction bags. They can be replaced, of course, with durable garbage bags, but sharp edges of pieces of concrete, for example, easily break ordinary cellophane.
- After that it would be nice to walk on the floor with a construction vacuum cleaner. It will collect the main dirt and the cleaning front will decrease significantly. And we need to clean the apartment as soon as possible after repairs, right?
- Then begins a wet cleaning. The main task of washing the floor is to collect the remaining dust. So do not smear it on your linoleum or parquet floor, and just collect it from far away.
Important! Do not forget to often wash the mop and change sponges or rags from time to time, do not feel sorry for them.
- After the main part of the garbage has been collected, and small dust left only small traces, it is already possible to arm with an ordinary vacuum cleaner. Ideally, a flat nozzle with a corner cut off at an angle is suitable. Well go through all the corners and places around the furniture left in the room.
- After this, it is necessary to wipe with a damp cloth all vertical and horizontal surfaces on which fine dry dirt has settled. This will help to finally remove building dust after repair.
- It remains only to unwind all wrapped furniture and appliances, and after a good washing of the floor with a detergent.
Important! From the first try it will not be possible to remove all the stains and blemishes, but do not despair. A few days later, there is no trace of repairs, except for a brand-new beautiful room or an entire apartment of .
to the contents ↑Useful advices:
- Customize yourself positively! Think how clean and good it will be in the room after cleaning. Turn on your favorite rhythmic music, take breaks for delicious tea. All this will help not to be exhausted morally and physically during the cleaning of the apartment after repair.
- Within a week after repair, ventilate the room regularly so that unpleasant odors will evaporate. Solutions of salt, activated carbon, essential oils will help to fight them faster. They absorb bad odors well, so after a couple of days no one smells paint or varnish.
- Be sure to repeat the spring cleaning a week after the repair. So you are guaranteed to get rid of the remains of dust and other debris.
We hope, now you understand how easy and quick to clean the apartment after repair, and you did it. Means - comfort in the house is provided and you will be satisfied with the fruits of your labors during the change of design in the rooms.


