
- What can I make the rings from?
- How to make a beautiful ringlet?- Get ready for creative work
- Ring from wire
- Ring from pins
- Ring from satin ribbon
- Ring from coin
- Ring from button
- Ring from beads
- Ring from leather
- Ring from chain
All girls like jewelry, and more is better. But you will agree, sometimes in shops there is not what we want - everything is boring and monotonous. Do you want something unusual and original, for example, a ring? Then you asked for help at. In this article, we'll show you how to make a ring at home. Such an ornament, made by own hands, is much more pleasant to wear, since it was invested in the soul. Each house has many unnecessary things that can be useful in work. We will look at each method in detail. Stay with us and you will learn how to make a ring with your own hands from long-forgotten materials. So, let's begin!
to the contents ↑Where can I make the rings?
If you decide to do something extraordinary, then use the most unpredictable materials, from them creative and unique ornaments are obtained. Learn a few ideas:
- Revise your box with long forgotten buttons. A little digging, you can find the original buttons of interesting shape and performance.
- Almost all houses have wire. This is an excellent assistant in creating the basis for the ring. For work any wire, regardless of thickness and color, will work. Each girl has beads and beads. Look closely at the jewelry box. Each girl, for sure, has torn once favorite beads or a bracelet. Using them for the purpose, you get a bright ring.
- Never throw away old broken rings. They will serve as an excellent basis for a new ring with their own hands.
- From old coins you can make a stylish ring, and not only.
- Satin ribbon will help in creating a feminine and gentle image.
We have listed the main materials for making the ring with our own hands, and believe me, this is not the whole list. To create a ring, you can use almost everything that you like, you just need to include imagination to do something exclusive.
to the contents ↑How to make a beautiful ringlet?- Getting ready for the creative work of
How to make a ring with your own hands at home using only improvised materials? Yes Easy!
Before you start working with selected materials: :
- First, determine which ring you want.
- Now we need to determine the size of the future ring. To do this, you need to take a piece of paper and wrap it with your finger, on which you plan to wear a ring.
Important! If you already have a ring for this finger, then use its size in making a new ring - this is the easiest way.
- Now with a pen or pencil make a mark at the intersection of one edge with another.
- Cut off the excess pieces of paper and get the right size for the ring.
Important! You can simply measure the strip - this will be the size of the new ring. This same strip can be used as a template for measuring the prepared materials.
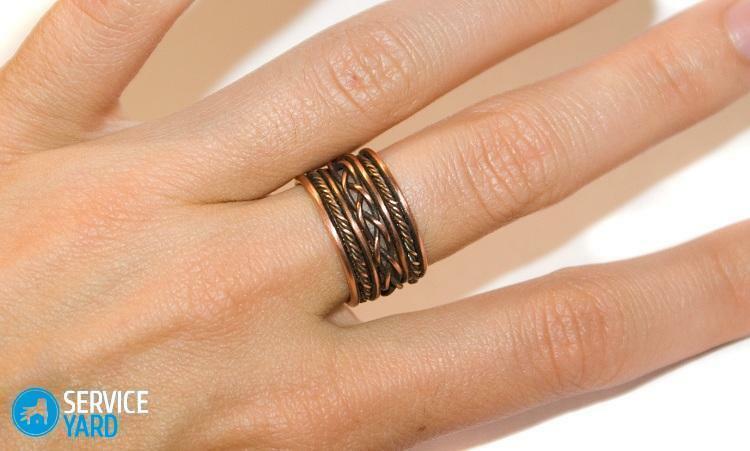
to the table of contents ↑Ring made of wire
Next we will show you how to make a ring with your own hands using wire. Wire - this is the most common material in the manufacture of rings with their own hands. Do you remember how in childhood we twisted rosettes from wire and wore them, as the most expensive decoration? Copper wire is sufficiently accessible and durable and multifunctional. It can be used for any kind of weaving: pigtail, heart and many other shapes.
Important! If you do not have experience in weaving rings from wire, then first practice on simple elements, and after - you can start creating a complex composition.
This is one of the easiest ways that any needlewoman can handle. To make a ring made of wire you will need such materials and tools:
- An interesting button or natural stone.
- Soft wire.
- Pliers.
- Round nose pliers.
- Piece of a tube in the form of a cone.
Procedure for making a ring from a wire:
- First you need to fix the stone on the wire. If you use a bead, then simply thread the wire into it.
Important! The stone can be painted using a can of paint. To do this, put a pebble on a piece of paper and point the spray gun at it. After completely drying, turn the stone and in the same way treat it from the other side.
- After - using wire cutters, bend the wire back, attach it to the conical tube.
- Wrap the entire conical tube several times.
- Next - tightly tighten all the turns of the wire, and its ends bend up and down.
- Remove the finished workpiece with the tube and the ends of the wire, fix the turns from the sides of the central stone or bead.
- The ends of the wire wrap the entire ring, about 3-5 times.
Important! Make sure that the coils are snug against each other.
- At the end of the work cut the excess wire using round-nosed pliers, fasten all connected turns to give a flat shape.
Important! Remember that aluminum breaks down quickly, so if you took just such a wire, when creating loops of different shapes, you need to be extremely careful and attentive.
to the table of contents ↑Ring from pins
Do not believe that it is possible to make a ring from the pins with your own hands? You are very wrong. This material can be used advantageously in such an interesting lesson. How? Next, we'll tell you everything.
For work we need:
- Pins.
- Beads.
- Elastic thin elastic.
- A chain with small links.
So, let's start creating a ring in the style of the 80's using pins:
- First, take a pin and string it with beads. The number of beads - at your discretion.
- Through both ends of the pin we pass two thin gums.
- Now take the next pin and use the same method to dress it on an elastic band, only its head should look in the opposite direction.
- Do the same manipulations, alternate the pins in turn until the desired circle turns out.
- At the end of the work we tighten the elastic and fix it, hiding all the nodules.
Satin ribbon ring
Before starting work, the following materials and tools should be prepared:
- Satin tape of medium width.
- Thick wire for the base of the ring.
- Pliers.
- Scissors.
- Pliers.
- Thread with a needle.
- Adhesive gun.
- Adhesive.
Below is a step-by-step process for making a ring from a tape:
- First of all, measure the required length of the wire, and cut off the excess with wire cutters.
Important! In order to ensure that the future ring is strong enough, we recommend making a few turns with tape. You can multiply the girth of your finger by 3 and get the desired length of satin ribbon.
- Now just wrap your finger with a wire, using pliers. So we get the foundation of the future ring.
Important! In this case, you can take a size cone, because it is much faster and more convenient.
- We take a satin ribbon and with the help of a glue gun we attach it imperceptibly to the edges of the wire. We begin to wrap the tape around the whole ring.
Important! It is necessary to look for the tape to fit tight enough to the wire when wrapping the circumference.
- When the tape is wound on a ring, we cut off excess material, and after - we fix the end with glue.
- Next, cut off the tape segment, about 10-15 cm and cauterize the ends with fire.
Important! In order that the edges of the tape do not pour, before cutting it is possible to heat the scissors with fire.
- From the ribbon we form a bow, and we fix the middle with stitches.
- We glue the bow to the base( where the end of the tape is glued).
Ring from the coin
You can make a ring from the coin, but this is a rather complicated and time-consuming process. You can ask for help from a person who knows the skills of working with metal products.
In order to start making a ring with your own hands, using a coin, you need to prepare such materials:
- Drill.
- Sandpaper of fine grain.
- Coin.
- A small piece of metal.
- Hammer.
- Soft cloth.
- Steel spoon.
- Sanding roller.
- Polishing wheel.
- Clip for decoration.
Now we get to work:
- At the first stage we take a coin, put it on the edge and place it on a metal base.
- Press the base with a teaspoon.
- Then we do a lot of hard work. We take a hammer and knock on a teaspoon until the coin becomes flat.
Important! Constantly control the process of flattening a teaspoon. Try to strike the coin with the same force for the most flat edge.
- Then drill a hole in the very center of the coin. When you drill through, the coin will be securely fixed.
- Now grind the edge of the coin with sandpaper until the surface shines.
- Then use the drill to enlarge the hole in the circle. We constantly change the bit to a larger size, until the necessary circle for the future product is obtained.
Important! When you create the size of the jewelry, always try it on, so that eventually the ring is not large.
- Use a sanding roller to polish the inner surface of the ring.
Important! If desired, you can make engraving on the ring, but for this you need to contact a specialist.
to the table of contents ↑Button ring
If you do not have a suitable base for the ring, then you can buy it in the jewelry store. On this basis, you can attach different materials: a button, a stone, plastic, a shell and other materials. In this case, we will tell you how to make an original ring of long-forgotten buttons and a piece of cloth.
For work we will need such materials and tools:
- Round section of black felt( diameter 5 cm).
- Bright buttons.
- Super glue or glue gun.
- Base for the ring.
- Pliers for ornaments.
- Scissors.
Getting Started:
- If the button has a loop, then remove them using pliers.
- Next, we paste the buttons on a piece of felt according to the scheme: from the center - to the edge of the circle.
Important! The buttons need to be darkly fastened to the felt in such a way that the result is a round shape.
- After full drying of the adhesive, cut off excess felt from the sides of a flat or zigzag line.
- We grease the substrate well with glue.
- We glue the previously made fabric with buttons on the base.
- We are waiting for the complete drying of the finished ring and we are happy with the new thing.
Ring with your hands at home is ready!
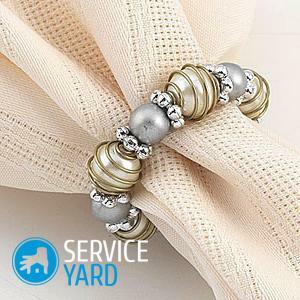
to the table of contents ↑Bead ring
You surely made different bead rings in your childhood? Its large assortment gives an opportunity to show its imagination. It all depends on your desire and experience. Beads can be taken in different designs: glue, thread on a fishing line or sew. Of course, the jewelry will not look presentable, but with beads and beads you can create a pretty nice ring.
To get started we will need:
- Thin wire.
- Beads( at your discretion).
- Beads.
- Adhesive.
- Pliers.
- Pliers.
Let's start making rings from beads and beads:
- First you need to measure the size of the future ring. For this, multiply the girth of the finger by 3 or 4 and add 2 cm.
- The resulting length is cut off from the copper wire.
- Next, thread the beads on the wire.
Important! Note that at each end of the wire should remain 1 cm. The edges of the wire need to be sealed with glue to ensure that the beads do not crumble.
- Wrap the wire with a bead around your finger or use a size cone. The remaining ends bend - they will later be needed to fix the ring.
- Now we begin making the ring. Take the wire and cut off three pieces 2-3 cm long.
- For each piece we sew two beads. We bend the ends of the wire so that the beads do not roll down.
- After this, bend all three parts in half, that in the center formed a groove, the beads spread on the ends of the wire.
- In the cavity we place the previously prepared substrate, passing parts of the wire through it.
Important! Do not forget that the bent edges of the wire should be located only near the ring.
- Now bend the lengths of the wire so that the beads are close together.
- We twist all the ends of the wire so that the beads are on top.
- The ends, which were previously bent, finally fix the ring.
Important! When making rings from beads, you can use different designs: weaving in one or more rows, combining beads with other materials. Do not be afraid to experiment, and you will succeed!
to content ↑Ring from leather
Agree, not every girl wears a ring from the skin, but this does not mean that you need to give up such an interesting idea. We will tell you the simplest and most affordable option.
List of necessary materials for creating a ring of leather:
- Leather cord of any color.
- Wire.
- Pliers.
- The basis for the ring.
Important! The base can be of different thickness, since after the whole manufacturing process it will be possible to adjust the size by simply moving the wire spiral.
Read more about all the steps:
- First, wind the wire on the base, do a few turns, stretching the irregularities.
- After - cut off the ends of the wire, and in order that they do not prick, bend into the loops.
- Now take the leather cord and begin to twist in the form of a spiral on the entire base of the ring, skipping the end of the skin from above above the wire, then from below, constantly alternating. We repeat this procedure in the opposite direction.
- We continue to weave until the whole base of the ring is wrapped around with a leather cord.
- After all the procedures, cut the cord and hide the tip under the eyelet.
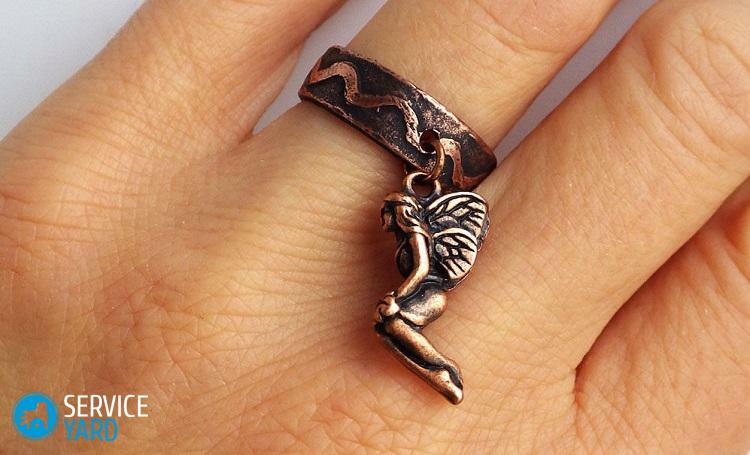
Ring from the chain
What can I do with a ring on my finger? Have you ever thought about the chain? But in vain. From the chain, you can make a beautiful and delicate ring. Almost everyone has a torn chain that can not be repaired, and it's a shame to throw it away.
In order to get started, you need to prepare such materials:
- Pliers or tweezers.
- Chain.
- Small clasp-clamps.
So, we begin work on making a ring from the chain:
- Take the chain and wrap it around your finger. In this way, we determine the size of the ring and cut off the correct length of the chain.
- The excess part is carefully cut off.
- Using a ring with a clip, fix both ends with pliers.
Important! If desired, the ring can be decorated with small pendants, fixing them on the chain link.
Now you know how to make a ring with your own hands from improvised materials. Agree, this is not so difficult. Having become acquainted with the main ways to create a ring, you can easily make a stylish and original ring. Use your creativity in the right direction, and you will succeed!

