
- Materials that will be required for the work of
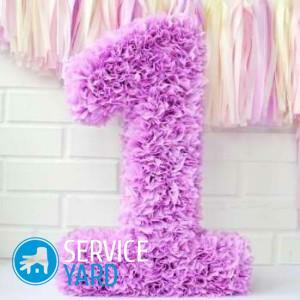
- The volume figure for the first birthday of
- We make a flat base for the figure from the
- cardboard. We decorate the figure with napkins
- . Decor of napkins
- .
- fringing. Trimming
- . For whom to make numbers?
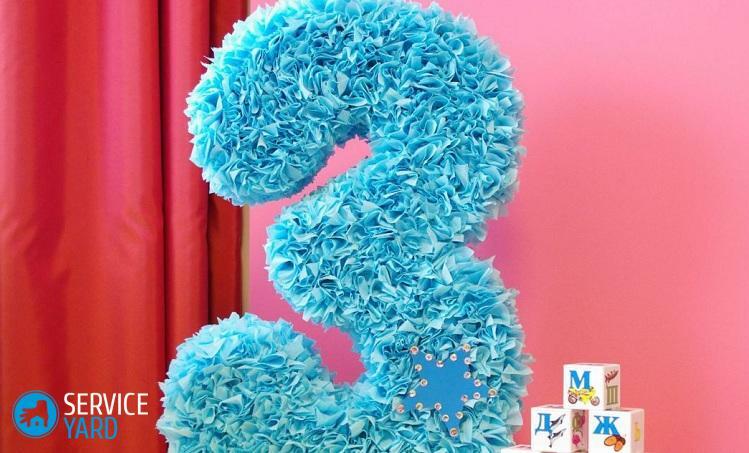
For the birthday of the child and a beautiful photo shoot, you need the original props. Today, very popular figures from napkins - they can be seen on many children's holidays. Indeed, such decorations on birthdays are beyond competition. They are light, inexpensive, children can play with them and get only pleasant experiences.
How do I make a figure from napkins?- To do this, you do not need to have supernormal abilities, you can cope with this task by applying a little effort and spending several hours of free time. But the emotions of a happy child who will receive such a figure will more than pay off all the costs of effort and time.
to the contents ↑Materials that will be required for the work of the
To create a holiday composition, different materials will be required.
Napkins
Plain wipes without pattern. Of course, the larger the figure, the more napkins will be needed.
Important! One package is not enough for you, so take a few packs of 100-200 napkins in each. The more magnificent the decor, the more beautiful the numbers of napkins look.
However, napkins are not the most important thing.
Important! Less common are figures made of wood, as a rule, they are not decorated with napkins, but painted with colorful colors.
Cardboard
As a blank for a figure of napkins, empty boxes, shipping packaging from household appliances can be used with their own hands. In general, those materials that are often just thrown out are used in this case, and there are such features here:
- Small packages are obtained from the packages from the products. Packages from milk or juice are cut and inserted one into the other. Their outer part is masked with the help of papier-mache( pasted layer of paper-cut paper).
Important! For gluing, take a thick PVA glue, because it will be very insulting if the cardboard swells and falls apart. Or you can choose a package with a foil surface, for example, a juice box.
- With cardboard it will be necessary to work - correctly cut, glued, give the product rigidity.

Polyfoam
It is much more convenient to work with polystyrene, because it is light, like cardboard, but at the same time, it differs rigidity. Polyfoam panels you can easily find in any construction shop. If you wanted to make the numbers thicker, then thin sheets can be glued together with glue for ceiling tiles.
But the foam also has flaws. The material is pretty cranky - crumbling, sticking to the hands and tools, working with it is still that fun! So how to be?
- The most successful option is to use a professional cutting tool with a heated nichrome thread. Such a hot wire is capable of cutting foam plastic, like oil.
- You can also make a cutter from a soldering iron with a fixed copper wire. These options are suitable for those who are going to make numbers from napkins with their own hands in large quantities.
Important! Styrofoam is cut exactly on a metal ruler - you should attach a ruler and draw along it with a torch. Near the place of the cut, you can put a vacuum cleaner hose - so the work place will remain clean.
to the contents ↑Volumetric digit for the first birthday
For a one-year period with our own hands from napkins we make a hollow inside the base.
If the unit itself is easy to build on paper and cut, then how to calculate the length of the sides? You can do everything by eye, but you can turn to the help of the mathematical formula: P = 2( a + b), where a and b are the sides of the figure.
Important! Do not forget to make a stock for gluing the parts together.
So, for work we need:
- Double corrugated cardboard.
- Hot glue.
- Knife and scissors.
- Hot glue.
- Stapler. Napkins.
Getting Started:
- Cut out the digit from the template. Transfer to cardboard and cut 2 parts.
- Correctly calculate the length of the sides of the future figure, cut out the sides.
- The figure can expand downward - if that's the case, then the sides will look like a trapezoid.
- Using a paint tape, fasten the parts together. Secure them from the inside with hot glue. Attach the second piece of the unit and fix it with adhesive tape.
- Pre-strengthen the inner part, install tightly fitting cardboard pieces into it. They will act like hard ribs, and the decor will not bend.
- Paste the number with a decor of napkins.
We make a flat base for the figure from the
cardboard. As a basis, a sheet of sufficiently tight packing cardboard will make the finished composition not bend and become unformed under the weight of the decor:
- To make the figure 8 of the napkins, prepare a template: print out or draw a numbermanually. Or build a figure directly on a sheet of cardboard.
- On a square sheet of cardboard, place the number diagonally to make it larger. The size of the finished digit for the birthday will be 63 cm.
- Draw a diagonal using a pencil and ruler - this will be the axis of our figure eight.
- Estimate the size of the product and mark on the diagonal its beginning and end. Take the protractor and set off from each mark 90 degrees - draw perpendiculars to the initial axis. So we have outlined the limits of our figure.
- What's next? A figure of eight is two rings that cross borders. On the axis to the eye, put a mark that divides our axis into two parts: belonging to a larger and smaller ring. Also, from the mark, put the protractor 90 degrees, draw a perpendicular to the axis.
- Now it's up to the compass. Attach the size of each of the rings, open the desired radius of the compasses, draw two intersecting circles. So we got the outline of the figure eight.
- Now from the same centers draw two smaller circles - these will be holes in the figure-eight.
Important! Do not look very nice figures with a thin "canvas".However, too small holes should not be done: the decor of napkins can swing to the side of the hole and "eat" free space. Too small a hole can be completely covered with napkins.
- The lower part is slightly shorter - make an even cut so that the eight can stand, leaning against the wall, without falling on its side.
- Cut out the digit. To do this, use a stationery knife or scissors. If you are more comfortable with a knife, then do not forget to put a cutting mat under the cardboard.
- The figure is ready for decoration.
We decorate the figure with napkins
Now that you have learned how to make the number 8 of napkins, let's try to figure out how and how to decorate it.
Important! I would like to note that for the decor you can use not only napkins, but any other thin paper - corrugated, cigarette, quiet. Colors should be selected accordingly: for girls - tender( blue, white, pink, lilac), for boys - brighter( green, red, blue).
You can decorate the figure in different ways:
- Colors.
- In the technique of "facing".
- Fringed.
- Make a figure-figure.
Decor from napkins
The most common decor for figures is flowers. They are suitable for girls and boys. Flowers should be fluffy, easy to assemble, because you will have to make more than one flower.
Important! To save time, choose the variants of those colors that turn out to be the most magnificent: roses or asters.
For a beautiful lush aster you will need:
- Scissors.
- 3 wipes.
- Threads.
We create a flower:
- Fold the napkin with an accordion and twist the center with a thread - so that the bow turns out.
- Straighten the petals towards the center, moving to the edges.
- In the middle, make a bud, squeezing tight paper.
- Lower the lobes to make a pad for gluing.
Important! Combine the colors using napkins of different colors for one bud. Also on the edge of the napkin, you can draw a line with a felt-tip pen.
To create a rose we need the same materials:
- Fold the napkins in a pile and cut out the petals( a few semicircles).
- Then unfold the rose, moving the petals and fixing the tip with a corner.
- At the end, fan the flower.
Important! Try to make the edge of the flower wavy, zigzag with scissors. The flower with the teeth on the edges looks somewhat more interesting.
to content ↑Trimming
The figures that are decorated in the technique of facing are beautiful and very fluffy. It is best to take corrugated paper, although it is also good from plain-colored napkins:
- Cut the paper into squares.
- Put a pencil in the middle of the sheet, press it with paper.
- Attach the wand with paper to the surface, pre-coated with glue.
- Thus, filling the entire surface, spread the decor with your hands.
- Superfluous cut with scissors.
You can also make flowers in the cutting technique, for this you will need:
- Several rectangular paper sheets.
- Plasticine.
- Wand for cutting.
Let's get to work:
- Hand with plasticine.
- Wrap the wand with paper so that most remain free.
- Stick it in a small piece of plasticine.
- Similarly, create 3 petals.
- Fill the space between them with the same petals, but in a different color.
- Seredinku, where plasticine is visible, close a piece of paper.
Important! Polyfoam billets are the most suitable for decor in the technique of facing. There is no need for any glue - the stick pierces soft material, and the end remains in it.
to content ↑Fringe
Fringe is the simplest way, which takes less time than all the others. But this option requires a long strip, so we do not take napkins, but paper in silence, and start working:
- Fold the paper into a neat rectangle.
- Cut.
- Straighten and fluff fringe.
- Glue the fringe with double-sided adhesive tape to the workpiece and wind the number.
Important! Fringe looks more interesting if glued to the waves. It is desirable that the colors of the paper are contrasting - so the waves will be noticeable from afar. By combining different colors, you will get a very bright and original figure.
to the contents ↑For whom to make numbers?
In conclusion, I would like to say that decorated with napkins figures will please any adult. Not only on your birthday, but on any other holiday you can make a figure from napkins.
Important! The figure does not need to be covered with the same flowers. Use different shades: on the front side - more gentle shades, on the sides - dark. Thus, the figure will look more volume.
Also make sure that the decor is held tight, but you should not use skewers for this purpose if it is assumed that the child will play with the figure, because the holiday composition should be not only beautiful, but also safe.

