
- A bit of theory
- We make the drying chamber
- Using the
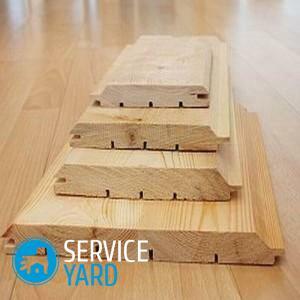
design If you have a large amount of untreated wood, which you need to dry soon, you need to get a special dryer to perform the primary processing of the material. This is an obligatory procedure for construction and finishing works, since if the material is raw, there will be problems with its laying, and in the future other defects in the structure will appear. About how the dryer for boards is made by own hands, you learn from this article.
to the contents ↑A bit of the theory of
Before you start making this design, you need to know what to do to dry the tree. From the name it is clear that the design is designed to get rid of excess moisture from the wood, however, we need to dwell on some theoretical points.
Wood moisture
Wood moisture is divided into two groups:
- Free, that is located in cellular cavities and intercellular space. The content of this group of moisture is determined by the conditions under which a particular tree grew, as well as by the way the sawn preforms were stored. During drying, this moisture evaporates fairly quickly.
- Bound or structural moisture - the so-called fluid that forms part of the cell walls of a tree. The amount of structural moisture depends on the tree species - this means that the drying time can vary: trees, depending on the breed, can get rid of the associated liquid for several months, and several years.
Important! Typically, the tree is saturated with moisture no more than 30%.Species with a high moisture content are called "gray", and are usually not used in construction.
Why do I need to dry?
Before you can make a wood drying chamber with your own hands, you need to decide what it is needed for. Let's conduct a small analysis and answer this question:
- When moisture is removed naturally, the configuration of wood fibers changes, which is why the dimensions of the board decrease.
- At the same time, the board loses excess moisture unevenly, which causes the deformation of very different planes and at different speeds.
- Due to the uneven "drying out" inside the workpiece, so-called tension lines are formed, which give rise to cracks.
Important! Usually the board gives a crack along the fibers, originating from the butt. This happens because of the fact that in these places the connections between the longitudinal fibers are somewhat weaker.
- Another problem is the transverse deformation of the board - the part acquires a completely uncharacteristic shape, arched by an arc or a "propeller".This is due to the fact that the fibers dry out unevenly and non-simultaneously, hence their length decreases, too, differing from each other.
Important! From the above facts, it can be seen that wood with a high moisture content during poor-quality drying can be rendered unusable. You can get away from such a problem by preparing raw materials and drying it on a dryer for a tree made by yourself.

Three Drying Modes
When you use drying chambers, you significantly save the time required to prepare the material for work. Moreover, you can control the drying modes, controlling the operational properties of wood. At this point in time there are three modes of dehydration of the tree:
- Soft. The peculiarity of this regime is a gradual rise in temperature in the chamber - due to this property, not only the original quality of wood, but also its natural color is preserved. This method of drying is the longest.
- Standard. In this mode, the tree retains its pristine strength, while the shade of the material changes slightly.
- Forced. This mode is used if it is necessary to dehydrate the raw material as quickly as possible, however, the quality of the lumber is significantly reduced. It is also worth noting that after applying this mode the tree can darken and acquire a characteristic smell.
We make the drying chamber
So, we figured out what the building is for. Now you can start making wood dryers with your own hands.
Selection of a room
First of all, you need to choose the right place, where the lumber will be dried. To do this, follow the advice given:
- The area of the room must be based on the dimensions of the boards that require processing.
- The height of the ceilings should be 2-2.5 meters.
- The width of the room is selected by the user, however, it is worth considering that you need to leave space for the passage of a person.
- You need to lay the windows in the room with bricks.
- Doors should be such that they can easily load raw materials without any problems.
- There should be a window or small vent for ventilation.
Important! If a large room is chosen, it is better to make a wall for thermal insulation.
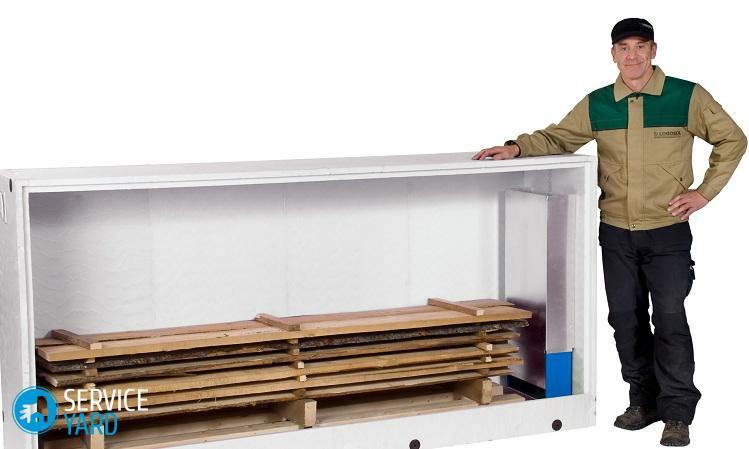
Construction of the dryer
Usually, as a premise for a dryer, choose a garage or a barn, but sometimes even they can not be used. For this reason it is important to know how to make a wood dryer for yourself using the drawings:
- Lay the foundation under the whole structure. Since the mass of the structure will be low, the foundation need not be made deep.
- After drying the concrete, it is necessary to assemble a frame from a steel galvanized profile( it can be replaced by a frame made of aluminum).The frame parts are connected using bolts, as well as special brackets.
Important! Aluminum frame is distinguished by its high price from steel, however, it has many advantages. For example, it is much more stable and not afraid of corrosion.
- To cover the walls with the roof with steel sheets fixed to the frame with the help of special screws. In order to maximize the effect, it is necessary to make a double skin, laying a layer of mineral wool insulation between the two sheets, having a thickness of approximately 150 mm.
- Lay the waterproofing membrane on the floor, then cover it with sawdust.
- Install the doors. They should be closed as tightly as possible.
- Construct ventilating air vents or ventilation pans to allow air to circulate unhindered.
- When the work is completed, check the tightness of the room. If necessary, eliminate the errors.
- Equip an infrared dryer for wood with your own hands. This point should be given due attention.
Hardware
Instructions for the equipment of the structure may differ from each other. This is due to the fact that the configuration of the camera and the material budget for each user are different.
Let's consider the general scheme of the equipment of a premise:
- To make a support on which in the further the stack of boards will be put. To do this, you need to fix the wooden structures on the floor, which allow you to raise the material approximately 20 cm above the ground. This is necessary to circulate the airflow from below.
- Can be used as a support for wall racks. For this, it is necessary to fasten the metal brackets on the supporting surfaces, which are intended for stacking the stacks along the walls of the chamber.
- Install the heater. Its role can play a stove, a thermal fan, a fireplace, a heat gun and other facilities - the choice depends on your desires and preferences. First of all, you need to pay attention to the power of the device - it is calculated from the volume of loaded timber.
- Install the fans for board drying by hand. Devices will ensure the movement of thermal air. Of course, you can do with the usual hood, but then the drying time of raw materials increases several times, which means that the expenses for electricity will increase.
- Arrange the fans and air heaters so that heated air passes across the airflow. Thus, you reduce the aerodynamic system resistance, so that the dryer will work more efficiently.
Important! Since you need a lot of power, it is recommended to install a separate power cable for the design. In addition, all materials that you use, you need to connect to the distribution board through the RCD with the necessary power parameters. This is necessary in order to protect yourself from a possible fire.
If possible, an automatic system can be installed that controls the temperature and ventilation of the dryer. This system provides a high-quality drying of wood, so its high cost is justified.
to the contents ↑Using the
design If you followed all our recommendations and built a wood drying kiln with your own hands, without making any mistakes, then its use will be very simple and effective. For this:
- You just need to lay the boards with a stack, laying between the rows of bars having a thickness of approximately 20 mm, then loading the stack into the room.
After this, you can change the temperature, gradually raising it.
Important! There are a huge number of schemes, following which you can make competent drying, but inexperienced users should first use the low temperature mode. This is due to the fact that its use is accompanied by a minimum number of defective boards.
Consider the classical process of wood drying:
- The temperature should be raised to 50 degrees, with a rate of its increase by 6 degrees per hour.
- Keep this temperature for 5 hours.
- During the drying, the moisture content in the wood should be reduced from 30 to 7-8%, for this it is necessary to withstand a temperature of 60 degrees for about two days. At the same time, both supply and exhaust ventilation should be kept at half capacity.
- To condition the room, it is necessary to withstand the boards at a 60-degree temperature using active ventilation.
- Cool the wood without heating and ventilation. In the end, you get suitable for further work boards.
From this article you learned that it is not so difficult to make a wood dryer by yourself, but you need to spend a lot of material and time for this. It is worth noting that all these costs justify their result, because in the end you get much more dried boards than if you bought finished timber from the manufacturer.


