- What do you need?
- Soft head for the bed with your own hands from the "foam"
- Head for the curved back
- Leather and foam
- Leather bed
- Head with buttons
- We tighten the buttons
Quality of sleep depends largely on the situation in the bedroom, the main subject of which is the bed. Factory beds are usually made with stiff backs, and this is not always convenient, especially for those who have a habit of getting out of bed at night."Half-asleep" injuries - is not so rare. To avoid them, you can make a soft head of the bed with your own hands. In this article we will tell you about several ways.
to the contents ↑What do you need?
To make a soft headboard for a bed with your own hands, you probably do not need to buy anything. You can see that you have left from the repair of the apartment, as well as look into your locker, where there are different items for needlework.
Are suitable:
- pieces of leather;
- pieces of microfiber;
- remnants of cotton and linen fabrics;
- buttons;
- braid;
- corsage belt or parachute sling;
- underwear elastic;
- twine( normal or synthetic);
- foam rubber;
- sintepon;
- soft foam;
- plywood;
- universal adhesive;
- large sheet of paper;
- pencil or marker.
As for the tools, they are also the most usual, always available in a house where people are addicted to manual work: the
- sewing machine;
- scissors;
- ruler;
- simple pencil;
- chalk or soap;
- fret saw;
- drill and set of drills for wood;
- screwdriver;
- hammer;
- screwdriver.
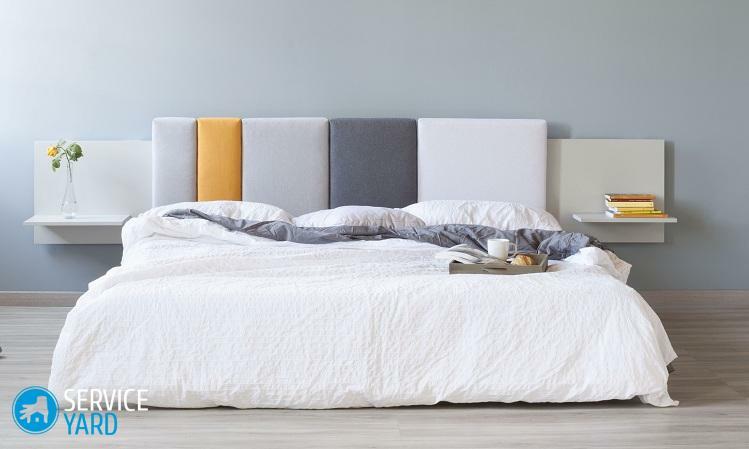
Soft headboard for the bed with your own hands from the "foam"
The most simple head of the bed with your own hands can be made of soft foam. Such "foam" is often used for gluing walls where good sound insulation is required. They love "foam" and tourists - this is exactly what litter for seating is made of. And in the hardware store you can always buy an inexpensive bathroom mat from exactly the same material.
For work you will need:
- large piece of paper or cardboard for patterns;
- ballpoint pen;
- very sharp knife:
- tape measure or centimeter tape;
- ruler;
- universal adhesive.
The sketch is not needed
If you are the first to do this kind of thing, do not pursue the form. It is better to do something simple, but refined, rather than inaccurately - a complex subject.
Important! Working with foam is easy, but this lesson has its own peculiarities - the slices should be very even. This head is better to do strictly on the contour of the back - more precisely, the part of it that rises above the mattress.
Operation:
- Measure this part - the width should be measured strictly horizontally, and the height from the top of the back to the top of the mattress, plus another 5 cm.
- You can draw a rectangle directly on the "foam", but it is more convenient to do this on a sheet of graph paper -so you will be able to withstand angles.
- Cut out the workpiece from the "foam" - do it best with a knife on a metal ruler.
- Place the workpiece with the wrong side up.
- Thoroughly lubricate it with a universal adhesive.
- Glue the headboard on the back of the bed from the side of the mattress.
Pros and Cons:
- The main advantage of this headboard is that you can dramatically change the appearance of your bed very quickly due to a convenient addition. Soft foam materials come in different thicknesses, which is very convenient.
- The drawbacks are that the color palette "penok" is very limited, so pick it up under the color of the upholstery or draperies is quite difficult. In addition, the soft surface is obtained only on the plane itself, the edges remain rigid. But there are solutions that allow it to be overcome.
Important! This option is suitable only for flat back, without protrusions.
Than to paste edges?
In principle, it is possible to glue the edging from the same material, but to make it beautiful will be quite difficult. There is a more interesting option - from polyurethane. In the building store you can buy a piece of skirting from this material. They come in different colors and different thicknesses, and you can simply attach them to glue.
to the contents ↑Head for the curved back
How to make the head of the bed with your own hands, if the back is curly? Of soft foam - the same way, only you need to take more care to make a pattern. To do this, carefully wrap the back. It is better to use thin, but hard cardboard. The size of the sheet should be larger than the size of the backrest itself.
Operation procedure:
- Glue a cardboard sheet to the back with an ordinary tape so that the edges protrude beyond the edges.
- Accurately circle the contours - this requires the ballpoint pen to be placed strictly perpendicular to the sheet.
- Cut the templar with a sharp knife.
Further actions will be the same as for the manufacture of a rectangular headboard.
to the contents ↑Skin and foam
Do you have a large piece of leather? Sumptuously! You can make a more difficult head of the bed with your own hands.
Preparation of materials:
- To begin with, of course, the skin should be renewed - cleaned of dirt and tinted with a special dye, if suddenly found scuffs. Small pieces are suitable for decoration.
- For filling it is best to use sheet foam.
- You will need more glue for leather or wallpaper nails.
Drawing a sketch
Much depends on the size of the headboard you need - whether it will cover the entire back or you just want to make out its fragment.
Important! The first option is suitable for flat surfaces, the second - for those that have a fringing or notch in the middle.
First, draw the backrest to scale. Pay attention to the shape of the top and side edges. If a piece of leather or leatherette is large, it is better to make a headboard out of a single piece - more precisely, even from two, since the outer part of the back should also be made( however, it can be done in other ways).
Important! Think of the decor elements. It is not necessary to get involved in complex ornaments, it is better to choose a pattern consisting of fragments of simple form - leaflets, geometric shapes, etc. Estimate how these elements will be located on the finished product.
Make a pattern
Carefully measure the backrest and draw its outlines in full size. If it is curly, attach a sheet of cardboard to the part and carefully circle it. Think about how you will fasten your head - on glue or on nylon nails.
Next:
- Cut out the template.
- Strictly cut out the foam pattern.
- Place a piece of leather face up.
- Apply the pattern and circle with a ballpoint pen.
- On each side, leave the allowances equal to the thickness of the foam, folded together, the thickness of the back, plus another 5-10 cm - it is better to circle each increment with a separate line: you will have several squares one in the other - inner, middle( in the thickness of the foam rubber) and the outeron the thickness of the back).
- From the corners of the extreme square, draw perpendiculars in both directions - you will get small squares that need to be cut out.
The main workpiece is, now you need to think about how to close the outer side of the back, if necessary. You can find a suitable leather square.
Important! If the material is rigid, allowances can not be left, and cut it strictly along the contour. Thin and soft skin is better to bend.
Assembling the head of the
If you are going to decorate your headboard, it is more convenient to do this before you collect all the items together. Elements of the ornament can be pasted or sewed. Then the procedure will be as follows:
- Apply a foam pad.
- Wait until it dries - it will happen quite quickly, especially since it needs to be smeared with glue only on the contour.
As for fixing the main part, there are possible options.
Option 1:
- If you intend to glue the part, apply the most extreme allowance with adhesive.
- Place the part on the backrest.
- Glue the allowances.
- Pay special attention to the fact that the corners are not stiff.
- On the outside of the back, glue another leather detail.
Option 2
The order of operation is not too different from the first, but wallpaper nails are used instead of glue. It is best to plan for them in advance.
Important! On the outside you can attach a plywood pad.
to the table of contents ↑Leather bed
If you made your first large leather product, you already know how to skin the bed with your own hands. It will be even a little easier than reinventing the original headboard. The main difficulty is to find such a large piece that it's enough for the whole bed, it's quite problematic, so you'll have to sew from smaller fragments. There is such a rule - first you need to get a large cloth, and only then cut out of it.
Important! It is not difficult to make a workpiece - the bed itself has a rather simple shape, it is important only to measure it correctly. To practice, try to cut out a piece of cheap material first and attach it to the mattress( for example, on scotch tape).
If everything turned out - just transfer the fabric blank to the skin. And the fabric does not disappear, you can always sew something from such a large piece.
Operation procedure:
- Mark the places for nails - ordinary or wallpapered.
- Put a leather blank on the bed - if the mattress can be removed, it is better to do it and put it on the sidewall, then it will be much more convenient to work.
- Cover the edges of the upholstery with adhesive tape( one-sided).
- And then it remains only to drive in turn carnations.
In fact, nothing else is needed - the skin keeps the shape perfectly, In addition, since the lower part of the mattress is not visible, it can not be masked. Make the second back the same way as the first( you can do without foam rubber), and your leather bed with your own hands will be ready.
By the way, pulling the bed with your own hands - it's also quite affordable. The main thing is to choose the right material. It should be tight and well held shape. In addition, you will need to replace the foam rubber or put the springs in order. With foam rubber, you can do it yourself, good, in construction and hardware stores it sells large sheets of very different thickness, but for the repair of springs it is better to call the master.
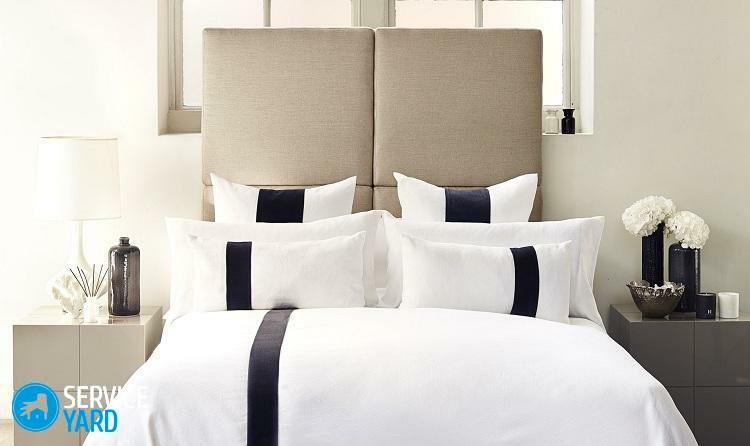
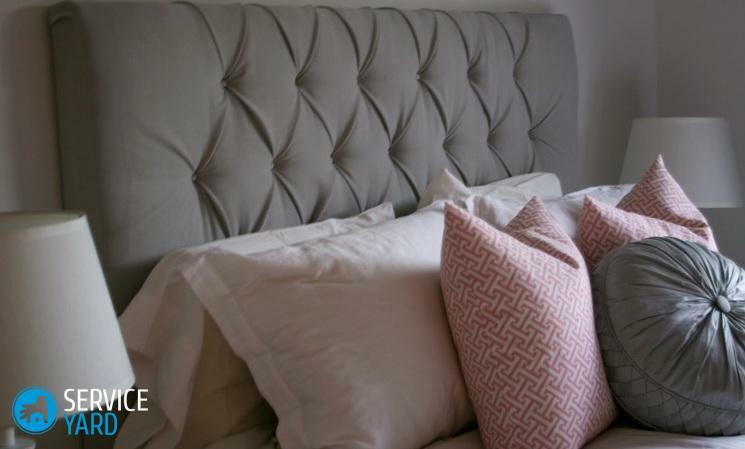
to the contents ↑Head with buttons
For this model you will need a lot of buttons. They can be of different colors, because you will still be wrapped in cloth, but of the same size. However, you can make an interesting composition, combining large and small buttons. You still need:
- thick, but not very thick fabric;
- foam rubber;
- material for finishing the outer back;
- universal adhesive;
- sewing accessories.
Crawl stock
This stage of work is no different from what was offered for the skin. However, there is one nuance - the cuts will still be better to bend or sweep, and the contours of the backrest drawn on the workpiece should be such that they are very clearly visible.
Button marking
First, count the buttons. To keep them better at regular intervals, and for this it is necessary to mark out the workpiece:
- Place the workpiece toward you with the side on which the lines are visible.
- Mark the top horizontal line in equal segments.
- Do the same on the bottom horizontally, and the points should be strictly opposite.
- Also mark the sides - the buttons will be on the intersections.
We tighten the buttons
Before making the headboard for the bed with our own hands with buttons, we should take care of the buttons themselves. There are two ways to tighten them with a cloth:
- ;
- to paste.
Important! Best of all, if under the layer of fabric there will be some gasket - for example, from the synthepone. Suitable sintepon with an adhesive layer. You need to glue it before you start to cut the details for tightening - it's much easier than messing with each fragment separately.
Option 1:
- Cut slices or squares about one and a half times the size of a button.
- Sew a part along the edge with a suture.
- Lightly pull off.
- Insert the button.
- Firmly tighten the edges.
- Secure the slices with a few sturdy stitches.
Variant 2
In this case, you can cut the circles strictly in the diameter of the button - you get the overlays. Each must be glued to the surface of the buttons.
Important! This option is good if you have a very thick fabric, perfectly matching the color of the buttons.
Tighten the head of the
When all the buttons are ready, you can start sewing them. Try to keep them firmly - when the head is ready, it will not be so convenient to sew the detached elements.
Place the finished part on the prepared backrest, bend the allowances on the outside and glue them. Close the outside - there are several options.
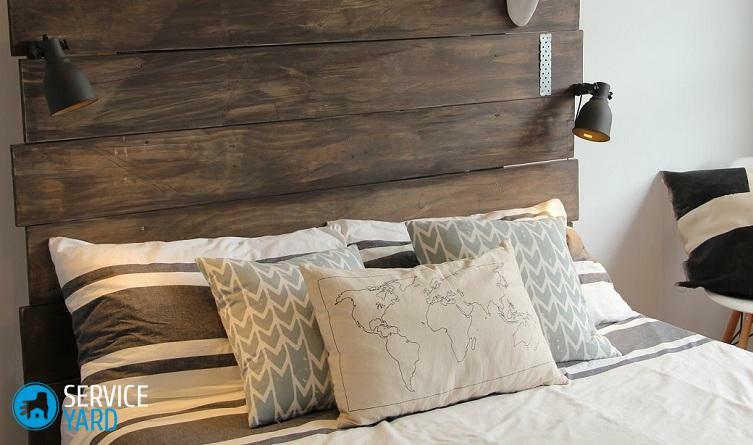
Options for the appearance of the external part
Close sections with the same material - the easiest way. But there are others. Knowing them, you can do not just the headboard, but also the backs for the bed with your own hands. This can be, for example, a plywood lining. To do it, you need to have some skills in working with a jigsaw, drill and screwdriver:
- Cut out the overlay to the size of the backrest.
- If the material is beautiful - it is enough to soak up the stain and cover it with varnish, but if necessary, you can paint it.
- You can connect with the backrest to which you have already attached the headboard, using screws, screws and other fasteners - it all depends on what is at your fingertips.
Edge Edging Options
You can not bend the edges of the headboard at all to the outside, and drive them under the bar. For the same edging, different materials are suitable:
- plastic tape;
- thin wooden slats;
- metal strips;
- polyurethane.
The plastic tape is of different colors. It looks, however, not very elegant, but you can think of interesting options. Wooden poles better cover with varnish and stain, on the contours of the back they can simply be glued or nailed with small carnations.
In this article, we looked at the various options so that you could make an interesting soft head of the bed with your own hands. Use these ideas to add comfort to your sleeping place.