- History of the idea of
- How to make a ring from a coin with your own hands at home?
- Ring from the coin. Method number 1
- How to make a silver coin ring. Method number 2
- How to make a ring from a bottle?
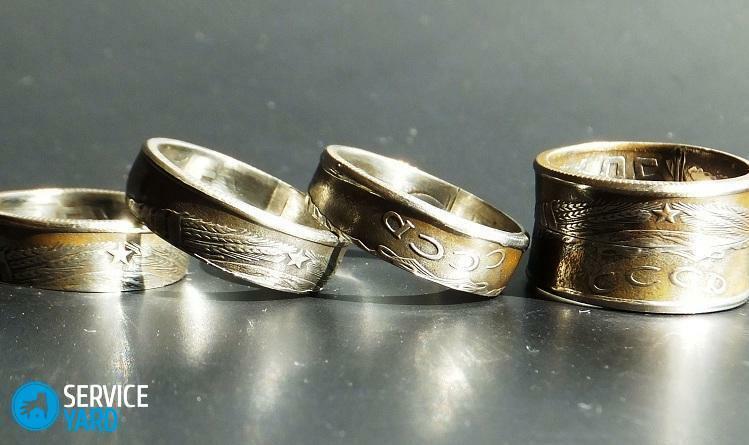
Unique and unusual things always attract attention. A gift, created by own hands, is valued at times higher, because a person, doing something himself, puts into his creation a piece of the soul and all his emotions that he wants to share with a loved one. Today we will introduce you to an amazing idea - we will tell you how to make a ring from a coin. Anyone who is inspired by our master class will be able to make a ring from a coin and please a loved one with a gift.
to content ↑History of the idea of
In the recent past, American designer Nicholas Heckman decided to create from a silver coin and a hammer a ring for his beloved girl. Nobody could have foreseen that it would be an exclusive and original jewelry, which would delight not only the young lady, but her relatives.
Subsequently, inspired by his idea, Heckman released a whole series of author's rings. Jewelry has brought the author fame and recognition throughout the world. It happened that the designer even had to stop selling products, because they were in high demand. Heckman decided to share his practical guidance with the public, thanks to which everyone can now feel like a home jeweler and make original products in comfortable and convenient conditions for him.
to the contents ↑How to make a ring from a coin with your own hands at home?
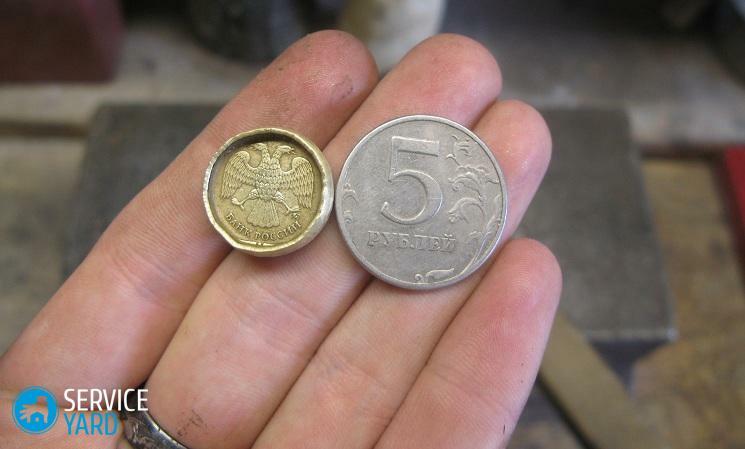
First of all, it is necessary to prepare for the process. Choose not only a coin, but also tools for work. The requirements for a coin are not that vast. Of course, coins equivalent to less than 1 ruble are unsuitable for work, as they do not fit in size. And the remaining qualities are quite standard for metal.
Choosing a suitable coin
When selecting a coin, pay attention to the following set of qualities:
- Maximum strength. The coin will be processed to create a jewelry, so the metal must withstand all the mechanical and thermal effects.
- Security. A ring made from a coin made by one's own hands should not cause any harm to a person's health.
- Color. This parameter depends on individual preferences. According to the color scale, there are coins: bronze-yellow and silver-steel.
- Size. Of small coins, you can not make a ring even of medium diameter.
Important! The bigger the coin, the wider the ring.

A self-made coin ring can be made from the following materials:
- Silver.
- Brass.
- Bronze.
- Steel.
All these materials are absolutely harmless and strong enough.
Important! Be careful with coins containing copper and nickel. Metals are not safe. They can cause skin diseases, allergies and poisoning of the body.
Hand tools for the work of the
In addition to the coin, you need to pick up tools. If you have a whole workshop, then make a jewelry product will not be difficult, using special tools. On how to make a ring from a silver coin under such conditions, we will discuss further. In the meantime, we will hold a master class for "crazy pens," who prefer to do everything at home.
to the table of contents ↑Ring from coin. Method number 1
So, for work you will need:
- Drill or bolt and plastic hammer.
- Vices.
- Stainless steel spoon.
- Anvil( or piece of rail).
- Coarse and fine-grained sandpaper.
- Drill.
- Power tools with tools for grinding and polishing.
- Combination pliers.
- File.
- A piece of woolen fabric.
- Abrasive composition for polishing.
As you can see, there are no technical difficulties in the search for tools. Now let's get to work, acting to the best of our skill and ingenuity. However, do not forget about safety.
Prepare the following protective equipment:
- Safety glasses. Do not remove the glasses until the end of work.
- Mask.
- Specialized gloves. In the process of work, you will deal with heated metal, and this is unsafe.

Ring from the coin - step by step instruction:
- Take the coin in the left hand, put it on the anvil with the rib.
- Take the spoon in your right hand. Applying a convex piece, start tapping evenly around the edge of the coin. For example, tap on one side three times, then turn the money a bit and tap on the other side. All should be evenly, if you knock three times on one side, then such a number of knocks should be on the other side.
- Periodically check the shape of the workpiece. Stop when the edge of the coin becomes sufficient for the width of the ring.
- Mark the center of the coin using a nail or other pointed object.
- Make a hole in the center of the coin with a drill and a metal drill bit. Drill stop immediately, as soon as it passes through the money. The tool jams in the metal, and this will move to the next stage.
Important! Be careful when drilling a coin can get hot, so hold it with the pliers.
- Take coarse-grained abrasive paper to process the outer part of the ring preform.
- Turn on the drill so that the coin turns on the drill. Process the edges of the workpiece.
- Take fine-grained sandpaper. After turning the drill, repeat grinding.
- Prepare fabric, apply abrasive compound on it.
- Carry out the final step of polishing the outer surface of the workpiece with a cloth with an abrasive compound. To obtain a mirror gloss, polish several times.
- Clamp the workpiece in a vice. In order not to scratch the coin and protect it from dents, use paper or cardboard linings.
- Increase the hole in the coin to the desired size using a drill or other tool( bolt and plastic hammer).This is the most difficult and laborious stage of work. It is very important to monitor the symmetry and thickness. Do everything carefully, so as not to spoil the product. Periodically remove the coin holder, check the diameter of the hole.
- Turn on the power tool with a grinding roller, level the inside of the workpiece. After processing, the edges of the product become sharp.
- Go through the file at the edges of the workpiece from all sides at an angle of 45 degrees, until they become more rounded.
- Sand the inner surface of the product with a polishing nozzle with a small amount of abrasive material. Remove any remaining roughness.
- The homemade ring is ready.

Useful tips:
- If you only have a drill, bolt and plastic hammer, then to make a hole, place the coin on the bolt( the rod widening to the bottom).Accurate, accurate hammer blows accompany it to the lower, expanding part of the instrument. Focus on the mark on the deadbolt and indicate the completion of the work.
Important! To prevent the product from becoming like a cone, periodically remove it from the deadbolt and shift it backwards.
- To grind the workpiece from the outside, you can make a self-made nozzle from a suitable bolt and two nuts. Insert the drilled coin into the bolt and secure it with the nuts from both sides. Attach the self-made nozzle to the drill and sand the product using fine-grained sandpaper. Next, using the same method, polish the product with a piece of leather.
As you can see, making a ring from a coin with your own hands is not as difficult as it might seem at first glance. You can use other methods, which we will discuss below.
to the contents ↑How to make a silver coin ring. Method 2
This method is for those who have specialized tools, such as press and punch( exerts pressure on the material during stamping).
So, proceed as follows:
- Place the coin in the punch.
- Punch the hole with a press. The hole can also be drilled with a suitable drill.
Important! Measure the thickness of the wall around the hole with a caliper.
- Remove the burrs inside the hole with the help of nail files and sandpaper.
- Place the workpiece in a solution of denatured alcohol and boric acid to protect the metal from the flame before firing.
- Pick up the coin by the center with a metal wire and bring the workpiece to the burner to burn alcohol. As a result, the coin is covered with a protective white film.
- Warm the workpiece with a torch until it becomes a dull orange color.
- Immerse the coin in water. Repeat the heating and cooling process several times.
- Determine which side of the workpiece will be outside the ring.
- Place the coin face down in the frame.
- Place a large ball from the bearing in the center of the workpiece.
- Set the frame with the coin in the vise, squeeze it slowly.
- Get the rim out of the vise. The coin must have a conical shape.
- Put the workpiece on a conical shape. Using a wooden hammer, lower the ring as low as possible, rotating the mandrel.
- Remove the ring. Now it needs to be leveled and check the size on the ring mandrel.
- Slightly level the ring in a vice.
- Take the mandrel with the smallest cup, set the product with the wide side down.
- Very tightly squeeze the vise.
- Check the ring after alignment.
- To align the surface, place the ring in the mandrel and squeeze in the vice.
- Check the ring from all sides. Put on the size bar to make sure the diameter of the product is accurate.
- Treat the edges with a file.
- Use alumina powder mixed with water for polishing. Apply the composition to the rough side of the piece of skin and polish the product.
- A self-made ring is ready and glitters.
There is another interesting way to make a ring with your own hands. We propose to make an ornament from the usual plastic bottle. This way of making the ring will appeal to the female half of our readers, since no special tools will be needed to create a unique accessory.
to the contents ↑How to make a ring from a bottle?
Plastic bottles make a lot of original jewelry and handicrafts. For example, necklaces, bracelets and rings. Different materials are used for decoration of products, and the method of making unique jewelry is quite simple.
For the ring you will need:
- Plastic bottle.
- Scissors.
- Scotch.
- Iron.
- Thermal gun.
- Ribbons( lace).
- Rhinestones, beads, chain( for decoration).
Step-by-step instruction:
- Wash the bottle and dry it.
- Cut a strip 1-2 cm wide using a smooth part of the container.
- Make a workpiece from the strip to the size of your finger.
- Cut off excess material.
- Secure the workpiece with adhesive tape.
- Turn on the iron to the maximum temperature.
- Press the edges of the ring with the iron. Process the workpiece on both sides.
- The basis of the ring is decorated with thin ribbons. Wrap the tape around the ring and fix it with silicone adhesive.
- Cut the end of the tape, burn it with a match and glue it.
- In the center of the ring, glue the bead( strass) with a thermo gun.
Now you know how to create a unique piece of jewelry from handy tools and without much expense. In the same way, you can make a variety of widths of rings, using colored thread, lace or tape. Decorate the finished ring with beads, rhinestones or chain. Glue all elements with a thermo gun.
Create your unique and unique jewelry, choosing your own improvised means, which you can master masterfully, and create for the joy of yourself and your family!


