- Highchair
- Options for feeding chairs
- Combined high chair for feeding yourself
- Mobile highchair
When a baby is born, new items appear in the house that are necessary for him. And of course, every parent wants to get all the best for the child. And what could be better than manufactured independently. After reading our article, you can easily make a highchair for feeding yourself. Drawings, sizes, schemes - all this will be stipulated. And most importantly - it will be convenient and safe for your baby, because you will be assured of the quality of the selected materials, and the reliability of the assembly of the entire structure.
to the table of contents ↑Chair for feeding yourself
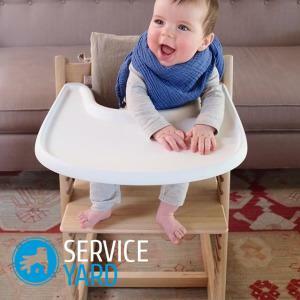
This chair for feeding will be needed for your child when he turns six months old and he starts to sit down on his own. On the chair is the formation of the musculoskeletal system of your baby, and his posture. This will be his first property, thanks to which he will get acquainted with the outside world.
That's why a highchair for feeding should be not only convenient, but also useful.
General requirements
In order to make this piece of furniture practical and comfortable, the following nuances should be taken into account:
- The chair should not be soft. To the skeleton of the child properly developed, the body must feel secure support. But on the chair for feeding you need relatively thin soft pads on the seat and back.
- Material for the chair. For a child it is important to use non-toxic, natural, for example, wood, plywood, particle board.
Important! Do not use plastic, as it contains not always harmless substances.
- Dimensions of the chair. To ensure that your baby on the seat feels comfortable, you need to correctly calculate the height of the backrest and the length, width of the seat.
Important! There is a special table, which is made up for children's furniture. According to this table, we determine that the height of the chair seat should be 20 cm, if your child's height is 80 to 90 cm, and the width, depth 33 and 26 cm, respectively.
to the table of contents ↑Options for chairs for feeding
The child starts eating at a common table starting from six months. Of course, it is necessary that the baby eat with all members of the family. For convenience, various options are developed, but putting the baby in a homemade chair, you should be sure of its safety.
Structures of children's chairs for feeding:
- A chair on high legs is made on long legs. Sitting in it, the kid will be on a level with everyone sitting at the dinner table.
- Soft cover - looks like a slim, which is attached to an ordinary chair. This option can be taken with you to the country or to visit.
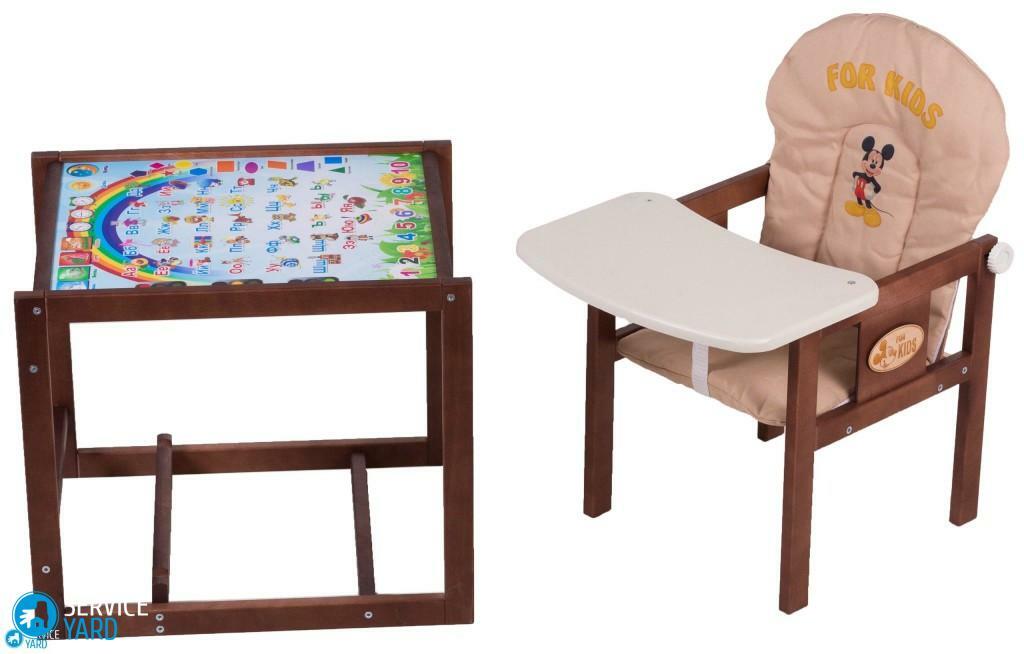
- Combined chair - on a small table set a small chair with restrictive rings.
Material selection
For the manufacture of a chair, coniferous pine or spruce wood is suitable. This species is strong enough and easy to process, the texture of the wood is pleasant in appearance.
Joiner's tools:
- nails, sandpaper;
- loops, screws, dowels( special connecting elements);
- saw;
- hammer;
- glue for wood;
- sheet of fiberboard, plywood;
- fabric, batting or sintepon;
- varnish or paint for the finish coat, brushes.
Important! Choose paint on acrylic basis, and varnishes are non-toxic on a water basis, because your baby can not only breathe them, but try to tooth.
to the table of contents ↑Combined high chair for self-feeding
We offer a detailed description of the stages of work on the manufacture of parts and the assembly of a combined chair for feeding. Here you need to make a chair and a table separately. Such an option collected can be used by feeding the child at a common table, and having dismantled, for it you can put the child to various games and activities.
Workpiece preparation
The first stage is the preparation of all the parts for this highchair. You need to prepare such materials:
- a beam in the thickness 200х400 mm - for legs and crossbeams;
- a board small in the thickness of 200-250 mm - for sawing of armrests;
- sheet of fiberboard 2x2.1.1 m for backrest and seat;
- plywood on the countertop.
Preparation of the details for the chair
For the manufacture of the chair you will need the following parts:
- 4 det. Legs - the length of the workpiece is 390 mm;
- 3 children.cross bar - length 300 mm;
- 4 children.rounded elements;
- 1 child.countertop 200x340 mm( can be changed for your taste);
- 2 pcs.- the upper crossbar is 220 mm in size;
- 2 pcs.- the lower crossbar is 340 mm in size.
Important! To ensure that your highchair for feeding with your own hands turned out to be beautiful and even, the dimensions of the parts must exactly correspond to the drawing.
Fabrication of
table parts It will require:
- 4 legs with a length of 500 mm;
- 4 cross bars, dimensions 340 mm;
- 4 plates with a length of 410 mm;
- plywood for the countertop dimensions of 380x450 mm.
Important! You can not buy all the necessary materials, you can choose the right size, using items that are unnecessary in your household.
Now we have reached the main stage - assembly of the entire structure. Be attentive and careful in your work, do everything perfectly well, because you are trying for your child, that means - it should provide him with safety and convenience in the first place.
Wood preparation:
- In the production of timber, the timber is sawn to a certain size. After cutting the parts to dimensions, you need to remove all roughness, roughness, and scratches with sandpaper.
- The part of the curved sidewall element for the chair needs to be rounded using a jointer or electric jigsaw.
Important! Make the curvatures of the sidewall according to the drawing of the highchair for feeding.
- The fastening was done with dowels( you can buy it in the furniture accessories department).In extreme cases, self-tapping is allowed.
Fastening process:
- In places of fixing on a board or a bar, cut out or drill with a drill hole depth of 30-40 mm.
Important! Carefully make holes without drill through the details of the chair.
- We connect and insert dowels.
Assembling the sides of the
Your chair will have two sidewalls that will protect your baby from falling. To do this, you will need on each sidewall on:
- 2 rounding;
- 2 feet;
- 2 straps upper and lower.
Sidewall collect separately each. For this it is necessary:
- Connect the legs and the lower crossbar.
- Secure the rounding to the upper crossbar.
- Glued these two pieces together.
Important! Before connecting two bars, the hole and the dowel must be greased with glue for furniture or PVA.
The same collection process will occur for the second part of the sidewall. All the elements must be left to dry for a day. After - walk around with sandpaper on this part of the chair to finally remove all irregularities. 
Important! Carefully ensure that all angles between the bars are straight, and the side parts are symmetrical.
Manufacturing of a seat
We proceed to the process, it is necessary:
- Cut out 6 rectangles 300x250 mm from the chipboard.
- Round the 2 corners along the long side.
- Sand all edges with sandpaper.
- Glued 2 plates to put under the press.
- Secure finished parts curved along a strip of metal or screwed with screws.
Assembling the seat
We proceed to assemble the chair, this is necessary:
- The sidewalls must be joined with cross bars using dowels, as described above.
- Fasten the straps to support the back and plywood top, the same method.
Important! In order to make it more convenient to fold the structure, it is required to map the location of the dowels, to drill holes and to make bars without glue. Carefully review, remove all the shortcomings. Then you can use the glue for the final docking of the elements.
Making a table
The process itself is very similar to assembling a chair.
Technology of table assembly:
- Attach the upper and lower brackets to the legs.
- With transverse bars 340 mm long, fasten the side parts of the table.
- Sidewalls are ground with fine-grained sandpaper.
- Attach the table top - it must be screwed from the end of the structure.
Making a seat
This step is optional, but for the comfort of your child, do not regret the material and the time spent. For this you will need:
- foam rubber not more than 2 cm thick;
- a dense furniture fabric or a colorful oilcloth;
- construction stapler.
We proceed to the process, for which you will need:
- Cut foam rubber along the contour of the seat and backrest.
- Stick to the chipboard using PVA.
- Unfold the backrest and seat patterns by making allowances for a 4-5 cm bend in the seat, and on the back will take so much to cover the two sides.
- Apply a cloth to the seat.
- Secure the four sides with the staples on the back.
- Shoot around the circumference of the seat, adjust the uniform tension of the fabric.
Important! The same techniques you need to cover the back of the seat with the difference that here you will be wrapped and the wrong side, wrapping the fabric diagonally with an envelope.
to the table of contents ↑Mobile highchair for feeding
You can take this chair option with you to the dacha or to visit. We offer you a portable( mobile) version of a highchair for feeding, which you can sew at home, having elementary skills in sewing.
Materials for work
For this you will need:
- fabric( cotton, linen, lining fabric) - 3 m at a width of 1.5 m;
- slings 2.5 m( buy in the fabric store);Buckles-carabiners - 3 pcs.;
- scissors;
- sintepon;
- needles;
- sewing machine;
- thread;
- thick strong braid.
Step by step sewing instruction:
- Open the fabric according to the pattern below. You should cut:
- 2 main parts of fabric;
- 1 basic of the synthon;
- 4 parts for wide straps.
- Sweep the sintepon to one side of the body, then stitch it back from the edge 1 cm.
- Stitch each strap around the circumference by sewing the slings into it:
- with a ruler;
- iron out all corners;
- is to be attached to the main part in the places indicated on the pattern;
- Fold the two main parts face-to-face, and sweep, stitch in a circle, not dodging 7-10 cm.
- Unscrew and level all corners and folds.
- Detach by stepping away from the edge 1 cm.
- Attach the carbine buckles to the straps.
That's all your chair for baby's feeding is ready. Applying your imagination, the chair will be original and comfortable for you and for the baby. With his help, your baby will get acquainted with the world around him.
