Very often after moving or renovation in the bathroom revision occurs. You study the quality and features pipe wiring, device and connection plumbers. What to do if you suddenly notice a leak on the bathroom floor? Usually the culprit is a failed gasket between the tank and the toilet. If you have time to solve the problem yourself, then be sure to turn off the water supply to the tank and, following the instructions in our review, fix the breakdown.
Read in the article
1 Functions of gaskets for domestic toilets
2 Types of seals at the articulation of the bowl with the tank
2.1 Round options
2.2 Oval options
2.3 Trapezoidal options
2.4 Universal gaskets
3 When is a replacement needed?
4 How to choose a product
4.1 Material and shape
4.2 Manufacturer
5 Temporary troubleshooting
6 How to replace the gasket
6.1 Removing the drain tank
6.2 Seal replacement
6.3 Mounting and fixing the tank
6.4 Connecting internal fittings and hose
7 Leak test
Functions of gaskets for domestic toilets
Usually the gasket between the tank and the toilet either bursts or shifts. This is a simple but very important element of any plumbing fixture. It provides tightness when draining water. To ensure a reliable connection, it is necessary to know what defects and features of the installation can lead to leakage. The gasket itself is necessary in any device, as it protects the sanitary ware from stress and cracks, and your bathroom from flooding.
PHOTO: stroy-podskazka.ruThis procedure is easy to perform on your own, the main thing is to choose the right seal for your toilet
Types of seals at the articulation of the bowl with the tank
To replace the seal, it is important to know which of the options is located in your tank. Seal options for plumbing fixtures weight. All of them can solve the problem, the options primarily depend on the tank itself. They can be round, oval, trapezoid and universal. The latter are a little more expensive, but the chance that they will help you out in your particular case is much greater. It is these universal rubber bands that are recommended to always have in stock. The seal may move or wear out. No matter what exactly caused the malfunction, we will study each type of them.
Round options
Round cistern gaskets are commonly used in almost all modern models. They are usually a standard size and can be purchased at your average hardware store or hardware store. Such a seal is usually the easiest to install and budget to buy.
PHOTO: krovlyakryshi.ruActually, this is one of the most common types of seals.
It happens that craftsmen use old models of seals that are made of ordinary foam rubber. They can help you out in an emergency, but after a couple of days they can cause a leak. These bowl liners are considered more of a first aid than a real long-term solution. Sometimes a simple cuff replacement can resolve the issue.
Oval options
The oval shape of rubber seals is most often used in toilet bowls from the Soviet era. They are also easy to install and can not cause any complaints. Except perhaps the lack of such an option in the construction supermarket.
PHOTO: remontnik.ruIf we compare modern models and this one. Which one will you choose?
Trapezoidal options
These gaskets are extremely inconvenient to replace. The form involves fixing from several sides at once, not only on bolts, but also on liquid glue. And all because they are quite capricious and can easily budge. They can be applied and fastened without additional fixation, only if you have a huge supply of patience and... glue. Usually, for such a gasket in the design of the toilet bowl, not 2 connecting screws are provided, but 3 or 4. The place for fasteners is usually fixed with bolts. When installing such a gasket, additional fixation with bolts and sealant is required.
Universal gaskets
The most convenient type of seal available, which is suitable for any toilet model. It is considered an excellent solution "in haste". Most often, it is these fasteners that provide maximum tightness of the structure.
PHOTO: puls.spb.ruThe outer side of such a seal is smooth and round, and the inner side is in the form of an equilateral hexagon.
Related article:
What to do if water flows in the toilet: how the flush system in the toilet works, its possible breakdowns and ways to fix problems, preventive measures for the flush tank, tips and tricks.
When is a replacement needed?
How can you tell if the seal needs to be replaced? The easiest option is to check if there is a leak or not. In addition, the mobility of the tank can also play a role. If you noticed water under your feet in the toilet, then, most likely, the gum needs to be changed. In this case, it will not be superfluous to disassemble the structure, remove the tank, having previously blocked the cold water. If you are convinced that the gasket is leaking, it must be replaced. How to install the gasket, we will show a little lower in the video.
PHOTO: remontnik.ruFirst remove the fixing bolts, drain the water and remove the tank
How to determine by external signs whether the seal needs to be replaced? Usually everything is clear and at the first inspection - a shift, physical abrasion of the part leads to a wet floor. Well, if you are at this moment at home. And if not? After dismantling the tank, if there are no visible signs of aging, the cuff is felt. If it is too hard, replace it. It is not difficult to change the connecting link, you just need to have an idea of what types of gaskets are, sometimes it fails in just a year.
The main condition for replacement is a suitable size and shape. Each type of gasket has universal sizes, just remember the marking or take a leaky gum with you. Usually any store employee will be happy to help and find the product you need.
How to choose a product
This is exactly what you should do if you need to quickly and accurately select the gasket. This makes it easier to choose the option that is ideal for your model. It is better not to rush into the choice and take gaskets made of dense rubber, in no case foam rubber. They will last you just a few days. And most importantly - you buy exactly what will really last more than one year.
Material and shape
It is best to choose models not from plastic and dense foam rubber, but from durable rubber. Modern manufacturers have learned to use various additives to increase the elasticity and strength of the material. Such tank gaskets are more wear-resistant and less capricious. There are no special differences, but it is still better to choose elastic models with minimal shrinkage and no chemical smell.
Pay attention to the design and structure of the landing shelf. The shape and size of the gasket depends on its features. Please note that the diameter of the so-called seat is exactly equal to the diameter of your spacer disk or gum. There are variants of the bowl with smooth landing shelves, as if recessed into the base of the landing bowl.
PHOTO: mdo-info.ruIn this photo, just such an option
The easiest way is to replace it with a model that is located directly on the toilet bowl. The seal in this case wraps around the drain more tightly and practically cannot move. An important point - when fixing the gaskets, the screed of the structure plays a key role. Sometimes it is worth using additional intermediate spacers to align the structure and fix it to the landing platform.
PHOTO: WeldomtvFixing bolts
Elastic bands and seals help fix the tank and protect it from pressure cracks. In addition, a properly installed toilet gasket will solve the problem of leaks in the bathroom.
Manufacturer
Today, in any building supermarket or hardware store, you can find gaskets between the tank and the toilet from almost any well-known brand. Everything depends on your desire. But most, of course, use more budget models, considering gaskets to be consumables.
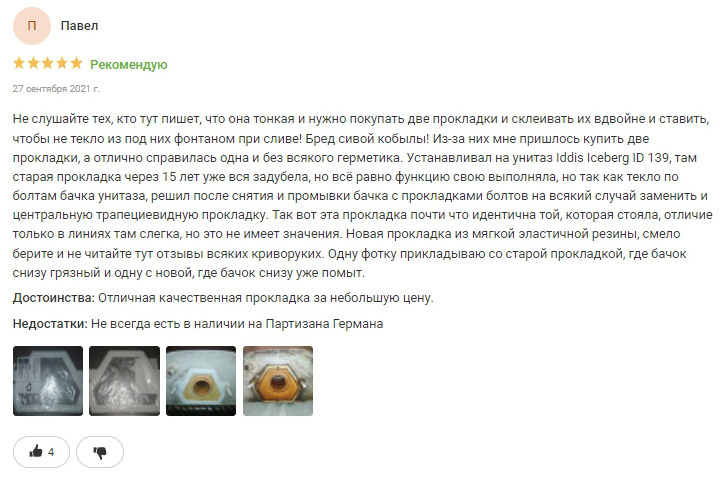
Here are some reviews on a variety of models.
Feedback on the gasket between the tank and the toilet:
More on Leroy Merlin: https://leroymerlin.ru/product/prokladka-dlya-unitaza-18696528/otzyvy/
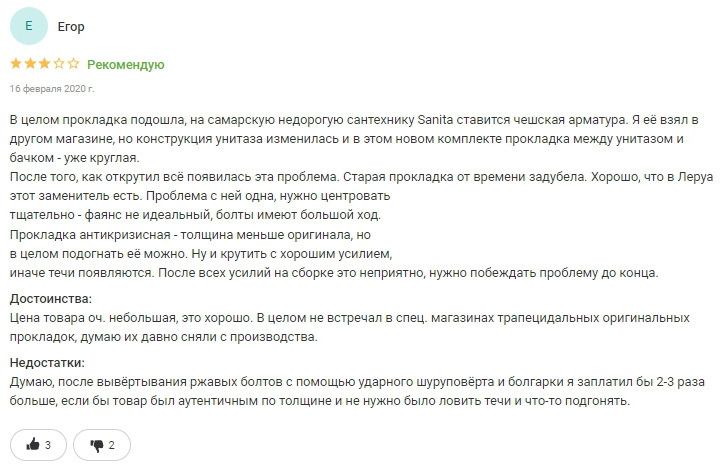
Another review on the gasket between the tank and the toilet:
More on Leroy Merlin: https://leroymerlin.ru/product/prokladka-dlya-unitaza-18696528/otzyvy/
Temporary troubleshooting
If you do not have the right gasket on hand, then you can use ordinary dense foam rubber and sealant. To do this, it is necessary to cut a gasket of the required diameter and size from the foam rubber. Fix the structure to the sealant.
However, this solution will save you literally a day or two. You can also use insulating tape. But the width must be three times wider than the joint in order to maintain tightness even under pressure.
How to replace the gasket
There are usually no difficulties with replacing rubber seals. The most important thing is to block the access of water to the drain tank, remove it, determine the problem and proceed with the replacement. If the rubber gasket is too old, it can leave traces of presence even on sanitary ware. In this case, the tank should be degreased and washed with a cleaning agent to prevent leakage due to loose fit. The process of installing the seal takes just a few minutes.
PHOTO: tula.santehnic-doma.ruCan be done alone
Removing the drain tank
Usually this procedure is not difficult. Most often, the tank is mounted on special bolts or studs, which ensure its stability during the maximum intake of water. The studs are double threaded for fixing nuts. Most often, such bolts are attached to the back of the drain tank.
PHOTO: i.gardendecorgalore.comDepending on the type of plumbing, the drive can be mounted on two or three bolts.
Seal replacement
After removing the tank, it is necessary to install the seal. To do this, you need to combine the studs with the aligned holes on the platform platform. Next, the gasket is installed and fixed with nuts.
PHOTO: i.ytimg.comWhen tightening, pay attention to the clamping force
Please note that too rigid fastening can significantly increase the load on the threaded connections, which means there will be a risk of damage to the plumbing. A leak in this case can occur even with a high-quality gasket, but its incorrect fixation.
Mounting and fixing the tank
Installation and fixation of the tank takes place in a container freed from water. It is necessary to unscrew the fixing nuts from the inside of the tank, carefully remove the bolts and studs that fix the tank. Pay attention to the integrity of the fasteners, in case of corrosion, it is better to replace the bolts. The cavities of the cistern and the toilet bowl are connected by a common pipe, insulated at the junction with a rubber sealing ring.
Please note that in some models of gaskets there are special ears that must be passed through the mounting bolts that fix the drain tank. It is important to combine all the necessary elements and only then tighten the bolts.
PHOTO: krepezhinfo.ruAccuracy first of all!
Follow the rule of uniform tightening of nuts in order to avoid distortions and get rid of cracks in the tank itself and the platform. When fixing the structure, it is necessary to observe the uniformity of screwing the nuts in order to avoid distortions. After one or two turns, it is necessary to check the uniformity of winding. Please note that propylene bolts can burst when overloaded and distorted. And also, if the clamping is too strong, the thread can be damaged.
PHOTO: musicstore.suCheck the quality of pressing
Connecting internal fittings and hose
For those who are more or less versed in the installation of plumbing, the procedure for installing a tank can not be complicated. You should follow a logical sequence and do not use superfluous efforts. After all, tile is a rather fragile material. It is necessary to pay attention to some features that to a large extent affect the final result.
Before carrying out work, shut off the water supply to the toilet drain. Empty the water tank. If there is a separate plug for water, this will not prevent anyone from using both hot and cold water. This option of shutting off the water simplifies the installation of plumbing and does not interfere with everyone at home, as it does not require a complete shutdown of the water in the apartment.
PHOTO: kursremonta.ruDo not forget to turn off the water when installing the tank
In old apartments, the water supply to all rooms is usually blocked. This is not very convenient, but in principle acceptable. Especially when the whole process does not take much time. Shut-off valves must be freely accessible and not “sewn” under the box. Show your family where and how to turn off the water tap in case of emergency. For this, either a tap is used, which stands on a special outlet for the toilet, or, in the absence of the latter, shutoff valves that are responsible for the entire apartment.
Typically, pipes made of steel or copper are used to supply water. Modern and inexpensive analogues are rubber tubes reinforced with metal threads. Their advantage is that they can be used when installing a cistern in difficult and hard-to-reach places. It is best to make sure that you can turn off the water supply to the toilet at any time.
Leak test
First of all, turn on the water. Fill the tank and rinse off the water. Listen carefully to the sound of the water. Check connections for leaks. Sometimes condensation can occur in the bathroom due to high humidity. Turn on the water supply and check the device for leaks. After checking, you can turn on the water at full power.
Important! After replacing the gum, learn how the toilet works for 2-3 days.
Check the quality of the bolts. It may take a day or two to tighten them up. Since, depending on the load, the volume of the tank and the material of the gasket, it may sag slightly. The easiest way to check the junction is with toilet paper, if it is not wet, then everything is in order. It is important to clearly calculate the pressure and load and install the gasket, taking into account all the features of the device.
If you have ideas for a quick and inexpensive toilet liner replacement, be sure to share your experience in the comments. It is especially interesting to listen to professionals in their field. Leave your comments, share your experience, talk about the tricks of work and installation.
You can watch a step-by-step instruction on disassembling the drain tank, replacing the gasket in a short video.
Discuss0
Everything will be if you purchase electrical appliances for 12 volts.
There are 4 panels in the country house and that's enough for everything.
What are these blocks you have so rotten? Never had a problem with gas silicate blocks...
We saved up for a long time, we had to severely limit ourselves in the usual things, until we found out ...
In general, as far as I understand, this is done differently in different regions. Yes, looking at...
I have such a question if I have a central gas pipe that runs right next to the house p ...
Especially with the insulting hint that not new yarn was used in my product, but ...
Hello. It is very unpleasant that you use other people's photos in articles without asking ...
With my own hands, I can't build very well. My wife and I decided to buy a bath from the tower ...
Partly, I liked the interior, I was impressed by the estate, I started to smile, only …
In my opinion, going to the village is too much, if there are no plans to take care of the household. Could…
It looks more like Lerchek bartered furniture, renovations, décor, and clothing. And there h...
When Buryatia was included in the Far Eastern Federal District, housing prices jumped more than 2 times due to this ...
It's a pity we don't have such a program as in the Far East. I had to buy a country ...
I've been looking at buying a sauna for a long time. I recently found exactly that one at an exhibition in Zyablikovo ...