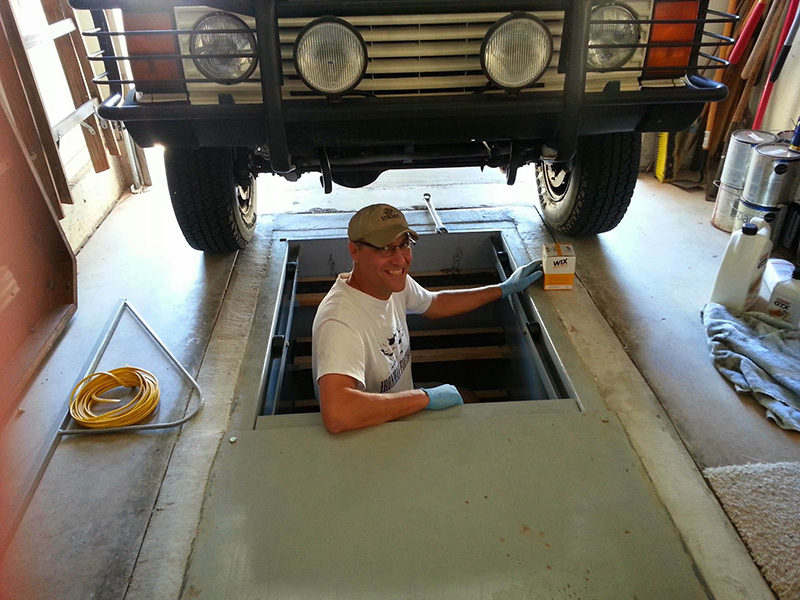
There are car owners, and there are car enthusiasts, with an emphasis on "amateurs". These are people who love the car and love to maintain, repair and improve it. But for this you need to be able to get to the bottom of the car, because there is the entire chassis, and it cannot be left without maintenance. A large load is placed on the chassis, and all the dirt is collected there. To get to the bottom, you must either put the car on its side, or be under it. To do this, you need to either raise the car above your head, or crawl under it. This means that in the garage you need to equip a viewing hole, and it is most profitable to do it yourself.
Read in the article
- 1 Preparatory work
- 1.1 Sizing
- 1.2 Marking and digging a pit
- 2 How to make a viewing hole out of concrete for a car
- 3 Tools and materials
- 3.1 Floor concreting
- 3.2 Making concrete walls
- 4 How to make a viewing hole out of brick for a car
- 4.1 What do you need to work
- 4.2 Bottom concreting
- 4.3 masonry brick walls
- 5 Additional work
- 5.1 Waterproofing methods
- 5.2 Edge reinforcement and wheel stops
- 5.3 Cover making
- 5.4 Warming
- 5.5 Niches and wiring for lighting fixtures
- 5.6 Finishing work
- 6 Operating rules
Preparatory work
Any serious construction work begins with a project. Moreover, the project is needed not for formality, but for oneself. Everything is thought out in it, from the general view to the smallest details. In particular, a technological map is created, in which the sequence and content of technological operations are signed.

Sizing
The size of the pit is determined by the size of the car and garage. The inspection pit should ensure the safety of the worker, convenience during work and ease of maintenance of the car. The width of the trench should be such that the machine does not accidentally fall there, but at the same time, so that the worker does not feel cramped there. This is about 40 cm narrower than the wheel track.
The depth of the trench is usually 1.8 meters. If the employee is not tall, he can make a stand.
The length of the trench is recommended to be about 1.5 meters longer than the machine. Too deep and too long a hole will require more financial investment. In total, usually a pit for a passenger car has dimensions of 1.8 x 0.8 x 5 m. The wall thickness is approximately 150 mm.
Marking and digging a pit
Before deciding on the construction of an inspection pit, one should deal with the groundwater level (GWL) at the place where the pit is planned. If the GWL is less than 2 meters, it is unrealistic to build a pit - it will be regularly filled with water. In this case, you will have to install a metal or plastic caisson, but this is an expensive pleasure. If the GWL is more than 3 meters, you can safely start building a pit.
In the garage on the floor, you need to mark the future trench. The axis of the pit usually coincides with the axis of the car entering the garage. Moreover, the dimensions of the trench should be larger than the finished pit, taking into account the formwork, walls, bedding, waterproofing, etc.
The complexity of the process of digging a pit depends on the characteristics of the soil. In the case of clay soil, you can dig a pit with vertical walls. But if the soil is sandy, the walls will crumble all the time when digging. We will have to remove this scree, save it, and after creating the walls and cleaning the formwork, pour it back into the free space.
If the garage itself has not yet been built, an excavator can easily dig a foundation pit. And if the pit is being built in an existing garage, then you will have to dig with your hands.

How to make a viewing hole out of concrete for a car
The finished inspection pit must have strong vertical walls. For example, concrete. And a strong flat floor, also concrete.
Tools and materials
Pit concreting is no different from similar work at other sites. First you need to stock up on the necessary tools and materials. Simple tools and fixtures are needed: a bayonet or shovel shovel, a bucket, a carpentry tool for making formwork. To level the surface, you need rightsandla.
A more complicated tool is a vibrator for processing a poured mixture. The most difficult and most important is the concrete mixer, in which the mixture will be prepared. When pouring, a reinforcing mesh for pouring, a gutter, beacons will be required.

Floor concreting
The floor in the pit itself and around it should be extremely flat and aligned with the horizon. Horizontalness is provided by pouring over the beacons. The mixture for pouring the floor is made in the following proportion:
- one part of cement;
- three parts of quarry sand;
- part of fine gravel;
- water.
Filling the floor with a cement solution to improve its quality should be one-time continuous, on a previously cleaned surface. Film waterproofing is arranged under the concrete pouring. Isolon is considered the best option; in its absence, roofing material or a thick plastic film is used. The edges of the film must be above the level of the concrete pour, they are then attached to the wall.
Making concrete walls
Concrete walls are poured into the formwork. This is the most popular method of making a concrete wall. With the help of formwork, the mortar is given the necessary shape, and it does not spread. The formwork should be built collapsible, but strong. It should not deform under the pressure of the concrete poured into it. Full hardening of concrete occurs after four weeks.

How to make a viewing hole out of brick for a car
If you do not want to mess with concrete, the inner walls of the viewing hole can be made of bricks.
What do you need to work
To work on the construction of a brick version of the inspection pit, you will need: crushed stone, concrete grade 200, cement, gravel and sand, as well as waterproofing sheet materials (isolon), plaster, brushes with shovels, level, step-ladder, metal corner, boards, polystyrene foam for insulation, metal pipes and gratings for ventilation and, of course, the brick itself.
Bottom concreting
Work in the pit begins with concreting the bottom. With brick walls of the inspection pit, the floor is still made of concrete. The algorithm is traditional: a pillow of sand and gravel, waterproofing with raised edges, concrete pouring. With a strong desire, you can lay and fill in the reinforcing mesh - it will not be worse.
masonry brick walls
The walls are laid in one brick. When laying out, you need to provide small niches for lighting fixtures and shelves for tools. The practice of working in inspection pits shows that the optimal dimensions for a standard niche should be as follows: depth 12 cm, height 25–30 cm, and length approximately 50–75 cm. The brick is placed in a dressing with an offset of half a brick.
A gap is left between the brickwork and the wall of the pit for subsequent backfilling with gravel and previously excavated soil. Specialists recommend plastering every four rows of masonry on both sides.
After this operation, the previously excavated and preserved earth is filled in the sinuses between the brick wall and the wall of the excavated pit. Clay should be added to this earth. Backfilling is carried out in layers of 15 cm with obligatory tamping.
Another important point. Despite all efforts, water will get into the inspection hole: it can drip from the wheels, and you can spill something, and condensate will appear. To avoid puddles all over the floor of the pit, a small slope is made into one corner. And there a small depression is made, where unwanted water flows. And the pit itself is covered with a solid grate for safety reasons.
The inspection pit has a rather large volume, and the work in its area is not the most deodorized: the engine will have to be started, oil will leak, and gasoline will drip. The pit is gradually filled with harmful odors that must be removed. Therefore, ventilation is needed. Ventilation is best done combined: natural and forced, with an additional fan. Along one wall in the corner you need to lay a pipe. All vapors will be removed and no condensation will appear.
Additional work
In addition to the fact that the pit needs to be dug and a set of construction works completed, it also needs to be equipped - to ensure absolute safety, ease of operation and at least minimal comfort.
Waterproofing methods
During the construction of the pit, various technical problems have to be solved. One of them, from the category of important and complex, is the protection of the pit from water. Water mainly comes from the ground. Not without reason, the first step in the process of building a pit is to solve the question: “Is it possible to build a pit on this place?”. We have already talked about this. To do this, you need to familiarize yourself with the hydrogeological characteristics of the site on which the garage is built.
There is one technically interesting, but very expensive way to build a pit in a place where the groundwater level is less than 2 m. This method is called "caisson construction". The caisson in this case is a waterproof box with an internal size equal to the desired viewing hole. It is welded from sheet steel or made of plastic, and then loaded into the pit and fixed there tightly, so that it does not float on the waters that have come into the pit. If the owner of the garage owns welding methods and is able to buy the right amount of steel sheet, the caisson can be made metal. But it must be covered in two layers with hot bituminous mastic.
If the groundwater depth level is deeper than 2.5 m, you can safely build a pit and solve waterproofing issues in the usual way. A cushion of sand and gravel is formed on the bottom of the pit, a waterproofing material is laid on it, which is poured with concrete. After the concrete has hardened, the released edges of the waterproofing rise up and are attached to the wall. A concrete or brick wall outside should be smeared with two layers of hot liquid bitumen. Drops of water flowing into the pit should be collected by gravity into a special pit, arranged in one of the corners of the pit. The pit also needs to be concreted. Water is pumped out of it. You can perform this procedure automatically. A humidity sensor is installed in the pit, which at the right time turns on the pumping pump.
Edge reinforcement and wheel stops
And without water, the pit has enemies. The edges of such a pit (even concrete, even brick) under a regular variable load have a habit of gradually collapsing. To prevent this from happening, you need to close the edge around the entire perimeter of the pit with a metal rolled corner. Corner No. 45–55 is suitable for this. A frame is welded from it around the entire perimeter, anchors are welded to it from the outside, when the floor is concreted, they are poured with concrete.
In those places where, when inspecting the car, its wheels are located, it will not hurt to lay additional beams, otherwise the wheels will push through the floor and destroy the edge of the pit. In those places, jacks will be securely installed.
For safe installation of the machine, limiters are required at the edges of the pit. It is possible to arrange a control and warning ledge above the floor level, which, when the machine is normally installed, will be inside the wheel track. You can limit yourself to low columns. In any case, the places for the wheels should be marked with bright, eye-catching paint.
Cover making
The car does not always stand over the pit. And so that someone does not accidentally fall into it, the pit should be covered with a strong lid. In the design of the side of the pit, grooves can be provided into which the boards will be inserted.
Warming
Working in the cold is unpleasant and inefficient, so in cold weather you can put a heater at the bottom of the pit or direct the air flow from the fan heater there. But for faster heating between the soil and the wall of the pit, a heat insulator should be laid, for example, sheets of extruded polystyrene foam (EPP).
Niches and wiring for lighting fixtures
For quick placement of tools and parts in the walls of the pit, small niches about 300 x 400 x 450 mm in size are arranged. For a passenger car, four niches are enough in the area of \u200b\u200beach wheel.
Light is necessary for work, therefore, when making the walls of the pit, it is necessary to provide places for placing lighting fixtures and sockets. The direction of the light must be adjustable.
Finishing work
Well, if the pit looks nice and clean. To do this, the internal walls can be beautifully plastered or lined with ceramic tiles. It is also possible to make a lining with a tree, but it should be impregnated with protective reagents and varnished.
Operating rules
The inspection pit should be equipped with a convenient and safe entrance and exit. For this, one or two stairs are built.
The machine installed for inspection should not block the exit from the pit.
When lighting is operated from 220 V, it is necessary to make hidden wiring, all equipment must have electrical insulation and waterproofing, and luminaires - mechanical protection, metal cases should ground.
The pit, on which there is no car, must be covered.
For an active and skillful motorist, a viewing hole is a must. You can wash the lower part of the car from dirt, change the oil, check the traction and levers only by climbing under the car. All sorts of lifting devices are not available to everyone, and you can build a viewing hole with your own hands. A good and correct pit will be a real helper for many years.
I've been looking at buying a sauna for a long time. I recently found exactly that one at an exhibition in Zyablikovo ...
A friend designed a garage for me. It remains only to find a team for implementation. Well on…
Guys, it's not complete. You don't mention Domorost, but still these guys have a problem...
Hello, thank you for the informative information. Health to you and your loved ones. Sk…
From strong winds, fences sometimes fall if they are installed unreliably. We have our own at Terem-p ...
We bought a summer cottage with a dilapidated country house. They restored it through the tower. AND …
The tm film and the zebra have nothing to do with PLEN, do not mislead people ...
We need this Vodonaeva with her cats like fifth leg dogs.
I need to make a Christmas tree out of cardboard for the office. If you do this please give me a call...
Don't chase the blizzard... In your opinion, all the great writers were prostitutes. Go...
Hello! And how can you make a cone planter for flowers, or rather, how to fasten the cone?
Four days ago I ordered a Revolts heating kit for our dacha. I'm going to pick up tomorrow...
If the apartment is ready, then why doesn’t Buzova broadcast to the whole world about moving and living ...
Like 10m. Enough tape for 1.5m of fence?!
This is most likely an Internet modem like yota. And, I remember, they used both polarizers ...