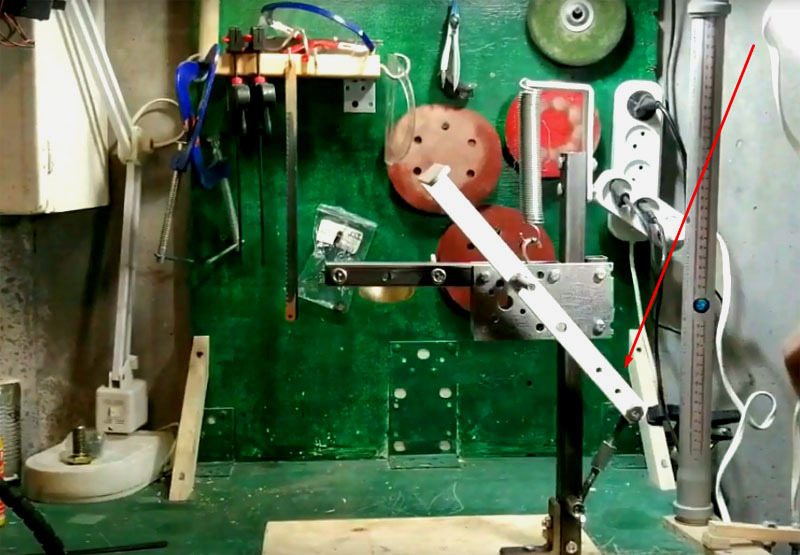
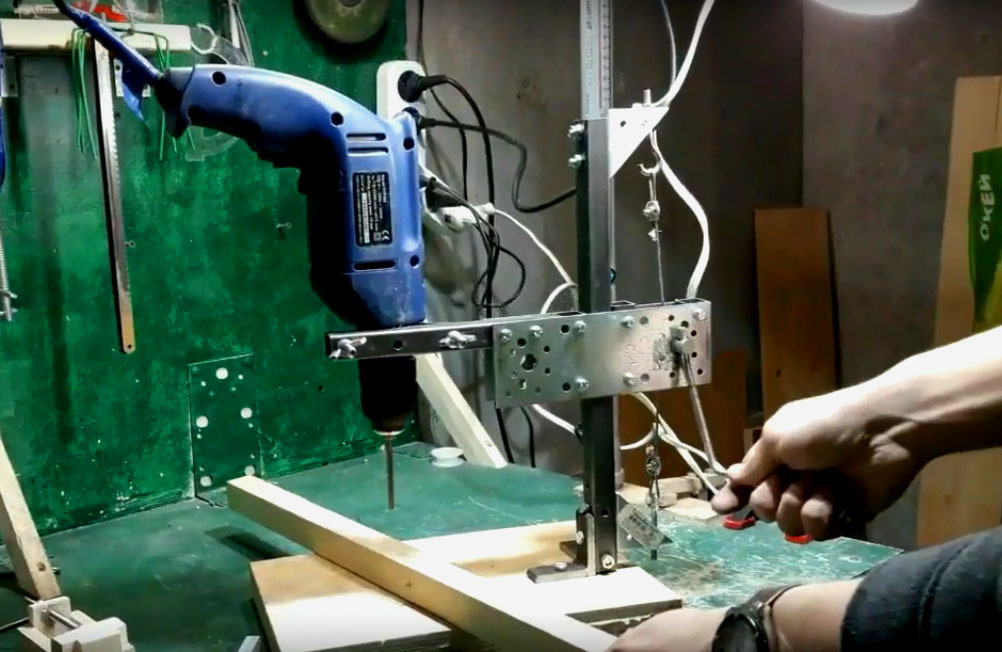
Homemade drill stand with lever or lift mechanism

click fraud protection

In addition to tools in the workshop, various stands are absolutely necessary, which facilitate the work and provide additional opportunities for using familiar tools. Various work tables and stands for electric tools play a special role in this. Grinders, saws, drills - all this can get updated functionality precisely due to additional devices. For example, mechanizing the control of a drill allows you to reduce the stress on your hands and perform precise work, like on a drilling machine. On sale you will find various options for such racks at a price of 2,000 rubles. and higher. But in principle, you can do such a design with your own hands, it is not so difficult and, moreover, allows you to adjust the tool to your needs and physical parameters. YouTube channel author Grumbler's Workshop offered two options for the execution of such a design, perhaps one of them is right for you.

Read in the article

  • 1 A little about the necessary materials and tools
  • 2 How to assemble the base of the rack
  • 3 Fixing the rack to the platform
  • 4 Rack control mechanism
  • 5 Practice with a homemade rack

A little about the necessary materials and tools

The most profitable option is to use the materials at hand, so do not rush to buy, perhaps you will find most of the parts in your bins. First of all, you need a 20 × 20 or 25 × 25 profile pipe. On average, a segment with a length of 120 cm is enough.

In addition to the pipe, you need a pair of metal corners. If there are no ready-made ones, you can make them yourself. You will also need two perforated plates, mounting bolts, a metal cable, a platinum metal lever handle and a piece of cable.

Prepare a file for metal, a drill and a wrench from the tool. The beauty of this model is that no welding is required.

How to assemble the base of the rack

What's important in a drill stand? Strength, mobility and the right height. Strength will be provided by a profile pipe, but mobility will be due to a special design and a lifting and lowering mechanism.
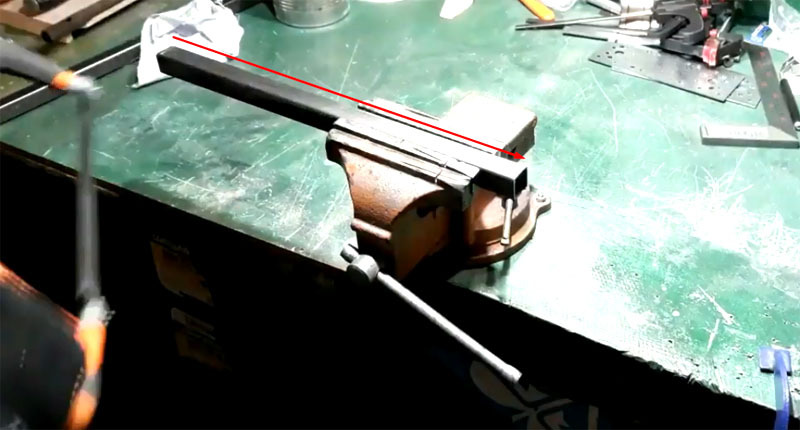
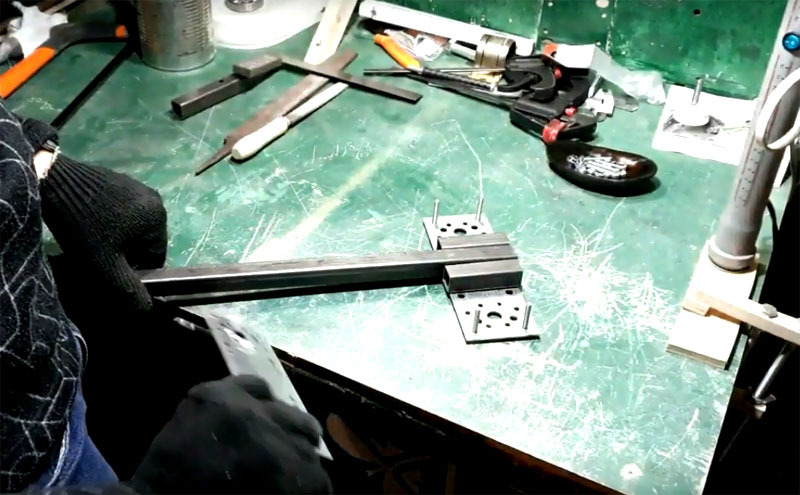
Homemade drill stand
PHOTO: YouTube.com
The main part of the stand is a piece of pipe about 60-70 centimeters long. The cuts must be smooth and polished.
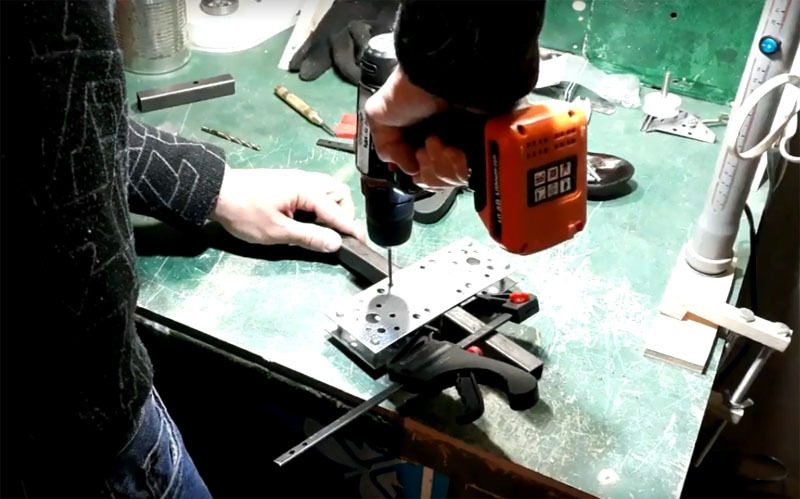
The design of the stand is such that the sleeve with the drill should move along the guide up and down. To do this, cut off two pieces of a 10 cm long profile pipe and fix them on the plate so that they fit snugly against the main guide. Do not fix the guide itself on the plate.
PHOTO: YouTube.com
The design of the stand is such that the sleeve with the drill should move along the guide up and down. To do this, cut off two pieces of a 10 cm long profile pipe and fix them on the plate so that they fit snugly against the main guide. Do not fix the guide itself on the plate.
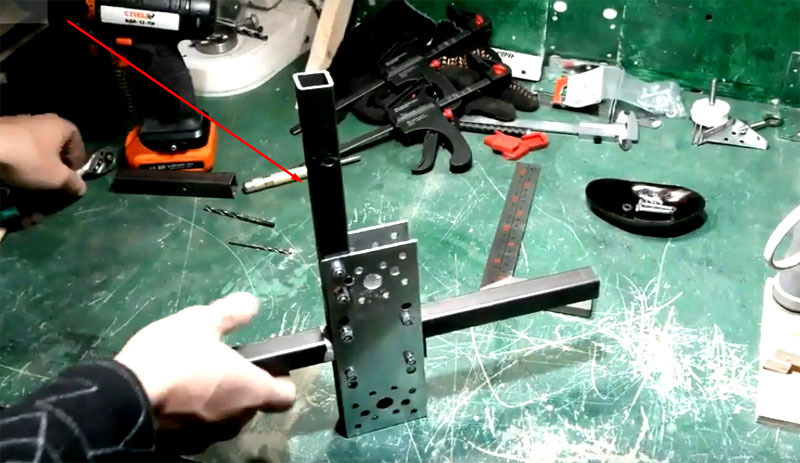
Cover this structure with the second plate and bolt it together. Check: the two plates must move relative to the main body without tilting to the side and without much effort.PHOTO: YouTube.com
Cover this structure with the second plate and bolt it together. Check: the two plates must move relative to the main body without tilting to the side and without much effort.
Now you can fasten the sleeve between the plates. It is located at an angle of 90 ° from the main post and is fixed to the movable part with a pair of boltsPHOTO: YouTube.com
Now you can fasten the sleeve between the plates. It is located at an angle of 90 ° from the main post and is fixed to the movable part with a pair of bolts

Fixing the rack to the platform

Your structure should be stable on the workbench. This stability will provide a wide platform, which is better made of solid wood. Keep in mind: together with the drill, the stand will weigh a lot, so the platform should be at least 20 × 30 cm.
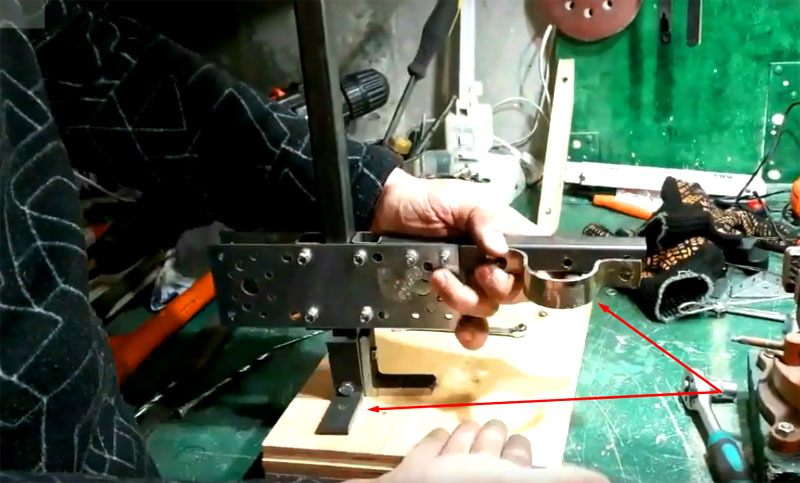
The stand is placed in the corner of the platform so that the center of gravity, which the drill will become, is in its centerPHOTO: YouTube.com
The stand is placed in the corner of the platform so that the center of gravity, which the drill will become, is in its center
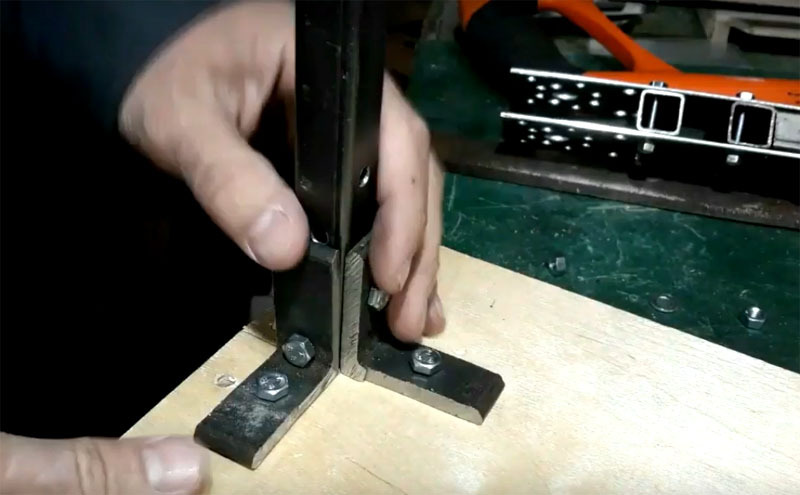
Attach the stand to the corners. The author made them from a piece of a larger profile pipe, but you can also use ready-made parts that are easy to find on sale.PHOTO: YouTube.com
Attach the stand to the corners. The author made them from a piece of a larger profile pipe, but you can also use ready-made parts that are easy to find on sale.

Rack control mechanism

As already mentioned, the author has proposed two ways to control the rack. Both are quite effective, but have proven to be different in practice.
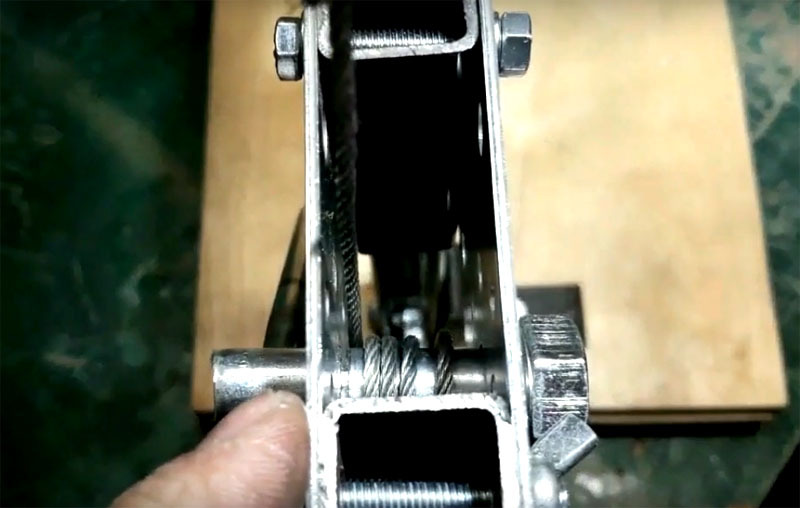
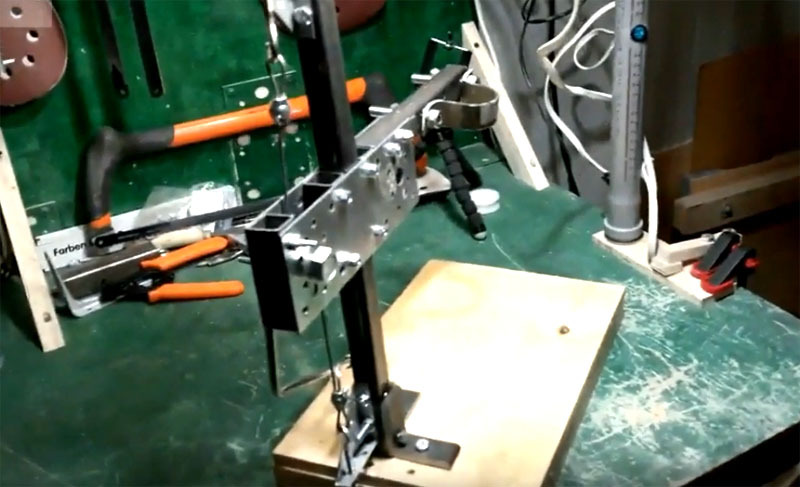
The first version of the mechanism for the movement of the sleeve with a drill is an elevator one. It consists of a rotating bolt with a cable wound around it, one end of which is attached to the top of the rack.PHOTO: YouTube.com
The first version of the mechanism for the movement of the sleeve with a drill is an elevator one. It consists of a rotating bolt with a cable wound around it, one end of which is attached to the top of the rack.
The elevator is controlled by a handle, which must be turned in one direction or the other to move up or downPHOTO: YouTube.com
The elevator is controlled by a handle, which must be turned in one direction or the other to move up or down

Practice has shown: such a mechanism is easy to operate, but does not give the required pressure on the drill, the stand moves in jerks. This is not the best option from the existing ones, although you can get used to it. The second version of the device turned out to be much more convenient in practice.
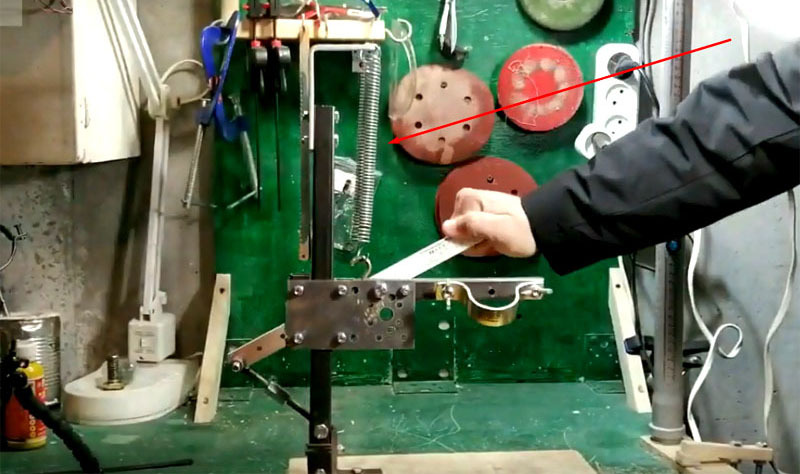
The second option provides a movable lever that returns the drill to its original position using a spring.PHOTO: YouTube.com
The second option provides a movable lever that returns the drill to its original position using a spring.
The length of the arm should be selected individually. The drill itself is attached to the shoulder of the rack with a bracket. In this case, the position of the drill will be on the side of the rack, this is the main design difference from the factory models. But this situation does not in any way affect the efficiency of the tool.PHOTO: YouTube.com
The length of the arm should be selected individually. The drill itself is attached to the shoulder of the rack with a bracket. In this case, the position of the drill will be on the side of the rack, this is the main design difference from the factory models. But this situation does not in any way affect the efficiency of the tool.

Practice with a homemade rack

It is very easy to work with such a rack.
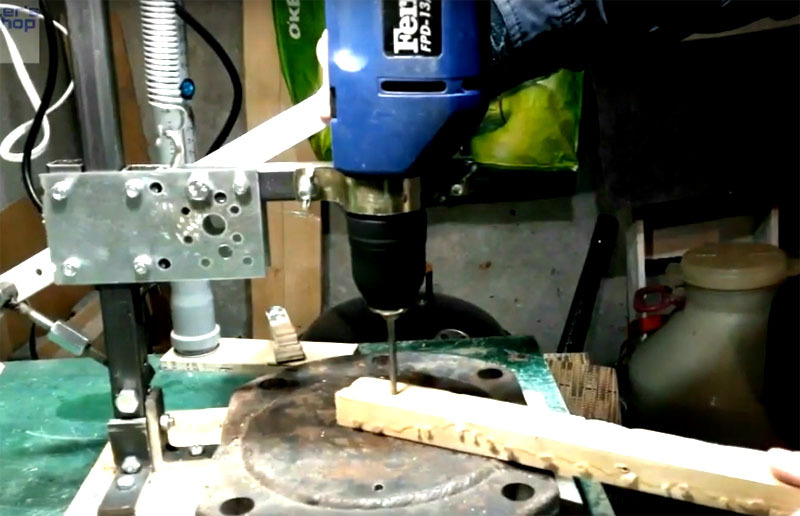
Attach the drill to the shoulder of the stand with a bracket and plug it in, fixing the button. Then you simply operate the lifting mechanism by placing the necessary partsPHOTO: YouTube.com
Attach the drill to the shoulder of the stand with a bracket and plug it in, fixing the button. Then you simply operate the lifting mechanism by placing the necessary parts
An elevator drill can handle wood easily, but much slower with metal. But the lever with a spring will master any materials without any problems.PHOTO: YouTube.com
An elevator drill can handle wood easily, but much slower with metal. But the lever with a spring will master any materials without any problems.

The device is primitively simple, assembled without welding, which is very convenient. The most difficult thing in all the work is to cut the profile into the required segments. Everything else will take a few minutes.

And here is another stand that is not difficult to perform and is available in terms of materials in the video master class:

What do you think about the presented model? How clear and accessible was this master class? What's left behind the scenes for you? Write about it in the comments! Send us a photo of your designs with a description of the manufacturing process! The most interesting master classes will certainly be published!

Discuss0