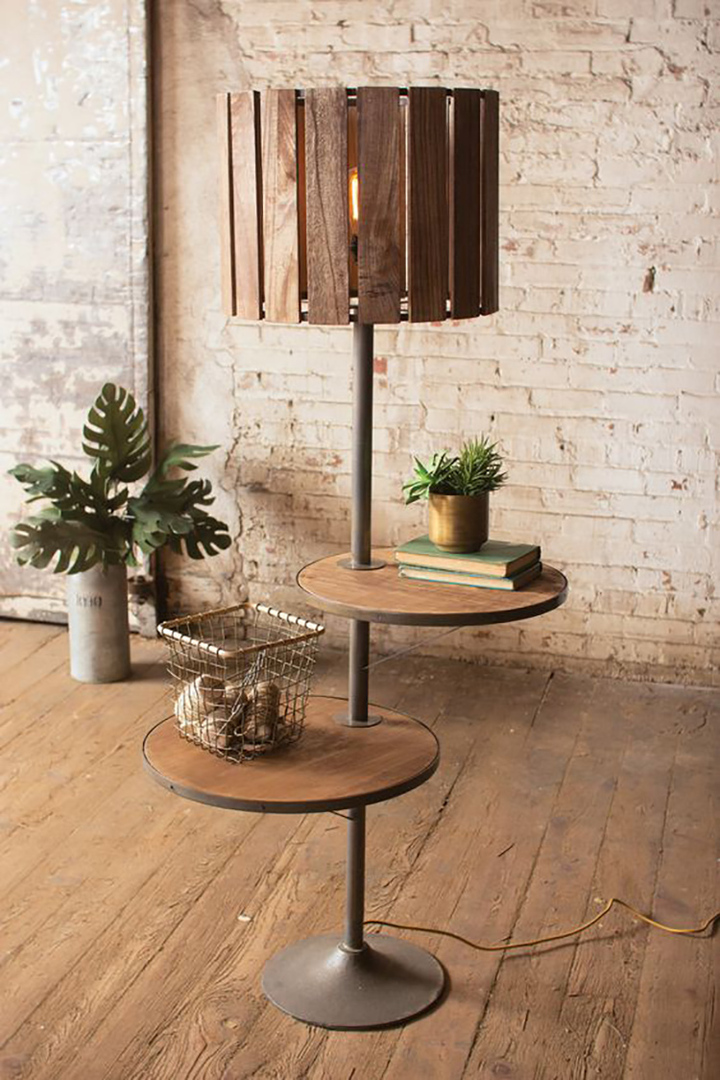
Floor lamps are one of the additional mobile sources of artificial lighting in the apartment. They perform not only applied, but also decorative functions. With their help, the zoning of the space of the room and the placement of accents in the design are carried out. In this article, we will tell you how to make a floor lamp with your own hands at home, as well as provide a gallery for ideas for its restoration, decoration and manufacturing.
Read in the article
- 1 Floor lamp design
- 1.1 Base
- 1.2 Rack
- 1.3 Shade
- 1.4 Additional materials
- 2 How to make a floor lamp with your own hands: from idea to execution
- 2.1 Metal pipe floor lamp by Jessica Jones
- 2.2 Loft-style floor lamp made of polymer materials "like metal", the author of the project is Istomin Gennady
- 2.3 Floor lamp on a tripod
- 2.4 Wooden floor lamp
- 2.5 Isolona floor lamp
- 2.6 DIY floor lamp ideas
- 3 We update the old floor lamp
- 3.1 Making a new lampshade
- 3.2 We restore and decorate an old lampshade
- 4 Summing up
Floor lamp design
The name of the floor lamp comes from the French word torche, which means torch. Initially, it consisted of a stand, tripod (stand, leg, barrel) and a light source covered lampshade. At the moment, the design of these devices is more diverse. However, there are certain fundamental features that a floor lamp corresponds to.
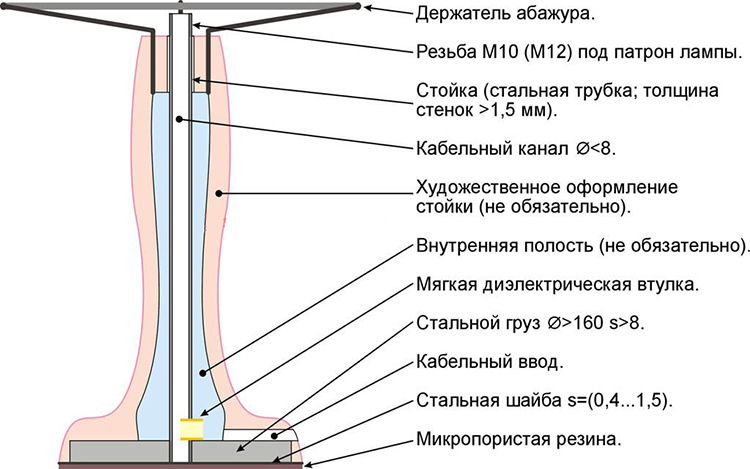
Base
The main parameter of the base of the floor lamp is stability. It is characterized by the combination of weight and area. For example, for vertical models, a small base is allowed, and for cantilever models, it should be more stable, since the tripod structure is subjected to significant bending effects.
It should be remembered that the smaller the area of the base, the more weight it must have in order to achieve the same stability. Ultimately, carrying the lighting fixture can be very inconvenient.
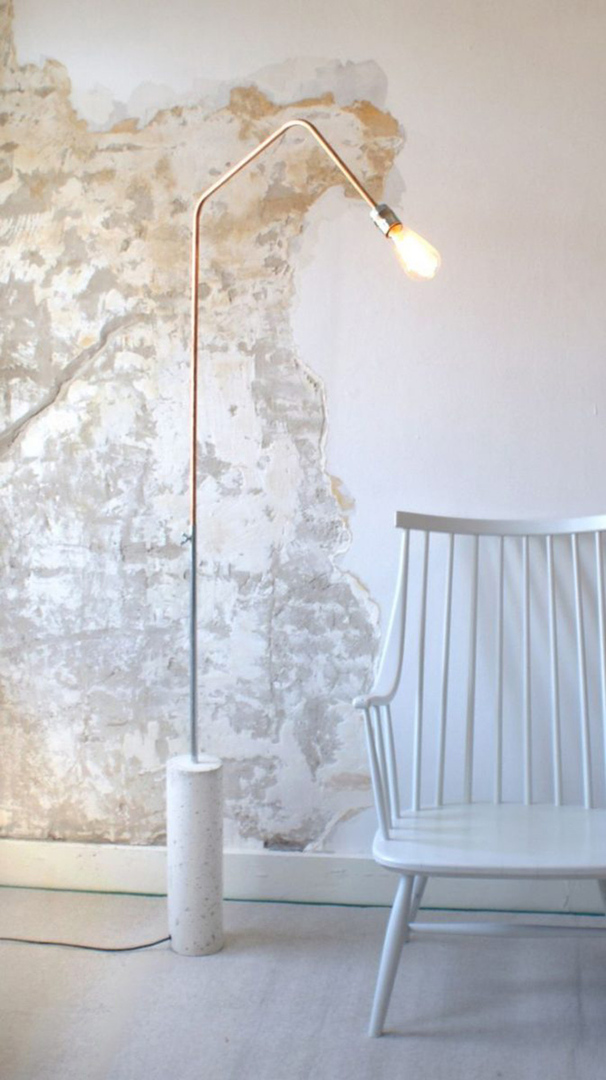 PHOTO: landshaftportal.ru
Rack
The stand (tripod) performs several functions at once. Adjusts the height and / or direction of the light source. Hides the power wires. Serves as a supporting base for the lampshade. Depending on the design, it can additionally play the role of a table, whatnot, bedside table, etc.
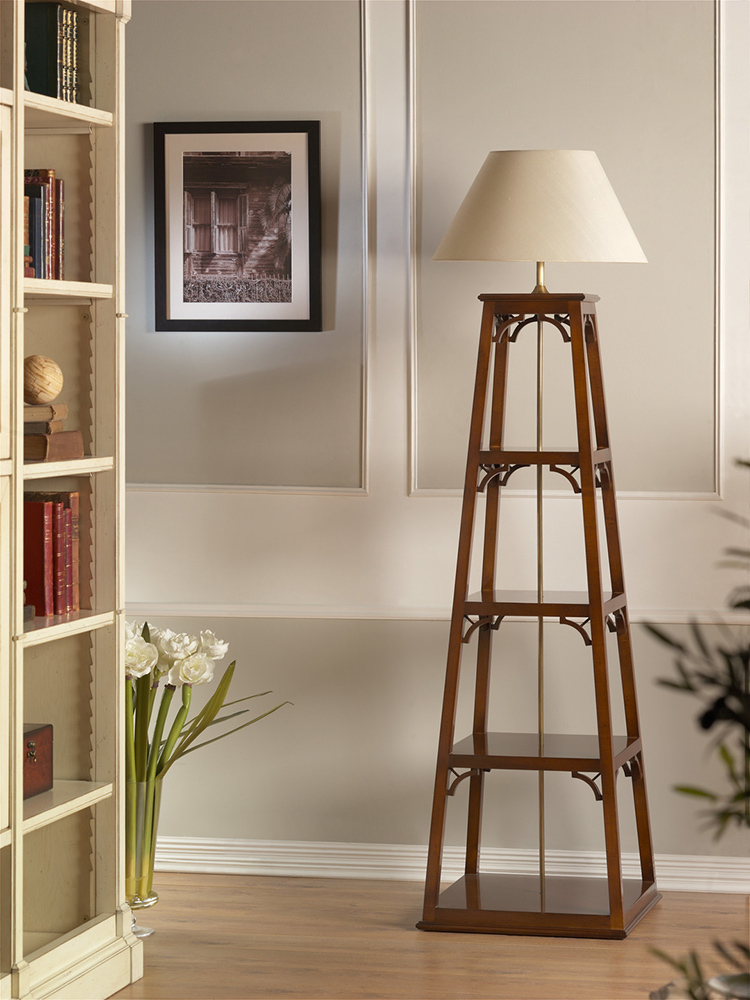 PHOTO: postroika.biz
The material of manufacture, as well as the shape, can be very different. From ascetic chrome-plated metal pipes to sculptures, musical instruments, etc.
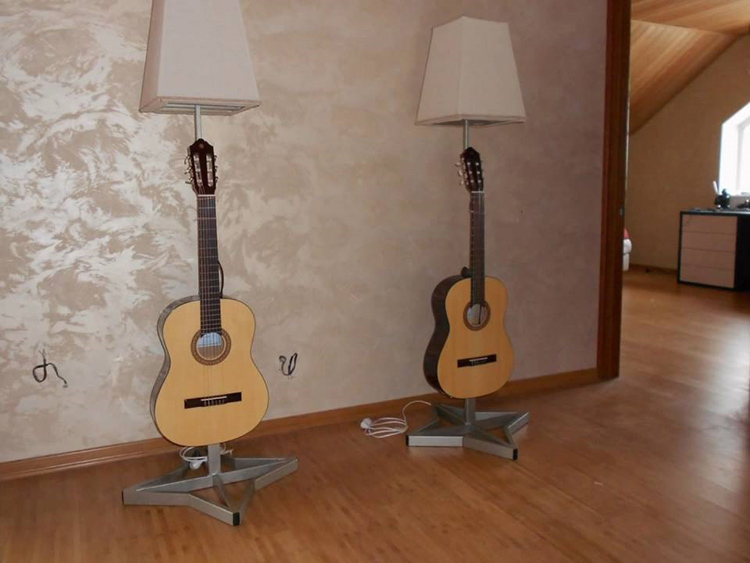 PHOTO: i.ytimg.com
Shade
To diffuse light from a light bulb in floor lamps, textile or paper lampshades and glass shades are traditionally used. However, recently other raw materials are often used: wood, plastic, metal, etc. When choosing a material for the lampshade should be remembered for its light transmittance so that the lighting fixture does not turn out to be a useless item decor.
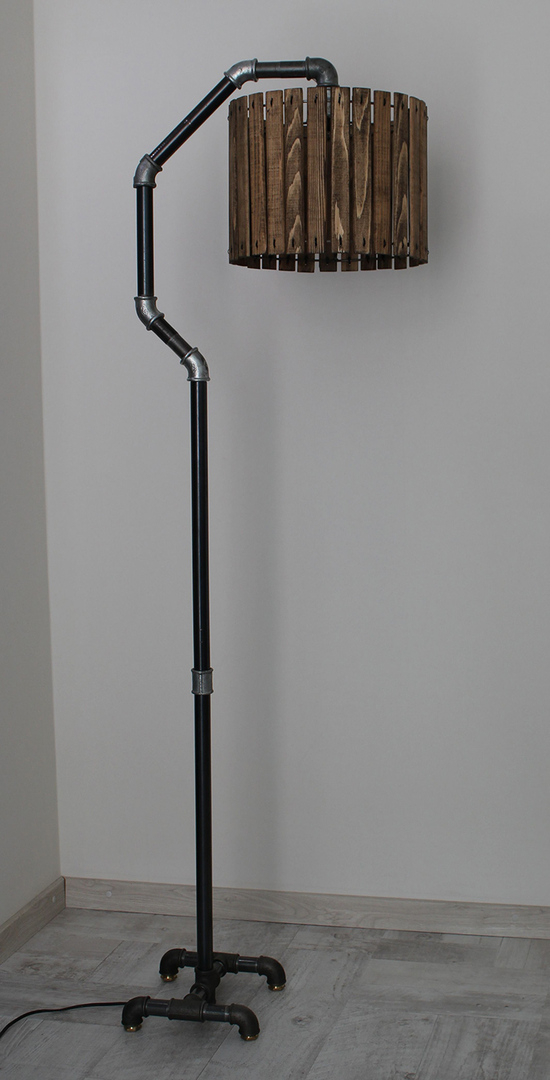 PHOTO: i.pinimg.com
If, when creating a floor lamp, the main idea is to obtain an effective light source, then it is quite possible to abandon the lampshade altogether. In this case, decorative bulbs are used: retro, candle, ball, etc. In addition, as a lampshade, you can use a directional light device: lamps with a deflector, headlights, spotlights, etc.
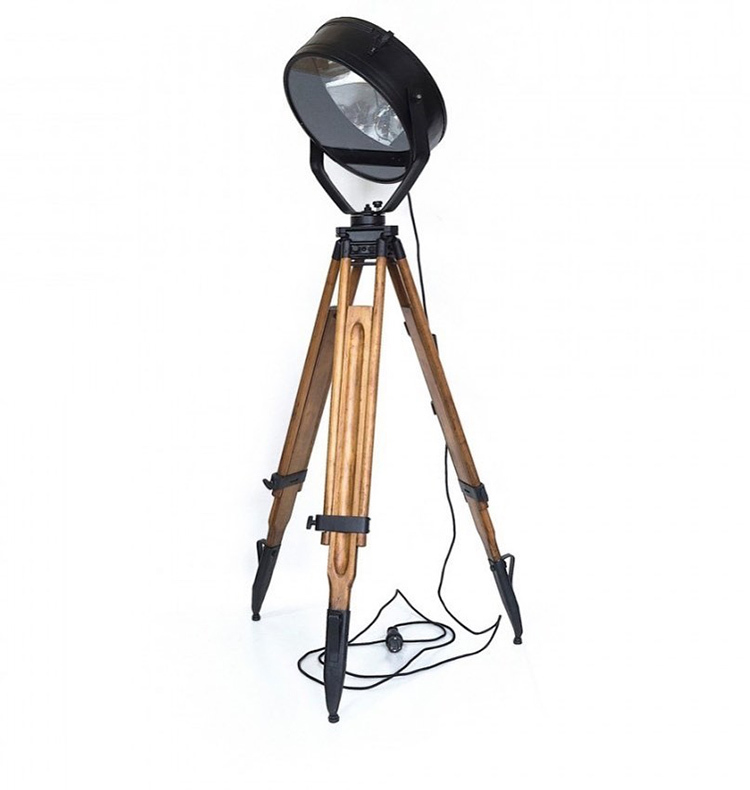 PHOTO: encrypted-tbn0.gstatic.com
Additional materials
In addition to the main structural elements, the floor lamp includes:
- cartridges. The most popular E27 and E14. Best used with ceramic body. They are the most fire resistant. For models without lampshades, you can use retro-style cartridges with a built-in switch;
- switches. Most often they cut into the power supply wire - floor-mounted, for sconces - push-button. But they can be mounted directly into the body of the floor lamp - for sconces with a chain (KTE), mortise push-button, etc.;
- forks. They do not differ from similar devices for other electrical appliances. The only recommendation is to choose models where the cable is led at an angle;
- cable. Three-core (with grounding) cross-section not less than 0.5 mm. Reinforced PVC insulation overall and separately for each core.
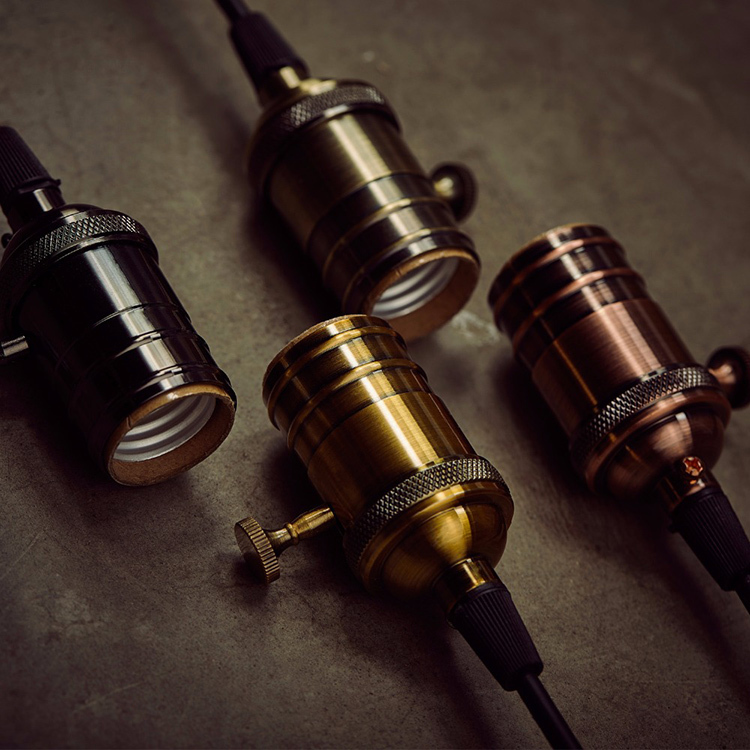 PHOTO: edisonelectro.ru
How to make a floor lamp with your own hands: from idea to execution
Before starting work, it is imperative to decide on the main idea: construction and design, taking into account the available parts and materials. It is necessary to clarify the main dimensions - the height, size of the lampshade and the base, which will determine how much space the floor lamp will take on the floor.
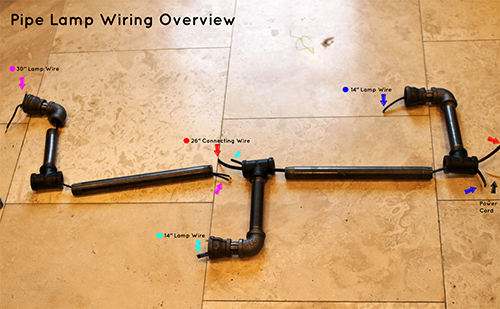
Metal pipe floor lamp by Jessica Jones
Depending on the model and design of the performance, such a floor lamp can be suitable for the styles of steampunk, urban, loft, techno, etc. The easiest floor lamp to assemble from water pipes and fittings with a diameter of 15-20 mm (½ or ¾ respectively).
For manufacturing, you will need the following materials:
- steel pipes with a diameter of 20 mm and a length: 90 cm - 1 piece, 30 cm - 2 pieces, 20 cm - 4 pieces, 15 cm - 4 pieces, 5 cm - 6 pieces;
- corners 20 mm - 8 pieces;
- tee (t-shaped) 20 mm - 5 pieces;
- cross splitter 20 mm - 1;
- adapters from ¾ to 1ʺ - 1;
- plug 20 mm - 1;
- metal pipe flanges - 4 pieces.
You will also need lamps, plinths, a cord with a switch, paint in cylinders.
| Illustration | Description of action |
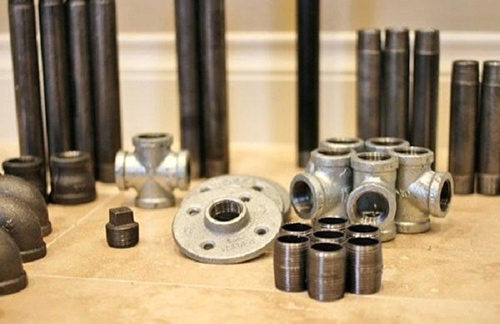 | Required details |
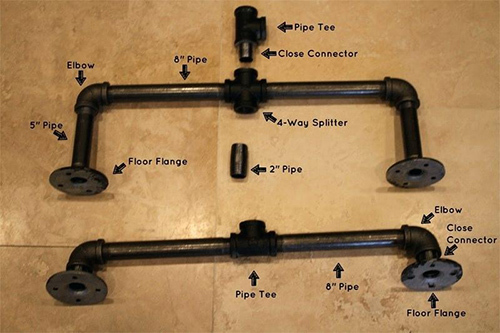 | Assembling the base |
 | After collecting the base and screwing the tee to it, we immediately insert the wire. In a fully assembled structure, this will be much more difficult. |
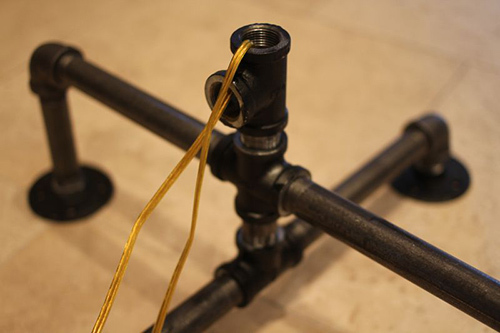
 | Assembling the main rack |
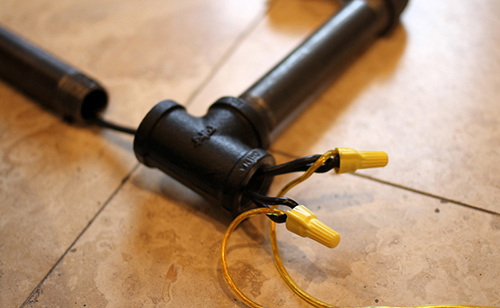 | We twist and carefully insulate the wires with electrical tape or special caps |
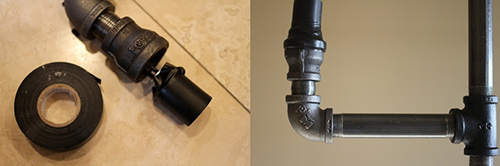 | It is recommended to fasten the base through black electrical tape. |
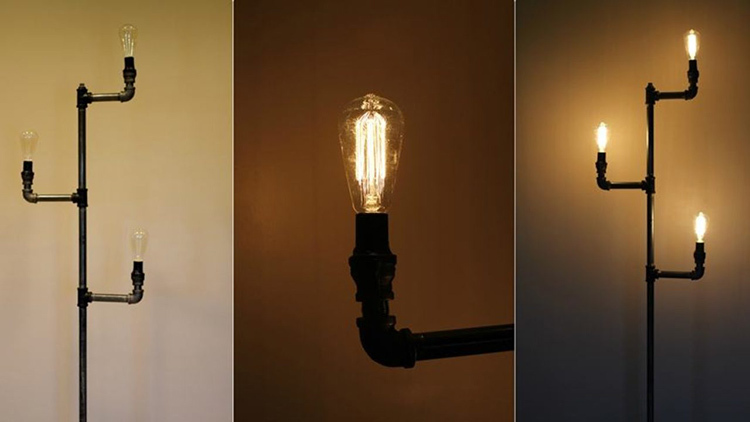 PHOTO: howaboutorange.blogspot.com
Loft-style floor lamp made of polymer materials "like metal", the author of the project is Istomin Gennady
The manufacture of floor lamps from polymer materials is much easier and more affordable due to their low cost and low weight. At the same time, having a can of bronze paint, the floor lamp can easily be given the appearance of a metal product.
For manufacturing, you will need the following materials:
- PVC pipe with a diameter of 20 cm and a length of 3 m;
- water bottle 20 l - for the shade;
- couplings and adapters for fastening the cartridge and base;
- wire, switch, cartridge;
- spray paint: bronze, glossy black.
Tools:
- soldering iron for PVC pipes;
- hacksaw and knife;
- plastic bowl for pouring the base.
| Illustration | Description of action |
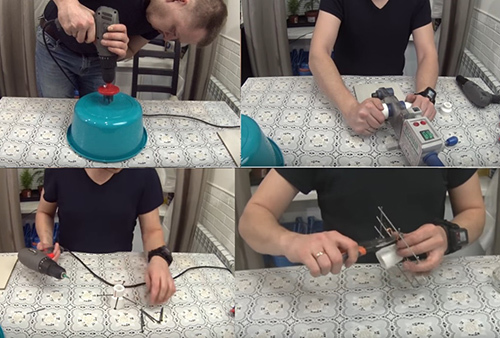 | We drill a hole in the basin. We solder the adapter to the pipe trimming, screw the screws into the pipe and fasten it to the metal mesh cut along the diameter of the bottom of the basin. How to create a base fill reinforcement |
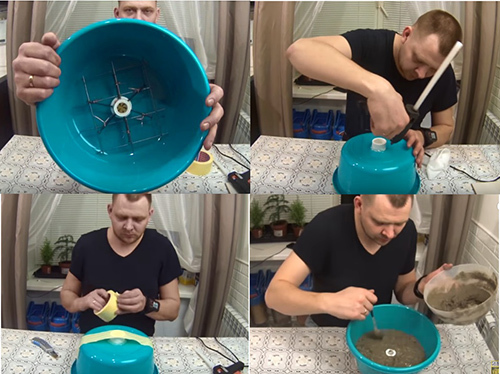 | We insert the workpiece into the hole in the basin. We carefully seal the gaps from the outside with silicone glue. We additionally strengthen it with masking tape. We fill in concrete |
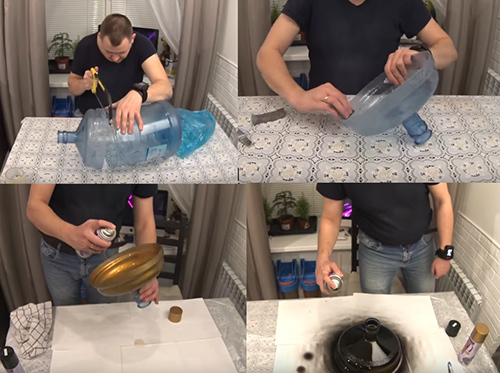 | Cut off the top from a 20 liter water bottle. We level the edges with fine sandpaper, and degrease the entire part. We paint the inner surface in 2 layers with bronze paint, and the outer one with glossy black |
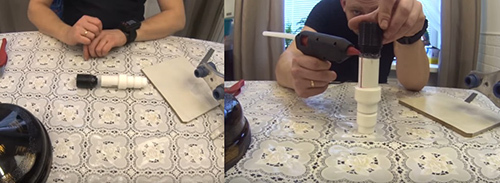 | We solder the adapter for 32 mm and the sleeve for 20 mm - this is the base for the base and the holder for the shade. Using a glue gun, we attach the cartridge to the base |
 | We weld the workpiece with the chuck to the top of the rack. We weld a tee to the bottom of the rack, through which the switch will be brought out, after which we connect both parts together. We remove the concrete base from the mold. We attach the assembled stand to the base adapter |
 | We stretch the wire from the base inside the pipe, bring it to the tee, attach it to the switch and the base. We paint the rack with black spray paint. Attach the lampshade |
You can learn more about making a loft-style lamp by watching the video:
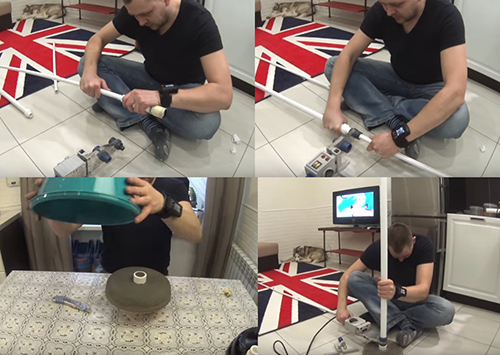
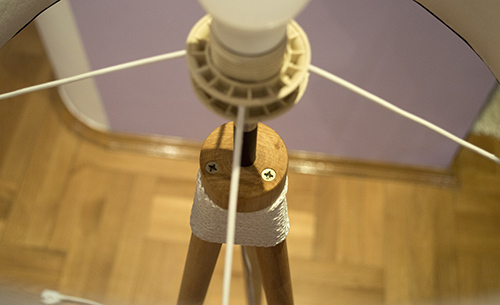
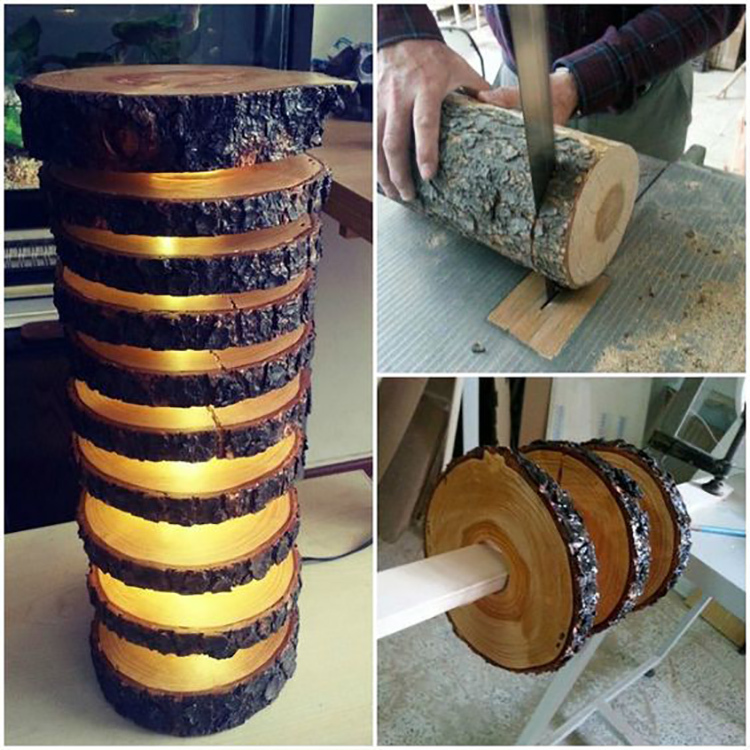
Floor lamp on a tripod
One of the easiest options to manufacture. To create it, you will need the following materials:
- thin wooden cuttings from shovels, rakes or hoes;
- wooden wheel (decor) with a diameter of 10-15 cm;
- old magnetic roller from the cartridge to the laser printer - the model does not matter;
- base;
- metal frame for the lampshade.
| Illustration | Description of action |
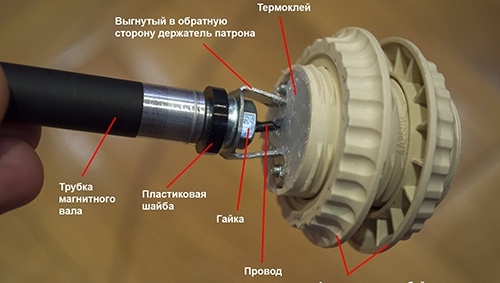
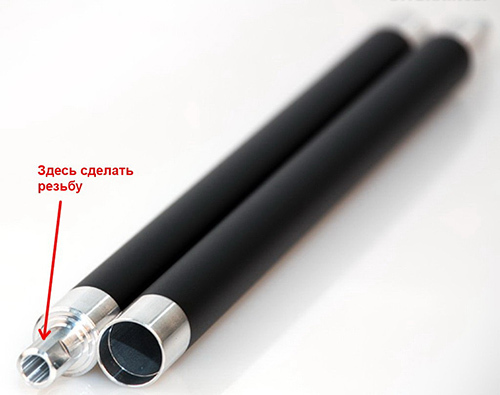 | We take a pipe from the magnetic shaft and using a conventional steel nut (soft metal holder) of the corresponding diameter, we cut a thread |
 | We fix the base |
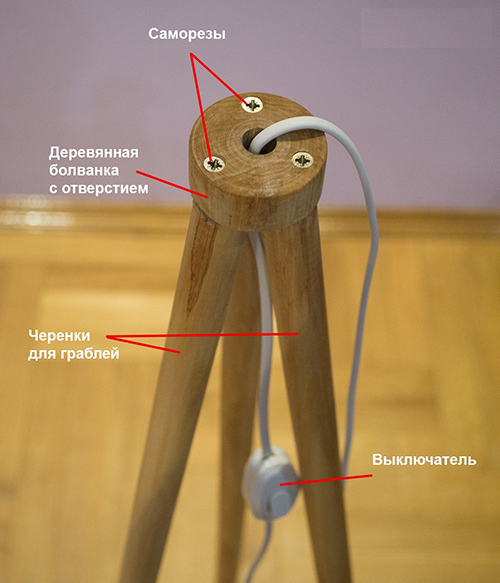 | We cut the ends of the cuttings with a hacksaw at a slight angle and fasten them with screws to a wooden wheel |
 | Insert the cut magnetic shaft into the central hole of the wheel, through which we pull the electric cable |
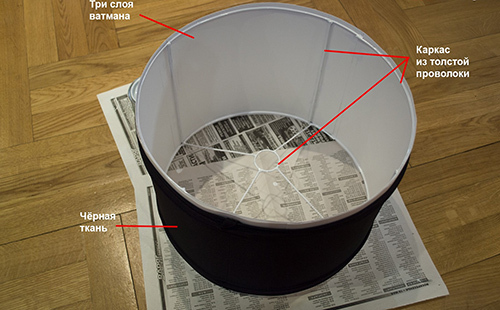 | We glue several layers of whatman paper on the wire frame of the lampshade, and then cover it with a cloth |
 | Installing the lampshade on the base |
 PHOTO: brainsly.net
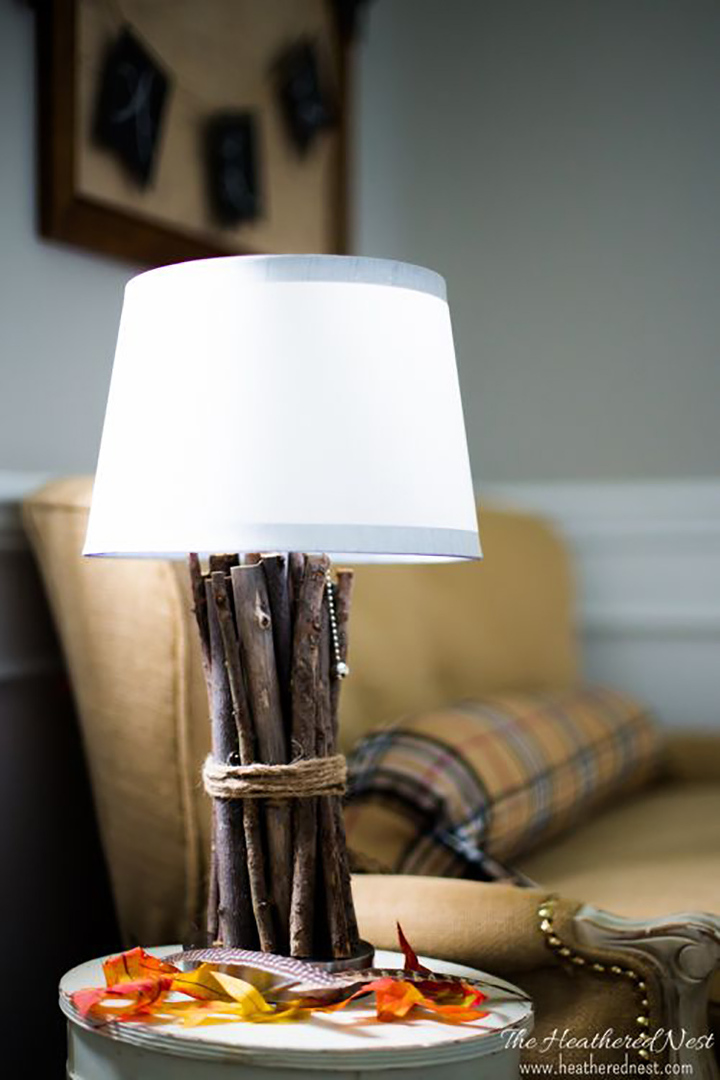
Wooden floor lamp
A more complex structure that requires a certain skill in carpentry work. For manufacturing, you will need the following materials:
- for the rack - wooden slats 30 × 50 mm, 1-1.2 m long - 4 pieces;
- for the base - wooden slats 30 × 50 mm - 1 running meter;
- edged board - 300 × 300 × 25 mm - 1 piece;
- base, cable, switch;
- tinted varnish for wood.
| Illustration | Description of action |
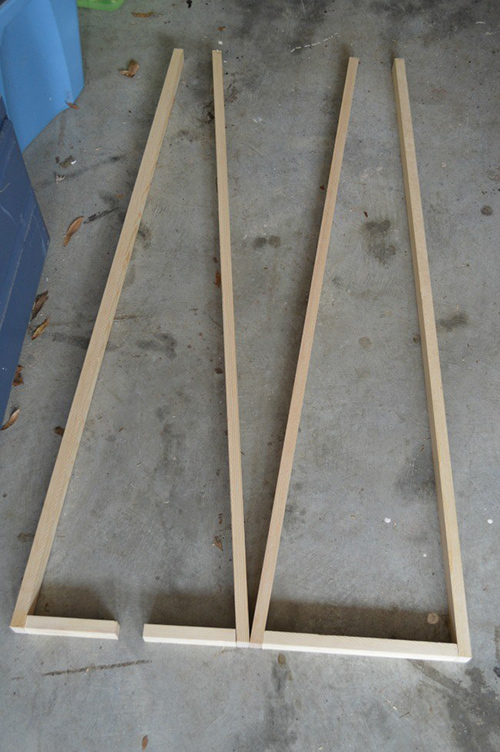 | Cut the rack rails to length |
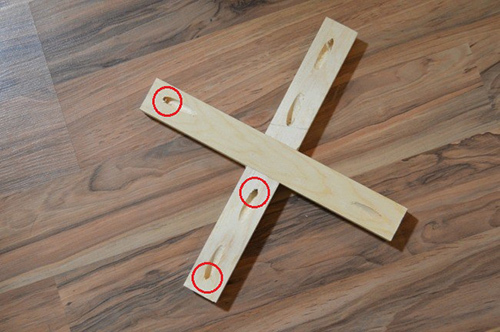 | We cut off the base slats and drill secret holes in them for fastening with screws |
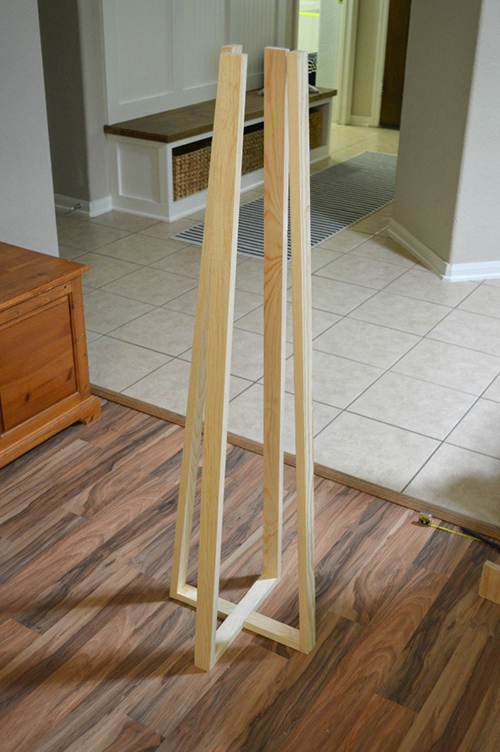 | Assembling the rack structure |
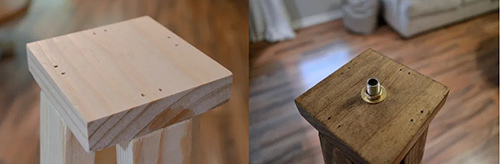 | We fasten the supporting base to the rack and drill a hole for attaching the base. We collect and install the lampshade |
 PHOTO: houseologie.com
Isolona floor lamp
The original design is represented by a luminaire with a frameless Isolon floor lamp. To make it you will need:
- sheet isolon - 3-4 running meters;
- metal-plastic or PVC pipe for the rack and base - 3-4 m;
- chuck with fastening ring - better than E14;
- sleeve for the chuck of the corresponding diameter;
- cable, switch, plug;
- dye.
Tools:
- glue gun;
- construction hair dryer;
- knife and scissors.
Preparatory stage. We make a stencil for petals from paper and cut blanks from isolon 8 pieces - 150 × 150 mm² and 12 pieces - 200 × 200 mm².
| Illustration | Description of action |
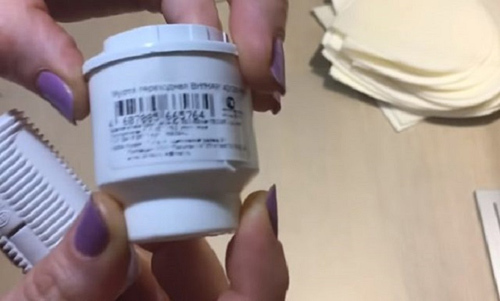 | The retaining ring is removed from the chuck and glued to the coupling |
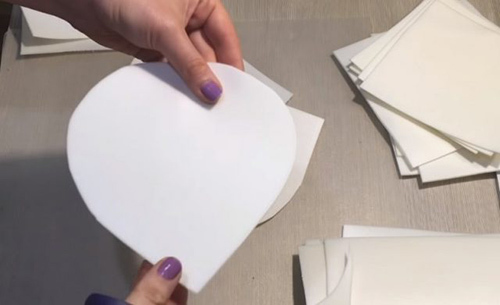 | We cut the required number of petals from the isolon according to the previously prepared patterns |
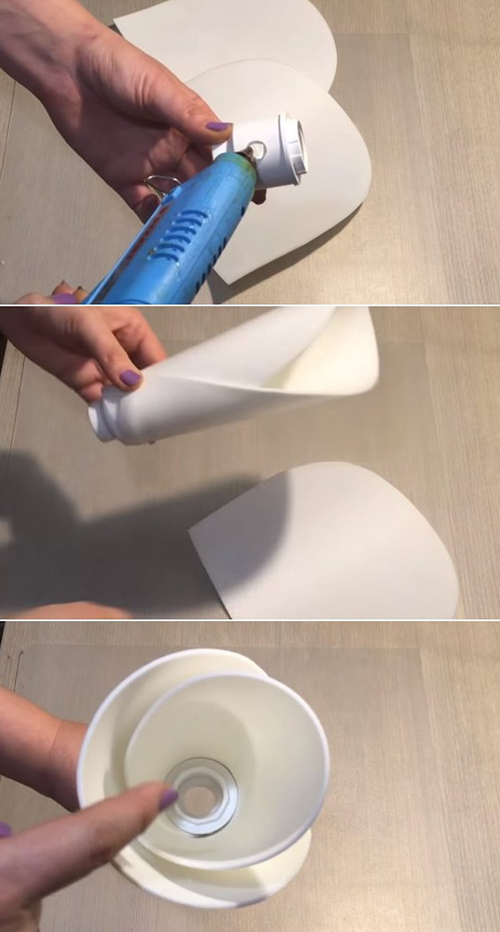 | We glue the sheets to the sleeve. Small at first, then large |
 | Using a construction hair dryer, soften the isolon and, using a round object (ceiling, ball, jar), form a relief |
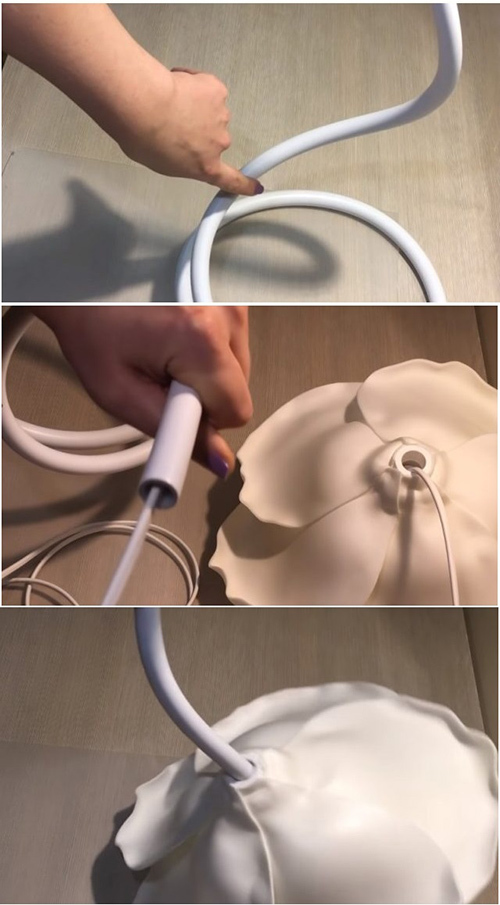 | We make a loop from the pipe that serves as a supporting base. We pass a wire through it and attach it to the cartridge through the sleeve |
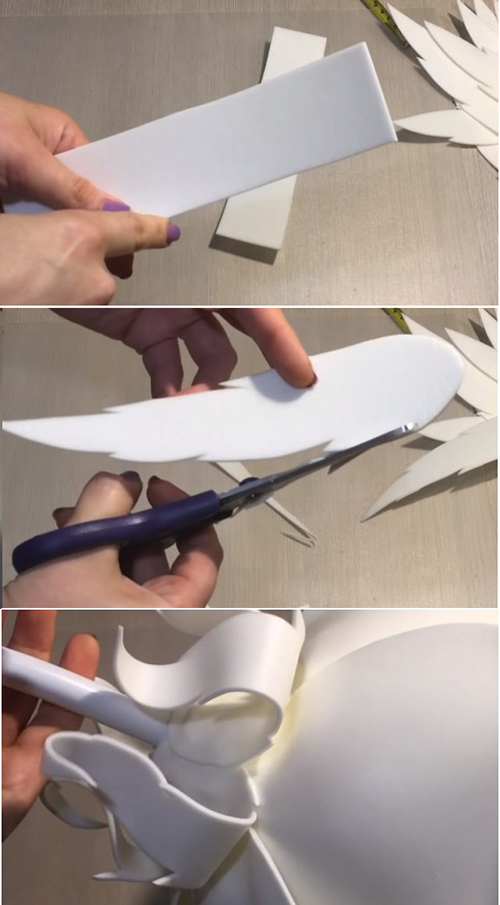 | We glue the final decor in the form of leaves and paint the product from a spray can |
 PHOTO: handmade-expert.info
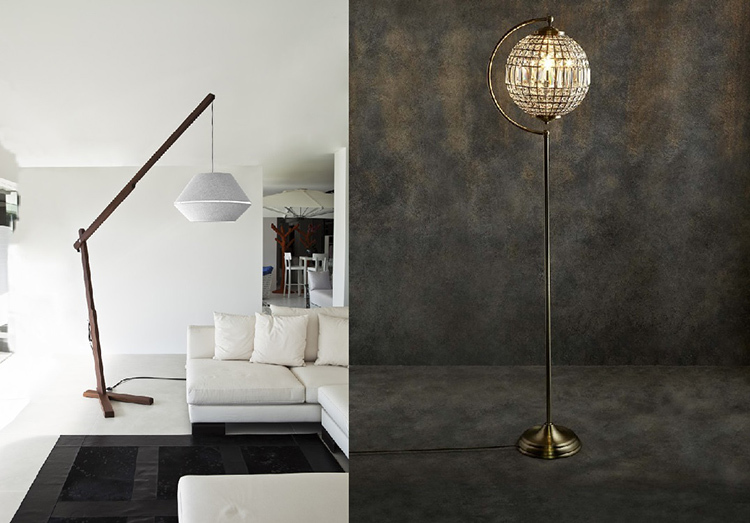
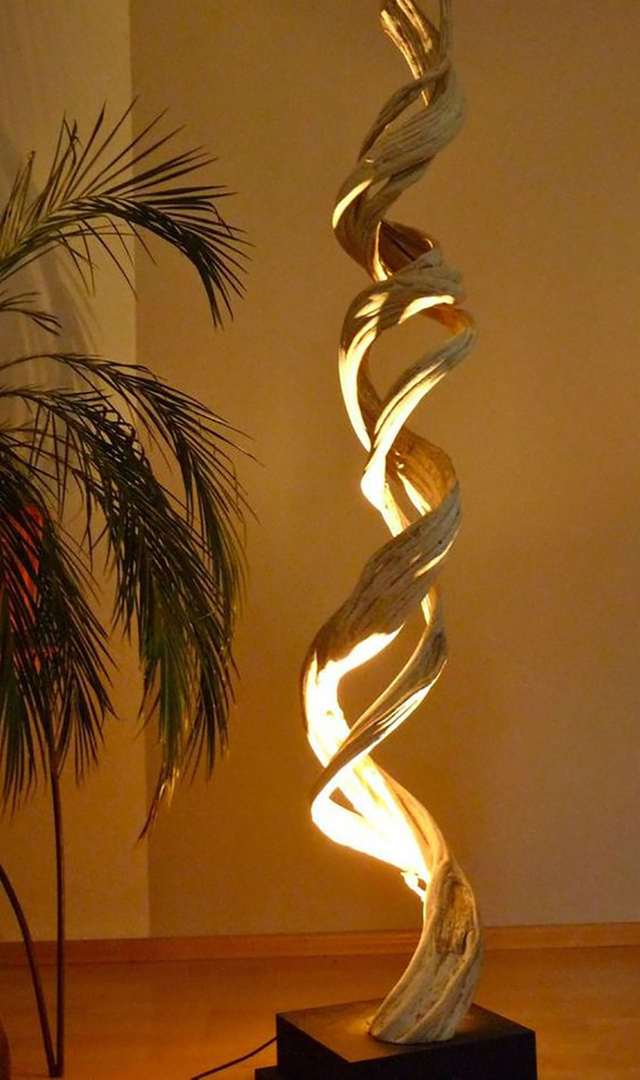
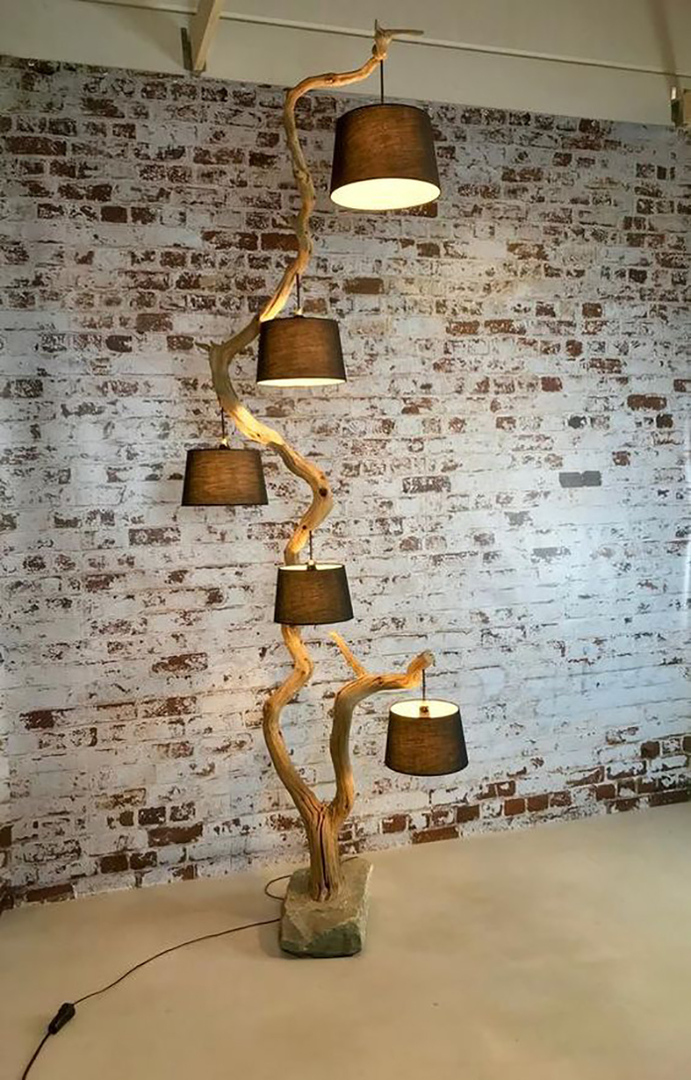
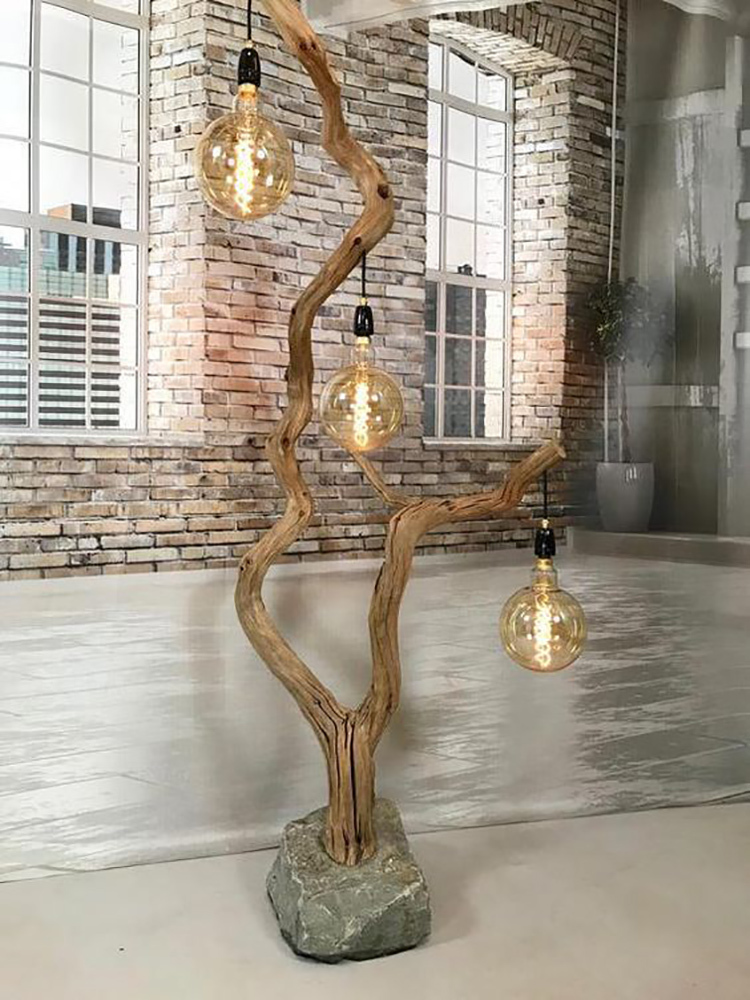
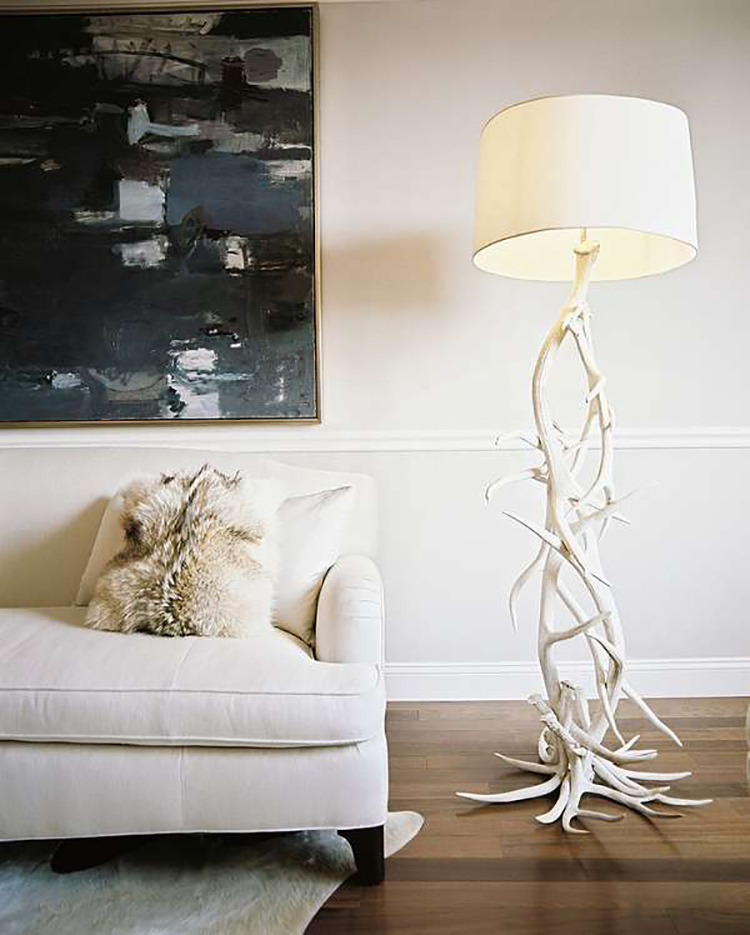
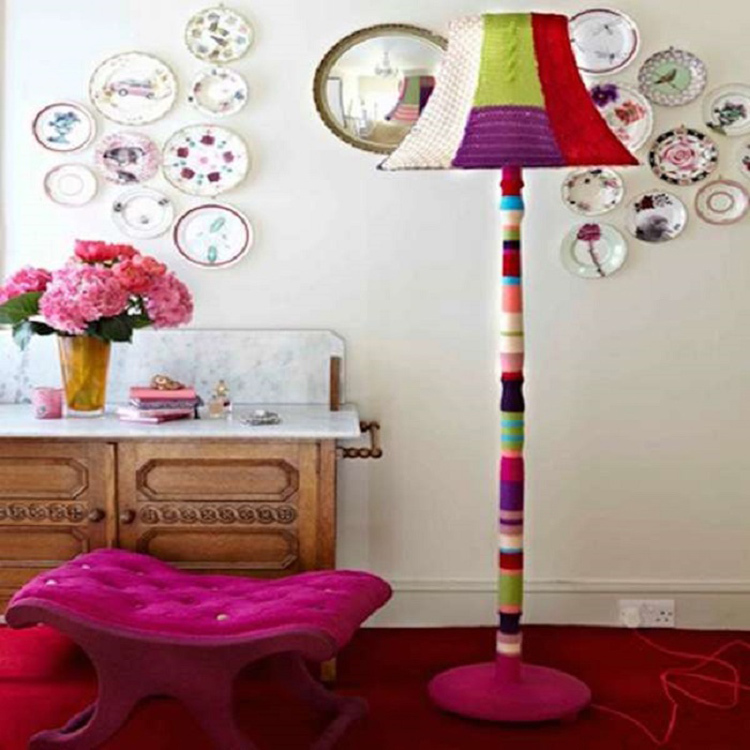
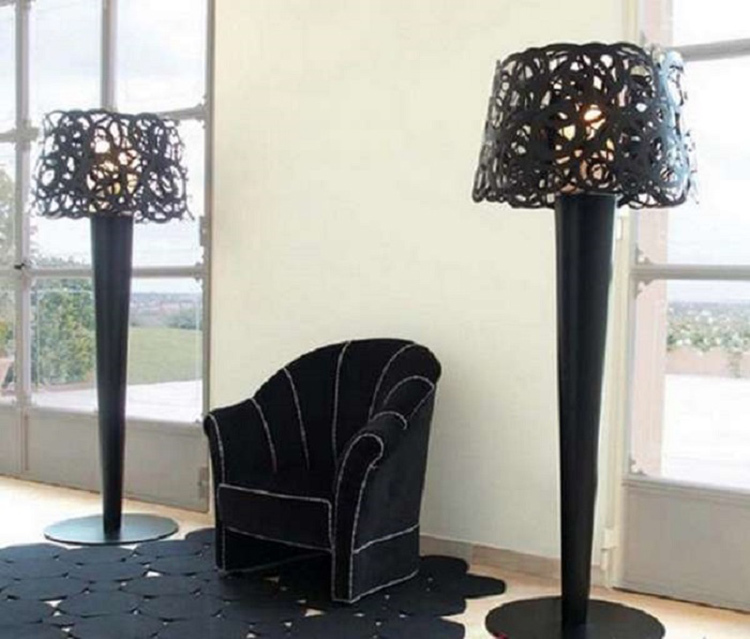
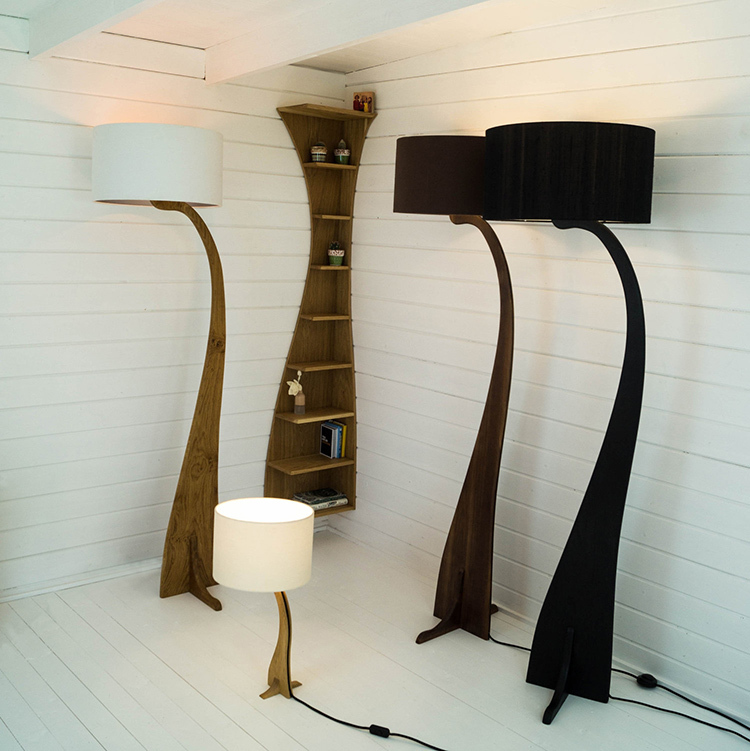
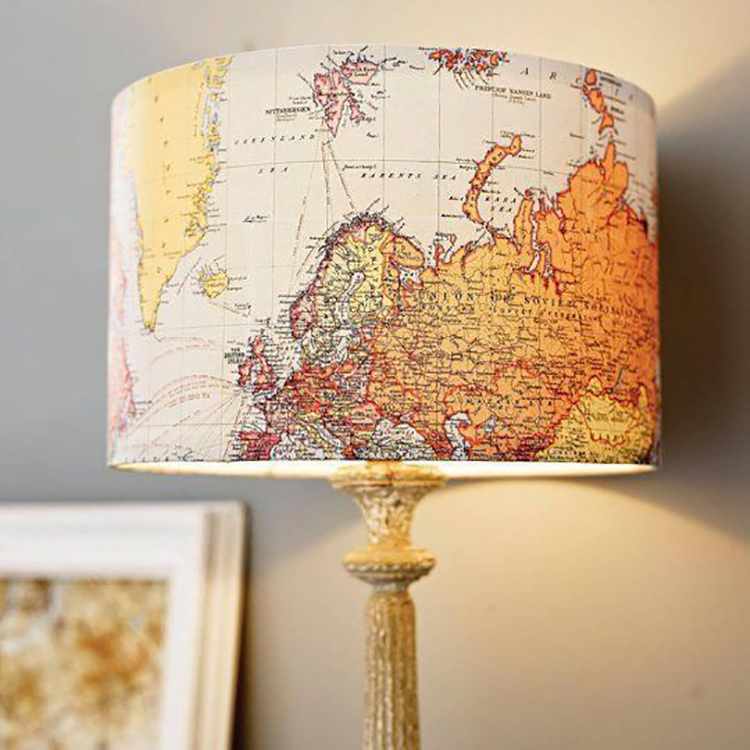
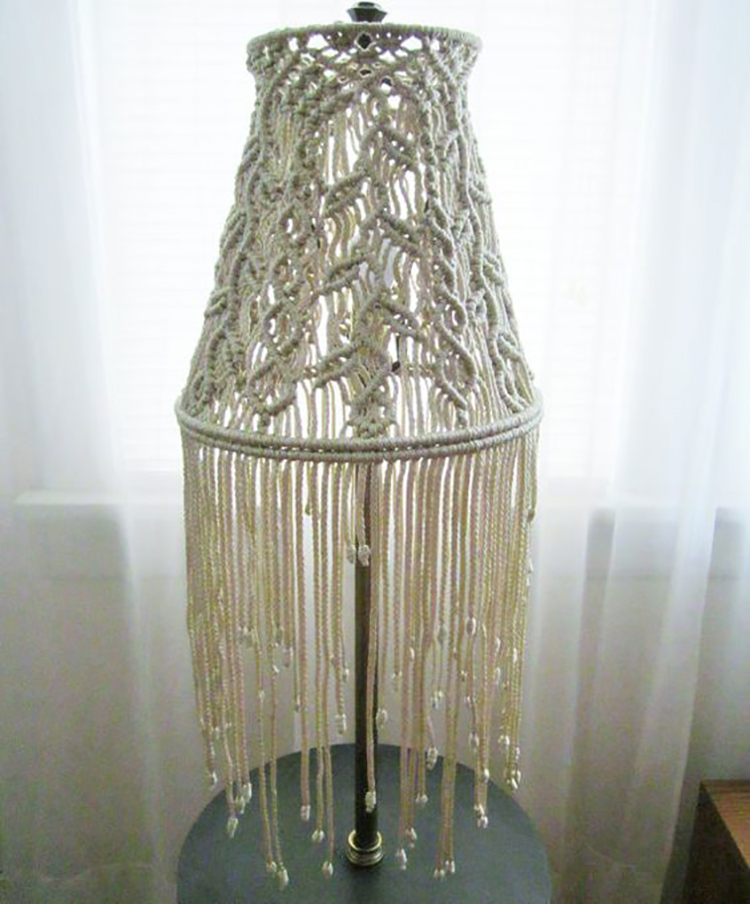
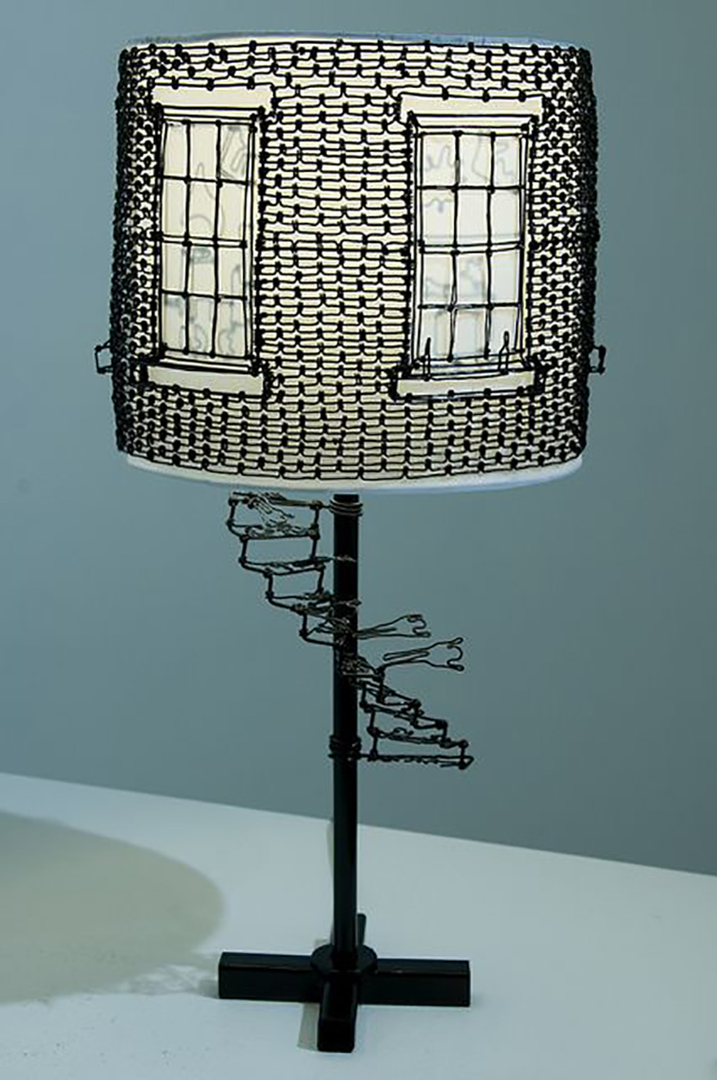
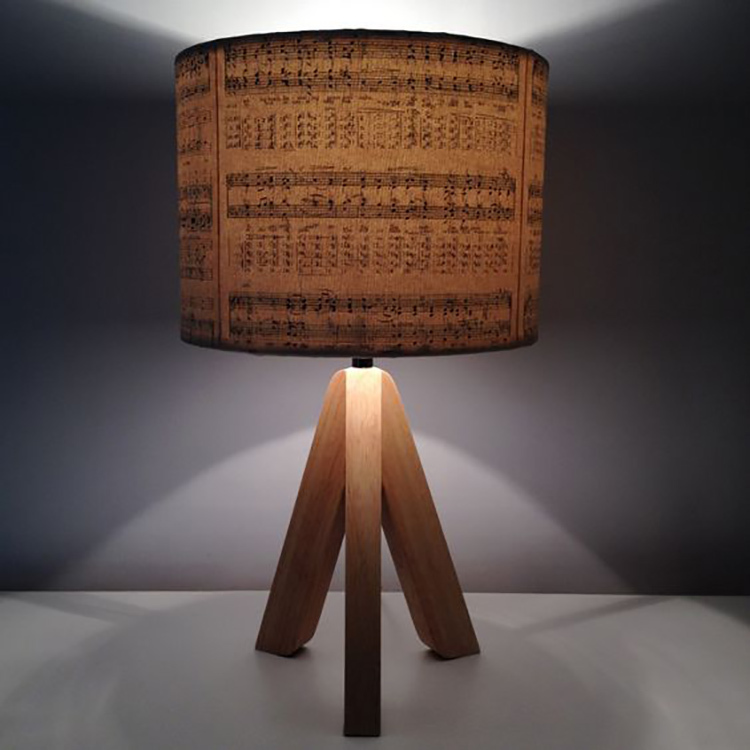
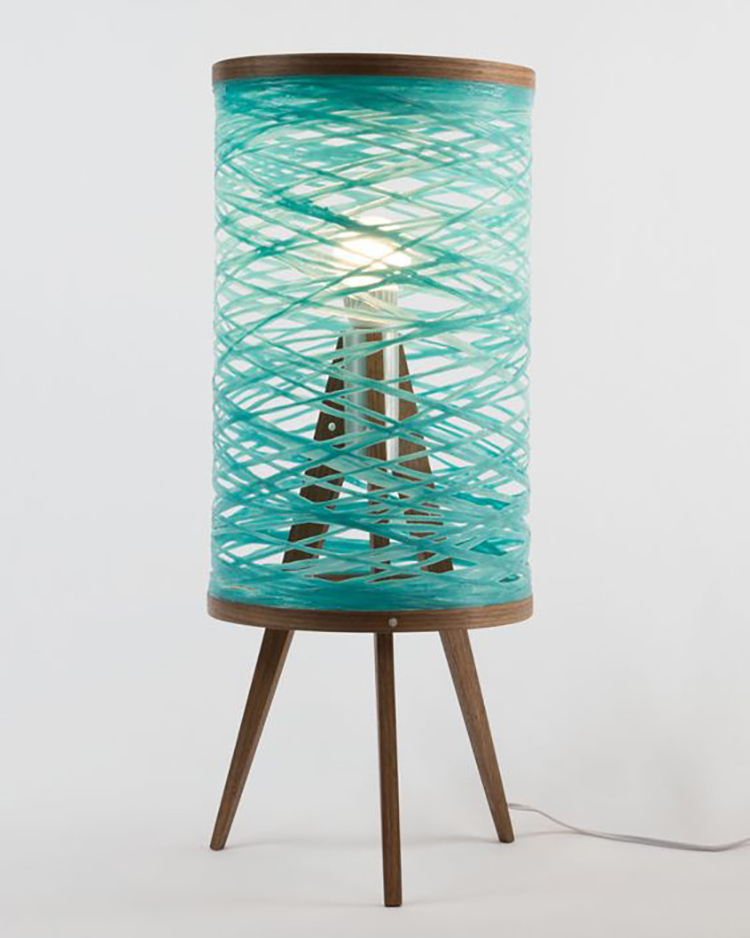
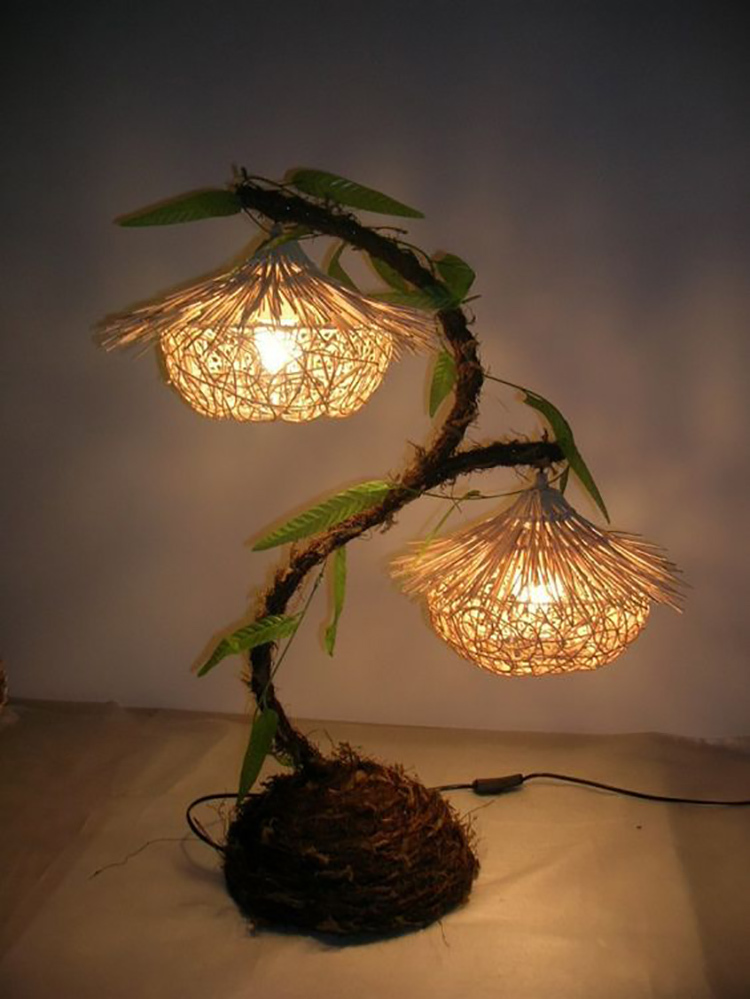
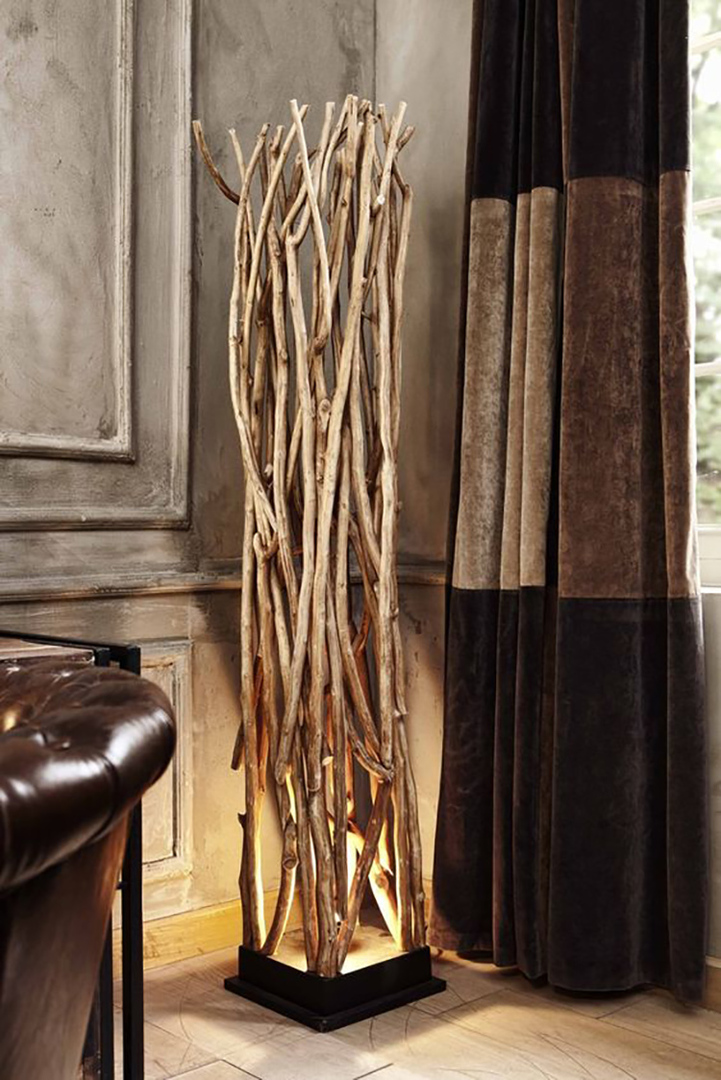
DIY floor lamp ideas
There are many ideas that can inspire you to make your own floor lamps.
1 out of 25


We update the old floor lamp
When you have an old floor lamp, you can postpone the manufacture of a new one. Even out-of-fashion and broken items can be transformed into completely new models.
Making a new lampshade
A loft-style lampshade is quite simple to make. To do this, you need a mesh wastepaper basket and a plinth.
| Illustration | Description of action |
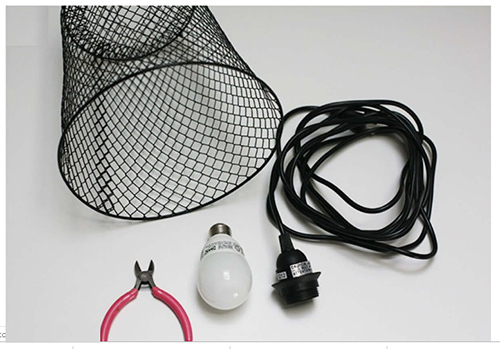 | Materials and tools for making a new lampshade |
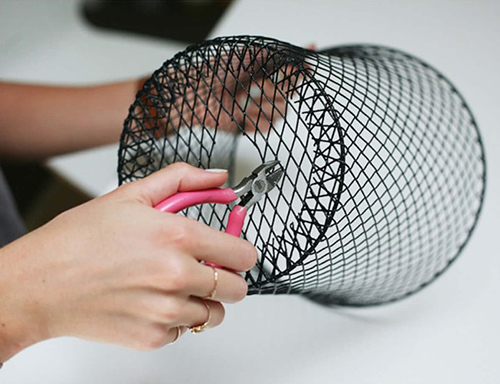 | In the bottom we cut a small hole along the diameter of the base |
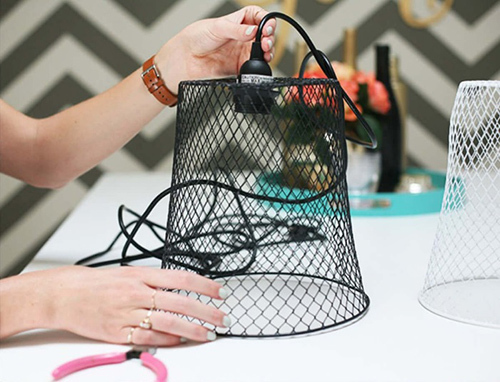 | We attach the base to the washers and install it on the floor lamp stand |
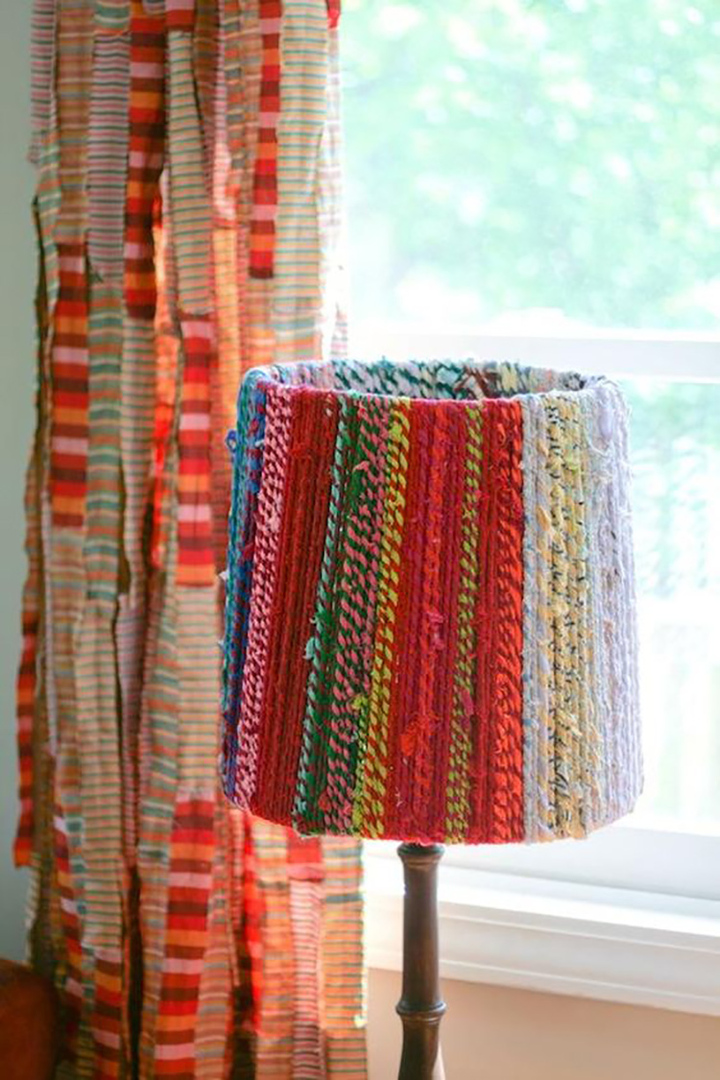
We restore and decorate an old lampshade
If the frame of the lampshade is strong enough, then you can completely overtighten it, changing the appearance of the floor lamp. The easiest way is to use textile ribbons or colored threads.
 PHOTO: pinterest.com
The second option that can be used if the lampshade material itself is intact is painting. Thus, not only is a change in the appearance of the product achieved, but also in its light transmission and reflectivity.
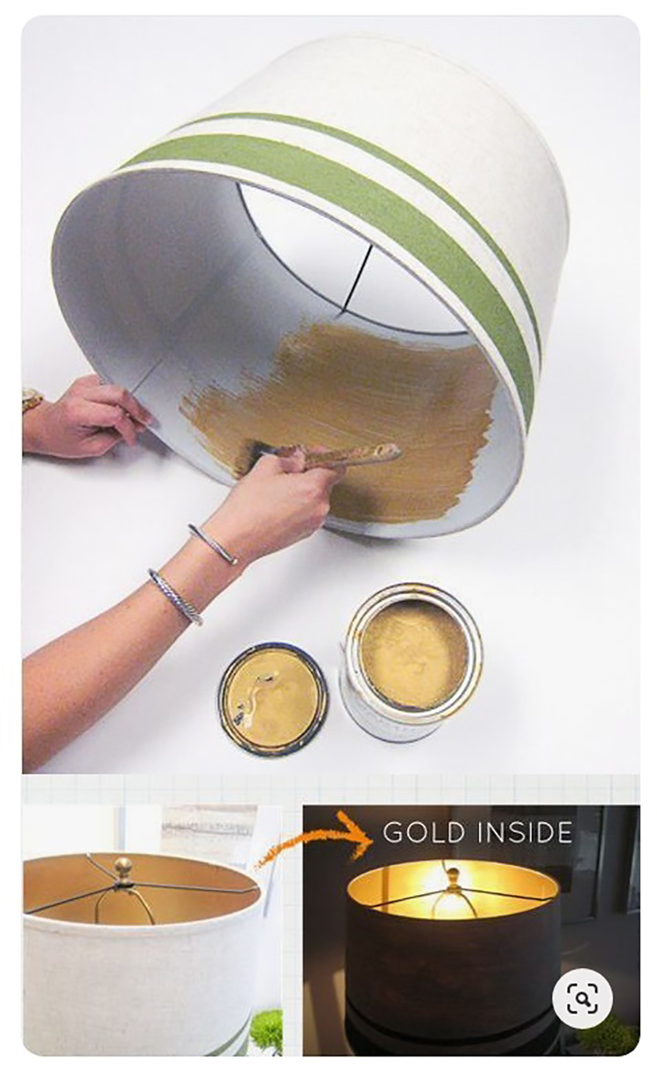 PHOTO: pinterest.com
The third decoration option is patchwork technology. It consists in pasting the surface of the lampshade with special napkins with drawings. Such decor does not cause any particular difficulties, but with due diligence it can transform the product beyond recognition.
 PHOTO: rukodelie-rukami.ru
Summing up
Making a floor lamp with your own hands is certainly more profitable than purchasing it in a store. Moreover, if already existing materials are used. However, when developing a design, you should adhere to moderation and try to harmoniously fit the product into the style of the room.
If you liked our master classes, and you found something new for you in the article, take part in its discussion and recommend what you read to your friends.