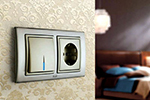
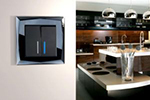
Self-installation switches pretty simple. Even a novice home master can handle it. However, inexperienced specialists are often afraid to get involved with the installation. two-button circuit breakers, especially if they are combined with a block with an outlet. Today we will try to figure out whether there are much more difficulties in connecting a double switch that a home craftsman will need for such an installation, how best to perform it.
Read in the article
- 1 External and internal structure of a two-button switch
- 2 Safety rules and regulations for the installation of switches
- 3 What is required to connect a two-button switch
- 4 How to independently connect a two-button switch
- 4.1 Wiring diagram for a two-button switch: examples
- 4.2 How to connect a double switch: step by step instructions
- 4.3 Connection of wires from a two-rocker switch in a junction box
- 5 The nuances of connecting a double switch combined with a socket
- 6 Installation of two-button switches with neon illumination
- 7 Pass-through two-key switch: what is it, how to mount it
- 8 How to avoid mistakes during editing: a few tips from the editor
- 9 Let's sum up
External and internal structure of a two-button switch
Everyone knows what a double switch looks like. These are 2 keys, clothed in the body. But not everyone guesses about the internal structure. Let's try to understand this issue, describing everything in simple words. Inside the switch there is a contact strip that is energized. It is connected to two movable tabs. Below, on the other side of the tongues, there are separate contacts with terminals. When you press one of the keys, the tongue drops and closes to the bottom contact, as a result, a voltage appears on the corresponding terminal.
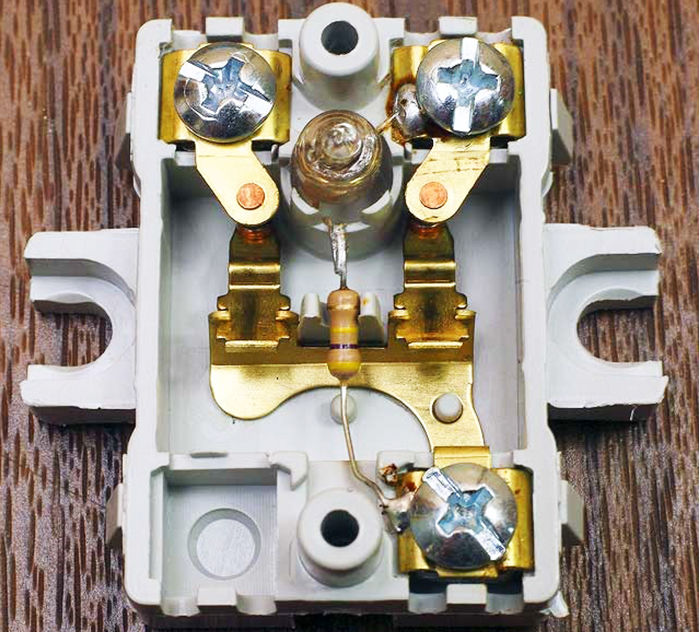
The breaker terminals can be different - self-clamping or screw. The former are much easier to install, but they are not always applicable. For example, if the electrical wiring is flexible, then you will not be able to use them without tinning the tip of the core.
Related article:
Sockets and switches: the best brands and models of different price categories, advantages and disadvantages, examples of unusual sockets and switches, the nuances of installing electrical fittings with your own hands - in our publication.
Safety rules and regulations for the installation of switches
Before proceeding with the installation of the switch, as well as before any other work related to electrical installation, you should understand some rules that must be followed. First of all, before starting work, you must completely de-energize the breaker. To do this, you just need to turn off the input machine in the dashboard.
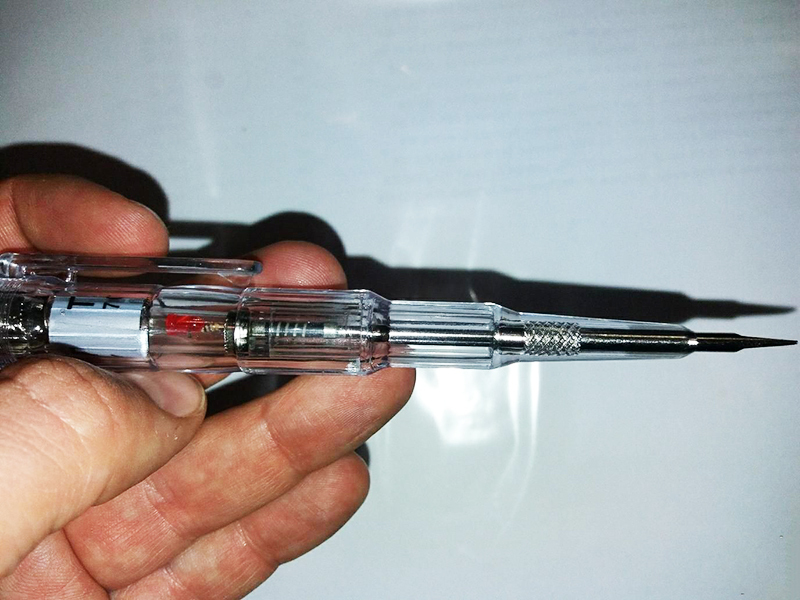
After the machine is turned off, you must once again make sure that there is no voltage at the switch terminals using a conventional indicator screwdriver.
All work should be done carefully, step by step, without jumping from place to place, so as not to miss a single trifle. After all, for example, one weakly stretched contact can lead to a fire. It is not worth joking with electricity, it does not forgive this.
Related article:
Wiring diagram for a two-button switch for two bulbs, for a chandelier and with a socket. In our publication you will find the features and step-by-step instructions for connecting, the necessary tools and expert recommendations.
What is required to connect a two-button switch
Before starting work, it is best to prepare all the necessary tools so as not to be distracted by the search for it in the process. To install a double circuit breaker you will need:
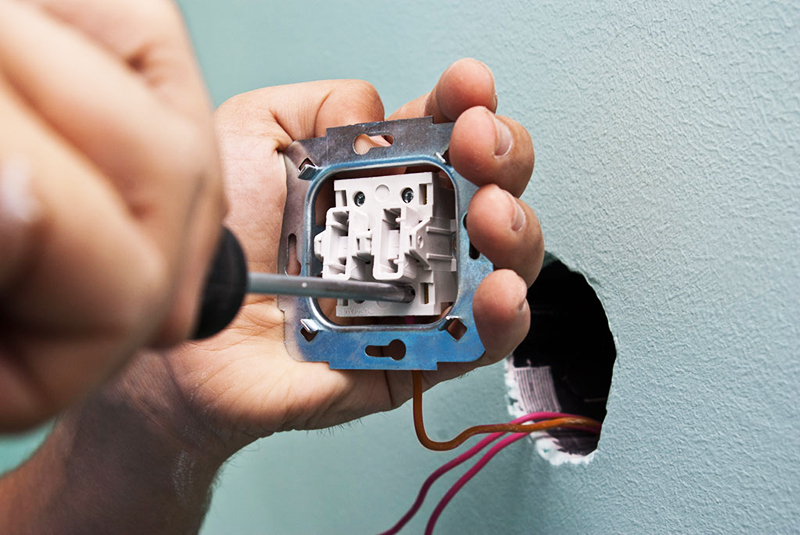
- screwdrivers - cross and slotted;
- insulation stripping tool;
- indicator screwdriver.
Here, in fact, is the whole simple set of tools.
How to independently connect a two-button switch
In order to independently perform all the work and not call a specialist, paying for his services, you should follow several steps, which will now be described. For example, we can take the option in which the old switch was removed by another person and the home craftsman has only three wires sticking out of the socket, without any marking. In this case, it is required to separate them in different directions and, making sure that they do not close, turn on the voltage in the home network for a while. Further, with the help of an indicator screwdriver, you need to find the core through which the voltage comes to the switch. Having marked it, the electricity must be turned off again from the input machine.
Wiring diagram for a two-button switch: examples
In order to make it easier for the reader to understand how double circuit breakers are connected, we suggest that you familiarize yourself with the installation diagrams visually.
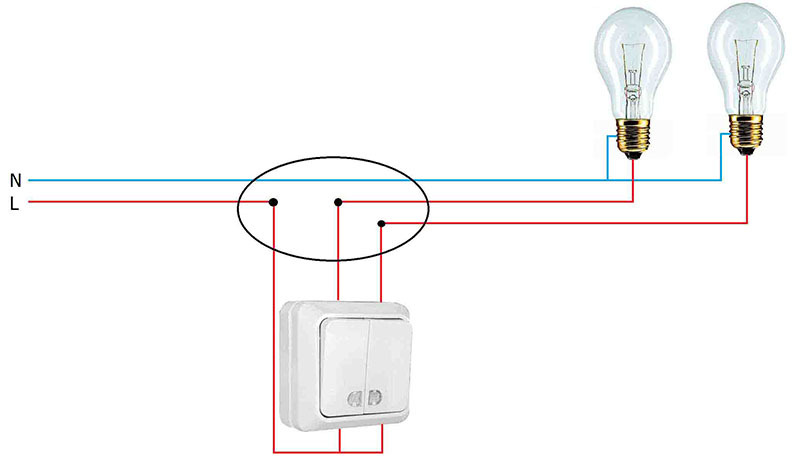
If another option is required, we can offer the following.
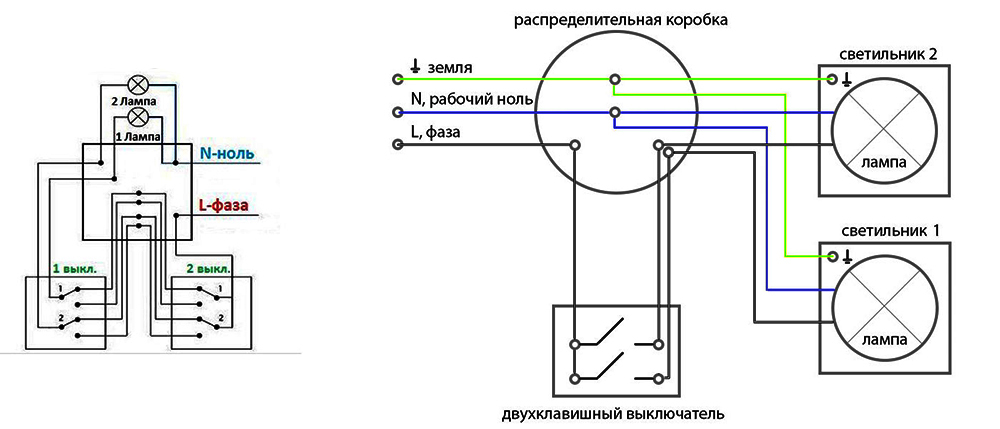
How to connect a double switch: step by step instructions
First, let's try to figure out how the two-button switch itself is connected. For this, computer graphics will be used as examples.
| Illustration | Description of action |
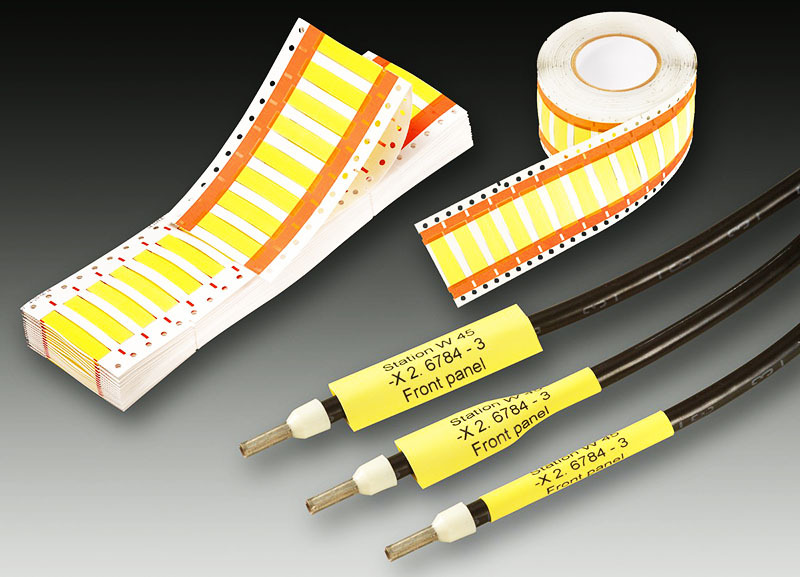
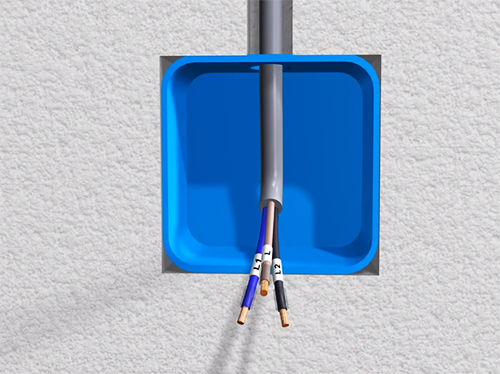 | First you need to mark the veins. For example, "L" is the incoming phase, and "L1" and "L2" are the outgoing ones to the lamps (signal). So later it will be more convenient to work. |
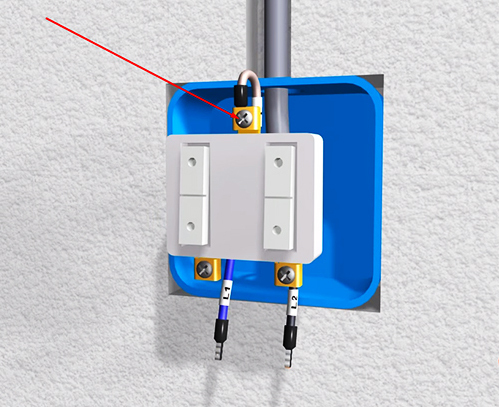 | Now the "L" conductor, through which the voltage comes in, must be connected to the upper terminal of the switch |
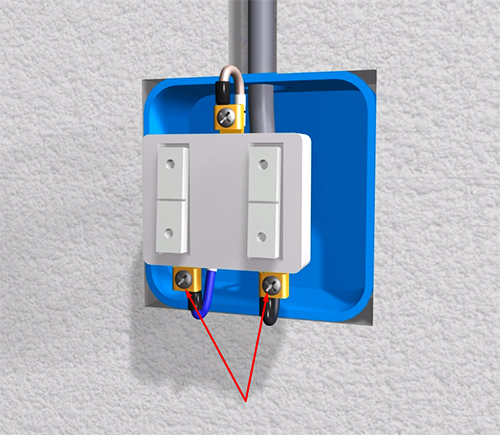 | The conductors "L1" and "L2" are connected to the lower terminals, respectively. They are signal, and they will supply voltage to the lamps in accordance with which key is pressed. |
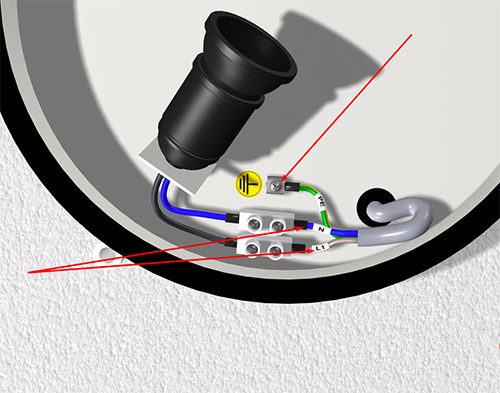 | In the luminaires, the connection is made according to the color coding. If it is absent, then, most likely, the ground wire will not be here either. |
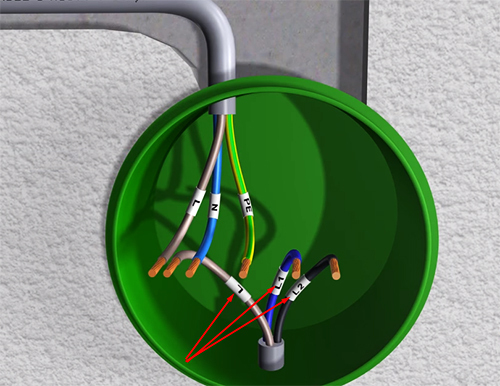 | In the junction box, it also makes sense to mark the wires coming from the switch. This will simplify subsequent wiring. |
However, it is not enough to understand how to connect the double switch itself. It is necessary to figure out how to make its connection in the junction box, which will now be considered.
Connection of wires from a two-rocker switch in a junction box
The meaning of connecting wires in a junction box is as follows. The "zero" included in the box is directly connected to the luminaire. The phase wire is "sent" to the switch, and 2 wires are returned, each going to its own group of lighting fixtures. Of course, it is much more convenient if the entire installation is done from scratch. Let's look at examples of how it is performed.
| Illustration | Description of action |
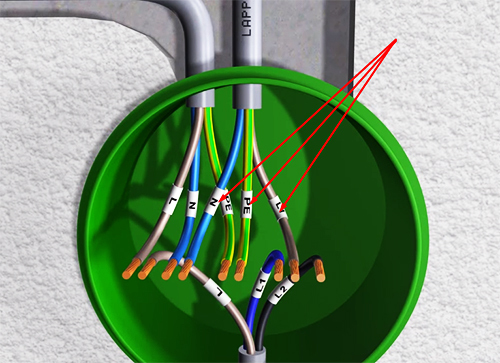 | The inserted cable from the first group of luminaires must be stripped and the cores marked in the same way as those through which power is supplied to the junction box |
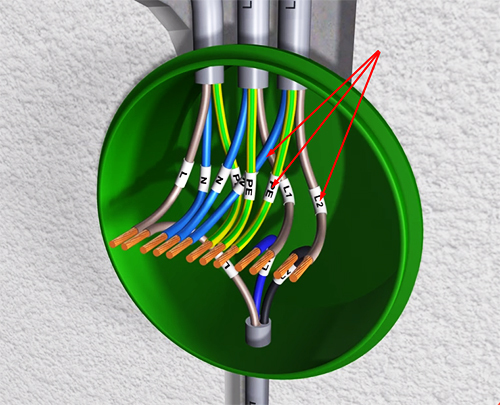 | The same should be done with the cable coming from the second group of lighting fixtures. This will avoid confusion when connecting. It is better to crimp the ends of the conductors of the flexible cable. Tips and crimper designed for these purposes are inexpensive, and reliability increases significantly |
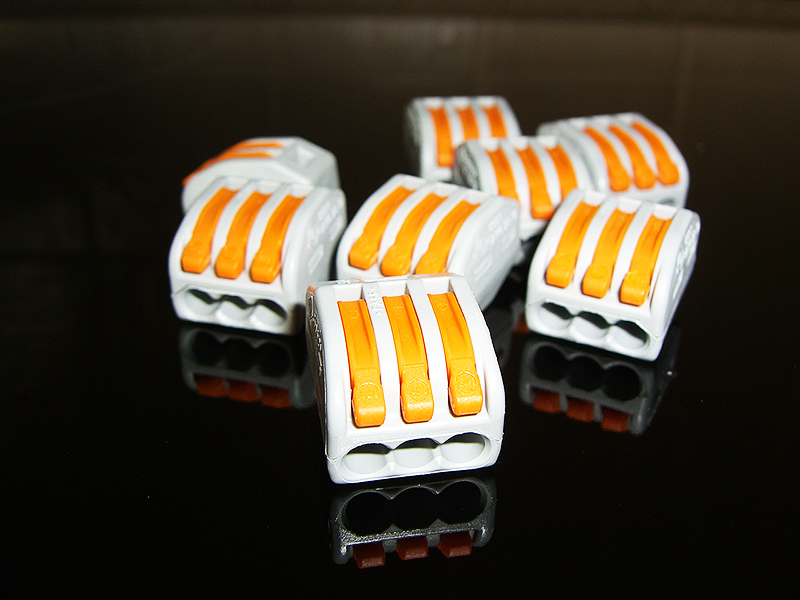
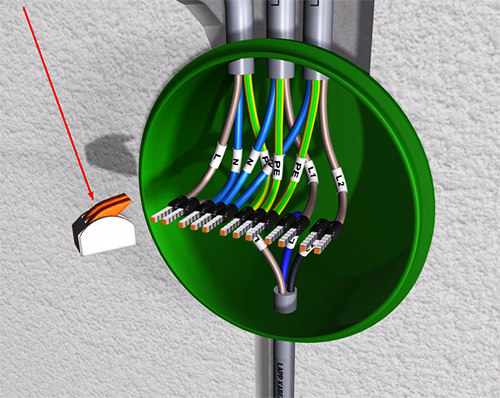 | When all the wires are distributed into groups, you can start connecting them. The most convenient and fastest option here would be to use clamping terminal blocks WAGO |
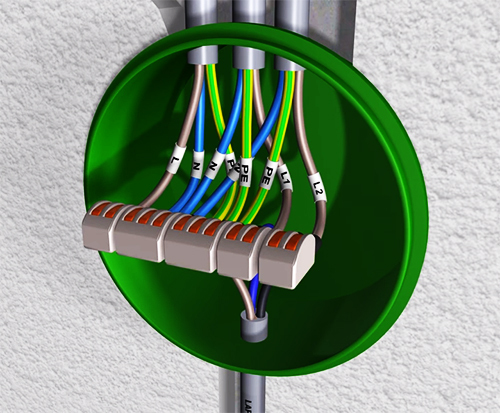 | As a result, you get a neatly divorced box. At the same time, the connections can always be disassembled and assembled very quickly, if necessary. |
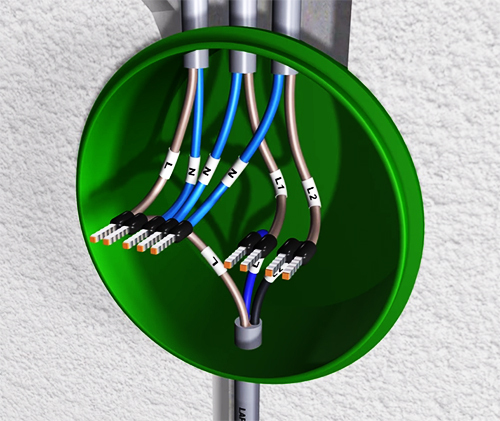 | But if there is no ground loop in the building at all, the wiring in the junction box will look like this. The same will be true provided that all lamps are made of plastic and do not require grounding. |
More master class on connecting two-button switches can be viewed in this video.
The nuances of connecting a double switch combined with a socket
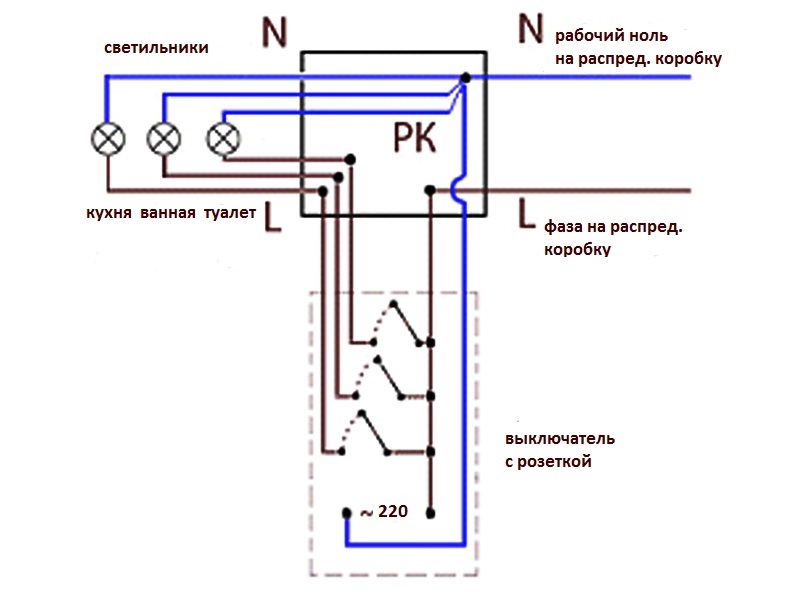
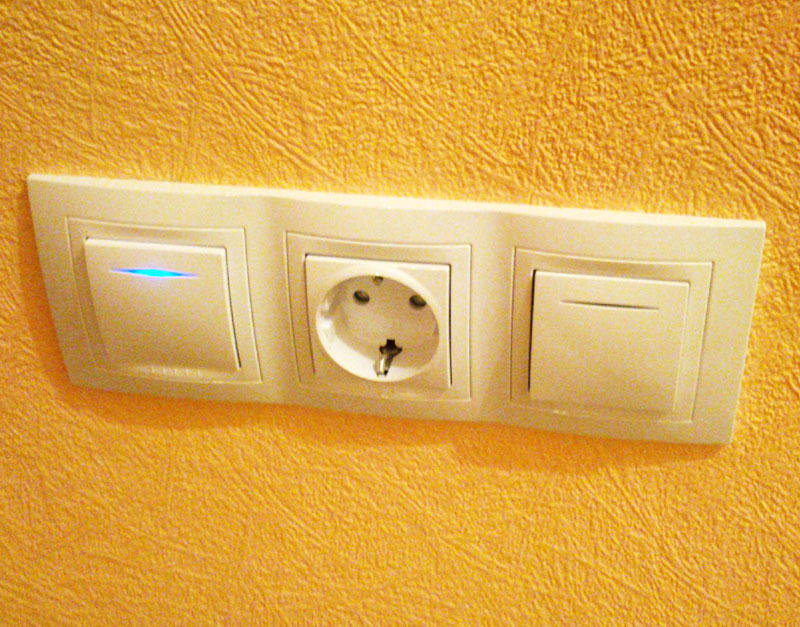
Installation of a block, which includes, in addition to a double switch, an outlet, for many novice home craftsmen turns into a terrible dream. But in reality, there are absolutely no difficulties here. The only thing that will distinguish such a connection is the presence of an additional neutral wire, which will only go to the outlet.
In the case of such an installation, a socket is first connected, from which a phase wire goes to the switch by a loop. And then everything is according to the already described scheme. Therefore, you should not be afraid to take on such a job. If the home master can connect a two-button switch, then he will not have any problems with the unit.
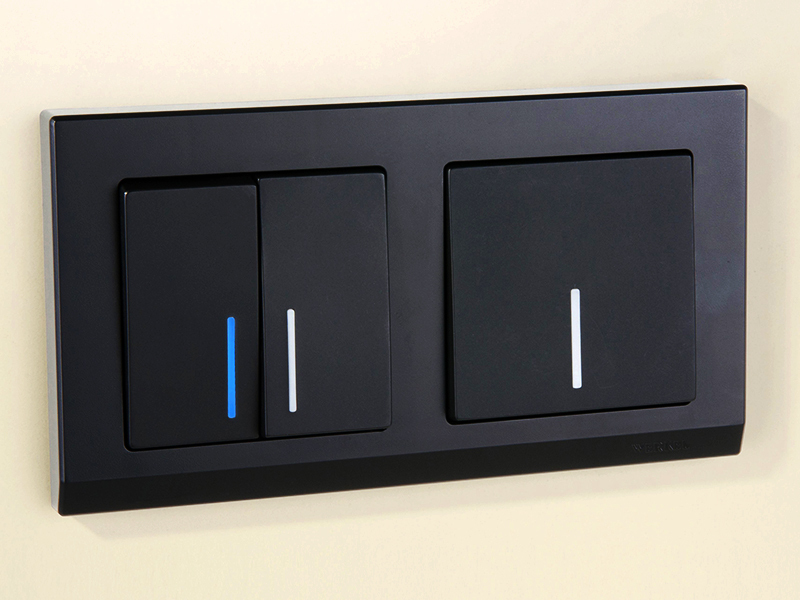
Installation of two-button switches with neon illumination
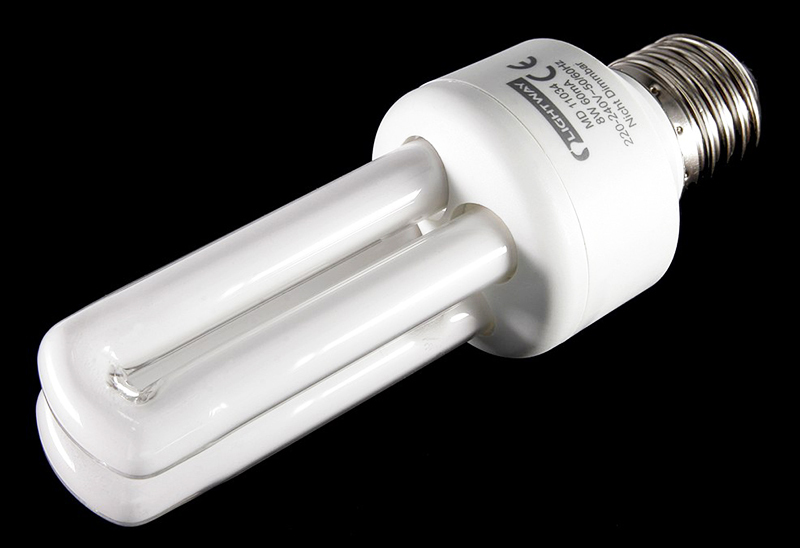
The connection of illuminated switches is completely the same as described above, but there is one important nuance here. Very often, after installing such switches, compact fluorescent lamps (CFLs), popularly called energy saving (with the lights off). Many people simply change the switch to a regular one and forget about it, which is a mistake.
Such "behavior" of CFLs is caused by incorrect connection of the cartridges in the chandelier or lamp. The fact is that, according to the rules, the phase wire must come to the central contact of the base, and the zero wire to the lamp thread. If this rule is not followed, the minimum current passing through the neon backlight will gradually charge the capacitor in the CFL starter circuit. And when the capacitor is charged to a critical level, it simply pulses off the charge, resulting in a short flash. Therefore, in this case, it is better to change not the backlit switch, but the location of the wires on the block chandeliers or lamp.
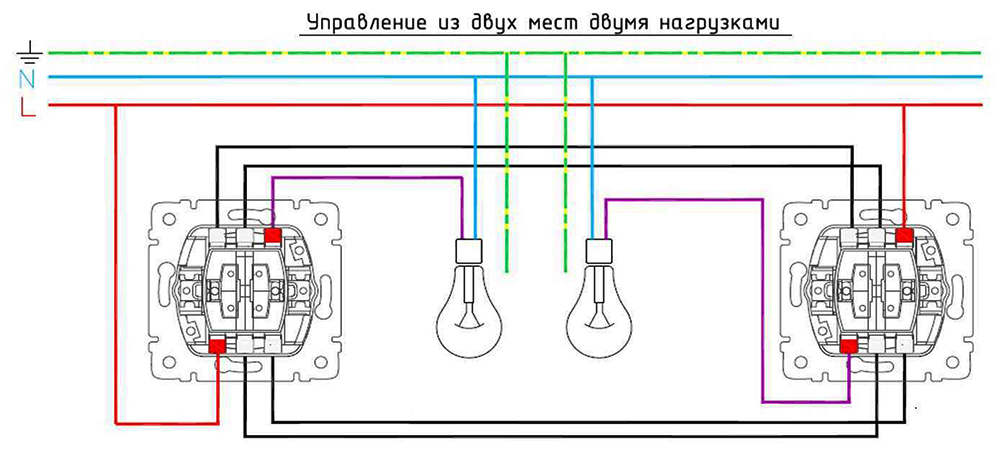
Pass-through two-key switch: what is it, how to mount it
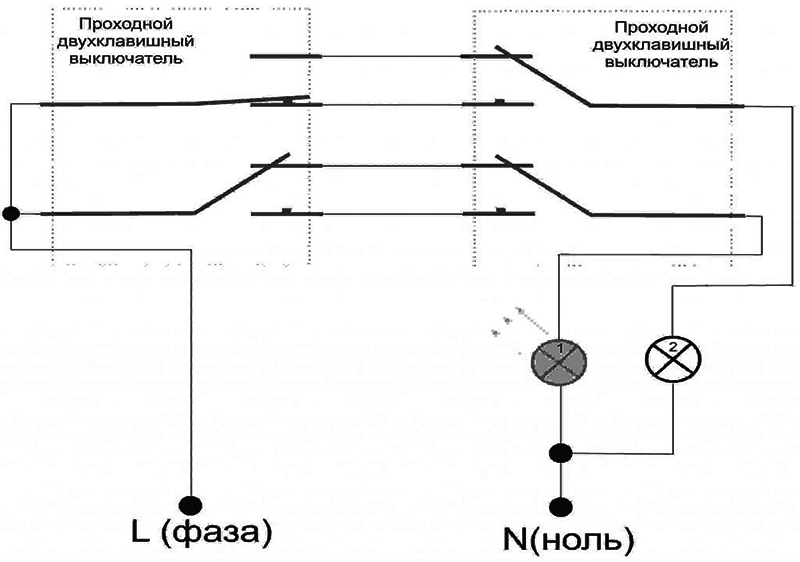
To be precise, the name "switch" would be more appropriate here. This element of the electrical network circuit is designed so that the lighting can be controlled from two or more points, regardless of the position of the other switches. For instance: long corridor, on both sides of which there are pass-through switches. A man, approaching the corridor, presses a key, turning on the light. Walking down the corridor, he turns off the light. And, despite the fact that the circuit is open, the next person who entered after him quite freely turns on the lighting again.
If you look at the connection diagram of the pass-through switch, it becomes clear how this is possible.
Related article:
Wiring diagram of the pass-through switch with 2 places: device and principle of operation, an overview of the main manufacturers of walk-through switches, installation nuances, advice and recommendations from specialists.
How to avoid mistakes during editing: a few tips from the editor
To begin with, you should fully think over which lamps or chandeliers will be controlled by this or that with a two-button switch, prepare tools and materials and only then proceed to work.
It is very important to be extremely careful and accurate when making electrical installations. When working with wires and equipment, the input machine must be turned off. Do not tempt fate.

When choosing switches, it is best to give preference to products equipped with self-clamping terminals, rather than screw terminals. The former are much easier to install and will last much longer.
Do not neglect the marking of wire cores. Spending 5 minutes of time on it now, you can save much more later.
After the installation is completed, it is necessary to leave the switch in an open state and only after that turn on the input automatic device. Next, in turn, you need to press the keys, checking whether the light is on and whether the machine in the switchboard has worked.
Let's sum up
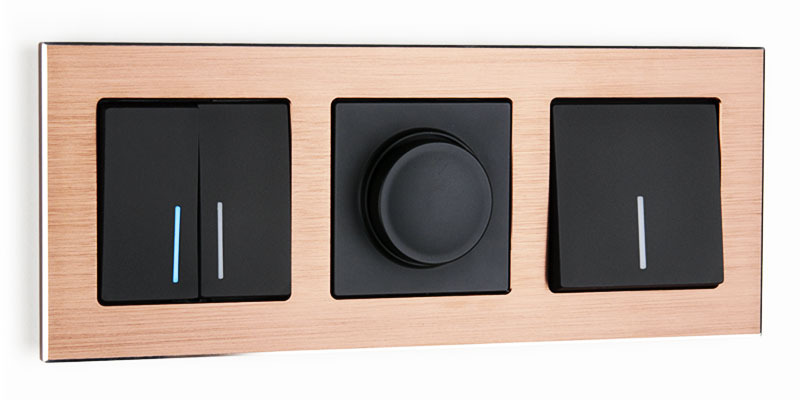
Not always, making electrical wiring in an apartment or a private house, you can get by with a one-button disconnect switch. Sometimes you have to use two- or even three-button switches. If you figure out the diagram of their connection, which is completely simple, then the installation of a home electrical network will be greatly simplified. In addition, such switches save a lot of space on the wall, because two one-button switches are 2 times wider than one two-button.
We really hope that the information we provided today was interesting and useful to the reader. If you have any questions about the topic, feel free to ask them in the discussions below. HouseChief will be happy to answer them as quickly and fully as possible. There you can also comment on what you read, leave your review or tell about your personal experience in connecting two-button switches. This information will be useful for novice home craftsmen.
If you liked the article, please don't forget to rate it.
Finally, as already established, we bring to your attention a short video that will help to more fully reveal today's topic.

