Decoration of various objects with the help of ready-made pictures, ornaments is a very exciting experience, different techniques which under force everyone to learn, regardless of age. Many people want to express their individuality, to join the beautiful, but not all have the skills of painting, drawing, sewing, for the development of which will leave a lot of time. Therefore decoupage for beginners masters will be an excellent start in the development of man-made creation.
As an art form, it was first mentioned in 15th century China, when they began to decorate furniture carved images. But the greatest popularity it received craze in Europe, which fell from Asia through Venice, to pursue an active trade with the Far East. For many years technique greatly developed, it is still very popular in many countries. Only now it can help draw up not only furniture, but also a variety of decorative items, Christmas decorations, dishes, clothes, and other items.
Content
- Decoupage - what it is and where it is used
-
Required tools and materials for creative work
- The choice of base
- List of tools
- Expendable materials
- The choice of napkins and paper
-
Decoupage technique and step classes for beginners
- Direct decoupage - classical technique
- Subtleties reverse decoupage
- Artistic or smoky decoupage
- Dekopatch - ease in starting
-
Volumetric decoupage and its features
- Materials and tools
-
Modeling paste - work rules
- Technique work with putty
- Ornament with a cloth
- Three-dimensional maps and their use
- Italian decoupage technique
- conclusion
Decoupage - what it is and where it is used
The word decoupage it with French, translated literally as "cut". The technique consists in drawing the figure, the image on the surface of various items, followed by coating of the final composition varnish. Occupation is not difficult, but can not do without artistic taste. It can be used to issue different unique elements, made of the following materials:
- glass;
- fabric, leather, eco-leather;
- wood, MDF, particle board;
- cardboard, paper;
- metal;
- plastic;
- ceramics, porcelain.


Scope decoupage enormous. Apply design can be on different designs:
- furniture, jewelry boxes, mirrors and combs;
- pencils, pens, notebooks, notepads, covers, books;
- flasks, bottles, napkin holders;
- trays, plates, tea sets, bread bins, refrigerator, microwave oven and other kitchen items;
- clothes, shoes, bags, hats, all kinds of fabrics;
- clocks, pictures, albums, vases;
- tablecloths, duvet covers, curtains, other textiles.
Required tools and materials for creative work
Beautiful design objects, made with your own hands can be a fun hobby that allows you to create stunning compositions. With the help of decoupage, you can decorate a variety of surfaces and items. However, remember that when working with materials that do not absorb dyes and varnished, it is necessary to use special formulations designed for specific raw materials.

Before you start practicing this technique, it is required to pick up the workpiece, which will be inflicted drawing, to prepare the necessary for consumables and instruments. By correctly executed actions largely depends on the success generated by the composition, so the question should be approached with great responsibility. For this we consider in more detail the preparatory process.
The choice of base
Decoupage can be applied to objects made from almost any material, be it wood, plastic or glass. But often in front of the newcomers is a question about where to begin, what basis to choose for the job, so that when the training does not spoil the interior items. The problem is easy to solve, can be used for this purpose:
- Special preforms made from untreated wood, MDF, papier-mache, which can be purchased in specialty stores.
- Old things, quietly gathering dust in the attic or in the pantry. Prepare and decorate their surface.
- If the house is not taken to keep older stuff, you can stroll through the flea markets in search of interesting items.
- Walk around the room and look around, you can probably find a shabby, noxious thing or furniture. These can be tables and chairs, trays, mirrors, sofa, cabinet and other elements.

List of tools
To carry out any activity necessary to have on hand certain instruments. Decorating can not be done without a minimum set of special tools. They need quite a bit. Consider the list of required elements used in the work:
- Sharp nail, stationery scissors with thin and slightly curved tips for cutting paper or fabric.
- Spatula need when working with large wooden objects for the application of the primer.
- Brush, sponge, soft textiles for applying varnish, paint and glue.
- Paint brushes used to emphasize highlight certain details of the composition, if necessary.
- Disposable plates, banks, other handy items used for mixing paints.
- A small roller, which smoothes image pasted to remove air bubbles.
- Measuring instruments, a simple pencil eraser.
See also:The paintings in the interior of the living room 75 photos


Expendable materials
Preparing a set of tools, we proceed to consider the list of consumables. To work required:
- Sandpaper. Used for cleaning the base surface. It should choose a product with medium and fine grain. The first type is used for primary polishing, the second - for finishing.
- Degreaser. Alcohol, mineral spirits, acetone, alcohol wipes, vodka.
- Putty. Used to eliminate defects on the surface of the wood.
- Primer. It is recommended to use an acrylic primer and can be purchased in specialized outlets.
- Glue. There are special formulations for decoupage works, but they are quite expensive. Experts say that an ordinary PVA is not inferior, it is invisible, well-component glues.
- Acrylic paints. Required for dyeing or podrisovki image. They dry quickly, easy to work with.
- Magazines, paper, photography, napkins for decoupage.
- Acrylic lacquer. You can use any options to give the desired effect, be it gloss, matt or craquelure.

The choice of napkins and paper
For applying an image using different materials. Most often, the three-layer napkins, but this list is not limited. In this technique can be applied a variety of paper products:
- Napkins. Newcomers better to use these elements for learning. However, it is necessary to handle them very carefully, because they are quite thin, can break. There are products consisting of two or three layers.
- Decoupage card. In fact, it's the usual paper sheets, which are printed images typographic way. Between a differ in density and size. They are stronger than napkins.
- Rice paper. It is very thin, loose material made from rice straw. Strength is not inferior cards. Suitable for decoration of any subject.
- Mulberry paper. According to its properties comparable to rice counterparts, it is soft. Ideal for work with glass.
- Gift paper. Before the work it will need to soak in warm water for 2-3 minutes, to dry on the fabric, otherwise it will not absorb the glue.
- The printer is printing. Can be downloaded from the network any favorite picture, print it out on a standard sheet of A4.
- Magazine clippings. Magazine images are similar to regular printouts.
- Photographs, postcards. They are overwritten with sandpaper to make thinner, then paste on the selected surface.


Decoupage card is prohibited cleaned with sandpaper on the back side.
Decoupage technique and step classes for beginners
Decorate household objects, furniture, accessories and other stuff can be in a variety of techniques. The most common kind of needlework - decoupage. Using napkins and other paper-based images can give objects a unique unforgettable appearance. For each material is convenient and practical application of pictures in a certain way. The transparent plate is better to decorate the reverse decoupage technique, suitable for three-dimensional drawing of a panel.

To create original articles do not need to be a professional. A simple way of decor fits with the description of the newcomer. To achieve the result, it is necessary to perform standard actions incremental master classes: surface preparation, paste decoupage motif paint on the edges lacquered. Learn more about the technology you can study the following workshops.
Direct decoupage - classical technique
A method of applying napkin is often used for decoration of rounded objects, vases, bottles, pots. He is the most popular and easy for beginners. This method can create the original packaging for beverages, decorate it topically to the holiday, any occasion.

The work begins with the preparation of materials. The bottle must necessarily be smooth with smooth curves without embossed inscriptions, relief. As most portable image, you can use multi-layer cloth, newspaper clippings, any drawing. The thinner the paper, the easier it will be sticking. Also need to prepare a PVA glue, acetone, paint brushes, acrylic lacquer. Make a great gift with their own hands simply by following instructions:
- Prepare the surface of the bottle. Soaked with soapy water, purify the label;
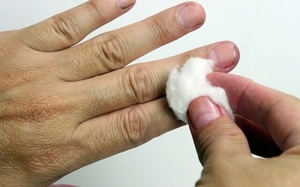
- Degreasing. Wipe cotton wool soaked in acetone;
- Gruntuem. This may be vitreous or other suitable lacquer formulations;
- Apply the blackout. For this acrylic suitable. Using sponges we coat the whole surface or necessary portion;
- Select theme. Cut out a picture from the purchase napkins, magazine preparing photo;
- Remove the top layer of paper. Photo paper, thick sheets should soften in water and divided into layers;
- Glue. Apply glue to the bottle and leans picture. After iron roller, in its obmoknuv divorced PVA;
- Anchoring varnish. If you apply multiple layers composition, gift bottle can be washed.
See also:The decor of the wedding hall 100 photo ideas design with their own hands
Subtleties reverse decoupage
In this technique, one can transform a simple glass plate, transforming it into a porcelain expensive product. It will be a classic decoupage, but from the back side. To work need a standard set of tools and materials. If you want to artificial aging, for the application of "traces of time" can be used krakelyurny varnish.

We start with the surface preparation. Overturn the plate upside down, carefully degreased it - my, wipe dry, wipe with alcohol. Try on prepared ornament size, gently pluck the edges. It is better to choose one large image than 3-4 small. This will facilitate the work of a novice master. Not necessarily decorate the whole surface. Flowers look good on one side, with a stop at the bottom and rim.
Lacquer coat with a napkin and attached to the bottom plate.
If the paper is illuminated, the figure should be applied on top of the white acrylic paint. It can be done using the rim contour as desired.
Artistic or smoky decoupage
In this technique, be decorated picture completely blend into the background, it looks like a real painting. It will be almost impossible to go abroad. Contents can be any surface with continued color shadows reconstitution medium.

With the help of smoke can pass three-dimensionality and depth of any object. Garnish in this technique is better small box. This can be done before or after the gluing of paper. haze effect should always be lighter than the decorated object. Create a haze in several ways: acrylic paints, wax crayons.
Smoky decoupage will look great on a simple box. First, conduct a standard procedure for the preparation, we clean, degreasing all surfaces. Making suitable conventional pasting pictures. Missing parts can paint on acrylic. Now we cover the whole box with varnish and leave to dry.
The final stage of decoration - the creation of haze. To do this, dip the brush into the retarder and the thick paint is better to take a single tone, or slightly lighter, put a point on the edge of the picture. Sponge feathered its direction from the edge of the picture. Pull tone transition must be very fast, until the mixture thickens.

When the entire surface of the box will be processed and dry, mist the primary colors should be a bit muted. Take a piece of sponge, dipped in paint background and passes along the edge of the image, removing excess brightness. Cover the box with varnish.
Dekopatch - ease in starting
Technique dekopatch close to decoupage, often used together in the classroom for needlework. Characterized by simplicity of execution, suitable for beginners handy people. As a basis you can use an amusing figure of any material, flower pots, all home accessories.
Figurines made of papier-mache (cardboard) - are ideal for creativity. Choosing a suitable and store necessary materials.
It is necessary to prepare several special sheets of rice paper with various designs, brushes, PVA glue, water-based lacquer. First, prepare a material for dekopatcha - rvom paper into pieces of 2x2 cm in size, and can be larger, it depends on the value of the most artefacts. Pieces of paper pasted on the product made of papier-mache overlap. All surfaces should be closed, the gaps will look inharmonious. Joints should not be seen even at close range. We cover the figure and give lacquer dry.

This way of decoration for pots that have lost their attraction. Chaotic pieces with no plot will be an original look on the surface of any size. Dekopatch visually reminiscent of patchwork, but a special thin paper is used instead of the fabric.
It requires very foundation, sandpaper, glue, brushes, sponge, paint, colored rice paper to decorate a ceramic pot. The first step is preparing the ceramic surface, we clean, we coat with glue and gruntuem. It is also necessary to capture a small strip on the inside. Tear the paper into small pieces and glue to the pot. You can leave the surface in its original form, or to give it a structure of stone, removing some paint cotton swab with acetone. Anchoring drawing acrylic paint.
Volumetric decoupage and its features
Technique for creating three-dimensional images of an independent and unique. Having mastered it, you can create original paintings, souvenirs, fridge magnets with their own hands. It is much more difficult to simply cut out of paper, but easily mastered by beginners masters. Enough with the stick to simple rules. Meaning ZD decoupage is layering images, gluing elements on top of each other.
See also:100 photo ideas how to decorate a house on New Year's Eve


To create a composition using at least 5 printed copies. Number of sheets depends on the complexity of the transmitted image. A three-dimensional view of the image gives a silicate adhesive, coating, special varnish. Be sure to distinguish three zones: the background, the foreground portion of intermediate layers.
It is necessary to prepare for possible difficulties with applying fine details. This may require nail scissors, tweezers, thin brush.
Materials and tools
To create a beautiful "living" pictures materials and tools should be selected carefully. Paper work must be moderately dense. It is better to use several layers of her species. In addition to the main raw material, you need the following materials and tools:
- A piece of plywood, boards as a basis;
- Scissors for large and small parts;
- PVA glue, silicate;
- Glaze, water-based lacquer;
- Knife, cutting mat;
- Paints and brushes.


Modeling paste - work rules
To create 3D images often use modeling paste. Of soft elastic material make compositions fragments of various sizes and shapes. Pasta of natural components solidifies quickly when exposed to oxygen, it acquires ceramic structure. Decorate it possible in the future in any color.
To work would take two of the same motif. From the first cut paper and glue. Lepim pasta harvesting and impose on the picture. Well we flatten, soften transitions. The material should not reach the pattern region. The second motif stuck on the three-dimensional figure. We combine the edge of the picture and well dried.

Technique work with putty
With the help of such a material can produce three-dimensional products, major items for decoration of large surfaces. It is more convenient to work with a palette knife. Apply a thick layer is not suitable enough 2-3 mm. Too much decoration will be difficult to smooth out.
Begin to stick to the motif to be more wet mixture. Putty - the perfect material to create a simulation of masonry, wood texture slice, crust, provided you use a good fixer.

Ornament with a cloth
To give an additional amount of the image, to designate the effect of presence by using the fabric. Such decoration is used to create items of clothing, making protagonists composition more realistic. In the same way to create stunning sea, ancient motifs. Working with textiles is very simple:
- First, to impregnate it with white glue;
- Put cloth on the surface to be decorated, attach the desired shape;
- dried;
- Paint with acrylic paints;
- Creating extra inlay (glitter, patina color paste);
- Cover with acrylic lacquer.


Three-dimensional maps and their use
Decoupage 3D map is used to create volume in the technique of drawing layers. They can be bought in a specialty store or make your own. You like to print in color pattern of several copies.
The first drawing - basic. It should be clear, of the highest quality. The remaining elements will serve as raw material for the 3D picture. Cut pieces and glued together silicate adhesive. This way of modeling looks good visually, gives the product sculptural.

Italian decoupage technique
Sospeso Trasparente - three-dimensional product made in decoupage technique. This method has been developed, patented by Italian artist Monica Allegro. From the words of the very inventor: «Sospeso Trasparente is open and the relief process." He became so popular that many it is used not only as a hobby, but also build on it own business.
Three-dimensional technique is unique in its kind. It consists in applying a decorative paper on a special plastic material. Three-dimensional article obtained by thermoforming raw material is heated by the heat source (Hot hair dryer, a pistol, a candle), after which the warm plastic is attached to any form, it solidifies within a few seconds.

With this technique can create self-contained compositions which can be adhered to any substrate, to act as an independent member. For example, three-dimensional flowers, which can be installed in a vase, a variety of brooches for clothes. For beginners equipment may seem daunting, but as you gain experience can become a favorite pastime.
conclusion
Master the technique of decoupage is easy. The main thing - the desire. For activities required to select the necessary foundation for the work to develop a set of tools and materials. In the early stages you should use the simplest methods, and as you gain experience you can gradually develop more sophisticated methods of decoration items.