
- Why is it better to sew a toy yourself?
- Getting ready for the process of sewing
- Scheme of work
- How to make a soft toy cat with your own hands from the sock?
- How to make a soft toy from pompoms?
- How to make soft toys?
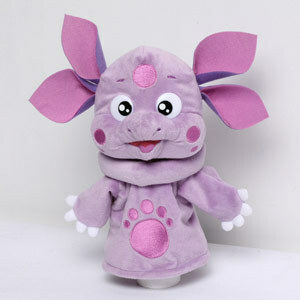
Each of us keeps his favorite soft toys from his childhood, with whom he played, went to bed, hugged him tightly. This is always a very good gift for the child, therefore on the eve of the New Year holidays we suggest to return to childhood and learn how to make soft toys with your own hands.
to the contents ↑Why is it better to sew a toy yourself?
Children's psychologists believe that every baby, starting with 2-3 years old, should have a soft toy. And although many shops offer a wide range of products made from different materials of pupae, bunnies, bear cubs, but soft toys created by themselves will be much more valuable and more unique than purchased ones. So - your baby will feel special and loved - and what else is needed to develop a full-fledged personality?
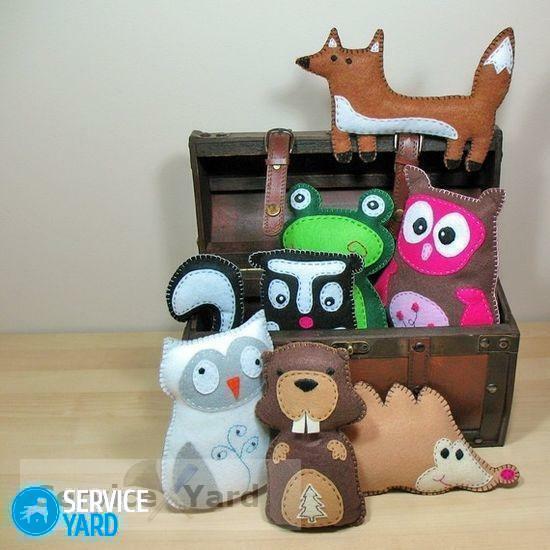 Soft toys, dolls can be sewn from fabric, as well as from handy things - mittens, gloves, sock, and at the base of the puller doll - a rope. We will offer you several options for sewing toys from different materials.
Getting ready for the process of sewing
To make a toy for your child yourself, you will need a little perseverance, as well as the material from which you will create your masterpiece.
We choose the material for the outer skin
As an assistant, you can use:
- trimming fabrics;
- old felt hats;
- tape;
- lace, etc.
The material for making the toy must be selected according to the size and type:
- The knitwear stretches very well, so you can sew anything from it: a hare, a horse, a cube, etc.
- Cotton fabric- just like cotton or satin, it has bright colors. Of this material, you can sew a doll or any other soft toys with your own hands.
- Terry fabric and flannel suitable for making bears with beautiful wool.
- Artificial fur is suitable for making excellent fluffy animals.
- Felt is good for making original and cute crafts. It is best suited for the manufacture of small parts: spouts, paws, ears, tail, crests.
- Velvet, wool and velor use for making cute bunnies, bear cubs, chanterelles.
Important! You can purchase in a specialized store kits, for example, "Needlework. Dolls with their own hands. "In this case, you will have to follow the instructions and implement the ideas of a professional master. But you do not have to select all the details yourself - they are already in the kit.
Choose filler:
- The most accessible material for packing is sintepon: it does not lose its shape, it dries quickly, so toys stuffed with such material can be easily washed in a typewriter.
- For filling, you can also use sintepuh in small balls. In the work this material is very convenient, does not cake with time and does not slip. Toys, stuffed with sintepuhom keep shape and well tolerate washing in the washing machine.
- Toys stuffed with a slicker( sheep wool, twisted into a roll), very soft to the touch. When filling the toy, the material must be inflated with hands to make a fuzzy heap resembling cotton wool. Minus filler - can not be washed.
- To fill a toy, it is possible to use pieces of old sock or other unnecessary things.
Choose a pattern for the
Pattern for the toy you can find in a specialized store, the Internet, or, having a fantasy, come up with an original pattern by yourself. To make a pattern of a toy, you can gently tear off an old, unnecessary soft toy, and draw a pencil silhouette on a sheet of cardboard.
Important! Patterns of dolls for one or another crafts are almost the same: therefore it does not matter whether you have a girl or a boy. You can sew both a spiderman doll and a doll for girls - a fairy princess, using the same pattern.
Collecting tools
In order to make a soft toy yourself, the following tools and materials are needed:
- Fabrics of different colors and strength;
- Threads of different color and strength;
- Scissors;
- Thimble;
- Needles of different sizes;
- Cardboard for patterning toys( or a ready-made pattern);
- Foam, cotton, sintepon and other child-friendly fillers;
- Sewing machine;
- Iron;
- Buttons, beads, eye, nose and buckle beads of soft toys;
- Ruler for cutting parts;
- Copier paper;
- The tailor's meter;
- Pliers and awl for the manufacture of the frame of a soft toy and the installation of small parts.
If you are joined by a child while you are making a toy, then do not forget about safety. Do not give the child small items and sharp tools. Needle, with threaded thread, keep in a jar with a magnet. Scissors with which the baby will work should be with blunt ends.
to the contents ↑Scheme of operation
 During the manufacture of a soft toy, follow this sequence:
- Select and prepare the material for work:
- Strip off the fabric.
- Wash it.
- Iron with iron.
- Open the details.
- Make a toy marking.
- Sew parts of a future product.
- Fill the parts with filling material( foam rubber, sintepon, etc.).
- Gather all the details of the future toy.
- Sew a detail or manually.
- Make an article.
Useful advices:
- Patterns of toys cut out of a thick cardboard, because such patterns fit tightly to the material, long retain their shape and easily traced.
- Place the pattern of the toy on the underside of the fabric. Press firmly, and then draw with a ballpoint pen, soap or marker( if the fabric is dark - use a white marker).
- When making soft toys with your own hands, cut the fabric with special care and accuracy. Make sure that the paired parts fully match the sides and are the same size.
- For a pattern of non-loose fabrics, you do not need to leave allowances for seams. In this case, use a stitch seam, since you can not turn out the finished shape. In case the fabric is sprinkled, allowances for seams should be made. Sew such an item on the sewing machine( or manually) from the wrong side, and then gently unscrew it to the front.
How to make a soft toy cat with your own hands from the sock?
For the manufacture of crafts you will need the following materials and tools:
- Sock;
- Scissors;
- Pencil;
- Needle;
- Threads;
- Adhesive;
- Woolen threads;
- Filler;
- Satin ribbon;
- Buttons for eyes and spout.
PIECE MANUAL:
- Fold the sock upside down.
- Mark the contours of the head and the legs of the future seal with a pencil.
- On the induced lines cut out the body parts( the cat's silhouette should turn out).
- On the muzzle draw a contour of the nose and mouth.
- Embroider items with dark woolen threads( use cross stitches).
- Draw on the silhouette of the claws of the claws and embroider them with woolen threads.
- Fill all parts of the body with filler( sintepon, cotton or scraps of fabric).
- To the body, sew your head.
- The front and back legs also sew.
- Attach glazed eyes to the muzzle or sew small buttons.
- On the neck of the cat tie a satin ribbon.
Important! In the same way you can make any other little animal that you like. The flight of fantasy is unlimited here.
to the contents ↑How to make a soft toy from pompoms?
For the manufacture of hand-made articles you will need the following materials:
- Knitting threads;
- Threads and a needle;
- Satin ribbon for decoration;
- Cardboard;
- Beads for eyes and mouth.
 Instructions for making a cat's soft toys with your own hands:
- It is necessary to make pompons - two large for the head and body, two small for the ears, four medium for the paws:
- Cut out two pairs of disks of the required size from the cardboard.
- Fold together two identical discs.
- Tightly wrap them with knitting threads - the threads must bend around the edges of the disc and pass through the center.
- After all the workpiece from the disks is completely closed, cut the threads with scissors along the outer edge.
- Insert the thread between the disks and firmly tie them into a bundle.
- Cut the cardboard disc and pull it out of the pom-pom.
- After all 8 pompoms are ready, collect a cat from them.
- Sew all parts to the torso.
- To the muzzle, glue the eyes and mouth.
How to make soft toys?
To make the animal or doll look as natural as possible and like the baby, we must carefully select the materials for the face or face.
Eyes
This detail gives the toy a special personality. The eyes make it alive, so they must be performed with the utmost care. The eyes of the toys can be of different shapes, depending on the chosen character: round, oval, drop-shaped, semicircular - the main thing that organically fit into the overall image.
The element can be manufactured from:
- Black or brown buttons;
- Multicolored oilcloth;
- Photographic paper;
- Pieces of skin;
- Colored pictures;
- Pieces of fabric, etc.
Important! To make the eye stand out, substitute for it under the eyecup of the same shape, but larger in size. The eyecup can also look like a crescent moon. Usually the eyecup is made white, but, for example, a cat, a tiger, a lion, it can be green, and a hare - pink or red, in birds - yellow or blue. You can also make a double eyecup. For example, under the black eye, put a colored, and under it a white subglass.
The toy's eyes can be made of transparent packings of tablets, different in size and shape:
- Cut 2 cells from each side of the package.
- Put a button or white colored paper inside the box.
Important! If the button lies freely inside the package, the eyes will move.
It is very important to determine the place of eye attachment. Animals have eyes at the level of the bridge of the nose.
Important! If the eyes are sewn above their normal position, the face is deformed and will turn ugly. Therefore, consider these tips when you make soft toys with your own hands & lt;:
- To properly position your eyes, divide the face of the toy( dolls) in half along a horizontal line. Place your eyes on this line.
- To make eye hollows, place the eye locations with a long needle and thread. Fix the thread behind the ear or in the lower part of the nape.
- Eyes, consisting of several parts, first glue together, and then place on the product.
Mustache
For some toys must necessarily have a mustache. They are made from fishing line. To paste the mustache to the desired location:
- Make a loop on the line.
- Pass the thread through the loop.
- Pull hair into the head with a thread.
- Attach the thread.
Nose
Noses in animals make different shapes. The most common is a ball. For its manufacture:
- Cut out a circle of suitable diameter from black fabric( velvet, satin, leather, oilcloth).
- Gather a circle on the thread with a seam over the edge.
- Pull off lightly.
- Put the sintepon or cotton wool in the resulting bag.
- Pull the thread to the end to make a ball.
A cat's nose can be made from a soft oilcloth of black color:
- First cut the shape in the form of a "T" with curved edges down.
- Connect the two lateral ends together and secure with a thread.
- Do not tear the thread, put the third( middle) end and fasten it together with the two previous ones.
Tips
- Before finally fixing the nose, eyes, ears to the head of the toy, pre-attach them with pins. Move them and look for the most successful and attractive location.
- When assembling a toy depicting an animal, first place the protruding part and nose on the muzzle. On the overlay, you can embroider or draw black dots to pull a mustache through them.
We hope that following our advice in the process of work, you have an interesting and attractive toy that will please your child so much that he will sleep with her, pressing to his chest, and in the afternoon - telling everyone how wonderful his mother is.
