- Piggy bank from the plastic bottle
- Bank to the piggy bank in the style of Superman or Batman
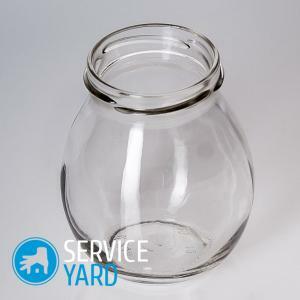
- Making a piggy bank from a glass jar
- Other ways to create piggy banks with their own hands:
Few people have a piggy bank at home. Someone uses it for its intended purpose and collects a trifle there, to someone the piggy bank serves as an element of decor. But very few people know that the history of this subject originates in ancient China, where donations were collected into it. The first prototypes of modern pigs for collecting trifles were in the form of an ordinary cup at the castle. On such a piggy bank, it was always indicated what the collected funds would go to. Then the piggy banks appeared in Russia and in Europe. The money box symbolizes prosperity and prosperity for all peoples. So, for Germans, the wish for wealth sounds like "pig's happiness".Let's try to make such "pig's happiness" with our own hands. There are many ways, following which you can get a very original piggy bank from the jar with your own hands, as well as from a plastic bottle, a cardboard box. All options can not be counted. Let us dwell on the most interesting in our opinion.
to the contents ↑Piggy bank from a plastic bottle
You will need:
- plastic bottle;
- aerosol paint;
- toy eyes;
- scissors and glue.
Operation procedure:
- Cut the middle part of the plastic bottle.
- Put the lower part on top, for better grip, they can be glued together.
- Paint the craft with aerosol paint in several layers. The color can be any you like.
- When dry, you can glue your eyes. They can be borrowed from some unnecessary toy. Cut from the remaining middle part of the bottle or from the cardboard ears, paint them in a light pink color and glue.
- The bottle cap can be painted with a marker in black, and you will have a pretty cute patch.
- Make a small hole on the top so that you can push through the small change and paper bills through it. This can be done with a knife.
- Legs for mumps can be made from plastic or from lids from bottles.
Your piggy bank is ready! You can feed it, and we wish you "pig's happiness"
Important! The first piggy-piglet appeared in medieval England, it was there that the first copies of the guinea pigs were released. Well, the Japanese, as always distinguished themselves and released a piggy-kamikaze. Its goal is not only to raise money, but also to teach young people to be responsible and punctual. If you do not throw a coin at a certain time, then it will crumble.
to content ↑Bank-piggy bank in the style of Superman or Batman
If your son is fan of superheroes, you can make with him a piggy bank in the style of Superman or any other hero that can be easily made from a jar. How to make such a superhero piggy bank with your own hands from a bank? Very simple:
- Find a beautiful jar with a metal lid.
- Paint it from the aerosol in several layers in a suitable color for your superhero color and let it dry well.
- From colored paper, cut out the logo or you can just print it on the color printer.
- Attach the picture to the jar.
- In the hole make a slot of the desired size with a knife.
Make a piggy bank from a glass jar
Take a regular glass jar of the appropriate size and screw the lid on it. On this lid make a slit for money. In principle, the piggy bank with its own hands from a glass jar is already ready. It remains to zadekorirovat.
For greater originality, we make a piggy bank of a square shape. For this we need the cardboard:
- Cut out two strips of cardboard. One strip is the width of the can. The second one is 1 height + diagonal cans + 1 height.
- These two strips need to be combined with each other in the place where the bottom of the jar will be, and fasten together with a stapler. This is the first billet under the frame.
- We make the second workpiece. To do this, put the first workpiece on the cardboard and draw, adding 1 cm to the allowances from the sides. It does not need to be made so long, leave 3 cm on each side. Cut out the second workpiece.
- In the center of the second blank we draw a circle equal to the diameter of the lid and cut it out.
- Now you need to put both blanks on the jar. We put the jar in the center of the first billet and raise the edges, and on top of the lid we put on the second billet and fasten them together with a stapler.
- For strength, you can fix the whole structure with tape.
- We make PVA glue in water in a ratio of 1 to 1. Cut into strips of paper towels. Strips of dunk in glue and waves are laid on the base. So we decorate the jar from all sides, preferably in several layers.
Important! Before applying a new layer, the old one must completely dry out.
- Each layer should be painted with acrylic paints. You can choose the color according to your taste.
Important! The first layer is painted in a darker color without lumens. The following layers are painted with lighter tones.
- Now take the glue "Titan" or "Moment", glue them with the neck and the places where the workpiece ends. Lay on the glue in a circle a packing rope, a woolen thread or a burlap. Using the same glue and rope, decorate the lid.
Important! Side can decorate the piggy bank with bows or buttons or other elements of decor.
to the contents ↑Other ways to create moneyboxes with your own hands:
- Do you have empty cans of coffee? Do not throw them away, you can use them to make a piggy bank. How to decorate such a jar-box? Find on the Internet a beautiful ornament, drawings of flowers or other image you like and print out the picture on a color printer. Cut out the picture based on the size of the can and cover it.
Important! On top, you can decorate the piggy bank with extra rhinestones, beads, buttons, bows or flowers.
- You can make a box of cardboard and colored thread. Just make a sketch of the box, cut it out of cardboard and fasten all the pieces with the help of colored threads. You can download the finished stock from the Internet, print and use as a stencil. On the lid make a hole for coins.
- Cut the plastic bottle to the desired height and sew a cover on the kulisk, which can be released or tightened back. Put it on the top of the bottle. Inside, you can put anything: money or just small items.
All the ideas suggested in this article are not the limit of fantasy. You can take them as a basic concept and create your own unique piggy bank design, bottles and any other handy stuff, then you will have more interest in filling it.