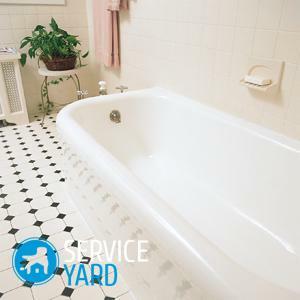
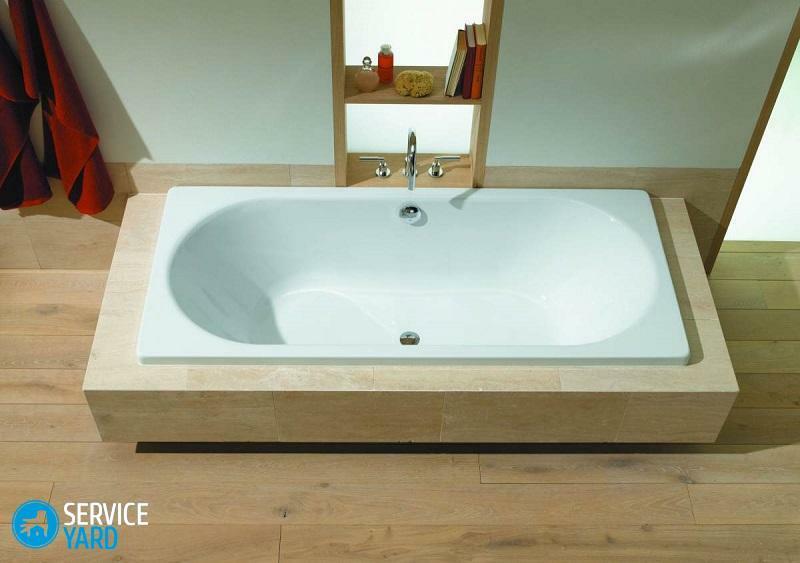
- What are the baths?
- Most common damage to
- How to prevent damage?
- The cleavage of the enamel on the bathroom - what to do?
- Repair methods
- Acrylic liner
- Porcelain patch
- Repair of cleavage in the bath with dry whitewash
- Other compounds
- Repair of cracks
- Through holes
- Point enameling
To change a bath is a troublesome and expensive business. To this the owner of the apartment usually ventures if he decides to completely change the interior or the bath has exhausted its entire resource and has come to complete disrepair. But even a new and good font on the surface there may be scratches, chips and dents, which seem to not interfere with life, but quite annoying. It is best to get rid of them right away. How to repair the chipped enamel in the bathroom? Now you will find out about it.
to the contents ↑What are the baths?
The oldest baths were stone. And now in someone's luxurious apartment used marble, porphyry or something else like that. The stone can be natural or artificial, but in any case - it's quite expensive.
Important! Designers also offer other materials - for example, in catalogs you can see exclusive models of glass or wood. Scratches on the surface of such a luxurious bowl is better and do not try to close yourself. Cope with such a delicate work can only master.
The most popular materials
In ordinary apartments there are bathtubs from much cheaper and more practical materials:
- cast iron;
- steel;
- acrylic.
A bit about each kind:
- Cast iron bowls usually serve for a very long time - even now in old houses one can see baths put half a century ago, or even more. The normative period is 25 years, but with proper care the cast-iron font can serve much longer.
Important! The main drawback of this material - fragility, chips and even holes can appear from the fall, for example, of a heavy object.
- Steel is fine material. The surface of the bowl can also be painted, respectively - the question is, what to repair the chipped enamel in the bathroom remains relevant. The service life is even longer than that of cast iron.
Important! Through holes in such fonts are rare, but scratches periodically appear.
- The most modern - acrylic bowls. This material has a number of advantages: it does not rust, it is easy to clean, does not lose its attractive appearance for a long time. But scratches on it are by no means a rare occurrence.
Most frequent damage to
Regardless of the material of the bowl, a defect may appear on it. The most common results are:
- chips;
- scratches;
- splits;
- rust;
- holes.
Metal baths are characterized by chips and rust. Sometimes there are scratches on the enamel. We must especially try to split a cast iron or steel bowl or make a hole in it. But it does happen.
For acrylic models, scratches are the most dangerous. The deepest can split the cup.
Important! Rust on the acrylic surface is rare and only where it comes into contact with metal parts.
to the contents ↑How to prevent damage?
Thinking about how to remove the chip in the bath, try to remember where it came from. This will help to avoid such problems in the future. When using the bathroom, no matter what material it is made from, you should follow simple rules:
- Do not place heavy or sharp objects on the edges and in the bowl.
- Avoid falling on the enamel of heavy objects.
- Do not use abrasive pastes, although many still do. The detergent should be soft enough.
- Do not use chlorine bleach - for this purpose it is better to have a special basin.
- Do not attempt to clean the enamel with acids.
- The bowl must be closed during repairs.
Important! The font itself should be thick enough and strong. But even if the walls and the bottom look reliable - you do not need to jump in it, because even a small child can damage the coating. If you have to wash a dog - do not forget to lay anything on the bottom. For example, a rubber mat.
to the contents ↑Enamel scoop on the bathroom - what to seal?
Despite the operation in a sparing mode, the chip on the surface still appeared? No problem. You can try to fix it. Just do not put it off, or you'll have to deal with other troubles:
- If a large piece breaks, the metal may rust.
- Even more dangerous is the chipping of the enamel on the acrylic surface. If you do not fix it in time, a crack can go. In the end, the font splits, and it will have to be changed.
You need to try and repair the defect.
Important! If you do it right, the bath will look almost like a new one, and the patch can last several years. To make it absolutely imperceptible will not work, at home there are simply no such conditions. But to repair the surface so that the repair site could be seen only by careful examination, it is quite possible.
to the contents ↑How to repair the
How to repair the chopping on the bath with your own hands? There are several ways to cope with the problem:
- by installing a special insert;
- pasting the patch;
- painted with a special compound;
- having imposed a new enamel on the damaged places.
Acrylic liner
The easiest( but not the least expensive) way to deal with the problem is to put an acrylic liner in the bowl. This option is especially good if the chip is large and other ways to make it invisible difficult.
Important! In the shops you will find liners of all kinds and kinds. Surely there is one that fits perfectly into your bathtub.
to the table of contents ↑Porcelain patch
When asked how to remove the chipped enamel on the bathroom, the broken porcelain cup will help you. This is a very old method, which was used even in those times when the fonts with enamel only appeared.
Prepare:
- porcelain fragments of suitable color;
- petrol;
- fine sandpaper;
- mortar with pestle;
- epoxy adhesive;
- spatula;
- respirator and gloves.
Important! The fragments must be exactly the same color as the enamel, otherwise the patch will be too noticeable. Work with epoxy better in a respirator and protective gloves.
Instruction how to seal the chipped enamel in the bathroom in this way:
- Clean the place of the chip with gasoline to degrease it.
- Thoroughly clean the place of the future patch with small nazhdachkoy.
- Chop the pieces of porcelain and rub them into powder.
- Apply epoxy adhesive to the cleavage site.
- Apply a layer of powder.
- Align the space with a spatula.
- Wait for two and a half hours.
- Sand the surface.
Important! If you are dealing with an acrylic bowl, all surfaces that can be scratched with a sandpaper should be closed.
to the table of contents ↑Repair of the chip in the bath with dry whitewash
For the patch, you can choose other materials, for example, white paint. You will need:
- dry white;
- glue BF-2;
- brush:
- stick;
- small capacity.
Option 1
The cleavage site and in this case it is necessary to degrease and sand, and then:
- Pour the glue into the container.
- Add the dry white.
- Stir this all to the consistency of thick paste.
- Apply paste to the cleavage site.
- Wait until the patch has dried.
Option 2
In this case, they act in the same way as during the repair with porcelain powder:
- Prepare the place of the chip.
- Apply a thin, uniform layer of BF-2 glue.
- Fill the chipped area with dry white.
- Align the layer with a spatula.
- Allow to dry.
- If necessary, repeat the procedure.
Other
compounds You can use different building mixtures to ensure that repairing the cleavage in the bathroom is effective.
Putty
Finish the chipping of the enamel in the bathroom with a putty.
Important! Choose one that matches the color of your bathtub perfectly. It is best to choose an epoxy putty.
In this case, proceed as follows:
- Prepare the bath for repair - remove rust stains, if any, wash it, degrease the cleavage site.
- Mix resin and hardener in a ratio of 30: 1.
- Apply the filler to the chip as soon as you mix it.
- Thoroughly humidify the substance.
- Align the layer.
- Allow the substance to completely freeze( the time is stated in the packing instructions).
Special enamels
On sale you can find special enamels for bathtubs. Use them easily and conveniently. The main difficulty is to choose a color that perfectly matches the color of the enamel. But if the bath is white, this will not be a problem.
Important! The advantage of such enamels is that they are designed just for baths, that is, they withstand both high temperature and water ingress.
At the final stage in this case, you can use an abrasive paste. It will play the role of nazhdachki, that is, polish the place of repair.
Important! It is not necessary to buy all the funds separately - it is much cheaper to get by a special set for repairing the chipped enamel of the bathroom.
Useful tips
Repair of small areas - it's not difficult, but it should be done carefully. Small tricks will help you:
- If you are not so sure that you can exactly patch, make a stencil.
- It is better to use the bathroom to start the day after four days after repair - this will ensure a good grip.
Stencil Patch
The stencil is best made from a dense polyethylene film:
- Apply the film to the chip.
- Circle the chip with a ballpoint pen.
- Cut the hole exactly along the stroke.
- Apply the stencil again.
- Secure it with adhesive tape.
- Seal the hole in one of the ways described.
- Carefully remove the film.
- Wait until it dries.
- Sand the surface.
Repair of cracks
Small cracks( not more than 1 mm deep) - this is quite common, especially on acrylic surfaces. Therefore, take this instruction on how to repair the chipped bathroom enamel:
- Strip a small area - about 0.5 cm from the crack in each side.
- Drill at the ends of the cracks small holes with a depth of no more than 1 mm.
- Rinse the cleaned area, degrease and dry.
- Apply the compound( epoxy putty, enamel or porcelain paste) to the crack, closing the holes.
- Align the layer and delete the superfluous.
- Wait 12 hours.
- Sand the surface.
Deep cracks
They will have to tinker with longer than with thin and shallow ones, but the principle of repair is the same. Among other things, you will need more construction tape.
We proceed as follows:
- Sweep the surface around the crack.
- Make holes from both ends, degrease the area and dry.
- Cover the crack with a construction tape - it must completely close it.
- Smooth out the adhesive tape and remove air bubbles.
In principle, the repair is complete, but you can close the adhesive tape with a layer of putty or porcelain paste.
to the contents ↑Through holes
Alas, holes on the baths also sometimes appear. Do I always need to change the font? Not necessarily, sometimes you can do repairs.
You will need an electric drill, and not only with thin drills, but also with a thick:
- Thin holes are drilled with a diameter of 2-3 mm. They are needed so that the hole does not creep further.
- Thick drill - attached to the hole itself is a form of a crater with gentle edges.
Important! The repair site, as in the previous cases, must be washed, wiped with gasoline and dried. By the way, for drying, the most useful thing is an ordinary household hair dryer.
Such a hole is filled with epoxy putty:
- Mix the components according to the instructions.
- Apply the filler to the edges of the hole.
- Make a layer of reinforcement mixture.
- Apply another layer of putty.
- Repeat the procedure until there is no trace left of the hole.
- Wait until the putty dries, then grind the surface.
- If putty and bath of different colors, apply a hole in the hole enamel.
Important! Epoxy putty and reinforcing mixture can be bought together, they are included in the kit, designed to repair baths.
to Contents ↑Spot Enamelling
This rather simple repair method is used when there are minor scratches on the surface. You will need an "enamel restorer".Buy it you can in the store plumbing.
Important! These are universal compounds, in principle they are suitable and in order to repair large damages. Such "restorers" can be put in order the surface of not only the bathroom, but also any other items where there is enamel.
Method of application:
- The agent is applied by brush on a degreased, dry, clean surface.
- To distribute it you need a very thin and even layer.
- Then allow to dry and apply another coat.
- For final drying, a day is needed.
In this article, we told you about all the means and ways to eliminate the chips of enamel in the bathroom. You only need to choose the appropriate option, based on the scale of the damage, your financial capabilities, repair skills and the amount of free time.