- What are the causes of battery discharge?
- Kinds of chargers for car batteries
- Charging from a computer power supply
- Adapter
- Using a light bulb and a diode
There are times when a car enthusiast does not have a battery for his car's battery. Some do not acquire it because they do not see the need for such a purchase. But the practice shows that every driver at least once had a problem with the battery, which suddenly sat down. Nobody forces you to buy an expensive device for charging, but you need to have it at hand. How then to enter? Why not just do it yourself? So you can save money, and certainly be sure of the quality of the assembly. How do I make a battery charger? This article will help you understand this.
to the contents ↑What are the causes of battery discharge?
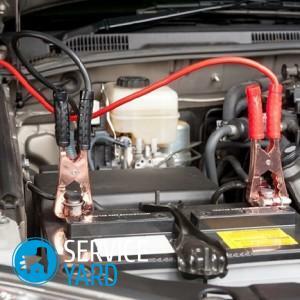
Prolonged use of transport can lead to the generator refusing to perform its work. All this can result in the fact that one day you will not be able to start transport. And the impact of temperatures can spoil the future trip, if the window is minus thirty degrees.
For "resuscitation" of vehicles it is necessary to have a charging device at hand. Create a charge is not very difficult, but for this you need to understand a variety of nuances and acquire certain components and tools. Let's talk about all this in more detail.
to the contents ↑Types of chargers for car batteries
Progress never stands still. The development of technologies takes place at a tremendous speed, and charging devices, which are based on transformers, have long since lost their relevance. Today they are replaced by chargers of pulse and automatic type.
Pulse
Pulse devices are small in size, capable of providing a full charge of the battery. The process of charging itself occurs in the following two steps:
- Work at constant voltage.
- Work with direct current.
The design itself consists of simple similar circuits.

Automatic
Automatic device differs in its ease of use. It is a diagnostic center with a huge functionality. It is very difficult to build such a device yourself.
The most "smart" devices will tell you about an error in the connection, if you incorrectly connected the poles. In case of incorrect connection, the supply of electric current does not even begin.
Important! Also such devices are able to measure the level of charge and capacity, and some even have timers.
How do I assemble the battery charger myself? Let's look at the most common ways to create.
to the contents ↑Charge from the computer power supply
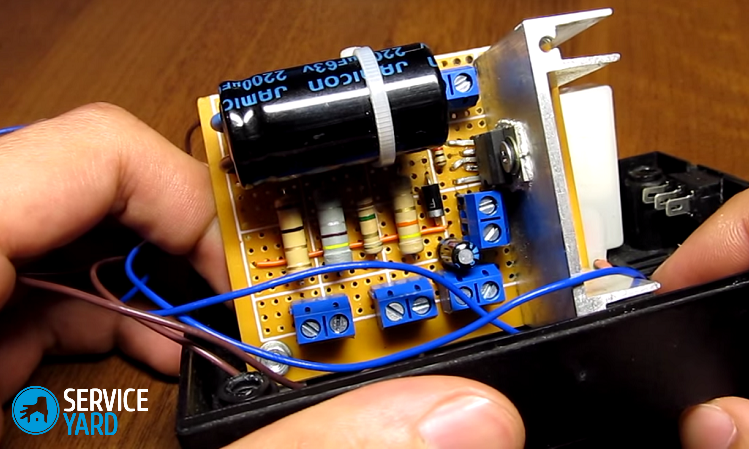
You will need an old computer that is lying around your "unnecessary" junk. Do not have one? No problem! You can buy an old power unit for a ridiculous amount. The old device from the PC can be used to create a variety of chargers. You just need to get a chip that will be used as a controller.
Important! Perfectly suitable for this TL494 or Ka7500.
Assembly features - kit and type of accessories:
- Power supply unit should vary from 150 watts and more.
- The resistor in it must be replaced by a trimmer.
- The diagram does not represent anything complicated. A voltage of 12 volts is applied to the upper terminal, and terminals 14 and 15 are simply cut off, since the need for them disappears.
Important! Leave only the sixteenth output, because it is connected to the main wire, but it must be turned off.
- The back of the unit must have a potentiometer. Also, you have to take two cords and skip them: one is useful for connecting the terminals, and the other is the network. This wire allows adjustment.
- Two resistors are needed for manufacturing. Its users find the 5W8R2J the best choice. Do not forget about the tuning resistor, which will have to be fixed to the same board, having got rid of the printed track.
- Before soldering, it is necessary to tighten the terminals: 1, 14, 15, 16. The idling voltage will determine the total charge, which can be set using a variable resistor.
- It is best to ensure that the insulation is of different colors. According to the canons: red is positive, and blue is negative. Of course, this is not important, but suddenly you have a pedantic radio operator inside of you?
Important! Try to avoid confusion with the wires, as there will be a risk of malfunctions and breakdown of the device.
How to assemble the charger in other ways? Read on!
to the contents ↑Adapter
Adapter for 12 volts is considered the best option for manufacturing a charger( charger).But here it is necessary to take into account all the technical parameters of the battery:
- The wires of the source device need to be removed from the insulation at the very end and exposed. About 6 centimeters will be enough for convenience.
- Wires with different signs of charge should be located from each other at a decent distance, somewhere 40 centimeters. At the ends of each of them, you need to wear a crocodile clip.
- Following the sequence, it is necessary to properly connect these clips to the batteries.
Important! To avoid damage to property, carefully monitor the temperature of the battery.
to the contents ↑Using a bulb and diode
The method is "simple" because of the availability of necessary materials: a light bulb and a diode.
Important! The power of the bulb should exceed 200 watts.
Do not charge batteries with a small capacity in this way. This is fraught with the fact that he will begin to "boil."
Important! The charge current must not be greater than a value that corresponds to one-tenth of the total power.
The second important component is a semiconductor diode that will conduct an electric current. It remains only to install the wire, terminals and plug.
Important! Observe safety regulations and correctly connect devices, focusing on the polarity of the wires. It is also recommended to use rubber gloves when using the memory.
When manufacturing, pay attention to the diode. Usually it has an arrow that points to a plus. A semiconductor diode transmits electrical current only in one direction, accentuate this attention and use a tester to determine the polarities of the clamps.
Important! The charging process lasts about 7 hours. After this time, you need to turn off the power to protect yourself from battery overheating.
Now you know how to assemble the charger yourself using three different methods. This lesson not only brings useful benefits, but is a very interesting experience for any car owner.

