- Create an electrical circuit
- Recommendations
- Precautions
Absolutely any electrical devices can be connected to power supply only via a linear or parallel connection. When the elements are connected in parallel, the current runs immediately in several directions. In other words, each element in the chain has its own power circuit. The most important feature of parallel connection is the convenience of work. If some element of the chain burns, we will quickly define it and replace it, because if one element breaks down, the current does not stop flowing to the other. Also, a number of devices do not cause power drops. The experience in the assembly of electrical circuits is very useful for understanding the principles of the operation of an electric current. How to assemble the electrical circuit yourself? Let's try to figure it out.
to the contents ↑Create the electrical circuit
When implementing the project, you should take into account the age and experience of the person who will be engaged in this. Such tasks can serve as a good and interesting experiment for high school students studying the laws of electric current distribution. This method can serve as the basis for the person who is taking the assembly of the chain for the first time.
The experiment itself can be classified into two different types of conduct.
We use to create foil
In order to assemble the electrical circuit at home, you need to do the following:
- Get a power supply. The most economical and common option is the most common battery.
Important! You can take a nine-volt battery for this task.
- Find the electrical devices that will be used during the experiment. These components you will connect to the power supply.
Important! Our example requires two incandescent bulbs or conductive diodes.
- You need to take care of the conductors. Today aluminum foil will be used as a conductor. It is through this foil that electric current will be supplied from the battery to the consumers.
- Cut the foil into four narrow strips: two pieces of 20 centimeters and two - 10 centimeters.
Important! Their width should correspond to the diameter of the drinking tube.
- The strips are more authentic to be connected with the batteries. One with a plus, and the other with a minus, respectively.
- Now it is worth considering the connection of electricity consumers. It is necessary to take the two remaining conductors and wind one end to a 20-centimeter conductor. One of the strips should be connected near the end of the long "wire", and the second strip - centimeters by 7-8 closer to the power supply. Wrap the loose ends of the short "wires" around the bulbs.
Important! If you can not fix it qualitatively, then use the insulating tape.
- If you avoided the breaks of the circuit, then when you connect all the elements of the light bulbs should begin to glow. Try to touch the incandescent bulbs of the second long conductor, which comes from the minus battery - the bulbs will light up even brighter.
You learned how to make an electrical circuit using aluminum foil. Let's try other methods.
We use wires and switch
This project is a complicated variation of the first one. Even here there should not be any difficulties, because this task is very simple. The only thing you need is the presence of wires and a key( switch).This lesson will bring good experience to those users who only learn the basics.
Important! This method requires stripping the ends of the wires. Be careful in your actions.
Order of work:
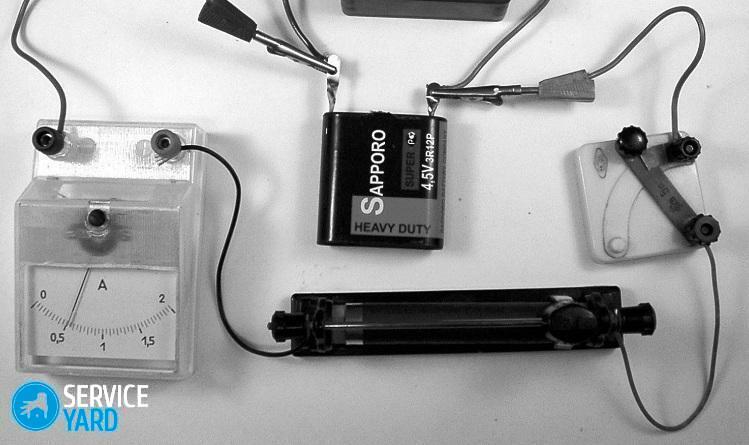
- First you need to prepare everything you need to create this project. It is worthwhile to find the following: a battery, conductors, a key and at least two consumers of energy.
Important! For a power supply again, a 9 volt battery is perfect, and you can easily find a switch in any household goods store.
- It is best to find a copper wire for current transmission. Cut it into several lengths not very long.
Important! On the whole scheme you can take 70 centimeters.
- In this method, light bulbs will be used again, but nobody prevents you from taking a different kind of consumer.
- Prepare the wires: cut the wire into five identical pieces with dimensions of 20 centimeters each. It is necessary to remove 2 cm of insulation from each of their ends.
Important! For such manipulations, a stripper is great, but its absence can be compensated with simple scissors or cutters.
- Connect the first power consumer with the power source. To do this, connect one of the wires with its plus, and connect the other end to one of the used bulbs.
- Now it is necessary to attach the key to the nutrient element. For connection, use one of the remaining pieces of wire. Connect its end to the minus of the source, and the second - connect to the switch.
- The switch itself must be connected to the first light bulb by means of another piece of conductor. The end of the wire is connected to the key, and then to the right side of the first consumer.
- Take the second lamp, using the last piece of wire, attach it to the left side of the first light bulb, and from the second - to the left side of the other bulb.
- With the last remaining conductor, connect the right side of the first bulb and the right side of the second bulb. The chain is ready.
- It remains to close the key and observe how the two light bulbs begin to glow.
Now you know how to make an electrical circuit in two different ways. Such experiments help to understand the essence of physical processes and give experience in future work with electrical circuits.
to the contents ↑Recommendations
For 100% fixing, you can use an insulating tape or soldering iron.
Important! Application of the latter requires from you basic skills in handling the soldering iron. Do not give the device to anyone who does not understand how to handle it.
to the contents ↑Cautions
In order to maintain your health and financial condition, the following elementary safety rules should be adhered to:
- Never undergo any manipulation of high voltage and high amperage if you do not have adequate protection against damaging effects.
- During stripping, you should carefully monitor whether the wire itself has not been damaged. The best tool for this case is a stripper.
- Use caution when using electric bulbs. Such elements are very fragile and careless handling can lead to cuts or electric shock.
Radio amateurs are not born. Good luck in all your endeavors!