- What can I sew from a leather cloak?
- Features of work with leather
- How to sew a leather waistcoat from a leather coat?
Genuine leather is a durable, practical and very effective material. Quality leather clothing will last for as long as you can not imagine. And even if such a thing just went out of fashion, it can always be reshaped for more fashionable clothes. If you are interested in knowing what can be sewn from an old leather cloak, then our article is just for you. Today we will tell not only what can be done from the old leather cloak, but also advise how to properly work with the skin, what tools are needed at the same time.
to the contents ↑What can I sew from a leather cloak?
Sewing things from such a practical and warm material, like leather, is necessary only for the reason that such products look very impressive. If the skin is of good quality and not shabby, then it is easy to reshape and sew fashionable things:
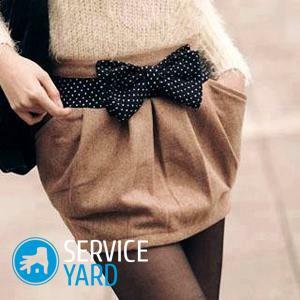
- Waistcoat of any length, with a fur collar and without.
- Sports short jacket.
- A small overall.
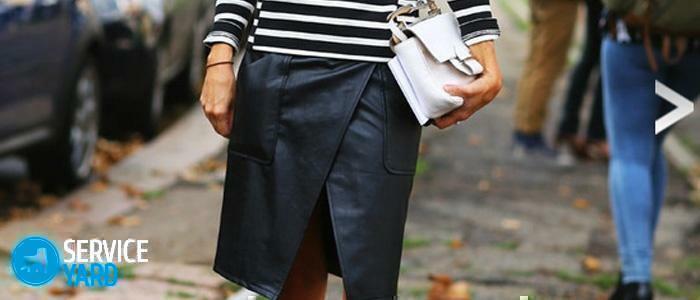
- Skirt.
- Pants and shorts.
- Gloves of various styles.
Important! If the leather thing has already been damaged in some places, the shabby places can be masked with embroidery, applique from other pieces of skin or combine the skin with suede, fur or knitwear.
If the skin is scratched and worn, and it can not be used for clothes, then it is possible to apply material for the manufacture of practical things and accessories. Here is just a small list of leather products:
- Bags, clutches and backpacks.
- Slippers.
- Wallets and purse of different sizes.
- Cases for phones and glasses.
- Belts.
- Shoulder straps.
- Dog collar, leash and muzzle.
- Jewelery: brooches, hair clips, bracelets.
- Bag with pockets for tools.
- Decorative basket for storing various trifles.
- Flower pots under the flower pot.
- Steering wheel cover.
- Floor Vase.
- Picture.
- Leather cords from completely unsuitable pieces suitable for decorating clothes and interior decoration of the room. For example, various hanging shelves can be fixed on the wall with leather straps or laces.
- Flowers for decoration of bags, berets and hats.
- Bindings for notebooks and diaries.
Important! If you use an old raincoat to make a bag or a clutch, then the lining cloth is not stripped off - this will shorten the time and facilitate work.
And nowadays skin is often used in the interior. It can be used for upholstery of armchairs, seats, armrests. From the practical material you can make a panel and application. In many cases, scraps of skin are not even sewn, but simply glued to the base.
to the table of contents ↑Features of working with leather
Working with natural material requires certain knowledge, skills and sewing skills. To work with the skin you need not only a special sewing machine, but also special threads, needles, glue materials. In addition, many tools are used, specifically designed for working with natural material. This all must be considered in order to sew from the old leather cloak really sound and neat in appearance things.
Important! The technology of tailoring the skin differs from sewing fabrics. The main technological feature of joining parts from the skin is that the allowances of the stitch seams are glued, rather than ironed. Therefore, before proceeding to the customization process, make sure that your sewing machine "confidently" works with the skin, that is:
- Does not make skip stitches in the line.
- Does not break the needle.
- Easily moves through thick sections of the material.
To make the sewing machine easier to work with the material and you could easily sew from the old leather coat exactly what you intended, listen to our recommendations:
- Be sure to buy a sewing foot for the skin. This item is sold in the sewing accessories store.
- Buy special sewing needles to work with the skin.
Important! Remember that the finishing seam on the leather product must be done only once. If you have to dismiss the line, then there will be traces on the product from the previous piercing of the needle.
Today, there are many books on teaching the technique of tailoring leather products. We only offer a few basic simple recommendations.
For each product correctly choose the grade and skin type:
- The same skin as for sewing gloves( kid's) will suit the costume jewelry. It is soft and elastic, capable of conveying the subtlest nuance of the small elements of the product.
- Bags are better to sew from a harder skin, because if you are sewing a bag of soft fabric, then to make the form necessarily have to use duplicate gaskets made of more dense material.
- For a fur vest with leather inserts, use a dense, but soft skin, since the rough one will "crumple", and too thin - it will break at the junction points.
You need to cut leather with a special shoe knife
. Of course, it's possible to cut the material with tailor's scissors, but it is better to use a special shoe or clerical knife for this purpose.
Important! Beforehand, before opening a layer of leather, a wooden board or plastic must be placed.
Skin can not work without glue
Before starting to work with the material, prepare a tube of glue for shoes or rubber glue. It is impossible to produce a quality product from the skin without glue. It is applied to a clean and degreased surface with a brush. Take care that the glue is not too liquid, otherwise - the material will get wet.
Important! Instead of glue, you can use special adhesive tapes, which are very convenient to work with.
Work with the adhesive as follows:
- Apply glue to the part.
- Set aside the treated part for a few minutes, until the formulation dries dry.
- Repeat the procedure with glue application, if you find areas of the material without glue( it can absorb).
- After 2-3 minutes, when the glue will dry a little, press the treated area to another area of the skin( without glue).
- Surplus glue immediately remove with a cotton swab.
- Place the bonded parts under the press.
- Slightly tap the glued elements with a hammer.
Important! Special adhesive tapes are convenient to use when replacing zippers in a leather product and putting up seam allowances. However, it should be noted that the tape tightly glues the skin areas and disconnect them in case of error is very difficult.
The technology of tailoring the skin
Working with natural material is quite a difficult task. It is necessary to be able to use various tools, adaptations, to take into account a lot of nuances. For example:
- When cutting out paired parts, it must be taken into account that the skin in the transverse direction is stretched more than in the longitudinal. Therefore, it is necessary to cut the paired elements in one direction.
- It is impossible to chip the skin with pins and thread, as there will be traces left from the piercing of the needle, which can not be removed.
- Soft thin skin can be sewn on a typewriter with a normal needle( №80 or №90).
- For sewing thick and coarse skin, needles with the shape of a point in the form of a two- or four-sided blade are used. Such needles make it easier to pierce the rough material and leave a less noticeable trace. In addition, special needles prevent the appearance of a badge in the stitch and breakage of the thread.
- The stitch length on the sewing machine must be set to the maximum value, since in places where the needle frequently punctures, the skin may tear.
- Not every machine can sew a skin. Before proceeding to work, be sure to read the instructions to the device. If there is not indicated that the sewing machine can sew leather, then do not even try to experiment.
- Use strong and elastic threads for sewing. Nylon threads, which cobblers use to repair shoes, are not suitable for sewing leather goods on a sewing machine, since they are used only for manual work and too "twisted".
- Clips on the sewing machine with a back stroke when sewing the skin should not be done, since the machine stitches on such products are used to blossom. To prevent this from happening, we recommend connecting the ends of the threads with several nodes from the underside of the product.
- Use a special foot for sewing leather goods. Instead of a flat sole, a roller or roller is used for such a device. The roller completely removes the resistance of the sewing foot, and does not weaken the force of pressing the material against the rail. Using a special presser foot, you do not need to put the newspaper under the presser foot or pull the fabric toward you.
- When sewing suede, be sure to consider the direction of the pile, since if you connect the elements of the product in different directions, they will have a different shade.
- Sewing a button to a leather product is only necessary when paired with another button on the wrong side. The duplicating button will protect the skin from rupture.
Skin Care
After finishing work with the material, the appearance of the product must be refreshed. For this:
- Marking lines left during operation, remove with soap and water.
- Wipe the leather surface of the product with a cloth moistened with glycerin or petroleum jelly, so that it will get the same shine.
- Strongly soiled areas are removed with warm, not boiled milk, wipe with whipped protein or half a bulb.
- Clean white skin with a mixture of milk and whipped egg whites.
Skin dyeing technology
For the skin dyeing procedure, use an aerosol can as follows:
- Spray paint on a piece of leather from a distance of 20 cm. To paint evenly, do not hold the can for too long in one area.
- Smoothly move with the can along the surface to be painted.
- Leave the product for 10 minutes.
- Apply the next coat of paint.
- Continue the staining procedure until the skin surface becomes evenly colored.
Important! Use aerosol paint only to partially "refresh" the surface of the skin. For the cardinal recoloring of clothes such paint is not used.
Let's move from theory to practice and tell you what can be made from a leather cloak. For example, if a large cloak, then you can shorten it and sew a smaller female or children's jacket. And the area from the bottom can be used to make a waistcoat with a fur collar.
to the contents ↑How to sew a vest from a leather cloak?
First, prepare the material for cutting:
- Dissolve and align the seams on stretch marks. The surface for cutting should be flat.
- With a soapy solution gently rub the front side of the skin to give it a marketable appearance.
- Rinse the surface of the material with a special solution: 1 glass of 9% vinegar, 50 grams of salt per 1 liter of water.
- Lubricate the skin with glycerin to make it elastic and shine.
- Crucify the natural skin on the board with a construction stapler.
- Leave the material to dry.
After all the procedures you will get an ideal cutting surface.
Cutting the vest
For cutting the product, you will need a pattern. Use any, suitable for your size, a pattern from the magazine or make it yourself.
Pattern patterns are laid out on the surface of the material and determine the length of the product. Pattern on the skin with a piece of dry soap or chalk.
Important! If there is not enough material for the length or width, then the missing parts can be made from attacks, and make decorative details. For example, from the remaining pieces of skin can be made: inserts in the sides, coquette, straps, vtachnoy waist belt around the waist, a tie waist at the bottom, shoulder straps over the shoulder seams.
Use flaps of any other leather or fabric - this will give the product an originality.
For the same pattern, cut out the lining for the product from a suitable fabric( lining).Do not forget to add allowances to the seams.
Assemble the vest for fitting, specify the model and make corrective changes. All the changes are transferred to the lining. Stitch seams on the skin and lining using a sewing machine.
Connection of a fur collar with a vest
Collar of fur can be reduced if necessary in width, and the obtained shreds can be used to extend it. Be sure to follow the direction of the pile.
Instructions for connecting parts:
- For the collar, prepare the lining from the lining fabric. Lining at the edges should be 0.1-0.2 cm less than the collar itself. For convenience, you can first make a collar layout on paper, and then produce all the cuttings.
- The gasket is connected with the collar over the outer seam, and the inner seal is left for embossing in the neck and the bead. Then mow and twist the collar to the front.
- Prepare the straps for transmission and prick them with a zipper.
- Connect the collar with the vest over the neck and sides. The lining of the collar must fall into the joint seam.
- Sew the straps with zippers to the sides, to which the collar is already sewn. Under the line must fall: the sides of the product, collar and straps.
- Connect the lining to the product along the neck, sides, armholes and bottom.
- Secure the seams with finishing stitches.
Why wear a vest?
The vests can be long, medium and short in length. All options look very elegant. Medium and short vests can be worn instead of outerwear.
Depending on the color, the vest can be worn with different things:
- Black classic - with skirts, trousers.
- Brown suede - will suit the ethnic style, Country and Boho.
- Leather waistcoat with fur worn with woolen jumper, turtleneck, knitted tunic, jacket. Suits leather vest and to dresses made of wool, knitwear, acrylic.
- For the style of cuegal to the waistcoat, choose jeans, a sweater or a turtleneck.
Important! A leather waistcoat is perfect for both business and casual style. Products are perfectly combined with leather shoes and bags. And if you use a leather vest for the evening image, then add it with stylish accessories.
Give life to old things, because so many beautiful stylish products can be sewn and made of leather. We wish you creative success!