- Repaint spanking
- Another version of the rework
- From what to make the top?
- Children's shoes
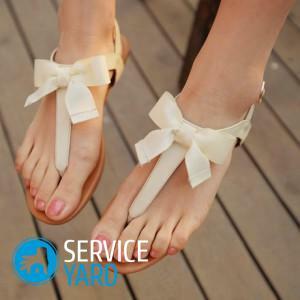
What just do not do today master themselves: decorations, furniture, interior items and much more. All this allows you not to feel part of the merged mass, but to feel your individuality. But why not try yourself in the role of a master and not create something exclusive? For example, designer clothes or shoes. Today we'll see how to make stylish sandals with your own hands. And first try to remake the shoes.
to the contents ↑Remodeling the flip flops
When the summer is close, I want the most breathable and comfortable shoes. Sandals in the form of slaps with frequent toes lose their attractive appearance. In this case, most often they spoil from the top, but retain a whole and firm sole. So why not use old shoes, and do not create from it a new thing that will definitely be unique. We will analyze the progress of the work step by step, but first we will get ready for work.
Step one: prepare
First you need to clean our shoes, rinse and dry. And also prepare tools and materials.
You will need:
- Actually flip flops, which we will redo.
- Thick, stretchable material.
- Thick cardboard.
- Oilcloth.
- Adhesive for shoes and instant.
- Scissors.
- Other materials for decoration.
After preparation, you should carefully cut all the elements of our future product, and you can start creating new sandals.
Step one: a trace
In order to make a mark, we need solid cardboard. For example, like in a shoebox. By the way, you can use a cut box.
Let's get to work:
- On the cardboard we trace an old trace with a pencil and carefully cut out the right and left parts.
- Next, we take any material that is convenient for you, which will cover the sole from above, and cut out the same two parts from it.
Important! The material is suitable for leather, leatherette or tight jeans.
- The next step is to connect the cardboard and fabric parts together with glue. Accordingly - we get two marks: right and left.
Important! Remember that even with very accurate operation errors are possible. Therefore, it is necessary to wait for the parts to dry out and attach them to the sole.
- If suddenly the transactions turned out to be slightly larger, you need to cut them to fit.
- Then our parts must be swept. This can be done with the help of yarn. You can choose the color you need based on the color of the top cover.
Important! It is better to use a yarn that matches the tone of the material.
- After the work on the mark, the glue is glued to the base - the sole and allows it to dry well.
- After drying, the sole must be stitched with a mark.
Important! If you do not have enough experience, this stage is best entrusted to the shoe masters. Of course, the service will have to be spent a little, but you will get a high-quality firmware.
The sole is ready, now you can leave it alone for a while, and go to the upper part of the shoe.
Step three: Making the top
To begin with, you need to take the measurements off your feet. You can use a thick oilcloth, which should be wrapped around the leg with an old footprint, pick up a comfortable tension, make a mark on the material and cut off excess. Thus, we get an almost ready basis.
Important! For accurate adjustment, gently sweep the base to the old track and check how comfortable it is for you. If necessary, correct the result.
Further, the upper part can be sewn with a soft, but strong fabric and proceed to the final stage.
Step four: connect parts
Before we have a pair of sandals, we need to sew the top to the sole. Work carefully, and it is better to double-check, several times, where the right, and where the left parts. In this case, you do not have to spend the effort to redo the work. In principle, sandals with their own hands are ready. If desired, you can add to them a heel for the heel and various decor elements.
Important! In order to make beautiful shoes yourself, you do not have to spend huge sums on designer products, and you can not be a shoe master. If you have a sole from the old shoes, you can create other options for stylish and comfortable sandals.
to the contents ↑Another version of the rework
If the first version of the instructions how to make sandals with your own hands from a slap, you did not fit, there is another way.
You will need:
- Outsole. Any one from old slippers, slippers, vietnamoks will do.
- Material for the upper part - trimming from the old leather cloak, dense elastic fabric. Needle, thread and scissors. Thread it is better to choose strong. Good for kapron shoes.
- Silo.
- Super glue or glue for shoes.
- Elements of decor. Tapes, buttons, beads, rhinestones, rivets
Having prepared all the necessary tools and materials, you can start working. 
Steps:
- First you need to remove all dirt from old shoes, as well as cut off worn parts.
- Next, measure a narrow long strip of material of this size so that it can be wrapped around the foot several times.
- In the holes from the removed parts on the sole we stretch the cord from the fabric and tie it with knots on the sole.
- The lateral part of the sole is notched and a cloth is inserted into the holes, which will hold the foot at the fingers.
Important! Do not make the incision big, otherwise - the step will be quickly erased.
- The finger strips are then cut off. They should be wider - about 8 to 20 cm, but everything is adjusted to the leg - the width should not allow the toes to hang, and approximately 1.5 cm from each edge will be needed to fix the footrest.
- After - the fabric is inserted into the notches on the sole, pressed and adhered.
- To ensure the best gluing quality, you can tighten the seats in a vice.
- Then it is necessary to wait for the complete drying of the product and proceed to create the front part.
Important! From the front, the fabric can be laid crosswise or with one straight piece. You can tie two strips of cloth knot in the middle. You can also decorate the model in different ways: use appliques, buttons, rhinestones, rivets, embroidery, beads and beads, belts buckles, belts, cords, ribbons and other elements.
to the contents ↑From what to do the top?
In order to save on the creation of shoes, it is necessary not only to make it yourself, but also to take care of inexpensive materials.
Tips:
- The old outsole perfectly fits as a blank for almost any model, the insole can be made by yourself.
- For upper parts, you can use scraps of leather, jeans and other dense fabrics.
- You can also tie the top with knitting needles or crochet, or use old straps.
- For firmness of the firmware use nylon threads, and also think over their color. Contrast thread can serve as an additional element of decor.
- It looks interesting the painted outsole. For coloring, acrylic dyes and clear lacquer for fixing the pattern are good.
- Very bright idea for the decoration of sandals with their own hands - felt flowers, or shoe coating with a brilliant varnish.
- More for the top fit knitted items with their own hands.
But this is not all the options. It all depends on the design of your chosen model.
If you have mastered the alteration of shoes for yourself, then you can cope with the creation of children's sandals.
to the table of contents ↑Children's shoes
For children, breathable shoes are especially important in the summer. If a little man has not yet learned how to walk, he can bind comfortable sandals with his own hands. The master class is designed for a leg of 10.5 cm, but you can choose your own sizes by adding or removing the width and length.
Master class:
- To create children's sandals we will need a hook number 2.5 natural cotton yarn.
- First outsole: twenty air loops with three lifting loops to start the next row.
- In the fourth loop of the row, three stitches with a crochet are knit. The rest of the columns are tied with folded stitches, not tying the last loop.
- The last loop is fastened with seven bars with a crochet for a turn.
- The subsequent row is tied with posts, adding to the last loop three columns with a crochet and a blind loop. This is the end of the second row.
- Following these instructions, two more rows are tied. We get insole. We need four such details.
Important! To make the sandals luminous, you can associate 2 parts of the same color, and two - another, more contrast. Further, the elements are ironed and the work continues.
- On the last column with the crochet details pass the hook and knit four air loops.
- Next, the first wall fits together. For this, six bars with two crochets are tied.
- After this, you need to make a chain of twelve air loops and tie it in the fifth column of the turn. This is the column that we made with two rounds. He is in the middle. So we get straps for our sandals.
- For the second side, we make eleven air loops and bind them in six columns with two crochets.
- For the strap on the heel knit 21 air loop 16 for the strap, and 5 for the buttonhole.
Important! On the second leg all the work is carried out in a mirror image. Those two details that have remained are the soles. They must be sewn to bound sandals.
Of course, such products are not suitable for kids who can already walk, but for very young children - this is a very convenient and beautiful version of shoes.
You can make the same sandals with the help of knitting needles.
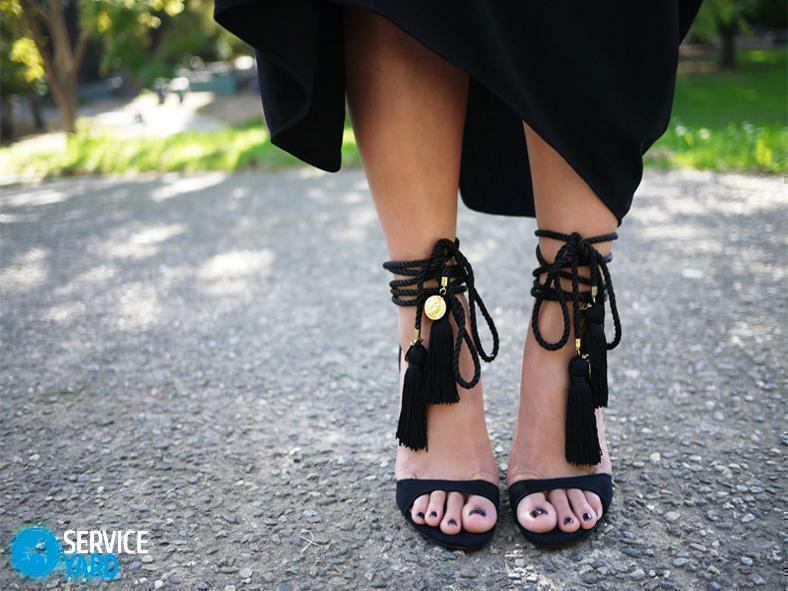
If you do not have summer shoes, this is not an excuse to get upset. If you have a sole, you can easily make yourself a real designer piece or knit a cute sandal. For the evening version, choose bright decor elements: chains, ribbons, brooches, laces. If you make shoes on a wedge, then the platform can be covered with patterns. The main thing is to work accurately, and if difficulties arise during the process, you should consult with experienced masters. Inspiration and creative success!


