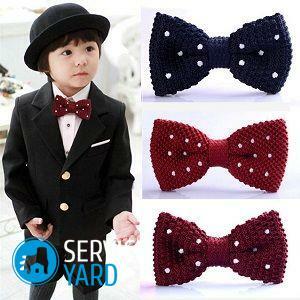
- Types of bow ties
- Sewing a bow tie
Butterfly is an element of a men's wardrobe, which was worn exclusively for solemn events. Nevertheless, today it is not only a "dress-and-holiday" accessory, but also a daily one. It can be combined with different types of men's shirts, and sometimes even with t-shirts. Of course, in this case one black butterfly you can not do, and buy a few - not everyone can afford. Therefore, in order to always look stylish and original, and do not incur special financial costs, you can make a lot of such accessories for any clothes yourself. How to make a butterfly for a shirt with your own hands?
to content ↑Types of bow ties
Despite its uniformity of form, there is a whole classification of different variants of butterflies.
By tying:
- Self-binding. Its name was received due to the fact that it is fastened at once to itself. There are both one-sided and two-sided models.
- Attachment. From the back of the butterfly is placed a special metal clip, with which it is worn.
By age and gender:
- Male;
- Feminine;Children's
- .
Important! To date, the boundaries between the male and female bow tie are obliterated and are conditional.
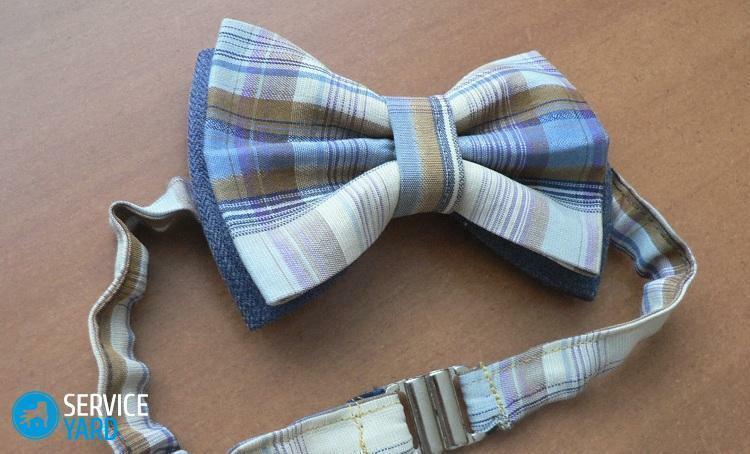
According to the form:
- Butterfly. This is the most versatile and classic option. Its name was due to the fact that at the edges like the wings of a butterfly. The width of the "wing" is about 6-7 centimeters.
- Large Butterfly. The analogue of the previous one, only larger in size. It was created for people with large physique.
- Batwing. Narrow butterfly with long wings.
- Diamond point. Its name is derived from the fact that in a folded form resembles a diamond.
- Rounded club. Has an original design with rounded ends. It is used for extraordinary meetings and parties.
- Western. At its core, it reminds of a tie-bow tied around the neck.
Sometimes:
- For special occasions. A classic version of the butterfly is black or white, which is worn with a tuxedo.
- Daily use. To date, stylists offer a variety of solutions, how to brighten your bow with a butterfly.
Sewing a bow tie
This is a very easy to make accessory. But even for sewing it is necessary to adhere to several rules, so that in the end the product turned out to be of high quality:
- Try to choose thick fabrics that will keep the desired shape of the finished product. It is best to take polyester, cotton or silk, but from woolen fabrics it is better to refuse.
- The color of the future butterfly should be chosen in accordance with the suit.
- Neck measurements need not be taken from a person. You can just know the size of the gate.
- When cutting a classic bow tie, it should be taken into account that the finished product should not go beyond the collar of the shirt.
Required inventory
In order to make a butterfly from the fabric on the shirt with your own hands, you need to prepare such materials and tools:
- Mat for the future layout;
- Pattern with the required dimensions;
- Sewing machine;
- Ruler;
- Centimeter;
- Long knitting needle;
- Thin sewing needles;
- Iron;
Important! It is desirable that the technical characteristics of the iron was the formation of steam.
- Chalk, a tailor's marker or a bar of soap;
- Scissors;
- A piece of cloth about 20 centimeters wide;
- Fasteners;
- Non-woven or doublerine( if necessary);
- Thick elastic band;
- Threads to the tone of your chosen fabric.
Master-class on sewing a bow-tie with an elastic band:
- Make all necessary measurements and blanks in the form of a pattern.
Important! You can make a pattern yourself or download an Internet ready from the Internet.
- Next, you need to cut out the elements of the future butterfly from the fabric, respecting its size.
Important! Standard billets for making bow ties are made in the form of rectangles in the following sizes: 13 * 24, 22 * 12, and 8 * 13 centimeters.
- Take the largest piece and fold it along in half. Further carefully iron and steam off the iron, especially the bend area.
- After patting, the rectangle is straightened and folded again in half, just across the previous fold. Also, iron it well.
- Lay out the finished workpiece so that the folds are at the bottom.
- The third time we fold the rectangle along, but in a different way. You need to have the edges of the cloth shred in the middle, and the fold line should be underneath. Again iron it all with an iron.
- Without turning the finished workpiece, it should be folded so that the untreated edges are on the line of the vertical fold with overlap. We iron again.
- With a medium-sized rectangle we proceed in the same way.
- The smallest rectangle is folded along and ironed.
- Open it and add it so that the edges meet at the level of the fold. Ironing.
- Do not unfold, fold again and iron.
- The largest workpiece should be sewn with ordinary seam, with a little pulling together. You also do it with the middle one.
- The smallest workpiece is given the appearance of a ring.
- Sew: on top of the largest element, we put the middle one and fix it with a "ring".
- In order to sew an elastic band on which a bow tie will be fastened, you need to perform an individual neck measurement. After - cut off the desired size of the elastic band and stretch through the ring on the butterfly. Fasten with thread and needle.
Important! When making gum you should take into account the fact that this accessory should in any case not be able to squeeze the neck. But do not be too free.
Master-class sewing a bow tie on the bar
Butterfly on the shirt with his own hands can be on the barrette. For its manufacture you will need:
- Cloth cut;
- Scissors;
- Threads;
- Needles;
- Special hairpin.
Operation:
- Cut two blanks with dimensions 18 * 24 and 4 * 5 centimeters. You impose them on each other.
- Now fold them into 3 layers.
- The edges of the resulting workpiece are turned to the middle. This must be done so that the halves are overlapped.
- Now fix everything with a thread and a needle. During the stitching, tighten a little to make a beautiful fold.
- A small piece of cloth should be folded three times. Turn around the middle of a bow tie, stitch.
- From the wrong side of the finished product, sew a metal buckle.
Important! When fastening the fastener, you can use ordinary tailoring glue.
Bow tie for a simple pattern
To create this model you need to have:
- A small piece of fabric;
- Doublerin;
- Scissors;
- Quotation or other paper for patterning;
- Chalk;
- Iron;
- Sewing machine.
Operation procedure:
- You need to cut out two details in sizes 5 * 7, 16 * 16 centimeters. The third element should be a width of 5 centimeters and a length equal to the neck circumference, to which should be added 4.5-5 centimeters.
- You glue the workpieces with dublerin.
- The biggest square is folded in half. Sew it, while in the center should leave a hole. The finished element is turned to the front.
- The long strip is folded in half. After - bend the tips inside and stitch.
- Do the same with the second workpiece.
- Center the large rectangle stitch so that creases form.
- A smaller workpiece wraps up a ready-made element of the future butterfly, fixed with threads.
- Make a long strip so that it looks like a strap.
- You sew velcro to the ends of the third element.
Two-sided model
Two-way butterfly is very versatile, as it can be combined with absolutely different suits. In order not to purchase or sew under each bow a separate accessory, we suggest you make a two-sided bow tie for a shirt with your own hands.
For its manufacture you will need:
- Pattern or pattern;
- Scissors;
- Chalk or soap bar;
- Ruler;
- Spoke for knitting;
- Sewing machine;
- 2 cloth with different colors;
- Non-woven fleece;
- Clasp for a future product.
Let's get to work:
- We transfer the pattern to the fabric.
Important! In order not to spend a lot of time transferring the pattern, stitching the elements, put one cloth on the other and secure with pins.
- Spread both elements with a sewing machine.
- After two halves are sewn, they should be cut.
Important! If you have a mock rug, then cut it better on it.
- Use the knitting needle to turn it to the front. Good ironing.
- Knot the knot and sew the fasteners.

Butterfly bowl of silk ribbon
In order to make a butterfly on the shirt, you need to take two ribbons 5 * 30 and 2.5 * 25 centimeters, needles and threads in color. Next:
- From the longest tape you should cut 3 centimeters.
Important! Satin ribbons have the property of crumbling, so they should be scorched with a match or lighters.
- Form a bow, with the slices to be overlapped and fixed using a needle.
- With the second tape, you do the same.
- Two bows should be made. Sew them together so that the wrinkles appear in the middle.
- The large part is folded in sections and ironed.
- Finally, everything is filed and straightened.
- Fasten a special fastener or Velcro from the back of the finished product.
Female bowtie
Butterfly in a women's wardrobe is an excellent accessory that will brighten up even the simplest image. In order to make it yourself, you need the following materials:
- Fabric;
- Satin ribbon width 1 centimeter;
- Threads;
- Needles;
- Scissors.
Order of work:
- We cut two strips with a width of 10 centimeters from the fabric, and 20 and 25 centimeters in length.
- Fold them together and iron.
- Overlap each other.
- The tape should be cut into two pieces equal in size to the neck and 3-4 centimeters.
- The smallest piece of tape wraps the product, fix it with a thread and a needle.
- Another cut stretches through the formed hole from the wrong side of the butterfly.
- Attach velcro to the ends of the tape.
Butterfly tie is a very simple, but at the same time, original accessory of both male and female wardrobe. It can fully complement the image, regardless of the style in which you are dressed. To have several different variants of butterflies at once, you do not need to spend a huge fortune on their purchase. Thanks to the above tips and recommendations, you can make a bow tie with your own hands without much physical effort and in no time. The most important thing is to have a fantasy and a little patience, and you will succeed!

