

- Fabric or ready-made dress?
- The main features of the style
- Is it necessary to classics?
- Do you need a pattern?
- We choose the material
- Calculation of the fabric
- Top of the dress
- Beginning to cut
- Padded dress for the style dress with our own hands
- Gathering the dress
- Separate jumping
- Belt
The dandies appeared on the streets of European cities in the early 50s of the last century. The world has only just begun to recover from the horrors of war, poverty and hunger. People again wanted to rejoice, have fun, relax and, of course, dress nicely. Bright colors and light fabrics fit perfectly to the general high spirits. That's when the new youth style came into fashion. In the Soviet Union, his adherents were called stylized. How to sew a style dress with your own hands? Now we will discuss this.
to the contents ↑Fabric or ready-made dress?
To sew a dress in style of style with own hands it is not especially difficult - our grandmothers with their primitive "Zinger" and "Podolsk" could do this perfectly. However, there is a small nuance - in those days when this style was extremely popular, it was almost impossible to buy a fashion thing in the store. But to do everything you want with your own hands - many people knew how, so the question - whether to sew or buy, did not stand at all. In modern stores you can find clothes for every taste. Including the one that corresponds to the style that dominated the European fashion in the middle of the last century. But you need to know what to look for.
to the table of contents ↑The main features of the
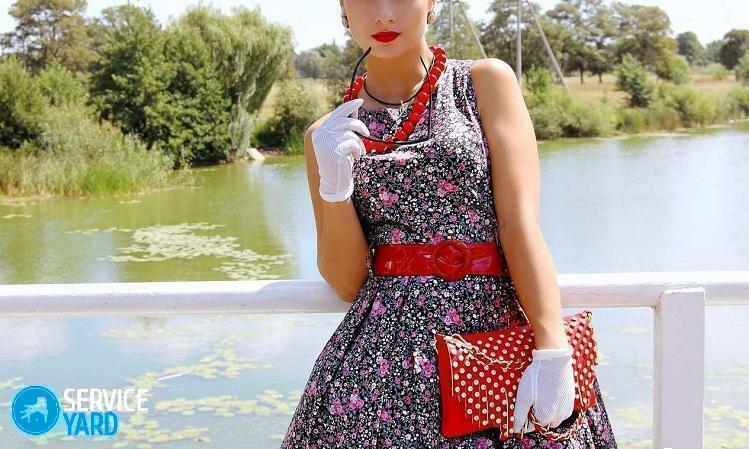
style This line has several characteristic features that you need to have an idea to sew a style dress with your own hands:
- is a lush skirt, often multilayered;
- bright colors - monophonic or with a large pattern;
- lightweight fabric;
- podrjubniki or additional layers;
- wide waist, emphasizing the waist.
There are other signs - they indicate what you can wear such a dress with. They will look good;
- high-heeled shoes;
- is a large, but not a luscious costume jewelry;
- body hair.
Important! Podukubniki not necessarily have to be the same color as the outer layer, they can be in tone or contrast.
to the table of contents ↑Is the class required?
Special attention should be paid to the color and pattern when choosing a fabric. The material can be monophonic, but it is not necessary. In those years the following colors were in fashion:
- flowers;
- peas;
- strip.
Important! If you are going to do something like the reconstruction of a style dress, it is these patterns that should be chosen.
But in the courtyard - the twenty-first century, the fabric manufacturers offer other interesting options, so you can afford to make modern dress in your outfit:
- use materials with prints;
- to sew a dress from a fabric with geometrical patterns;
- take metallized materials for gold or silver;
- use acid colors - similar colors were not invented in those years, but if such clothes were - the dudes would certainly carry it.
Do you need a pattern?
Any thing, certainly, it is better to sew on patterns. But if you think how to sew a dress in style of style, a pattern is not necessary.
Important! For a skirt, it is not needed at all, and as for the bodice, then very interesting variants are possible. For example, make a combined dress from a new skirt and an already available blouse with short sleeves or without them at all.
to the contents ↑Choose the material
Before you sew a style dress, you must, of course, choose the material. Fabrics fit light, but well-shaped:
- cambric;
- chiffon;
- silk;
- cotton;
- poplin;
- satin;
- thin flax;
- tulle;
- guipure;
- nylon.
Important! The latter material can raise doubts. Indeed, the dress entirely from him to sew is not worth it - he misses the air. But to make the top layer of the skirt is completely possible. But the knitwear for the lower part is not very suitable - it is too well draped. But from it you can make, for example, the top.
to content ↑Calculation of fabric
The amount of material depends largely on how many layers there are in your skirt and whether they are all from the same material.
For an adult single-layer skirt with a fabric width of 150 cm, the calculation is as follows:
- Measure the length of the skirt.
- Multiply it by 2.
- Add to the result 2 lengths of the bodice and 1 sleeve length.
- Add 15 more centimeters to different trimmings - allowances, batik or roll processing, etc.
- If 2-3 layers of the same fabric are expected, the length of the skirt is multiplied not by 2, but by 4 or 6.
Important! The lower layers can be made from a grid or tulle - the calculation of the quantity is the same as for the main fabric, but without the bodice.
to content ↑Top of dress
Models of the middle of the last century preferred several types of sleeves:
- simple straight;
- winglet;
- flashlight.
If you have a blouse that matches the color and style, you just have to rework it a little. Everything depends on how it is fastened:
- If the fastener is from the rear, it must be removed, and instead of it, sew a long secret zipper.
- The front closure can be left, but you can choose beautiful large buttons.
- In addition, the blouse will have to be sewn at the side seams, so that the volume of its lower part exactly matches the waist circumference.
- Perhaps it will have to be shortened, so that the bottom edge is only a couple of centimeters below the waist line.
Why do I need an old blouse?
You can take a pattern of a fitted bodice in a magazine or on the Internet, as well as order in the atelier. But a variant that is very popular with modern needlewomen is also suitable: to tear the blouse out of use and simply to coat it. It is necessary that the blouse exactly fit in size. And do not forget to cut and cut the dart! However, if you are thinking how to sew a children's dress in style of style, darts are not needed.
As for the skirt, the most popular option is the sun or the half-sun. Both are hidden directly on the fabric.
to the contents ↑Beginning to cut
Cutting is better to start with a skirt-the sun or a half-sun. The method depends on the width of the cut:
- is longer than the length of the skirt;
- is smaller than the length of the skirt.
Important! In the first case, the skirt-sun can be without a seam, but it will be necessary to make a cut for lightning - on the side or back( the second option is more convenient).A half-sun is always made with a seam.
Wide cut
The skirt is covered in one piece. You need to know only two measures:
- waist circumference;
- product length.
Sew a skirt for a style dress with your own hands:
- Fabric folded four times.
- Calculate the radius of the groove, dividing the waist girth by 6.28.
- From the closed angle, postpone the result in both directions and connect the resulting points with an arc.
- From the same points, postpone the length of the product, and connect the new marks with an arc.
- On the hem, add an allowance of 2 cm to the edge processing, along the notch - 1 cm to the seam.
- Do not straighten the fabric, cut out the workpiece.
The skirt-half-sunshade is somewhat different. The fabric does not fold fourfold, but twice. In this case it is better to use the compass:
- From one of the corners along the fold line, set the radius of the notch - it is calculated exactly as for the sun, plus 1 cm for the allowance.
- Put the circular leg on the mark, draw a semicircle.
- From the points of intersection of the semicircle with the fold and the edge, postpone the length of the product.
- Draw an arc between these points.
- Make a stock on the hem of 2 cm.
Important! For a dress in the style of a style, a sun-skirt is preferable, since it is lush.
If the cut is narrow
Sewing a lush skirt from a narrow cut is not the most rational option. Suitable is not any material, but only one-color or one where you can easily adjust the picture. But the fabric needs a lot more than when the cut is wide:
- Place the material in one layer.
- Decide from which angle you will draw the notch.
- Place a large piece of paper under the cut so that the edge protrudes beyond the edge from the side opposite the notch.
- Pin the sheet with tailor's pins.
- From one of the corners, set the radius of the notch to both sides.
- Connect the points with an arc.
- Along the edge of the notch, set aside the length of the skirt plus the allowance for processing the hem.
- Extend the cut line by the edge.
- Delay the length of the product from the end of the arc - the mark will be printed on paper.
- Connect the marks with an arc.
- Circle the edge of the paper - you have a segment, which will have to be cut from a separate piece and sewed to the main panel. Do not forget to adjust the picture.
- Carve out 3 more basic parts and 3 segments.
Important! If the fabric is solid, excess seams on the hem can be masked with embroidery, applique, prints.
to the table of content ↑Padded skirt for the style dress with your own hands
Pantograph is a must for dresses in this style. True, it is not necessary to sew separately, it can be part of the skirt.
Important! The first option is suitable for fabric, since this part is almost always starch, the second is for tulle and netting.
You can sew it:
- from the same fabric;
- from any thin, but rigid material, suitable in color;
- from the grid or tulle.
The principle of manufacturing is the same. With tulle work the easiest way - it perfectly holds the form, it does not need to be sewn, but it can be cut in all directions. In addition, the snails will not have to starch:
- Take the folded 4 times( as well as cut) the skirt-sun blank.
- Fold in 4 times the tulle.
- Set the workpiece so that its folds coincide with the folds of tulle.
- Attach the skirt blank to the fathin with tail pins or a notch.
- Circle the detail and cut out.
You can, of course, expand the tulle and workpiece in one layer, but it takes much more space. Necessities are not present - the material is cut magnificently, even if it is folded in ten layers and more. So you can simultaneously cut two or three podsubnik.
Important! Fatty need not be sewn, so the allowance for the hem is not needed.
to the table of contents ↑Gathering the dress
The style dress for girls differs from the adult only in size and absence of darts. The sequence of work depends not on this, but on the design of the bodice and on whether you sew a multi-layered skirt or with a separate povyubnikom.
In addition to the main fabric and lining material, you still need:
- corsage tape;
- is a secret zipper.
Dress with multi-layered skirt
You can start with the skirt:
- Fold together all the layers, combining the notches.
- Mark a place for a zipper and make a cut - with most of the lightning should not be on the skirt, but on the bodice.
- Sweep the parts along the edge of the notch.
- Tear the main and inner layers.
- You need to bend the hem. This can be done immediately or after the entire product is assembled.
Important! The first option is suitable for a short skirt, the sun, which was cut with one piece - it is almost impossible to cut it out so that the edge turns out to be uneven. The edge of the skirt, sewn from several pieces, it is better to process the last.

We collect the bodice
The order of the bodice is the same as for any dress.
Important! With parts it is easier to work when they are already swept, especially if the fabric is heavily crumbled. So do not delay processing with an overlock, but do it right away. It is not necessary to sweep the bottom.
Get started:
- Sweep and stitch darts, if any.
- Sweep the shoulder and side seams.
- Try on what has happened, if necessary, adjust the seams.
- Stitch the shoulder and side seams.
- Heal allowances.
- Handle the bottom of the sleeve: make a wedge, if it's a flashlight, and a simple straight line or a winglet - hem out.
- Stitch the sleeve, ironing allowances.
- Sew the top of the sleeve with a notch, small stitches( or a large stitch on the machine).
- Slightly pull off the top.
- Take in the sleeve and try on your product - the fit is adjusted by assembling the pellets.
- If everything is in order, sew up your sleeves.
- Process the cut with a swipe.
The final assembly of the
is very little left for you, but this stage requires accuracy:
- The zip fastenings are zipped on the underside of the bodice and skirt.
- Sweep the bottom of the bodice to the recess of the skirt, aligning the edges of the incisions with the zipper.
- Arrange the fitting, and then stitch the parts.
- The oversizes of both parts sweep together, press on the side of the skirt.
- Clean and sew a zipper.
- Fold the edge of the base layer, and the tulle ups on the edge.
Separate
padded jacket The dress with removable layers is worn in the same way as in the previous case. The order of assembly differs only in that only a part of the main fabric is sewn to the bodice. For a separate povyubnik you need:
- fabric, suitable for color;
- elastic band in tone;
- material for the processing of the bottom;
- sewing accessories.
Important! For such items of the wardrobe, materials that are well starched are most suitable, but they do not become too rigid. Cotton or linen is more preferable.
Regarding the processing of the bottom, there are several options. The hem can:
- just hem;
- handle by overlock;
- to sew with lace or braid.
If the stitch with the seam, sweep and stitch the seam, and then the order will be as follows:
- Process and iron the allowances.
- At the top edge, sweep the elastic band - the piece should be slightly smaller than the waist circumference, and during the sewing the elastic should be slightly stretched.
- Process the bottom.
Important! If there is not enough wide elastic band, you can make a kuliska and insert the usual linen gum into it.
to the table of contents ↑Belt
The wide belt is an effective and very characteristic detail of the style dress. If your creation will be worn by a little girl, you can complete the dress with a wide satin ribbon, tying it with a bow.
Important! Bows are also an accessory of this direction, so there will be no eclecticism.
But you can also make a belt on the fastener. You will need:
- a strip of fabric 10-12 cm wide and a length equal to the waist circumference, plus 10 cm;
- corsage tape or thick fabric;
- hooks or buttons.
Manufacturing technology will seem to you quite simple after you have sewn the dress. The only thing to keep in mind - the ratio of the size of the strip of fabric and corsage tape. The tape should already be strips about 2.5 times.
Work:
- Stitch the strip in half along the length of the face to the outside.
- Press the fold.
- Fold the strip face down.
- Stitch it around the edge, leaving one short side open.
- Supports the ironing, including those on the open side.
- Cut the angles of the margins very close to the seam.
- Remove the workpiece.
- Insert the corsage belt.
- Cover the open edge.
- If desired, detach the belt around the perimeter with a decorative stitch.
- Mark the places for hooks and loops and sew them.
A bit about the belts of
It's not at all necessary to make the belt tied or on the hooks. Other variants are also possible:
- traditional - with a buckle;
- on buttons;
- on the lacing.
Important! You can make in your outfit and modern notes - to make, for example, a belt in the technique of macrame or weaving with beads.
As you can see, it's very possible to make a bright, spectacular outfit in the style of the 50s of last century with your own hands. Of course, you will have to work hard, but the fact that you will attract attention to yourself in this dress and look very interesting is a fact!

