Contents:
- How to clean the computer
- Cleaning the power supply
- How to clean the motherboard and its components
For forced cooling of units and motherboard of a stationary PC, it has coolers( fans) that suck in cold air inside the case. Together with the outside air small particles of various debris get inside, so after a while the question arises: how to clean the computer from dust. If this is not done in a timely manner, the computer blocks will start to overheat and the efficiency of the home assistant will noticeably decrease. If the temperature is too high, the protection will trigger and the PC will automatically shut down.
How to clean the computer
If during operation the computer began to make noise more loudly than usual, and the image on the monitor began to slow down clearly, then in all probability the system unit needs to be cleaned from dust. You can rent a computer to a service company, or you can try to cope with the problem at home, yourself. First you need to determine the sequence of work.
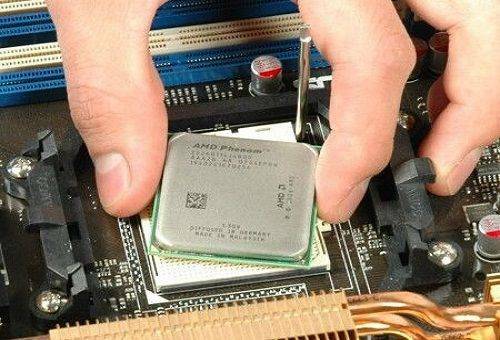
Computer Processor
The cleaning is usually carried out in the following order:
- Clean the power supply.
- Remove large fragments of accumulated dust from the inside of the enclosure.
- Clean the radiator, cooling the processor.
- Clean and lubricate or replace coolers( fans)
- Dust the motherboard, its accessories and attached devices.
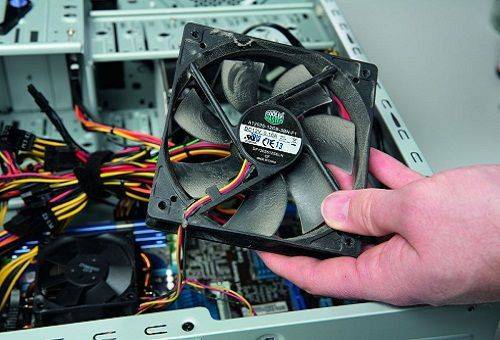
Cooler
Before cleaning, a soft cloth, a vacuum cleaner, a cross-shaped screwdriver and a flat screwdriver should be prepared. In addition, it is advisable to have a soft brush on hand( an old make-up brush, a small paintbrush or a shaving brush is quite appropriate).
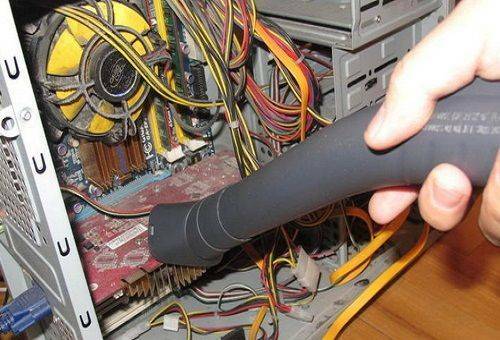
It should be remembered that during the work part of the dust will fly out, so it is desirable to clean the system unit in the appropriate room - on the balcony, in the bathroom, in the corridor, in the workshop or in the garage.
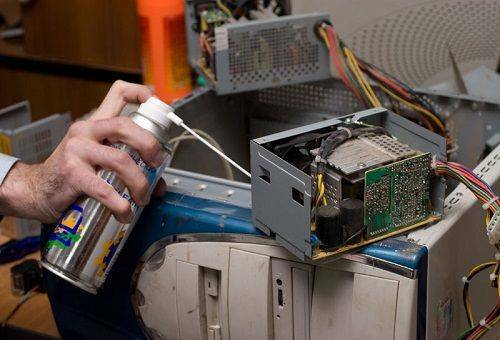
Cleaning the power supply unit
During cleaning, the PC is often left on the "after" power supply. But it should not be done. Dust is sucked in by the cooler inside the device with air. It settles on the board, covering parts, radiators and chips like a loose felt. This greatly reduces heat dissipation. As a result, the device overheats, its performance deteriorates, eventually it can fail.
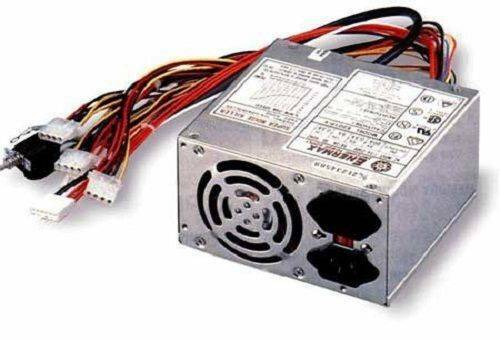
Computer power supply
Before starting work, it is necessary to disconnect the computer from the mains and disconnect the wire from the power supply, then you can proceed with the dismantling and cleaning:
- We stack the system unit on its side, unscrew the bolts at the end( usually two) and remove the side cover.
- Inspect the bundle of wires that is coming from the power supply. Without fail, we disconnect the connectors on the hard drive and optical drive for reading CD-DVD disks.
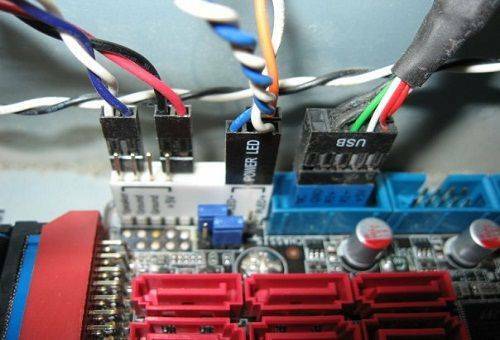
- The mains supply wires of the motherboard usually have a sufficiently long length and can not be disconnected. But if you decide to completely disconnect the device, then the long connector should be removed from the socket very carefully, while holding the board, as it is usually pulled out tight.
- Remove the 4 screws securing the rear panel and remove the power supply.
- Find and unscrew the four small bolts located at the corners on the side of the removed device. One of them is usually under a paper sticker.
- Remove the cover. It has the shape of the letter "P" and covers three sides at the same time.
- With a brush or a small vacuum cleaner, carefully clean the board, parts and radiators from dust.
- Clean the cooler with a brush. Do not touch the fan blades with your hands, since the greasy finger prints will stick very quickly.
- Assemble the power supply. All operations are carried out in the reverse order. If it does not interfere with access to the motherboard, then you can immediately install this node in place. And you can fix it in the system unit after cleaning all the PC devices.
Power supply cables of
motherboard How to clean the motherboard and its components
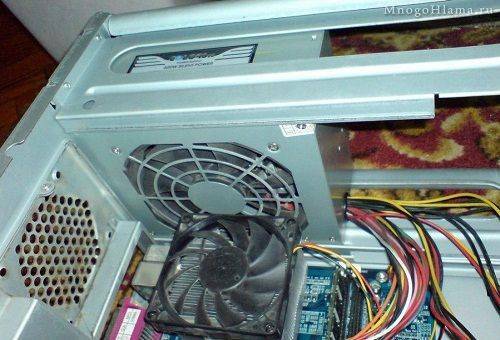
First of all, it is necessary to remove dirt from the cooling cooler installed on the processor. Specialists at the same time dismantle the cooler and radiator, clean them and replace the thermal paste. Users can not do this correctly and risk corrupting the processor. Therefore, in the home, the radiator is not removed. If the cooler installed on it is fixed to the bolts, then it should be removed, as this will allow a more qualitative cleaning of the dust between the plates.
A thin wooden stick( a toothpick is quite appropriate) you have to remove dirt from all the cracks between the radiator plates. When finished, place it with a brush, clean the cooler of the dust and install it in place. After such maintenance, the processor will not overheat, and, therefore, the efficiency of its operation will be significantly higher.
The final stage is cleaning the motherboard.
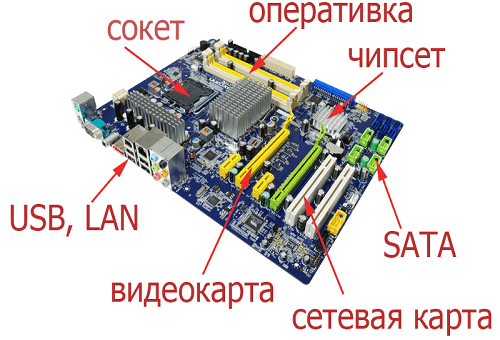
Motherboard
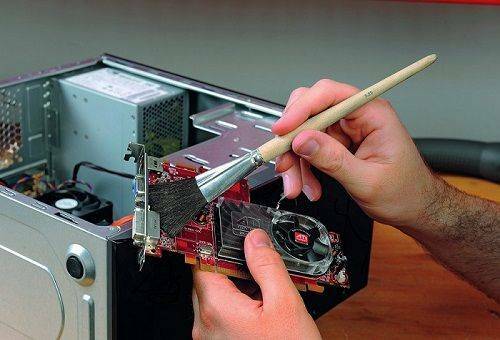
- If the video card is not built-in, then it is necessary to remove it( this is not difficult to do), then clean it with a brush from dust. The radiator and cooler on the chip are cleaned as well as the radiator, the cooling processor.
- Brush dust from the motherboard and the parts fixed on it.
- Remove all dirt and dust from the system chassis.
- Secure the video card in place.
- Install the power supply in case it has not been done before.
Power supply wires are connected to the motherboard.
Connecting the power cord to the
motherboard The long connector must be inserted into the connection on the motherboard very carefully, in no case doing much. The motherboard is fixed in several points in such a way that it actually is on weight. If pressed hard, cracks may form. This fee, most likely, will have to be changed to a new one.
Connect the hard drive and optical drive to the power.
It remains to be convinced that everything that was unscrewed and disconnected was installed correctly. After this, you need to install the side cover on the system unit and fix it with the bolts.
You can connect a computer to a network and check it in operation.