- The correct installation of the washing machine
- Installation steps
- Useful tips:
If you are tired of washing manually and decided to purchase a machine, it is important to consider that one purchase is not enough to immediately start using the technique. To save money and not pay for installation of equipment, try installing it yourself using the rules for installing a washing machine. But first, ask the sellers if the guarantee for this household unit is lost if it is installed by oneself. If the warranty remains, you can safely do the installation yourself, having previously read our article.
to the contents ↑The correct installation of the washing machine
The process of connecting the washing machine with your own hands is technically not complicated, but rather responsible. It is important to take into account that the probability of electric breakdown in a washing machine is several times higher than in a dishwasher. Therefore, for safe and long-term operation of the machine, it is necessary to properly prepare the workplace for it.
This can be done both independently and with the help of specialists, because the right choice depends not only on your desire and ability. Basically everything depends on the grounding.
Solid trading organizations often include the cost of installation in the cost of the goods. It seems to be nice, because the surcharge itself is small( since the case is put on the flow).But there are a few nuances:
- Solid companies sell modern expensive models, and if you want to purchase a budget option, then you will not find it there.
- The equipment of protective earthing is not dealt with by dealers, as it must be arranged in advance. In case of his absence, the company refuses from the installation. As a consequence, you lose the extra charge and guarantee, because the rules for installing a washing machine of any model clearly prescribe that the operation of the unit without grounding or protective devices is unacceptable.
Important! Proceeding from these factors, before you choose, buy and go to the installation of home appliances yourself, please specify in advance the presence of grounding. If it is not there, provide it with your own hands.
to the contents ↑Stages of installation
 To keep the washing machine on for a long time, it is necessary to follow the rules for installing the washing machine and do everything in stages. At once we will define and note the list of steps that you need to go through. The study of the proposed detailed instructions will allow you not only to learn all the rules for installing a washing machine, but to understand them and to perform everything correctly and quickly.
Stage # 1 - preparation of
- Inspect the purchased equipment. If you ordered a delivery to the house when buying equipment, do not hurry to sign on the courier delivery form. This is one of the first rules for installing a washing machine. Do the following:
- Ask the couriers to unpack the washing machine.
- Carefully check the outer coating for dents or scratches.
- Pull the machine gently from side to side, and if you hear strange noises and knocking inside the machine, ask to replace the unit.
- If you do not like something, then immediately report it to the couriers. Do not put the signature on the receipt until all the problems are resolved, because you spent a lot of money on the purchase.
- Remove all shipping parts. Take care of the dismantling of all the details of transportation: brusochkov, staples, bolts. Read the instructions beforehand in order to recognize all the transport parts, because if you turn on the machine without dismantling, the machine will be damaged.
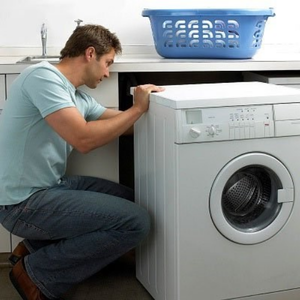
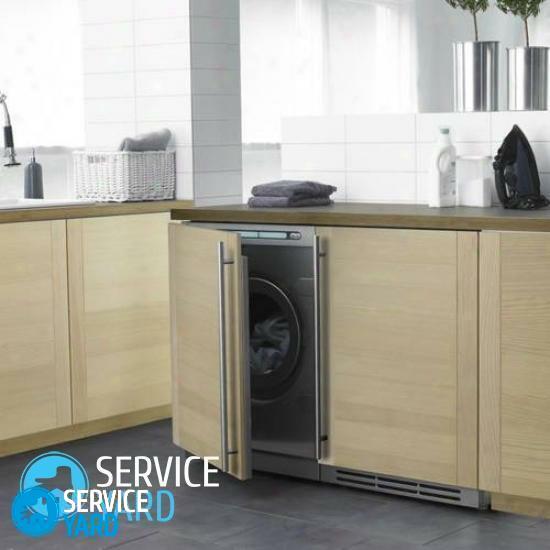
- Inspect the installation site. We hope that you have set the location of the washing machine in advance, because all the measurements - both in height and width, and all the preparatory work must be done before the purchase. They include the achievement of such conditions:
- The surface under the machine must be solid( reinforced concrete), any protuberances and dents - both on the surface of the walls and the floor, are prohibited.
- Technique should be at least 2-3 cm from the wall. Since during operation it vibrates, the installation rules of the washing machine are strictly forbidden to put the unit back to the wall.
- Place the machine on a prepared place using the level. To keep the machine level and level, use the level. Pay attention to the special supports that are located at the bottom of the home appliances - they are regulated. Fix each foot at the desired height using a special counter nut. Clamp it properly so that the legs do not untwist during operation.
Important! In new models of devices such supports are located only in front of the unit.
Stage number 2 - Connecting the appliance to the water pipe
Almost all washing machines are connected to cold water. If there is already a drain for the washing machine in the installation site, there will be no difficulties. If such a challenge is not provided, then you will have to make all the tie-ins yourself.
Important! For iron pipes you will need a welding machine, and for plastic pipes - a soldering iron. If you do not have neither one nor the other, then get a crimp clutch-tap. Produce it for different diameters of pipes. You can install such a tap on both plastic and iron pipes.
You can buy the coupling-withdrawal in any hardware store or in the construction market. You will need a 15 mm coupling sleeve or slightly larger, depending on the diameter of your pipes.
To make a separate connection to the water supply, purchase the following parts:
- Tee.
- Valve.
- Adapter from ½ "to ¾" thread.
- Fluoroplastic sealing tape.
All parts are assembled together, and when the assembly is assembled:
- Cut the water pipe.
- Insert the tee.
- Attach the adapter and hose to the valve from the machine.
Important! With an emergency groove, the valve will allow you to detach the washing machine from the water pipe, without blocking the water pipe itself.
During installation, use rubber gaskets and bolts for clamping and girth.
Stage number 3 - connection to the sewer system
The rules for installing the washing machine assume not only its connection to the water supply for the supply of water during the washing cycle. It is necessary to issue and withdrawing the system of waste liquid volume - through the sewage system.
To connect to the sewer line, prepare the following tools and materials:
- Tee 50 mm.
- Elbow with a diameter of 50 mm and a length of 40 cm.
- Coupling.
- Fixing clamp.
- Rubber cuff.
- The air valve is 50 mm.
Important! In the room where the unit will be located, it is necessary to ensure free access of the drain hose to the drain point - this will determine the correct installation of the washing machine.
 After completing this work:
- Using a metal hacksaw, make a 12 cm pipe entry for this pipe.
- Insert a 50 mm tee and a coupling into the hole.
- Install the plastic pipes in such a way that they can be moved freely from side to side, to install a tee and a coupling.
Important! Pay special attention to the riser pipe: in the bathroom the riser is 10 cm, but in the kitchen it is 2 times smaller.
Stage number 4 - connection to the electrical network
The most difficult stage of work, which involves the rules of installing a washing machine - is its connection to the power grid. Here you need to be extremely accurate.
Important! The energy consumed by the washing machine is approximately 2.5 kW.Therefore, the room in which the unit is located, is considered dangerous, because they have a very high voltage.
Before starting work, it is necessary to study the device of the machine and prepare additional components. Take the following information for yourself:
- In the newest machines there is grounding and double insulation to increase the safety of automatic machines. D
- To connect the washing machine to an electrical outlet, it is necessary to have a special outlet with an integrated grounding contact.
Important! These rosettes are jokingly called "Euro-sockets" because of high quality, as old sockets are designed for current only 6A, and new ones freely conduct current 16A.
- Choose a rosette better from ceramic material, as plastic models are unsafe.
- Install the outlet as close as possible to the washing machine, as the unit cord is 1.5 m long.
- Do not ignore the safety rules and choose a high-quality outlet that has a grounding contact
Important! All extension cords, adapters, tees significantly reduce protection from splash of electricity and increase the risk of fire, and may cause a short circuit.
Currently, new sockets are installed in the bathroom, since it is there where the washing machine is most often located. But do not forget that it is in the bathroom that there is a high humidity and this is fraught with serious consequences.
Important! To reduce the risk of electric shock, install the RCD.It is able to de-energize the electrical circuit during a power surge and emergency situations.
Stage # 5 - test run of the
After the installation of the equipment, test the machine. Fill the detergent powder to wash the machine from the factory grease and fine debris, start the washing program. At this time, pay special attention to the following:
- How water is poured.
- How quickly the water heats up.
- How the machine spends.
- Is the drain correctly drained.
Important! If everything works "like a clock", then you have installed the installation correctly and you can start using household appliances.
to the contents ↑Useful advices:
- Do not overpay for the valve for hot water and connect the unit to hot water supply, because such a connection can deliver a lot of problems when washing delicate things.
- To reduce noise and vibration in the washing machine, use rubber coasters.
- When installing the washing machine, do not use uncomfortable draining into the tub or sink with the standard drain hook. This method has a lot of drawbacks: when operating the unit you can not use a sink or a bath, in addition, siphons of shells and baths often clog, and water can overflow.
- To prevent sewage water from entering the machine, fix the drain hose above the outlet to the sewage system by about 60-80 cm.
- The washing machine is equipped with a wire with an euro plug, which means - when connecting, be sure to purchase an outlet with a third contact for connectionground wires. Sometimes this outlet is included when buying equipment.
- Do not increase the drain hose, since in low-performance machines the drain pump is low-power, and the additional hydraulic resistance of the long hose will overload it. As a result, the pump will quickly fail.
- Drain the hose securely securely to prevent it from falling to the floor and flooding the apartment.
In order for the washing machine to work for a long time and not cause problems, install it correctly and ensure a reliable grounding. Then washing clothes will not just bring you pleasure, but also save time - both on the washing itself, and on eliminating problems.