- What happened to the seal?
- Why is the cuff leaking?
- Why is rapid repair a temporary phenomenon?
- How do I change the cuff?
- How do I seal the cuff of the washing machine hatch?
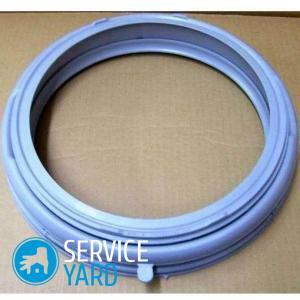
The cuff of the washing machine is a sealing ring. Its main purpose is to seal the hatch. As a sealant, rubber or silicone is often used - materials are elastic, but not the strongest. At one not very pleasant moment you can notice that the water from the hatch began to flow to the floor, and this threatens major trouble. In many cases, repair of the cuff of the washing machine is quite accessible to a person whose hands grow out of the right place. How to do it? This will be discussed in our article.
to the contents ↑What happened to the seal?
Noticing that soap water is emitted from the hatch, there are two ways to proceed:
- replace the seal completely;
- seal the cuff of the washing machine hatch.
Important! Sealant still have to be changed, since rubber or silicone started to leak. The whole question is whether this should be done this minute or you can wait a little.
In any case, for replacement you will need:
- a new cuff that perfectly matches your car;
- master who can do this - not all models can remove the cuff without having to break the case;
- some time without washing.
Important! To seal the cuff of the hatch of the washing machine it is possible without attraction of experts from the service center, that is it will manage much more cheaply. In this case, completely remove the seal, most likely not required.
to the contents ↑Why is the cuff leaking?
In any case, you must first find out the cause of the failure.
There may be several:
- puncture or cut;
- abrasion;
- crack from vibration;
- aging of the material;
- initially low quality rubber.
Punctures and cuts
Such damage occurs if you erase not accurately. Punctured seal can, for example, forgotten in your pocket, a key, a carnation or a paper clip, as well as hard parts of clothing - all kinds of buckles or rivets.
Therefore, the main measure of prevention - carefully sort the laundry before washing, pull out of your pockets everything that there should not be, as well as use special bags for washing clothes and shoes with dangerous parts.
Important! Since such damages are accidental, you can safely forget about replacing the sealant and simply put a patch.
Abrasion
This defect happens if there is something wrong in the design of the machine and the parts rub against each other. The sealant material is soft, it rubs much more easily than metal or plastic, so the consequences of constructive defects on it are more noticeable.
In this case, proceed in this order:
- eliminate the constructive flaw;
- to deliver the patch.
Vibration cracking
In the vast majority of automatic machines vibrate not so much that the seal is tearing from it. But there are exceptions. Sometimes the tank jumps so that it would tear and cuff from a much more durable material than rubber.
What should I do? To begin with - to eliminate the cause of vibration, and this without a master is unlikely to be done. And then you can put patches.
Important! If you act in the reverse order, the repair will not make any sense - the seal will crack again and again. As a result, it is absolutely necessary to completely replace the worn out part.
Aging material
How old is your car? If a lot - the reason for breaking the cuff, most likely, is that the rubber is already old. It ages much faster than metal. To seal the cuff, of course, you can, if there is no way to do more thorough repairs right this minute. But it is better to replace this part in the very near future.
Important! Silicone ages slower, but it still happens.
Initially low quality
Low-quality rubber can crack in just a couple of washings. This seal is better to replace immediately, so as not to suffer. To glue it is completely useless, after the next wash it will be rubbed off in another place.
Important! Cracks can also occur in cases where the car constantly wash oiled clothes - first you need to remove stains, then load things into the machine.
to the contents ↑Why is rapid repair a temporary phenomenon?
A patched cuff can last several months, from a year's strength. In addition, when home repair is not always possible to get a strong glue. It is very important to determine the material from which the sealant is made and act on the principle of "silicone to silicone, rubber to rubber".
The fact is that silicone, of course, is durable and resistant to wear, but it does not stick well. Cure with it can only silicone sealant. But even with the use of special adhesives, there can be no guarantee of quality. Therefore, patching the silicone part and putting off the overhaul of the cuff of the washing machine makes sense only in the following cases:
- you can not replace it now, because there are none in the service center;
- you do not have the money and time to put a new one.
How do I change the cuff?
Regardless of the reasons for which the cuff has failed, the replacement is still more reliable than temporary repairs. The ideal option is to find exactly what it was. But this is not always possible.
Important! If you have a car from a recognized manufacturer with a large number of salons and service centers, you will not find any spare part of labor. But there are many models from little-known Asian and European firms, when it is not possible to find exactly the same seal. In this case it is necessary to select analogs.
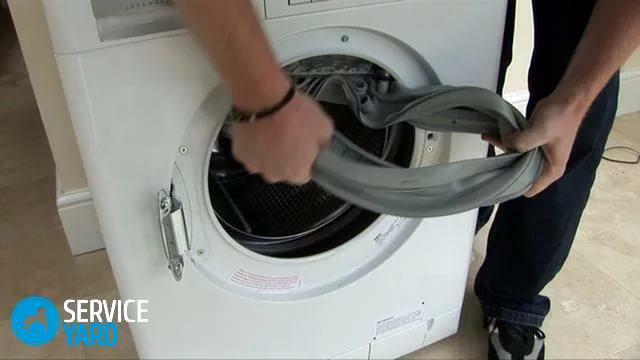
If you find a suitable seal, the next thing to do is remove the old cuff. Can I do this without having to dismantle the car? Sometimes it's possible, and it's very easy to check:
- Take the edge of the seal.
- Pull it down
- If you see a thin steel cable - boldly remove the cuff.
 To remove the seal, you need a thin flat screwdriver. The next step is as follows:
- Use a screwdriver to pry the clamp - the same cable that you saw on the inspection.
- Slide the screwdriver along the cable until you find the fasteners.
- Loosen and remove the clamp.
- Pull the cuff over yourself until you reach it.
- Push the new seal into the groove and place it in place of the old one.
- Intercept the seal with a yoke and tighten.
- Straighten the rubber.
- Try closing the hatch.
Important! If the hatch is closed - everything is done correctly, the cuff is as it should be. If the tightness is broken - you have to spread the rubber or repeat the procedure.
to the contents ↑How to seal the cuff of the washing machine hatch?
You can, of course, stick a patch on the outside of the cuff. But it will be sloppy and not very high quality. Sometimes you have to do this - when, for example, there is no way to remove the seal, without dismantling the case.
Important! The gluing will be stronger if the cuff is removed, especially if it is difficult to get to the rupture point.
Preparation of
If you still decide not to change the cuff, but to patch, prepare yourself for work:
- Inspect the cuff and determine what happened to it and why.
- Remove the cuff as necessary.
- Select the material for the patch.
- Choose the glue.
- Attach the patch.
- Put the cuff in its place.
Important! In some units, in order to dismantle the seal and seal the cuff of the washing machine, it is necessary to remove the front wall. These are models such as:
- Bosch;
- Siemens;
- Samsung;
- Beko;
- LG;
- Hansa.
In this case, it makes sense to think whether you have enough patience and skill for such a thorough repair and is it not better to replace the seal, if you still have to remove it. But if the place of damage is clearly visible - it is also possible to disassemble the unit.
Material for a patch
Items from which you can make a patch are easy to buy at the nearest pharmacy and they are very inexpensive. These are condoms and rubber gloves. They are made of durable and elastic material. But they are rather thin, so it is better to make the patch in several layers.
Important! It is better to first cut out a few pieces in the form of a patch, glue them together, and then patch the cuff.
Choose glue
Perhaps, this is the most crucial moment.
Important! The glue should be as elastic as possible and have high adhesive properties, that is, stick firmly to everything. You will find this information on the packaging.
For your purpose are suitable:
- silicone sealant;
- shoe glue;
- rubber glue;
- "Moment" and its variations.
Important! If in half a year after the gluing you could not change the seal, refresh the sealant layer.
For degreasing you will find:
- petrol;
- white spirit;
- alcohol;
- is any other solvent.
We repair the cuff
The work is not particularly difficult, but it requires a certain algorithm:
- Make a patch by cutting several layers in the same shape( for the sake of truth, you can make a stencil from cardboard).
- Glue the layers together.
- Straighten the cuff.
- Degrease the place to be patched( with a margin of at least 2 cm in each direction).
- Wait until the solvent has dried.
- Apply a layer of glue according to the instructions.
- Press the parts straight away or wait a while - again according to the instructions.
- Install the cuff and secure.
- Wait a day - only after that the machine can be used.
Important! The patch should be more than a 1.5-2 cm hole in each side.
We check
After the work is done, it is necessary to check its quality. To check:
- Load the drum and start the machine.
- Set the rinse and spin mode.
- After the test, inspect the gluing site. If the water does not oozing, everything is in order.
Now you know how to repair the cuff of the washing machine - how to seal it and how to replace it. Choose a more suitable method for you right now and act, because in any case, such a malfunction must be eliminated, at least for a while.


