- Types of cooker hoods
- Operating modes of hoods
- Grounding and zeroing
- Choice of air ducts
- How to calculate the required power?
- Installation procedure for
extract It is extremely important in modern kitchens to have hoods, because during cooking evaporation of a variety of odors that can not always be pleasant. Even if you have already purchased a hood, then you should know how the installation of the hood in the kitchen is going on. In this article, we will tell you about what kind of hoods exist, and also how to install them.
to the table of contents ↑Types of kitchen hoods
You can not just go to the store and take the first device you like in appearance. We must understand what they are different. And the first criterion is the installation principle, according to which the following are distinguished:
- Suspended, also called flat and standard - are fixed under the cabinet directly above the plate.
- Built-in - install them inside the cabinet or in the table, which is why they perfectly fit into any design.
- Wall mounted - they are mounted on the wall above the stove, can have a variety of body design.
- Corner - mounted in the corner.
- Island hoods - specially designed for the kitchen, which has an "island."You can fix it anywhere in the kitchen, attaching it to the ceiling.
Important! Regardless of the appearance, installation of the kitchen hood above the cooker is possible only at a distance of 70 cm, and above the gas cooker it is necessary to retreat 80 cm.
to the contents ↑Modes of the
hood operation In addition to the fixing type, the kitchen hoods differ in the ventilation mode, and this tooit is necessary to pay attention. Otherwise, it will not be possible to achieve the expected efficiency of the equipment.
Here we have the following options:
- Flowing - draw the polluted air inside the ventilation shaft. This method of ventilation is called "air outlet", that is, the exhaust mode. This method is the most productive and effective.
- Circulation hoods - air is passed through carbon filters that are built into the body. After the cleaning process, we get fresh air at the outlet. Such a hood does not require the presence of ventilation in the kitchen, which is why its installation can be called the simplest, and at the same time less effective, if we talk about cleaning.
Grounding and resetting
Before we talk about how the hood is installed in the kitchen, we should mention electrical safety. Due to the fact that a huge amount of fat splashes inside the cabinet, the kitchen constantly has a high level of humidity, this all increases the chance of electric shock during improper connection of the hood to the network.
Therefore, the kitchen hood must be connected to the mains by three wires: zero, phase and earth.
Important! As a rule, the grounding wire is marked in yellow with a thin green strip. Before installing the hood, it is necessary to provide grounding for the safe use of electrical appliances.
How to proceed:
- If the house has a ground loop and euro-type sockets installed, you will not have any problems: during the connection simply connect the wire to the ground terminal. It is indicated by bands of different lengths or by the word Ground( GND).
- If your equipment does not have a grounding connector, then you can do it yourself by screwing the wire to the metal case.
Euro-socket with grounding
Euro-socket with connected grounding can be found only in new apartments.
But most can not find euro-outlet in their apartment, and they are wondering how the installation of the hood in the kitchen is going on, if there is no grounding? In this case, you can do zeroing yourself, but under no circumstances do not connect the neutral wire to the pipes and batteries. It must be connected to a blank neutral.
To do this:
- Open the switchboard with counters, find there walled pipe in the wall, where the wires come from.
Important! Be extremely careful, because the wires are always under voltage 220V.
- Most likely, you will find on it a ready-made pin and already abandoned zero wires. This is the very dead neutral, the pipe is perfectly grounded.
- You need to get from it to the kitchen a stranded wire with a cross-section of at least 2.5 mm2, and the hood must be connected using a 6.3A automatic separator.
Selection of air ducts
There are several types of air ducts for kitchen ventilation:
- Plastic ducts are made of PVC - strong, light, and also noiseless, because they practically do not create resistance for air because of its very smooth surface.
- Corrugated aluminum pipe is quite light material in terms of self-assembly, it can be bent to the required size without any problems. Another excellent quality of the corrugation is the almost complete absence of hum and vibration, which differs from rigid boxes.
Important! The disadvantage of this duct is an ugly appearance, so you can figure out where to hide the ventilation, for example, under the ceiling of plasterboard.
to the contents ↑How to calculate the required power?
Very important parameter during the acquisition of the hood is its maximum cleaning performance, which is calculated in cubic meter per hour. As you might have guessed, this value shows how many cubic meters of air the hood cleans for 1 hour of operation.
Important! You can easily calculate the required power for this incredibly simple formula: Ceiling height * Kitchen area * 12 times.
You should also take into account the margin for the loss of power due to the bend of the duct, the length of the entire ventilation shaft and other parameters, for this, add about 30% to the calculated result.
For example, if your kitchen has an area of 6 square meters.m. and a height of 2.5 m, the calculation will be approximately like this: 6 * 2.5 * 12 * 1.3 = 234 m3.
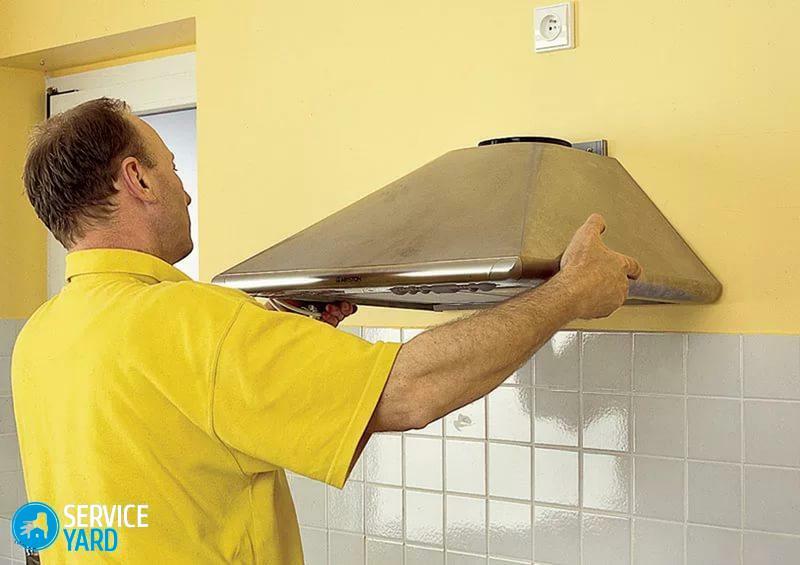
to contents ↑Assembly procedure for extractor
The independent installation of the kitchen hood depends on its type and the location of the ventilation shaft. To begin with, we will consider the installation using the example of a built-in hood in a cabinet.
Anti-reversion mechanism
This mechanism does not allow air to return to the kitchen.
If you want to do everything as it should, then:
- Start with the process of manufacturing the box for the cracker. You can make a case made of aluminum, galvanized sheet or tin.
- You can also not suffer, but simply purchase an anti-return valve that looks like a butterfly opens. It is placed in front of the ventilation shaft itself.
- In order for you to be more comfortable, mount the case on the wall cabinet itself above the stove.
- Then fix it more tightly, closing all the slots with a mounting foam and gluing to the cabinet in order to avoid the appearance of resonance.
- First try on the shell of the cracker, and make a markup for the hole on the cabinet.
- After that, you can remove the cabinet from the wall and cut in the bottom wall with a jigsaw hole in the lower frame.
- To do this, drill a hole in the center of the marking area with a large drill, then insert a saw blade and cut the shape you need in the cabinet.
- Then, in the same way, cut the hole in the inner shelves, if they are present, under the air duct.
Duct connection:
- Insert the corrugation into the previously made holes, and on the top of the cabinet, give the desired shape of the square.
- Cut the corrugation with a certain margin, cut the corners, and then bend them outward.
- Now you can hang the cabinet with the corrugation on the wall.
Important! Do not forget to treat all the joints of the duct with silicone sealant, so that the power is not lost.
- Now, the self-made box is fixed to the cabinet so that it can help you connect the corrugation together with the ventilation shaft.
- After this you can secure the hood inside the cabinet. Screw it with self-tapping screws, dowels, in case the fastening is intended for walls.
- Firmly fix the corrugation on the hood and fix it with a clamp.
- In the place of fixing the collar, seal with sealant.
Attaching the corrugation to the ventilation
If you use PVC ducts, the installation process is the same: simply connect the pipes together with the component parts and conduct it before ventilation.
Important! During the installation of ventilation, try to minimize the number of bends in the pipe so that the draft of air remains sufficiently good. Remember that with each bend the power is lost by about 9-10%.
Now you know about what kind of hoods are for the kitchen and have a step-by-step guide on how to install a suitable model with your own hands. Hence - henceforth in your kitchen will always be extremely pleasant aromas of freshly prepared dishes.