- Why laminate?
- Which laminate to choose?
- Mounting methods
- Preparing for installation
- Fastening with adhesive
- Fastening on the lath
- Fastening on the
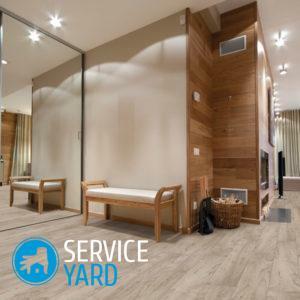
knitters The popularity of the laminate as a finishing material is growing. As a floor covering it is known for a long time, but more often it is used for wall covering. From this article you will learn how to fix a laminate on the wall, what are the advantages of this material in front of the rest of the wall coverings, and many other useful information that will help you make a unique design for your apartment or house.
to the contents ↑Why laminate?
There are a lot of materials designed specifically for decoration of walls. And among all the others, the choice of laminate flooring for use outside of its intended purpose looks rather strange. What are the designers guided, giving preference to such strange material for the walls? The fact is that the choice of this particular material has its undeniable advantages, which are much greater than it may seem at first glance.
Let's consider them in more detail:
- This material is an environmentally friendly product.
- Very high abrasion resistance, even as for flooring. And using special panels for walls, you can forget that once it will have to be changed. In this case, you do not need to buy the most expensive and durable material - it will be enough and minimal durability. This allows you to save significantly.
- The color palette is very diverse, which allows you to create the most diverse design of rooms.
- Ease of care. Laminate is not as fussy with detergents as most wall materials.
- Methods of fixing the material can hide any unevenness of the walls.
- Has excellent anti-static properties and does not attract dust.
- Even a novice with no special skills will be able to fix the laminate on the wall.
But where there are advantages, there are always shortcomings alongside. But these are much smaller:
- Laminate is susceptible to high temperatures, so it is not recommended to place it in the kitchen near the stove.
- The cost of working with a laminate will cost more than, for example, painting or decorating with wallpaper.
- If the fastening is directly on the wall with glue, the wall must be leveled.
- From an overabundance of humidity it can swell, therefore it is not suitable for kitchen and bathroom.
Which laminate to choose?
Before you talk about how to put a laminate on the wall, you need to clearly understand which of its types is suitable for these works best. The choice should be made according to several criteria, namely: locking system, price and strength class.
Lock system
There are several options for fixing boards of this material among themselves: adhesive, sheet pile, click. What is the difference between them:
- Glue laminate does not have a special system for fixing the panels together. Everything is done with the help of building glue.
- Sheet piling - has fastening in the form of a tongue and groove tongue. This technology allows you not to use glue and get even joints.
- The crawler version has a lock system more advanced than the previous version. This makes the coating more stable.

Price and strength class
First of all, when choosing home such a finishing material, choose the desired color and texture. An important factor will be the cost. Here you do not need to save money - the quality of the laminate depends directly on its cost.
Speaking about the strength class, you can safely say that you will use material with a low score of 21-31.It is not necessary to take a material with a digital symbol 33-34.Such high strength for walls is not required, but you will pay more money.
Results of
Based on what we just looked at, we can single out a list of the rules of choice:
- When choosing such a decor element, always consider the load that can be produced on it. Quality of the material depends directly on the quality. The key moment may be the presence of small children or pets that can damage the coating.
- Appearance also plays not the last, but practically the first role in the selection. The design of your room will depend entirely on such an outstanding detail. The market provides a sufficient number of different colors and textures of this material, so you do not have to limit yourself. It is possible to buy material suitable for any style and any color range of the room.
How to fix the
There are 3 options for fixing the laminate on the wall:
- Using a building glue.
- Nails to the bar of the crate.
- with the Kleimer to the crate.
Preparing for installation
Before you begin to fix the laminate on the wall, you must prepare the surface and the material itself. To do this, you need to do the following:
- It is usually recommended to leave the purchased material for a couple of days in the apartment where the work will be done. This allows you to purchase the final form material for this environment.
- If you are going to fix the laminate on the glue, then you need to carefully prepare the mounting surface. Align the walls so that the difference value is not more than 3 mm.
- If the laying is done on the crate, you need to make it. To do this, take the rails 2-4 cm and attach them with screws at a distance of 30-40 cm.
Important! Depending on the direction of the boards, racks are also installed. This must be done perpendicular to each other.
- Pay attention to the corners. They should also be as smooth as possible, this directly determines the ideal styling.
- It is necessary to dismantle the clypees on the doors and windows.
- Calculate the material consumption for the job. This is done very simply. Multiply the width by the length of the area where the installation will be performed. Add to this number another ten percent for fitting and trimming. The resulting number will be the area of the required material.
- Select the starting point. If you only fix the laminate on top, you should start on the wall from the top. Mark on the wall the distance in one board. If only the lower part is removed, or the whole wall starts from the bottom.
Required tools that should also be prepared immediately:
- Punch or drill. If the walls are made of stone, concrete or brick, the drill needs a winning bit.
- Screwdriver, hammer, electric jigsaw, pliers.
- Pencil and marker.
- Construction level, measuring tape and plumb line.
- Spatulas, including toothed.
- Required materials, which are determined by the fixing method. For example, screws or glue and a container for it.
- Trowel or trowel.
Fastening with adhesive
This mounting method is considered to be the simplest among all others. We talked about preparation before gluing before, for the very process we will need:
- Construction glue or liquid nails.
- Wooden hammer.
- A rag to remove excess glue.
Important! For better adhesion of the adhesive to the surface, the wall is pre-primed.
After all the preparatory work, we begin to glue the laminate on the wall. To do this:
- Apply glue to the panel and glue it to the wall to the starting point.
- Depending on the glue, it may be necessary to remove the panel for 5-10 minutes and allow it to weather.
Important! It is necessary to leave a gap between the lower row of the laminate and the floor. The gap, which is formed, will be closed by a plinth.
- After - all other panels are stacked, periodically checking the smoothness of the laying with the help of the level. The surface is taped with a hammer.
- Depending on the pattern, the next row starts with half the panel or with the whole.
- If the adhesive for the laminate on the wall is not weather-beaten, then after 3 rows, allow it to grasp. Otherwise, under the weight of the subsequent rows, the lower ones may shift.
We attach to the crate
This method is more laborious, but at the same time, it can be used for any walls. If in your house they are not even and align them is not possible, this way of mounting is for you. Also, this method of attachment allows you to hide various communications.
After you have prepared the frame, mount the brackets from the zero point, fixing them to thin nails through the bottom wall of the groove.
Important! The nail hats should be thin enough to make the laminate stay flat and there are no gaps.
to the table of contents ↑Attachment to
kleimers Attach not only nails and glue to the laminate wall, but also kleimers. They are made of galvanized brackets, which are designed to fix the laminate on the wall. There are 2 types of fixing data:
- With serrated ledges. These are driven into the board and then fixed with screws to the crate or wall.
- With flat ledge. Used to press the protruding part of the lock against a wall or crate.
Laminate is a reliable and durable material for wall finishing. With the help of it you can easily make a unique modern design of any room. And with the help of our article to fix the laminate on the wall for you will not be difficult.