
- Features of ceiling tension lighting
- Types of luminaires for tension ceilings
- Requirements for spotlights
- Installation of spotlights
- Chandelier fixing to tension ceiling
- Chandelier fixing
Stretch ceilings are very popular today. Perhaps, there simply does not exist in the modern market other materials that could make the tension structures worthy of competition. However, in this article we will not talk about the tension ceilings themselves, but about the correct installation of luminaires in the stretch ceiling, because you can not install all the fixtures, but only those that meet certain requirements, regarding power, appearance, etc.
to↑Features of ceiling tension lighting
In the process of lighting planning, you will naturally want it to be uniform, so that the light is not very bright, do not cut your eyes, do not distort colors and do not interfere with perceiving everything that surrounds you. Is it worth recalling that the well-known Illich lamp, which is suspended from the ceiling on a carbolitic cartridge, does not meet all the desirable requirements. Along with this, even the most beautiful and effective chandelier does not give a good lighting - it only attracts excessive attention, and still does not leave dark corners in the room.
All the above problems can be eliminated by installing point lights in tension ceilings. High-quality and even lighting of the working area in the kitchen, soft and calming light in the living room rest area, absence of gloom and a pleasant environment for the eyes - all this can be achieved fully, provided this kind of lamps.
Important! The lighting of stretch ceilings with the help of built-in spotlights is carried out according to one specific principle. To the base ceiling, a support structure is initially attached, which is also called a post, on which subsequently the embedded elements will be kept. And only after the stretching of the web is performed, holes are cut in it, which are fixed by reinforcing rings. Then, if necessary, glue the thermal insulation ring and install a spotlight.
to the contents ↑Varieties of luminaires for tension ceilings
As the popularity of point fixtures grows continuously, their diversity becomes wider every day. Most of the fixtures that are used to illuminate traditional ceilings and lighting facilities, also suitable for tensioning cloths. By the method of fixing, the fixtures for tension ceilings come in two varieties - with the external and internal arrangement of the bulb.
Variants of fixtures
In an external arrangement, the light bulb is located below the tension ceiling level and is separated from it by the platform. Overhead luminaires have the same mounting method as traditional chandelier, and they are more preferable, since the bulb is not located in a closed space and quickly cools down.
Luminaires of this kind do not affect the service life of the ceiling, they are brighter and better illuminated, because they have a wide scattering angle, they "eat" less than the ceiling height due to the external placement of the light bulb.
Important! Among the cons of false luminaires it is possible to distinguish the following: the luminaire's casing does not cover the protective thermo ring, and this slightly spoils the aesthetic appearance.
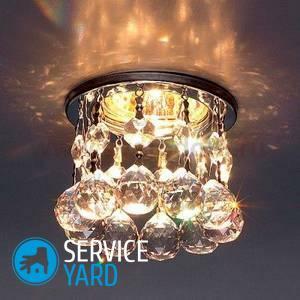
With internal arrangement, the bulb hides above the level of the tension web and practically does not protrude its level. The installation of luminaires in tension ceilings is done in such a way that the body together with the bulb is built into the stretch ceiling, and only a small visible part of the shell is visible from the outside of the canvas, which is called a decorative ring or a protective glass of the plafond.
Important! Lamps in which the bulb is located inside are less recommended for installation. Since the bulb is inside the ceiling, this affects the cooling, besides, the thermal ring itself and the ceiling overheat.
The spotlight has a narrow beam of light, which does not allow to illuminate a large area. If the installation is done incorrectly, then irreparable changes in the characteristics, appearance and properties of the tension web are possible.
But in most cases they still choose them, agreeing to fulfill several stringent restrictions, for example, it is inadmissible to use cast fixtures - only stamped ones. And they choose precisely such lamps because the point direction of light can change the usual drop of shadows in the room and create a rather interesting lighting exposure. Here the thermocouples are hidden by the side edge of the luminaire.
What are the lamps?
Overhead and embedded fixtures can have incandescent, halogen, LED and energy-saving luminescent lamps.
Important! The main type of luminaires for the suspended ceiling are MR16 with a halogen lamp, as well as R63 with an ordinary incandescent lamp.
Fluorescent energy-saving lamps are rarely used with stretch ceilings, because the bulbs of this type are large. Accordingly - the lamp with this lamp during installation in the suspended ceilings needs a considerable distance between the tension and the base ceiling.
Quite an interesting solution for installing a spotlight in a stretch ceiling, - recessed lights with LED bulbs. But they can not be used as the main working light of the room because of the limited power, but for decorative illumination they will fit perfectly.
Important! In addition to traditional lamps, your choice can be made in favor of LED strip, which is installed with a canvas. With it, soft illumination of certain functional comfort zones is created, for example, around the perimeter of the room or in its other part.
to the contents ↑Requirements for spotlights
In suspended ceilings, it is not possible to build in any lighting fixtures, regardless of the desire of the owner. Recessed luminaires for suspended ceilings must meet certain characteristics.
Appearance
First of all, for lighting fixtures in suspended ceilings, only round lighting fixtures can be used. And, to a greater extent this refers to the mounting hole, which is necessary to install the luminaire in the stretch ceiling.
Important! It happens that a square or other shape of the luminaire inside has a round landing unit. Such a lamp is also suitable.
The housing of each of the fixtures on the inside should have a landing flange. When choosing a lamp, pay attention to the difference between the outer and inner diameters of its housing. This indicator should have at least 10 mm.
Important! So it is necessary that the installed luminaire covers the thermal insulating ring, which is glued to the ceiling. Otherwise - the tread ring will protrude beyond the luminaire and it will be too noticeable.
It is desirable that the bulbs be covered with a special opaque paint, in order to prevent the penetration of light beyond the ceiling. If you use other lamps for luminaires, the stretched ceiling can be illuminated, and a small halo of light can be created around the lamp.
Power
During the selection of lighting devices in order to install a spotlight in a stretch ceiling, it is necessary to take into account the limitations on the power of the lamps and the limitations that relate to the distance between the lamps and the surface of the stretch ceiling. This is important, since PVC film during heating above 60 degrees is able to melt and deform. Therefore, it is desirable to install double thermal rings.
To prevent damage to the tensioning sheet from overheating at the place where the luminaire comes into contact with it, you should choose:
- incandescent lamps with a power of less than 60 W;
- halogen lamps whose power does not exceed 35W.
Important! With additional thermal insulation, you can use lamps with more power.
If the overhead luminaires have an upper part, which is not very prominent from the level of the stretch ceiling, where a strong lamp is located, then the power limitations can be neglected. In some cases, they are not more than 70 W.An alternative is an almost non-heated energy-saving light bulb.

Mounting
The distance from the tensioning cloth with the internal placement of the fixtures to the base surface "takes" approximately 6-7 cm for halogen lamps and 9-12 cm for incandescent lamps. The distance from the stretch cloth to the overhead lights should be at least 15 cm, but it is better if this figure is 20-40 cm.
Contact of the point light and tension ceiling housing is inadmissible, otherwise - the web will be pushed. On the suspended ceilings there is a gap between the edge of the luminaire and the canvas. On the other hand - the maximum diameter of the hole can be cut out for mounting fixtures in stretch ceilings up to 15 cm.
Important! In a room where there is this type of luminaire, it is recommended to install dimmers - dimmers.
When selecting spotlights for installation in a kitchen, bathroom and a swimming pool, it is advisable to take special lamps, with the available protection against moisture and dust. Often, such products have on the package marking IP65, if the manufacturer uses European standards for marking.
Important! In spotlights halogen bulbs can be on 12V or 220V, only for the first variant it is necessary to use a transformer, whose power is more than the power of the connected lamps. Each separate luminaire is best connected from the position of subsequent use to a transformer of 60 watts.
to the contents ↑Setting of the spotlights
Before installing the spotlight in the suspended ceiling, you should determine the installation location.
Important! Determine the location for fastening before starting the installation of the film coating. Laying should be done after installing the frame.
Basic rules for
Procedure:
- Install the skeleton and mark the plane of the ceiling.
- Select the location for the lighting connection point. For this, the connection point must be equipped with a junction box. To this point there should be free access after installation of the ceiling.
- Calculate the cross section of the wiring. Do not take the material back-to-back - better give preference to the cable, the power margin in which is more than the required capacity by 20%.
- Make channels to connection points. For a concrete surface, use a bolgar with a circle around the concrete. This will save your time. The cable is best placed in the corrugation - the width of the channel should be made with this in mind.
- Connect the cable to the junction box, swipe through the channels.
- Make the wire fastening to the ceiling surface.
Important! While connecting, avoid twisting - this is a very unreliable connection. It is better to use special terminal blocks, through which secure connection and secure connection is ensured.
- At the installation site of the luminaires, make a cable for the connection. The length of the wire make 10% more than required.
- On the main ceiling, mount the racks that are needed to install the lighting fixtures.
- Attach the brackets, for which use the puncher.
- Connect the lamps temporarily and look at the operation of all wiring, as well as the correct lighting of the room. This must be done, since after fixing the film coating it will be too late to fix something.
Important! Remember that with the use of ordinary lamps in the room, the plane of the stretcher can drop 10 cm, and the power of the lighting device will be limited to 40 W.Using energy-saving lighting devices, the ceiling can drop only by 4 cm, and power limitations may not be at all, because they heat up poorly.
After the wiring is completed, put a stretch ceiling.
Important! Before starting to work, it is necessary to disconnect the line where the work will be carried out from the power supply, and also to mark the fixing points of the luminaires.

Mounting:
- On the film coating along the light fixture installation circuit, attach a plastic ring that must be purchased or made of 1 mm thick plastic. This will help in future to protect the blade from the rupture. It is necessary to apply glue on the surface and glue to the film.
- Pass the wires through the hole.
- Make the connection of the contacts to the terminals of the luminaire. Then press the spring clip onto the body.
- Make the adjustment of the lamp and set it according to the ceiling level. In this case, the springs return to their original position, which ensures the reliability of fastening.
- By the same principle, connect and all other lighting devices.
Important! Wire the wire to each lamp. Do not mount on one line. If the lamp burns out, in this case the light will go out all over the branch.
to the contents ↑Fastening the chandelier to the tension ceiling
Many people choosing chandeliers, want to install them on a stretch ceiling. Today in shops there are many kinds of similar constructions. However, for a stretch ceiling not all are suitable. Such an element must be selected immediately.
Choosing a chandelier
You can attach almost any of the lighting fixtures to the suspended ceiling, but sometimes there may be difficulties in the further operation. Therefore, you must adhere to certain rules when choosing the right elements:
- When choosing a chandelier, it is undesirable to buy a plate type design. Typically, in these chandeliers, the base is made of a fairly thin metal, which can become too hot during lighting.
- It is necessary to pay attention to the elements with the plafond and the lamp inside. During the operation of such a structure, there will be no stains on the ceiling.
- If you still decide to use the design without a plafond, then try to choose the direction of the lamps in the sides or down. In addition, it is desirable that the chandelier had a light reflector.
- Give preference to devices in which energy saving lamps can be used.
- Do not buy too complex models - the simpler, the better.
Fastening the chandelier
After the chandelier is selected, it is necessary to correctly fix the chandelier correctly on the tension ceiling. For this, there are several types of performance of this work.
Ceiling hook
Perhaps this is the most famous and applicable connection option. It is quite reliable, because it rigidly connects to the surface. In the process of fixing in a stretch ceiling, no additional materials are needed. The anchor hook is best for fastening.
Procedure:
- Make a hole in the ceiling using a puncher and attach the hook.
- Make it should be slightly above the ceiling plane - this is done by adjusting.
Important! It is necessary that the glass is attached to the canvas without too visible gaps.
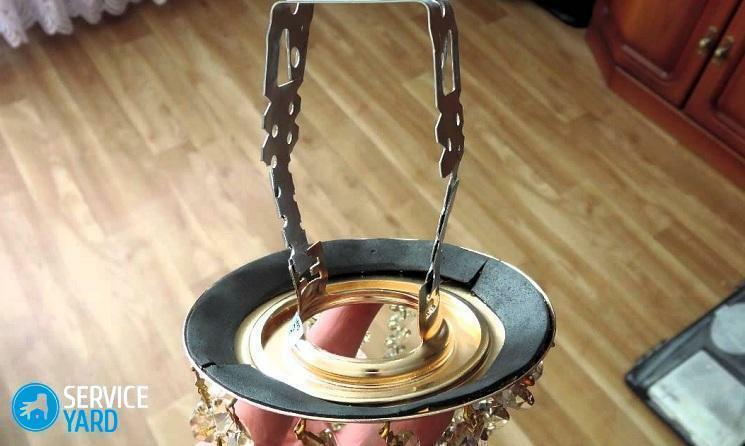
Mounting rail
A similar construction can be found in newly installed suspended fixtures.
Procedure:
- Attach the chandelier to the ceiling.
- If there is an old hook on the place where you are going to install the chandelier, then it needs to be folded - it is undesirable to cut it, because you still do not know what kind of chandelier you will have in the future.
- Attach the mounting plate to the plane and mark the mounting locations.
Important! In order to perform the marking on the ceiling, first make it in the mounting plate. After applying to the plane, make marks with a drill. If you make separate mounting points on the ceiling and the bar, then they may not coincide - you will need to redo the entire work.
- Make holes with a perforator and install dowels.
- Attach the bracket. The bar is set either according to the level of the ceiling, or slightly higher.
Important! Even for fastening, a double-bar can be used, which connects to the surface in the same way as the previous principle. From each other they differ only in appearance. It is also installed using a platform.
You can always try to implement the installation of luminaires yourself in stretch ceilings. This is not an easy task, but the pleasure obtained from the result will be compulsory. If you consider all the features of the interior of the room when selecting lighting fixtures, choosing shades of light, puzzling careful study of all the nuances, the room is exactly transformed, than you can not help noticing.