- Tile - good and different
- Choose tile
- Make measurements
- Tools
- Remove cover
- We wall
- Floor preparation
- Lay tile
Tile is perhaps the most popular material for bathroom linings. Most often it is glued to the floor and walls, but there are options for a very effective design, when tiles are laid on the ceiling. However, the interior will look good only in the case when everything is done neatly and qualitatively. How to lay the tile in the bathroom with your own hands? Now we will discuss this.
to the contents ↑Tile - good and different
Before you put the tiles in the bathroom with your own hands, you need to take care of purchasing quality materials.
Pros
The tile has many advantages:
- resistance to moisture;
- resistance to temperature changes;
- good waterproofing properties;
- durability;
- simplicity of care;
- price availability;
- large assortment;
- possibility to lay yourself;
- possibility to use several times.
The increased humidity in the bathroom, as well as the temperature drops, is a normal phenomenon and even almost mandatory. The tile does not allow water to pass through. Seams, of course, to some extent, it can skip, if you use not very high quality grout, but still get an additional waterproofing layer, and in the bathroom it is extremely useful.
Important! If the tile is properly tended( and it is quite easy) and does not subject it to mechanical influences, it will serve a wonderful long time. Such a coating perfectly tolerates both abrasives and hard wool. True, they almost do not have to be used - practically any dirt is removed with a soft cloth soaked in a usual detergent.
Design features
On sale you can find a wide variety of tiles:
- shiny;
- matt;
- is smooth;
- textured.
Important! In addition, tiles can be of different colors and sizes. You can buy a decorative panel with already applied drawing.
to the contents ↑Choose a tile
Putting tiles in the bathroom with your own hands will be much easier if you select the right materials and tools. We need to start from the tile itself. It is better to buy it in an ordinary construction store, and not through the Internet, because you will have to check if not every tile, then at least a dozen fragments - in order to draw a conclusion about the quality of the whole lot, this will be quite enough.
There should not be any on the tile;
- chips;
- scratches;
- cracks;
- flows;
- visible differences in color;
- bubbles;
- air pockets;
- sags.
What you choose should match:
- in form;
- in size;
- by color and shade;
- on the article.

Symbols on the
package. Do not be lazy to look at the markings - you can learn a lot about it. There may be such icons:
- snowflake;
- palm;
- outsole;
- bulb;
- spark with a number inside;
- gear;
- chemical symbols;
- is a horizontal rectangle, the top and bottom of which are arrows pointed to each other;
- a rectangle on legs, from above - an arrow pointing downwards;
- inclined board with stepping shoes on it;
- designations of mass, area and size;
- designation of the place of application.
What does all this mean?
- Snowflake means that the tile is resistant to frost, so that it can be used in unheated rooms.
- The image of the palm shows that it is possible to glue the tiles from this batch only on the walls, and if you see the foot - the material is intended for flooring.
- The bulb on the label indicates that the surface is not sensitive to aggressive chemicals.
- The gear indicates abrasion resistance.
- If you see a chemical symbol( for example, Ag is silver) will tell you that this substance is used in production, a spark with a number inside indicates the amount of firing.
- When you see the rectangle with the opposing arrows, you will learn about the thickness of the tile, and if the rectangle has legs and the arrow with a point pointed at the rectangle is hanging from above, this will indicate the resistance to mechanical loads.
- An inclined board with a shoe running along it tells about the coefficient of friction of a wet surface.
Where is the tile used?
By the icons on the package you can find out for which rooms the lot is intended. You can see:
- aircraft;
- cross;
- bed;
- Olympic Rings;
- stylized image of the plant.
Marking designations:
- If an airplane is drawn - you can decorate the airport premises, the Olympic rings indicate the use of this type of tile when decorating sports facilities.
- On the image of the bed you will find out that the tile you like is used to decorate hotel rooms, and on the cross - that it is suitable for hospitals.
- When you see the stylized picture with the factory, you will find out that this batch is suitable for repairing industrial premises.
How is it measured?
In building stores there are two types of tiles:
- decorative;
- normal.
The first is sold individually, and here it is necessary to make very accurate calculations. In the second case, it is indicated on the packaging, what area can be covered with a given amount of tile.
Important! The amount of material purchased should be approximately 10% more than the calculated one, in case you unsuccessfully cut the tile or break one of the fragments.
to the contents ↑Making the measurements
If your bathroom has already been pasted with ordinary tiles, but you want to put a new one - it's easy:
- One of the tiles must be measured.
- Count the total number of tiles.
- Choose in the store material similar in size.
Laying tiles in the bathroom with your own hands, if there was any other coating on the walls, requires a slightly different approach.
- Measure the area of the wall that you are going to cladding. If it is even, it is enough to multiply the length and width of the surface, which will be covered with tiles.
- If there are protrusions or niches, which also have to be clad, measure first the surface area without a niche, then - the niche or protrusion, then - the sidewalls.
- Look at the tiles of what size you are offered in the store. It is best to choose a tile of this size so that you can glaze the selected surface with whole tiles.
- Divide the area of the walls into the area of one tile. Ideal if you get an integer, in this case, you do not have to cut the tile, but this happens very rarely, most likely, you will get a number with the remainder.
- Multiply the remainder by 2.
- Add the doubled remainder to an integer - this is the minimum number of tiles.
Tools
Tiles for repair alone will not be enough - additional materials and tools are needed. From the tools you will need:
- tape measure;
- level;
- electric drill;
- notched trowel;
- tile cutting machine;
- rubber hammer;
- sponge or soft cloth.
Additional materials
If you started a bathroom repair, laying the tiles is not at all what you should start with. You have to:
- remove the old coating;
- to align the wall;
- apply waterproofing.
Only after this you can start to glue. So, together with the tile it makes sense to buy:
- primer;
- grouting;
- waterproofing material;
- glue for tiles;
- crosses for seams;
- wooden or metal slats.
Remove the coating
The speed of this process depends on the conditions:
- you are going to use the existing tiles in full or in part;
- you want to replace several fragments;
- you completely want to replace the tile with a new one.
In any case, you will need:
- soft sponge:
- chisel;
- hammer.
Important! The first option is not always possible - if the glue is spread all over the surface and there are no voids under the tiles, it is unlikely that the tile can be removed without damage.
If there are voids, then proceed as follows.
- Thoroughly moisten seams with water.
- Wait until the mortar is softened.
- Remove the grout with a spatula.
- Insert the chisel between the topmost tile and the one below it.
- Tapping lightly on the chisel with a hammer, enter it under the tile until it comes off.
- In the same way, remove all the tiles - the process is very laborious, but relatively clean, and this is the only way to keep the tile whole.

If you are not going to save the old
coating In this case everything will be easier, although dirtier:
- Before you begin, close all the plumbing, otherwise - it will be difficult to get rid of the dust later.
- Soak and remove the grout.
- Put on the respirator.
- With a perforator, drill a few holes where there is even the slightest emptiness.
- Remove the tile in any accessible way - maybe even the same perforator by inserting a drill between the tile and the wall.
We are walling the
The surface under the tile should be almost perfectly flat. The fact is that the tile itself is stiff and does not bend, so the slightest deviation will lead to either tile lying crooked or some tiles quickly fall off. The slope should not exceed 0.5 cm. It must be disposed of with a putty, as well as from all kinds of cracks.
to the contents ↑Floor preparation
Before laying the floor it will be necessary to make the screed, but first - to determine its height. By standards, the floor in the bathroom is lower, than in all other rooms, by 0.3-0.5 cm. This is done so that if there is a leak in the bathroom, the water does not enter the corridor and the rooms. This must be taken into account when pouring screed.
Waterproofing
Floor waterproofing is especially important for those who live on the second floor and above. For this purpose:
- bitumen and roofing felt;
- polymeric bulk composition.
How to proceed:
- Floor slabs should be cleaned and primed, as well as a 20 cm strip on all walls.
- After this, apply bitumen mastic. The ruberoid should also be applied by covering the lower parts of the walls.
Important! A very good option - modern self-leveling compounds based on cement with various water-resistant polymers. They are superimposed on a very thin layer on the floor and part of the walls - and they give an excellent waterproofing.
And here it is not necessary to make a waterproofing with polyethylene - after a couple of years it will collapse, and the water from your bathroom will systematically get to the neighbors.
Primer
Before facing the walls and the floor must be primed. This improves the fit of the tile, and in addition, reduces the consumption of the adhesive.
Features of choice and application:
- Primer is best to buy a ready-made, good assortment in stores quite large.
- Apply it with a wide brush
- The ground must be rubbed, slightly pressing with a brush to the surface.
- If there is enough white foam from the concrete floor or wall, the ground is sufficient.
Important! Priming walls and floor is best in the evening, then until the morning the agent will be absorbed and dried. If you apply the soil again, complete drying does not have to wait.
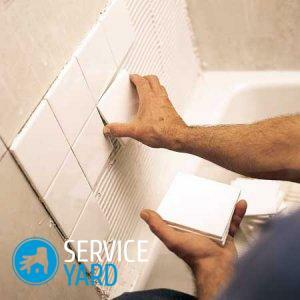
to the contents ↑We lay the tile
The installation of the tile in the bathroom begins with the inspection of the back of the tile. Almost all manufacturers make a special label there, which indicates in which direction glue should be applied - along or across.
Important! This is especially important if the room is spacious and the walls are long. Incorrectly chosen direction can lead to the fact that the seams will spread out.
When facing the floor, glue strips are applied to both the surface and the tile - perpendicular to each other. When the walls are covered with glue, only the wall is covered.
Making the markup
Answers to the question of how best to put the tile in the bathroom, only two. The tile should lie flat and hold tight. Something for the strength you have already done - carefully all calculated, leveled the wall and floor, laid the ground. And how to stick the tile exactly?
- Decide where you will begin.
- On the wall, draw a line parallel to the floor line.
- Draw the same lines across all walls.
Important! From which angle to start - it's up to you, it depends on the circumstances. But most often the laying of tiles on the floor begins from the wall nearest to the door, and if it is a question of walls, then the one near which the bath stands, and from the furthest corner of it.
Apply glue:
- The adhesive is best to buy ready and dilute it strictly according to the instructions.
- Apply it to the surface with a notched trowel.
- Use a flat part to spread the adhesive over the surface.
- Teeth - remove the excess.
Important! Adhesive stripes must be applied only in one direction.
Why do we need crosses?
In order for the tile to lie flat, the finishers use plastic crosses. They are put in the seams. Crosses can be bought in the same place as the tile, but it is necessary to take into account several points.
Note:
- for thickness;
- on the flexibility of plastic.
Important! Thin crosses are used when laying decorative tiles. The thickness of them is 1 mm, they are suitable for seamless laying. For ordinary tiles, which are often faced with bathrooms, 5 mm thick parts are suitable. The main thing is that they bend, but do not break. Crosses are placed where vertical and horizontal seams intersect.
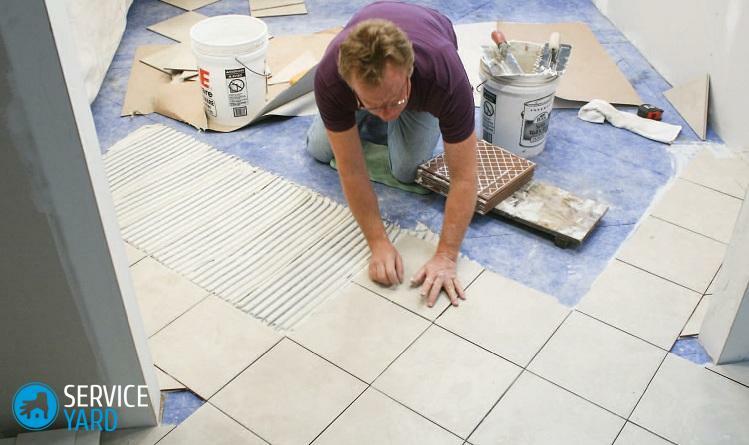
In what order to glue?
- If you finish the bathroom completely, start better off the floor.
- In some cases, it is allowed to do wall cladding first, and then flooring, but it will be necessary to leave a clearance of 0.5 cm from the bottom.
- The wall can, in principle, be lined both above and below. If all tiles are intact - it's better to glue off the floor, if some part has to be cut off - then start from above, so that the cut pieces are less visible.
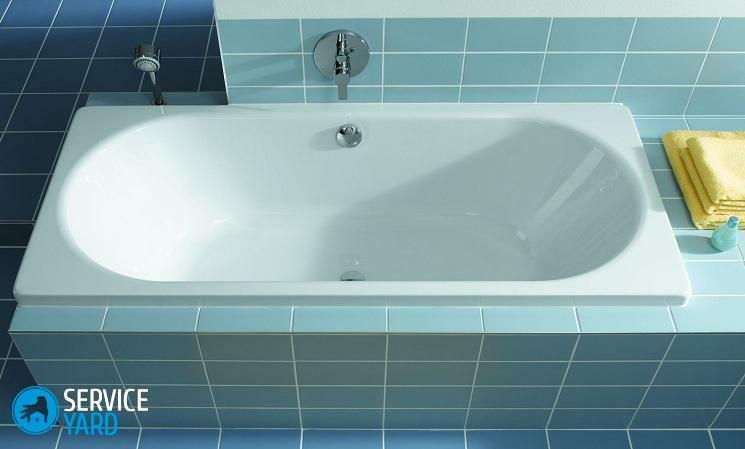
- That wall, which is adjacent to the bathroom, begins to be lined from the edge of the font.
The tiles are pressed against the surface, but not particularly tightly, so as not to crack:
- The first row is laid along the straight line( it is carried out according to the level).
- Place the crosses in the right places.
- Check the row level.
- Lay the next row.
In some cases( for example, when facing a narrow partition), the tile can also be laid vertically.
Important! If the tile should be cut, it is done with a tile cutter or a Bulgarian.
We process seams
The tiles are laid, but the seams do not look very nice? Nothing wrong. Grief will help the grout with sand, and maybe even with latex. The coating will be beautiful, elastic and will last for many years.
Important! If you add latex, the mixture does not dilute with water.
How do I grout joints?
- Prepare a small amount of grout.
- Apply it with a fine brush to the tile.
- Distribute rubber smoothing over the entire surface.
- Clean the tile - with a soft sponge soaked in water, wipe all the fragments.
Important! Do not wash the tile in parallel seams - you can remove the grout.
Final stage
The floor laid out with tiles does not require any processing. But this can not be said about the walls, especially those that adjoin the bath. Joints between the bathroom and the wall must be treated with a sealant, but this can only be done a couple of weeks after the premises are faced.
From this article you learned all the necessary information on how to lay the tile in the bathroom with your own hands. Adhere to the above tips and rules, and then the result will be really high-quality, and you will not have to be baffled by the change of the finish for a long time.