

- Need for a highchair
- What should be the highchair?
- Proceed to the assembly of the table
The feeding procedure should be as comfortable as possible for the child himself and for the person who feeds it. It was for this purpose that a table was made, beyond which it is possible not only to feed the baby, but also to play and engage with it. The stable design of the chairs is as safe as possible for a small family member, which means that the mother can not worry about whether her child is alright. About how to assemble a highchair for feeding, you will learn from this article.
to the table of contents ↑The need for a highchair
The huge number of both young and already wise parents will tell you with confidence that such a chair is simply necessary for training with a toddler. Not surprisingly, because this design has a huge number of positive properties:
- Small size - this will save space in the room.
- Ease of use and versatility - at this table, the baby can be eaten and played.
- Saving money.
- Physical and psychological safety - my mother does not worry that something could happen to her baby, because while he is sitting on a chair, he is safe.
- Ability to contact the child while doing household tasks - this saves considerable time.
- The child feels "his", sitting at the table with his parents.
- The kid unconsciously learns the initial basics of etiquette - this will help him in the future, for example, when he goes to the kindergarten.
What should be the highchair?
Before assembling the feeding table, it is necessary to decide what material it will be made from. Now very often there are plastic and wooden models on the windows of children's shops. Of course, each series has its pros and cons.
Wooden highchair
Baby products, which are made of natural wood, have always been valued more than their counterparts at all times. With this you can not argue, because even a highchair has a huge number of positive features:
- This product will serve you more than one year.
- It is made of environmentally friendly material.
- Has an aesthetic appearance.
- The back of the table can be adjusted.
- The height of the construction can also be changed.
Disadvantages of this product are also available:
- Impressive dimensions in both folded and unfolded form.
- There are not always protective covers in the package.
- There are sharp edges and angles - it's not safe for a child.
- Caring for the surface is difficult.
Stools made of plastic
Most often, young parents do not know how to assemble a chair for feeding from plastic. This is not surprising, because the details and functions in it are several times greater than in the previous version.
The merits of the plastic table include:
- You can choose a color to match the interior.
- Has many designs.
- This design can easily turn into a chaise longue.
- Has rounded edges - this reduces the risk of children's injuries by several times.
- The product case is waterproof.
Important! The only drawback of a plastic table is that it is artificial. Do not give in to the low price of the product and its bright design - ask the seller for a quality certificate before making a purchase.
There are three main models:
- Transformer. The height of the table top and chair can be adjusted, the angle of the design can also be changed. Such an assistant can become a working place for a baby when he grows up a little.
- Booster. This model is autonomous and can be attached to a floor or an adult chair.
- Suspended. Such an average design weighs 2 kilograms. With the lever and long handles, this design is easily attached to the table.
Let's proceed to the assembly of the table
Many parents, having made a purchase for their child, can not figure out how to assemble a chair for feeding. It is understandable, because all models, as a rule, are sold in disassembled form.
Before the assembly procedure, the following materials will be needed:
- Wooden crossbeams.
- Soft seat for the baby.
- Small and large worktops. Euroscrews and the key for them.
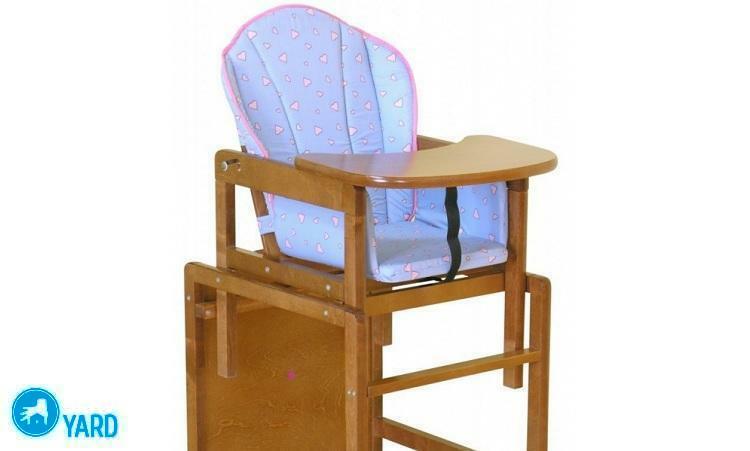
"Agu"
In order to assemble such a mini-installation, you must first obtain all the parts from the package. As a rule, the chair itself first of all gathers - the rest of the work will not be so complicated.
This model of chairs has two armrests, which in turn have triple vertical bars made of wood. The edge closest to these rods is called the front.
- Connect the armrests using a cross bar made of wood. Scroll it with two bolts from the front of the armrests from below.
- Attach the crossbar from the tree to the bottom of the seat.
- Place the soft lining in the base so that the seat belt is both front and bottom.
- Fix the seat with four bolts, the backrest and armrests - with two.
- Now it is necessary to collect a table for feeding. For this purpose, the table top should be placed on top and snapped into the bottom on the armrests.
Important! On the left armrest there is a plastic regulator, on which the range of the baby's desktop depends.
- Now you need to make a stand under the table. For this purpose it is necessary to connect together two identical parts in the set( you will notice them immediately) perpendicular to each other.
Important! Places of connection are marked with strokes, which you immediately notice.
- Put the almost finished structure on the legs, screw the last piece with the wall - the structure should remain stable.
- Connect the legs of the structure with the remaining jumpers and fasten all the bolts.
The assembly is complete.
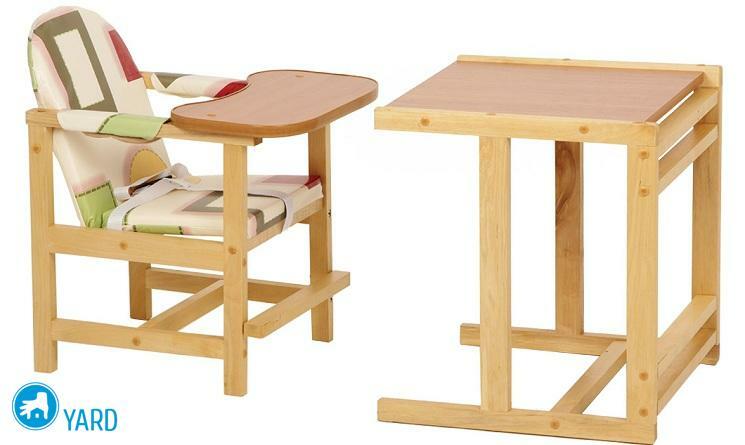
"Baby"
Before assembling the little chair for feeding "Baby", you need, like in the first example, to expand all the parts in front of you. Here they will be much more than described above, but the plus in these details is that they are all numbered( 2-9 - parts of the tabletop, 11 or more - parts of the highchair).
The collection process is as follows:
- Expand all the parts by numbering separately from each other.
- Combine and twist the parts with holes that have the same sequence numbers starting with the digit 12.
- Connect the parts under number 13.
- Fasten the holes of parts 11 and 14 respectively. In the end, you get a part from 4 parts.
Important! In the same way, the second part is assembled - the configuration of the same numbers is alternately connected, then these parts are connected together using a crossbar.
- Now it is possible to assemble a highchair for feeding by attaching a soft seat to your child's base for wood - the crossbeam should be between his legs, and the safety strap hang down. The seat must be locked with six bolts.
- The last stage of the primary assembly of the structure is the attachment of the table using two bolts to the armrests.
- Next is a stand under the table. To do this, select 4 elements with numbers of cells 3, twist them with bolts. As a result - you get a detail reminiscent of the form of the letter H.
- The second part is twisted in the same way by the numbering of the same cells.
- In the end, it only remains to assemble the feeding table by combining the basic assembly parts.
Important! Do not tighten the bolts too much - this can serve as the rapid wear of the entire structure.
A little kid's table is one of the most important assistants for his parents, because while their child is sitting behind him, they can be sure of his safety. From this article you learned about the basics of assembling such tables, it means - you can easily cope with the task, and you will be able to add your baby to self-feeding.


