
- Where will you do it?
- How can I make a good knife?
- What should I do with the handle? What metal is better to make a knife?
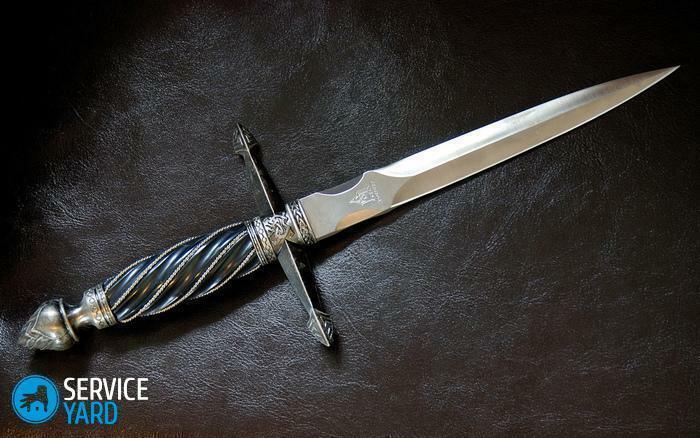
- Good knife with your own hands
- Homemade knife with hardening
- Knife from glass with your own hands
The choice of knives in stores is great enough. Kitchen, shoemaking, hunting, pen - the list can go on for a very long time. But there are situations when there is no cutting object at hand, but he needs it badly. For example, travel is always full of surprises, any thing can be on the bottom of a precipice or a lake. Or maybe you need a cutting tool for some special work? In a word, there are not so few situations when it may be necessary to do this kind of homemade work. What is it better to make a knife? About this, as well as how to do it better in this or that case, we will now talk.
to the contents ↑Where will you do it?
The need to make a cutting tool can arise anywhere:
- at home:
- at the cottage;
- in the campaign.
Houses, as a rule, make knives for some special works, as well as gift or collectible. If you do not do this professionally, then you do not have special equipment yet. But there may be a lot of suitable in the closet with tools.
There are many useful things to be found in the country. Most likely, there is almost everything - a broken metal hacksaw, an old file, etc. If you were left without a knife in the campaign - you will have to think and look carefully around. Strangely enough, the answer to the question of how to make a good knife with your own hands, can be right in front of you.
to the contents ↑How can I make a good knife?
The material for making the knife should be hard enough and it's good to keep the sharpening. For this purpose:
- metals;
- stone;
- glass;
- shells of shellfish;
- animal bones;
- tree.
Metal
Metals are not at all suitable. So what kind of metal is better to make a knife?
- It's unlikely that you will think of fiddling with aluminum - with such a knife you are more plagued than you can work.
- The most suitable material is steel, the best is stainless.
- Ideal - hardened, but it's as lucky.
Important! At home you can do the heat treatment yourself, in a hike - unlikely.
Stone, glass, shells
In the trek you will certainly find stones that can give a sharp cleavage:
- obsidian;
- shale;
- quartzite.
Important! These are layered materials, and the chips are quite sharp when the layers are separated.
In the places you visit it is not difficult to find a suitable piece of glass - here you have a simple solution, from which to make a knife. On the banks of the rivers there are shells of mollusks - for example, bezubok. Stratified, they also give sharp chipped, which allows you to make a good, albeit small blade.
In case of an urgent need, even a tree will be useful - however, a wooden knife is suitable only for small kitchen works.
Bone blade
Bone is an ancient material for making knives. In many regions of our planet, such tools are still used. To make a blade in the absence of emery, stencils and other useful things, only a few stones will be needed. One of them should be rough enough to be able to sharpen the edge of the bone. The other two are necessary to give the workpiece a more or less suitable shape.
to the contents ↑Of what to do the arm?
The handle is an important part of any tool. Comfort and safety depend on it. You can make it from different materials:
- plastic;
- wood;
- ropes;
- wire.
Plastic
At home, the ideal material for the handle of a metal or glass knife is an epoxy. However, in the economic and construction shops are now sold a variety of compounds, which when solidified into a beautiful and durable plastic. It is possible that you have something left after repairing an apartment or constructing a summer house.
Wood
Wooden lining - the traditional way of processing the handle. The handle can be given any shape, it is comfortable, does not heat up and is easily fixed.
Important! Many peoples have knives with woven handles. You can braid with a cord or a wire with a coating.
Homemade rope
It is possible that a traveler who found himself without a knife on an uninhabited island or even just on a long trip lost his rope. There's nothing to be done, it is necessary to get out of the situation. The rope can be made, for example, from the nettle. It has long enough fibers:
- Remove the skin from the stem.
- Fibers collect and dry( for example, near a fire or simply in the sun).
- Remember the fibers.
- Next it remains only to weave from the "thread" a rope - for a knife a lot is not necessary, half a meter will be enough - the shank is braided already with a ready-made rope.
Which metal is better to make a knife?
Despite the abundance of suitable materials, the best knives are still made of metal. This was understood back in ancient times, when they learned how to handle iron. And now the overwhelming majority of cutting tools are made of steel. For the knife-self-made fit:
- blade from the hacksaw for metal;
- broken saw;
- old file( better Soviet);
Important! Ideal - a blade of hacksaw for metal. This is the simplest material, which, moreover, does not need hardening and tempering.
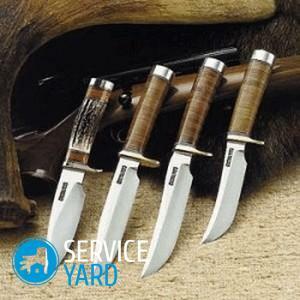
to the contents ↑A good knife with your own hands
To make a small knife with your own hands that does not need hardening, you will need, in addition to the hacksaw blade:
- sketch;
- marker;
- epoxy or other material for the handle;
- rivets;
- hammer;
- emery wheel;
- core;
- drill.
Sketch
Any work begins with the idea. A homemade knife in this sense is by no means an exception. First you need to make a sketch. It can be simply drawn, but it is much easier to find a suitable picture( so that the blade is not wider than the saw blade) and print on paper with a self-adhesive layer.
Important! The way in which your sketch is made depends on the way it is transferred to the blade.
Option 1:
- Place the cut image of the blade with the shank on the saw blade.
- Circle the marker.
- Grind the contour on the emery - at this stage it is not necessary to withstand extreme accuracy, the treatment can be quite rough.
Option 2
In this case, the stencil is cut, pasted onto the web, after which the workpiece is grinded on the emery.
Handle
The handle must be made before final machining. The workpiece should be comfortable to hold.
Plastic
The easiest option is to pour epoxy according to the method of application specified on the package:
- Allow the plastic to freeze.
- Process on the emery.
- Grind it.
Wooden handle
The wooden handle represents two identical overlays between which the liner is embedded. First of all, you need to cut 2 wooden blanks, absolutely the same. Final processing can not yet be done - it is important that they just exactly match in shape.
The whole construction is based on two rivets, for which it is necessary to make holes:
- Make rivet marks on the wooden workpieces and shank - when you assemble the handle, you should get through holes.
- Drill hole holes.
The rivets themselves are best made from a copper tube from the heat exchanger of the old refrigerator:
- Cut 2 pieces of copper tube - the length is equal to the width of the proposed handle( 2 layers of wood + metal layer) with a small allowance for riveting.
- Fold the wooden pieces together by placing the shank in the middle.
- Insert the rivet so that it protrudes slightly above the holes on both sides.
- Slightly rivet the edges with a punch to slightly widen the ends.
- Rivet the ends with a hammer( on a metal plate).
Wire or rope handle
If you know how to weave, it will not be difficult for you to make a handle from wire( in isolation), or ropes. You can also use a leather cord.
Important! Any kinds of weaving that give an opportunity to obtain a three-dimensional object are suitable. For example, macrame.
You can also make a temporary handle, extremely simple. To do this, it is enough to wrap the shank with electrical tape.
Finishing the blade
When the handle is ready, you can start finalizing and sharpening the blade. This is done on an emery wheel. The process lasts until the shape of the knife suits you.
to the contents ↑Homemade knife with hardening
To make such a knife with your own hands, you will need a file.
Important! It is best to take the old Soviet - in cheap Chinese models, which often break down, almost always used poor-quality steel.
Material for the
base The file must have a width of 30-40 mm and a rectangular or diamond-shaped section. The second option is more preferable - the knife will be more durable.
Tools
Prepare the remaining materials and tools. You need:
- grinder with grinding wheel;
- hacksaw for metal;
- electric drill;
- set of drills for metal and wood;
- sandpaper with coarse and fine fraction;
- vise;
- brazier;
- coals;
- oven;
- material for rivets;
- material for the handle.
Make a knife with your own hands
Start the work in the same way as when making a knife without hardening, that is, prepare a sketch, cut out the blade and shank. Then proceed as follows:
- Clamp the workpiece in a vice.
- Make a preliminary sharpening with a file.
- Sand the surface of the workpiece with a grinder on the grinding wheel.
Hardening
The important point is hardening.
Important! This procedure is necessary, since files are usually made of carbon steel - a fairly brittle material.
Work:
- Place the workpiece in a brazier with burning coals - the coals should completely cover it.
- Hold for 20 minutes.
- Remove the workpiece and allow it to cool completely.
- Put the workpiece in the oven.
- Preheat the oven to maximum temperature.
- Set the timer for 60 minutes.
- After holding the knife in the oven for an hour, turn off the heat and allow the entire system to cool completely. .
- Repeat the procedure.
Hardening with thermal shield
In fact, the ideal temperature for hardening is 700º.But it can be achieved only in the smithy - neither the gas stove, nor the Russian oven does not give such a heat. However, a way out can always be found. Space above the workpiece can be heated to almost the required level, if you build a heat shield. It's just a thick metal plate bigger than a file and towering 1 cm above it:
- Put the file on a baking tray.
- Place a few nuts around the perimeter of the workpiece.
- Place a thick metal sheet on the nuts( for example, a small cast-iron frying pan).
It is very convenient to calcine the metal in the oven with a transparent door. If you see that the metal has become an even cherry color, then the process goes right. You can perform hardening and without a stage with coals, just in the oven. But then it will be necessary to keep it at a maximum of not less than four hours. In this case, the metal should cool down simultaneously with the oven, that is, there is no need to get the workpiece.
Important! As an indicator, you can use table salt - as soon as it starts to melt, this will mean that you have achieved the desired temperature.
Hardening in the oven with subsequent release
Oven is still not the most convenient device for hardening metals. This is an urban option. Much better if you have a Russian stove. In this case, the heat shield is installed in the same way as in the previous case, but the metal can not only be hardened, but also released, which, naturally, will improve the quality of the future product.
Important! You can use a magnet as an indicator. He reacts naturally to cold steel. As the heating reacts weaker, and at one point stops doing it at all. Then it is necessary to take the workpiece with ticks and lower it into a bucket of cold water. And you will have a knife made of the best steel you can think of. Such material leaves scratches on the glass.
To prevent the blade from rusting
A good knife should not rust. In order to avoid corrosion, the billet must be treated in the chlorine gland. A gray matte film forms.
Chlorine iron is not always available, but it can be replaced:
- with vinegar;
- raw potatoes.
In acetic acid, the blade is lowered, the raw potatoes are simply rubbed. The effect will be the same as in the treatment with ferric chloride.
Next Steps
After the blade is hardened, you can start making the handle. It is done exactly the same way as in the previous case. In extreme cases, you should make a temporary handle so that you can safely take the workpiece without fear of injury:
- Strip the workpiece.
- Make the final grinding.
- Sharpen the blade on the emery.
Glass knife
Making cutting tools from glass is not very pleasant, but sometimes it is necessary, for example, in field conditions. You will need:
- a suitably shaped piece of pane;
- stone for sharpening;
- rope or electrical tape.
Important! Window glass, if necessary, can be replaced with a bottle. The main thing is to have a long piece with a more or less even edge. Too protruding chips it is better to immediately cut off, putting the workpiece on a large flat stone and working with a smaller stone.
After you have a workpiece of approximately the appropriate shape in your hand, make a handle. When working with glass, this is especially necessary. You can simply thread the tail. Make final sharpening on a flat rough stone. But in any case, this tool can be used more like a scraper, although it is possible to cut - meat, vegetables, etc.
Glass knife at home
You can make houses from glass a very real masterpiece that will both cut and decorate,for example, a kitchen. Particularly effective will look like a product of colored glass:
- Make a sketch - you can just on a sheet.
- Place a piece of glass on the paper.
- Trim the contour with a glass cutter.
- Make a grip of transparent plastic and grind it.
This sharpening knife does not need sharpening and grinding, if you just cut it flat enough.
Important! Glass is a brittle material, so do not press too hard on such a knife.
Now you know what it's best to make a knife in any conditions, how to do it, so in any unforeseen situation you will not be left without a cutting tool. And perhaps, using the tips and instructions from this article, you will begin to create real decorative masterpieces. And if it is so - we wish you creative success!