- Master-class for apron
- We sew a children's hairdresser's kit
Most people visit the hairdresser's shop almost every month, and each time the master wears a special apron and gives his client a special cape. These adaptations are necessary so that the hair does not get on clothes and skin. Some are cut at home without the use of special capes and aprons, which is not very convenient. Fortunately, you can sew an apron of a hairdresser with your own hands, referring to the Internet resources on which many video lessons and master classes are told and shown. Some sew hairdressing kits to their children for games - you can find hundreds of teaching recommendations for creating children's sets. In addition, the manufacture of aprons and capes does not require special skills and knowledge, and also does not take a lot of time. If you have children and an extra piece of waste material, use it to create a beautiful apron or toy.
to the table of contents ↑Master class for the apron
In order to start sewing the hairdresser apron, it is necessary to take the following measurements:
- Length of the apron( from the chest to the knee).
- Width of the apron( hem of the hips).
- Breast Center.
Important! If your height is about 165-170 cm, and the size is from 50 to 52, then you can safely start sewing this apron. To create it, you need about 85 cm of material, with a width of 90 cm. If you need the product to be longer, then add as many centimeters of fabric as you want it to be long.
Cutting material:
- Fold the material in half so that the edges are flush with each other.
- In the length of the future apron we make allowances for seams( +2 cm).
- Put it on the bottom and left on the right, half the width of the apron( thigh girth + seam allowances).
- From the resulting line, add up 46 cm.
- Add the top of the material to the left to the right, half of the center of the chest( taking into account the allowances of +1 cm).
- We round the armhole.
- Cut the future apron.
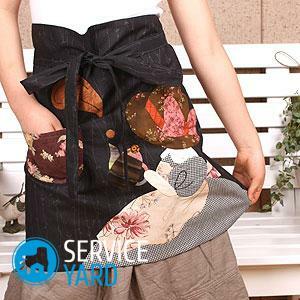
Pattern for small details of the apron:
- The pocket of any shape you like - round, semi-oval, square( you can have two pockets, but smaller ones).
- Two side zatvazochki 40-50 cm long, at least 2 cm wide. If the waist circumference is more than 110, then the strings are made longer.
- The neckline is 65 cm long, at least 4 cm wide. As a result, it will be 1 cm wide, as it will have to be folded and stitched.
- The underhook for the bottom of the product is 142 cm long.
- Top scoop for apron 52 cm long, 6 cm wide.
When all the small parts are ready, you can start creating an apron.
Sew an apron:
- The straps are pressed one centimeter from 3 sides, fold them in half and sew all three sides( the width of the seam is not more than 0.1 cm).
- The top bandage is also ironed and folded in half along the length, we sew along the edge, the width is 0, 1 cm. After stitching, iron well.
- The top and bottom ruffles should be swept from the short side, the width of the seam should not exceed 1 cm. Then we sew the lower parts of both parts by 3 mm. We gather ruches in such a way that the upper one is 26 centimeters in length and the lower one is 70 centimeters. Evenly distribute the planting of ruches and iron them.
- Sew the top section of the pocket half a centimeter, fold and do it again.
- Sweep the open pocket with a beautiful seam for 1 cm.
- Sweep the longest part of the top pocket skin.
- Sew the bottom ruff to the bottom of the apron, the width of the stitch is not more than 1 cm.
- Wrap the seam with an overlock and iron it, and then make a finishing stitch by 1 mm.
- Place the pocket on the center of the product, attach it with small pins.
- Next, sweep it with two seams. One width of 1 mm from the edge, and the other half a centimeter. In the middle of the pocket place the bartack to prevent the part from turning up.
- Sew the upper ruffle to the apron and take the top bandage from the wrong side.
- We cut the side sections of the apron with an overlock.
- Sew the side straps from both sides of the apron. Do this on the wrong side of the product, the width of the line is 0.5 - 1 cm.
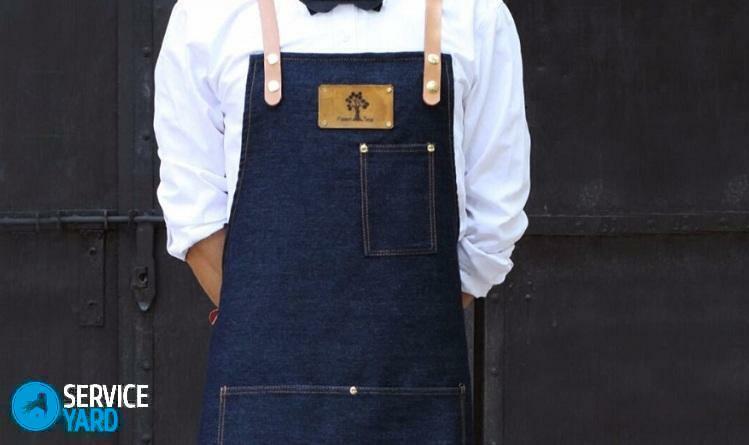
Thus, you have a very good apron of the hairdresser with your own hands, which you can wear when cutting or cooking.
to the contents ↑We sew a children's hairdresser kit
In order to sew a children's apron for a hairdresser and a cape with your own hands, you first have to make patterns. It's much easier to work with them, especially if you are a novice needlewoman.
Crawl:
- You will need a piece of fabric with a length and width of 80 cm( square).
- Fold the square of the material twice in half. The canvas is 40x40 cm.
- Use the centimeter to measure the lower cut of the cloak.
- Mark the line of the neck.
- Cut out the cloak and cut the material from one side along the share strand.
- Cut the strip to process the neck.
- We sweep the lower section of the product and its side sections.
- We sew the throat section, we sew a strip of fabric to it.
- The edges of the stripes are applied with the front part inwards and sewing.
- Turn out the edges, straighten the corners. We fix the obtachka stitching on the sewing machine.
- Sew a velcro from both sides.
Important! In order to make a cloak, it is not necessary to fold the fabric into a square. You can immediately cut out from a piece of cloth a circle with the necessary radius. Then the process of creating a cloak will take no more than half an hour.
In such a simple way, you can make a beautiful hairdresser's cape. The size and length of the cloak will depend on how much tissue you used to create it. If you decide to make a short cloak( nursery), then the tissue will need no more than a meter in length and width.
Crown apron
After preparing all the details of the future product, we proceed to their stitching:
- Shoulder sections should be sewn with a sewing machine.
- We sew the neck with an oblique bake.
- The upper pocket section is sheathed and attached to the front of the product.
- From a small piece of cloth we make a detail for the badge. Then sew it to the apron.
- We process the outer sections of the product and prepare it for the waistband. Sew them to the product from the wrong side.
Important! To the pocket you can sew a strip of lace for the pins and clamps. In addition to the fact that the product will look beautiful with a lace strip, fastening small hairdresser details on it is very convenient.
Make a children's hairdresser set at home is very simple, if you have a beautiful cloth and a sewing machine.