
One of the weakest points in the bathroom and kitchen is the joint between the wall and ceramic sanitary ware. For its sealing previously used epoxy, cement-sand and other solutions. After hardening, they did not allow water to flow down and reliably protected the walls from moisture, but quickly lost their presentable appearance.
This option was replaced by a more technological solution - a bathroom border tape. It has an affordable cost, allows you to do the installation yourself, and even after several years of operation remains attractive, but only if the material and installation are chosen correctly.
What is border tape
Curb tape is a moisture-proof elastic finishing material that resembles a plinth and is produced on a synthetic basis. It is designed to seal the joints between plumbing fixtures of any kind and the walls of the room while ensuring the aesthetics of the finish.
Due to its flexibility, polymer tapes are suitable for installation at joints with any shape complexity. They are not afraid of constant exposure to cold and hot water, changes in ambient temperature, exposure to cleaning products and detergents.
You can glue the bathtub border yourself using improvised tools. After fixing, the plumbing equipment gets a complete look with a neat design of the joint line.

Kinds
The first border sticker was produced in one format. Today, there are many options in stores that differ in the materials of manufacture, the execution of the front surface, size and other parameters.
By material
Flexible curb tapes are produced on the basis of synthetic components. Depending on the specific composition, the material is made of acrylic, elastic polyethylene or denser artificial rubber. Many manufacturers add fungicides to the composition that prevent the formation of mold and phytoncides that repel insects.
Depending on the version, the back side can be supplemented with an adhesive base - butanol glue. It shows high adhesive characteristics with almost any surface, is not afraid of moisture and temperature changes. To ensure that the adhesive does not lose its properties during storage of the self-adhesive lining, this layer is covered with a protective film.
By shape
According to the profile, the side for the bathroom is divided into two categories: curly and angular. The material with a figured profile is optimally suited for facing a wide gap between the wall and the bath. It has two longitudinal inflection lines that divide the surface into 3 sectors: two of them are glued to the wall and plumbing fixtures, and the third has a decorative role and is located at the junction.
Unlike curly, corner tapes have only one fold line located longitudinally in the center along the entire length of the material. This profile provides a secure fit for the sides and is best suited for masking and sealing narrow gaps.
To size
On sale is an acrylic bathroom border 3.2–3.5 m long and wide:
- 38 mm - products with a figured surface, designed for large gaps;
- 30 mm - for medium-sized slots;
- 20 mm - for masking small joints;
- 10 mm - for minimal, visually invisible gaps.
In addition to the listed options, on the market of finishing decorative materials you can find products of non-standard width, for example, 60 mm. Such borders are in demand in case of technical impossibility of installing a plumbing fixture adjacent to the wall.
by color
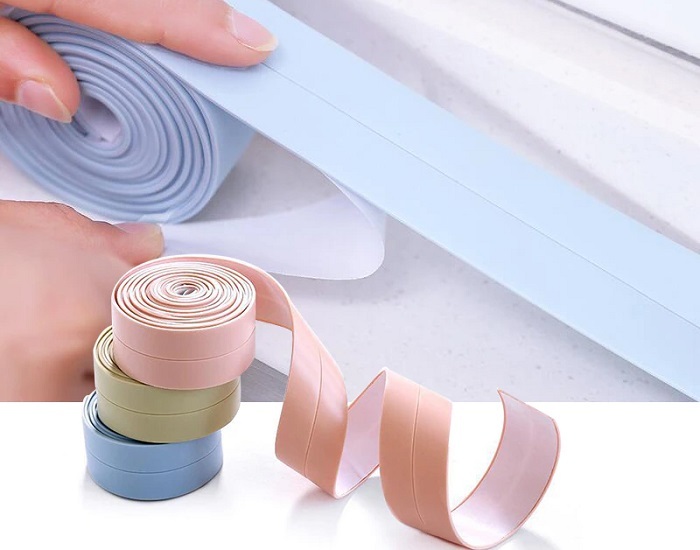
The main range of sanitary plastic bathroom borders is presented in white. This option is considered universal, as it goes well with tiled cladding and snow-white bathroomand also looks great in various interior styles. In addition to white, in stores you can buy cream, pink, blue, green ribbons in a classic design or embossed.
Packing
This finishing material is produced in transparent sealed packages in the form of rolls. Depending on the manufacturer, only the border is included in the product or it is supplied in an expanded configuration in the form of sets.
In addition to the tape, they include a mounting knife and a special applicator, with which the tape is fully attached to the surfaces and a right angle of the seam is formed. There are also sets with ready-made corners. These elements eliminate the need to manually form the corner joint. They are simply glued into the corner, where they give the joint an aesthetic appearance.
Preparing for installation
The process of installing a bath curb tape is quite simple, but requires careful execution and careful surface preparation. The key to high-quality fixation and a long service life of such sealing is in the reliable installation of the bath. If the plumbing equipment oscillates, the tape will sooner or later move away from the surface.
In addition to the correct installation of the bathroom, the preparation includes the following:
- With an old curb, regardless of the material of manufacture, remove it and its residues.
- Clean up the bonding area tapes near the joint from all contaminants - adhesives, old sealant, mold, dirt, ingrained soap.
- Degrease surfaces. To do this, it is recommended to use sparing products, the components of which do not impair the adhesive characteristics of liquid nails or the adhesive layer of the bath tape - soda, acetone, ammonia or ethyl alcohol.
- Dry surfaces thoroughlyby wiping them with a lint-free cloth or directing the airflow away from a hair dryer.
- If the gap width between the wall and the bathroom is more than 1 cm, it is sealed with a sealing material. The best option is silicone. After hardening, it is given a smooth surface, the edges of which are flush with the level of plumbing and walls. This solution provides good waterproofing in the future and adhesion to the glued material.
- Draw a base line edge positions for reference during installation. To do this, use a regular felt-tip pen or pencil.
- Cover with masking tape wall and bath surface outside the reference line. This will help avoid getting glue on them or liquid nails. At the same time, the construction tape is easy to remove, it does not leave marks.
Required Tools
To seal the joints of the elastic waterproofing tape for the bathroom, you will need:
- a dry, clean cloth for wiping the edges of the bathtub and walls;
- sealant gun;
- masking tape;
- sealing applicator;
- hair dryer;
- mounting (clerical) knife;
- pencil;
- roulette;
- glue (when fixing the border without an adhesive base);
- tassel;
- neutral sealant.
Mounting order
The installation of the curb tape is carried out at a temperature of +10°C and above. The best option is considered a temperature of + 20 ° C. The work is carried out according to the following scheme:
- Measure the required length border and cut the tape 3 cm longer than the required size. In the absence of corner elements, the beginning of the tape is given the shape of an angle.
- Laying is performed segmentally, removing the protective film from the adhesive base at a distance of about 15 cm.
- The prepared fragment is bent in the middle. In order for the material to better fix on the surface of the tile and the sides of the bath, it is heated with a hairdryer.
- If neededenhance adhesion, then liquid nails are additionally applied to the glue.
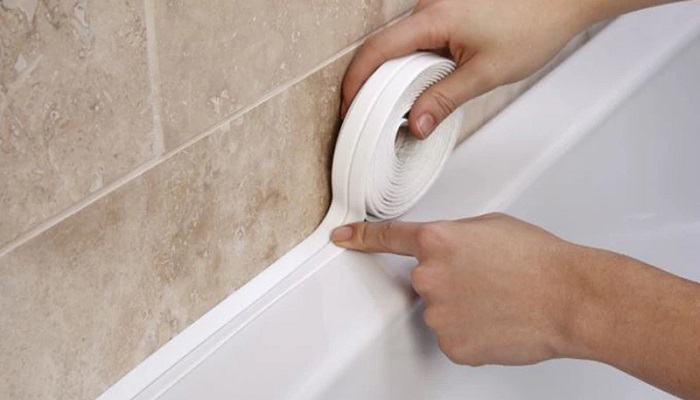
- Glue first bathtub edging on the long side, starting at the corner. At the same time, pressing the material to the base with the right hand, and holding the roll with the left hand.
- When laying the tape, you need to make sure that its edge exactly matches the reference line.
- After application, the border is tightly pressed to the pasted surfaces. In this case, the tape should lie down freely, without tension.
- Make out a corner. If ready-made corners are supplied in the kit, then they are glued first of all, and only then they start laying the tape end-to-end to it. In the absence of these elements, the end of the short side is overlapped on the long side. Then, with a knife, an angle is cut, adhering to 45 ° relative to the wall, the cut pieces are removed, and the resulting end edges are combined with each other. The result is an aesthetic bathroom corner between the wall and the bathtub without gaps.
- Sealing. To isolate the joint of the edges, the corners are coated with silicone sealant.
How to evaluate the quality of the work performed
You can visually assess the correctness of laying the curb tape immediately after completion of work. The quality of fixation is determined only after the glue has completely dried. A day is enough for this, but only on condition that the bath will not be used during this entire time, since moisture increases the setting time of the adhesive layer.
At the end of this period, they try to take the curb away from the wall with their hands. If the material is firmly fixed and does not lend itself to physical influences, then the installation was carried out with high quality. It remains only to remove the masking tape and the bath is ready for use again.
In the case when the edges of the polymer strip sometimes move away from the bathtub or wall, any waterproof adhesive that is poured into the gap and pressed on the defective side will correct the situation. Use the bathroom only after it dries.
Care
Polymer flexible borders are unpretentious in operation. They can be washed from dirt with a sponge and a soft-bristled brush using almost all detergents or cleaners. The only restriction concerns products that contain acids. With regular use, they corrode the surface of the polymer and make it porous. As a result, the material loses not only an attractive appearance, but also important performance characteristics. Tapes are afraid of pronounced mechanical impact and sharp objects that can break its tightness and nullify the purpose of their installation.
Conclusion
Adhering bathroom edging tape to a bathtub or sink is an effective solution that allows you to seal joints at an affordable price and avoid costly wall repairs in the future. This material not only does not pass moisture, it is easy to install and maintain, does not require the use of specialized equipment.