Among the many designs of the hearth, in recent years, the Swede oven has gained popularity among summer residents and cottage builders. In Russia, it appeared during the time of Peter the Great, in Europe - much earlier. The stove stands out among heating devices for home use with its appearance, design, and set of functions. In addition, it keeps heat for a long time, has a good efficiency, is omnivorous, unpretentious in terms of the type of fuel. You can build a Swede oven with your own hands.
Read in the article
- 1 Features of design and operation
- 2 Varieties of Swedish ovens
- 2.1 Fireplace option
- 2.2 Swede equipped with a hob and oven
- 2.3 Option equipped with a sunbed
- 3 Self-construction of the Swedish oven
- 3.1 What do you need to work
- 3.2 Building a foundation
- 3.2.1 Marking the soil, digging a pit and installing formwork
- 3.2.2 Concreting sequence
- 3.2.3 Heat-resistant layer device
- 3.3 The erection of the Swede
- 3.3.1 Drawings with order
- 3.3.2 Masonry guide
- 3.4 Product testing
- 4 Typical errors
- 5 Preventive measures to maintain normal operation
- 6 Conclusion
Features of design and operation
The Swede has a whole bunch of positive properties. It is quite complex in design, but it is easy to repeat. Only for this you need to acquire a set of drawings and orders. Orders are drawings of a layered layout of bricks. If these calculations are repeated during the construction of the furnace, then we get that ingenious system of chimneys that heats the entire volume of the furnace.
This oven is multifunctional. Usually it is installed at the junction of two rooms - the kitchen and the living room. On the kitchen side there is a firebox, hob, oven. On the reverse side of the stove there is an extension fireplace, a bench, a drying chamber. The set of functions is assembled at the request of the owner. They can be in any combination. If the oven door is opened when the oven is ignited, then after 10 minutes the room becomes warm. The reverse side of the oven warms up more slowly, but the mass of bricks keeps the heat for a long time.
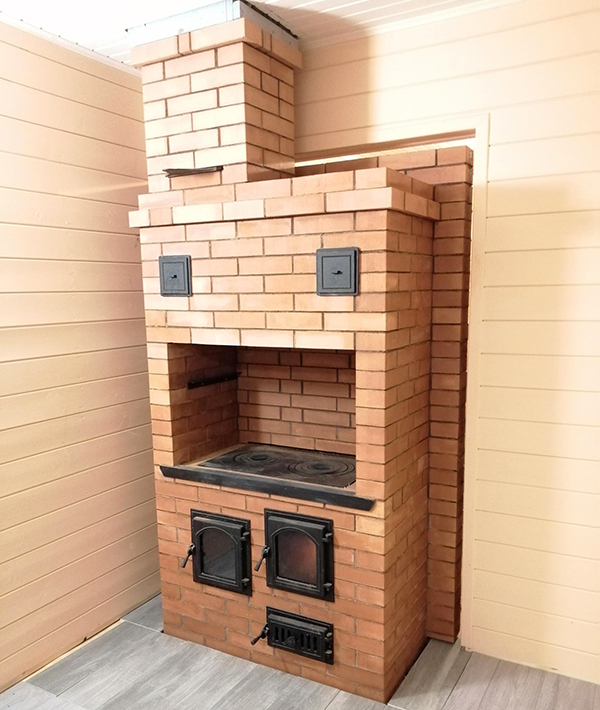
Such versatility is provided by the chimney system. Their configuration can be changed from the outside by opening or closing the valves. The valve allows you to select the operating mode of the furnace - summer, autumn or winter. It is clear that in the summer you only need a hob for cooking, and on major holidays an oven. And in winter, the stove should heat the house at full capacity. The furnace zone is laid out from high-quality refractory bricks, and the main volume is made from cheaper ones.
Varieties of Swedish ovens
A Swedish stove can be built for a specialized purpose, for example, only for cooking and heating one room. But you can also build a multifunctional one - with an attached warm bench, a designer fireplace. If the stove is built into the corner of the kitchen, it can heat two more rooms, and a double-sided stove can heat a room of 30 sq.m. Ovens often have a built-in chamber for drying clothes.
Fireplace option
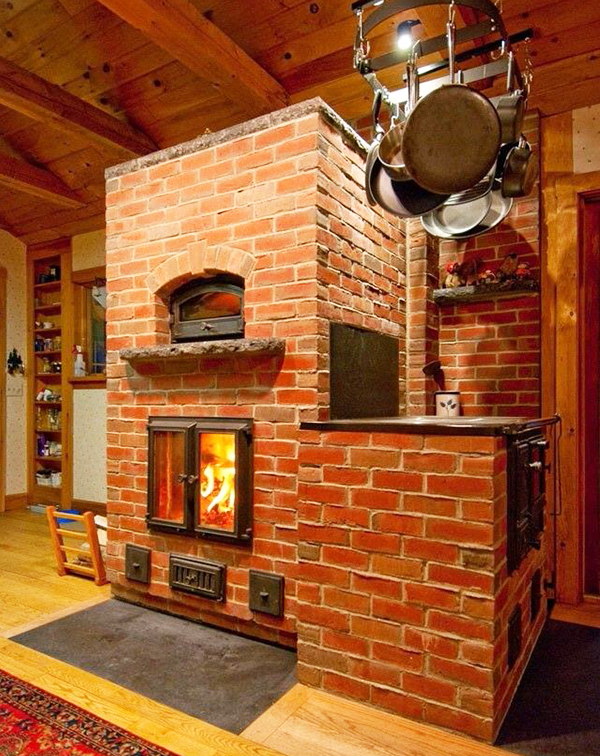
Since a heating stove and a fireplace, from the point of view of a heat engineer, are different units, after testing different options came to a decision: it is necessary and possible to build both a furnace and fireplace. The utilitarian side, which is responsible for the hob, for heating the entire array of bricks, works from the kitchen side, and the decorative function is implemented in the living room. The smoke channel in the furnace works for both functions.
The fireplace door is made of glass, you can admire the flame without fear of sparks and smoke. And when the door is open, the fireplace enhances ventilation in the room. With the successful execution of the fireplace insert of the fireplace, it can heat a small room.
Swede equipped with a hob and oven
Due to the domed firebox, the Swede is more economical than the Russian stove. And the food in these ovens is prepared in fundamentally different ways. In the Russian stove, pots with brew were loaded into the depths of the furnace after the fuel burned out and closed with a lid. No smells came out of there. The food was mostly baked and baked. The Swede is equipped with a cast-iron hob, on which pots and pans are placed. Food is boiled and fried over a fire. The smell spreads throughout the house.
Option equipped with a sunbed
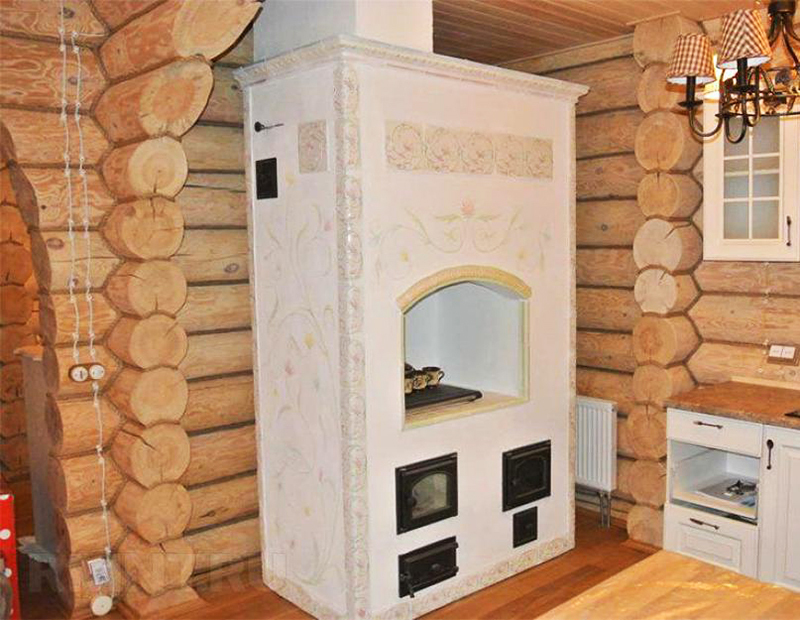
On a winter evening, after working in the cold, it is nice to bask on a warm couch. The bed is attached to the Swede. A smoke channel passes through the extension, and hot smoke warms the brick. The oven couch cures illnesses and gives pleasure.
Self-construction of the Swedish oven
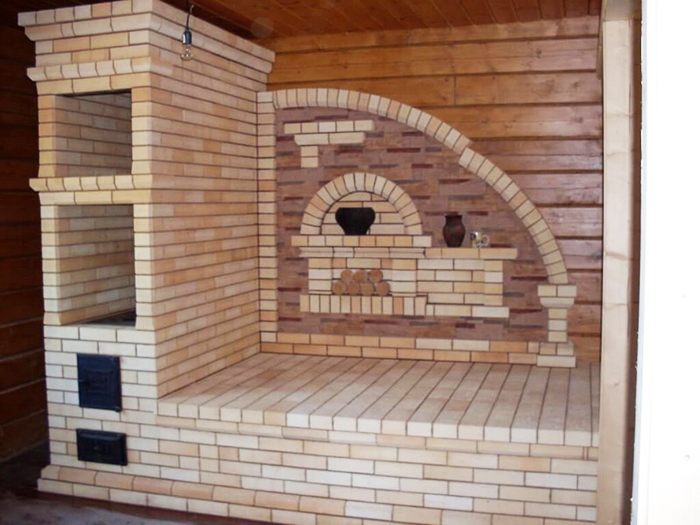
This type of oven can be built with your own hands. It is good if the hands have the skill to work with bricks and masonry.
What do you need to work
To get started, you need to determine for yourself what type of stove will be built. After that, you need to decide from what material - from brick or metal (cast iron or steel). Both options have their pros and cons.
The metal furnace warms up faster, but also cools down faster. You can not build it, but buy it ready. Installation is fast. The duration of operation of such a furnace is limited - the metal burns out, and you have to buy a new one. A brick oven is built for a long time, but it serves the owner for a long time. Plus, it's reusable. It also takes a long time to warm up, but it also keeps warm for a long time. A metal stove is dangerous - you can get burned on its body, and you can lean against a brick stove with your cheek and get warm. The brick model is significantly more expensive than the metal one, but it is more popular, and it can be decorated with tiles.
Brick for masonry needs only a new one, a used one is not good. The best refractory fireclay brick. We also need doors for the combustion chamber and for the blower, preferably cast iron. And also doors for revision and cleaning of channels and valves for chimneys. On the floor in front of the stove you need to put a steel sheet. The design may require steel corners. For the formwork of the furnace foundation, boards of any quality are suitable.
Clay needs high-quality refractory. Ordinary can be used for facing work. This is where the tile comes in.
The work is done with the tools of a digger, a bricklayer and a carpenter. You need a bayonet shovel for digging a foundation pit and a shovel for loading the earth. For mixing the solution, it is desirable to have a construction mixer and a container of suitable volume. You will need a trowel, a metal sieve, a mallet (rubber hammer), a construction stapler. A measuring tool will go into action: a tape measure, a marker, a building level and a plumb line to control the masonry.
Building a foundation
The furnace is a heavy structure, it must be built on a foundation. The owner of the house determines the place for the construction of the furnace, taking into account the location of doors and windows, the area of \u200b\u200bthe room, the roof structure and other characteristics of the room.
The foundation of the furnace is best erected at the initial stage of building a house. If the stove is being built in a finished house, then the stove foundation must be completely independent of the foundation of the house. This is done so that with the almost mandatory shrinkage of a new house, there is no harmful effect on the stove. Violation of its verticality can lead to destruction.
The sequence of actions is this. The place of the future furnace is marked on the floor of the room. Dimensions should be taken 15 cm larger than the oven, so it will be more convenient to work. A window is cut out in the floor, then a screed is opened along the same markup and a foundation pit is dug.
Marking the soil, digging a pit and installing formwork
The foundation pit for the furnace foundation is dug to a depth of 70–80 cm. Two layers of sand are poured at the bottom, which is well compacted with water. Then a layer of gravel is poured on top of 10–15 cm and is also well compacted. After that, a formwork is built, which is covered from the inside with polyethylene or roofing material for waterproofing. Mono raise the formwork one brick above the floor.
Concreting sequence
Now you can fill the base of the foundation with a mixture of crushed stone, sand and cement. The thickness of the base is 10–15 cm, crushed stone of a large fraction. Reinforcing bars are inserted into the poured base. A mixture is being prepared for the main fill with crushed stone of the middle fraction. It is poured to the ground level and leveled. A reinforcing mesh is placed on top, and then the remainder of the concrete mixture is poured to the top of the formwork and leveled. After a month, the upper part of the formwork above the ground can be removed.
Heat-resistant layer device
There is an interesting constructive moment. The foundation is thermally insulated from the furnace. Or you can say the opposite: the furnace is isolated from the foundation. Firstly, between the upper plane of the foundation and the first layer of masonry, five layers of roofing material are laid as waterproofing. And secondly, so that the heat does not go down and warm the ground, three layers of five-millimeter basalt cardboard are laid between the masonry and the foundation. Thus, heat is saved, and fire safety is increased.
The erection of the Swede
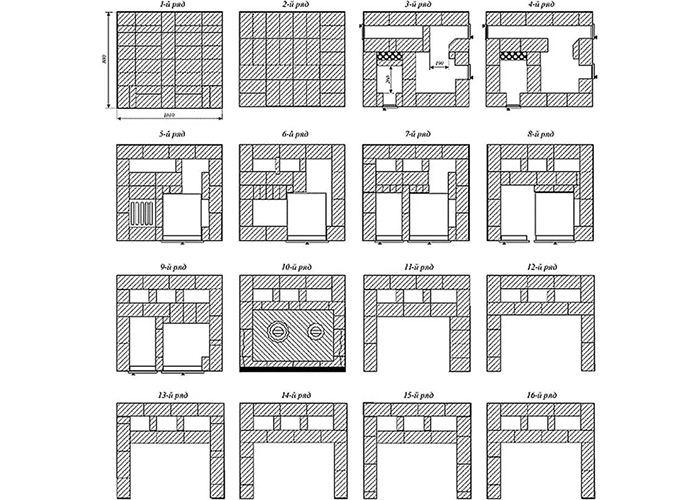
For each layer (row) of brickwork, there must be a drawing - ordering. The stonemason-stove-maker, according to these orders, lays bricks layer by layer. Moreover, even experienced craftsmen first carry out laying on a dry, without mortar, test. Then it is disassembled and laid already on the solution. But all the same, each next row is checked again with dry masonry, because it is impossible to redo anything in the finished furnace.
Drawings with order
Orders are the main technical document in the construction of the furnace. They have been tested dozens and hundreds of times, they need to be trusted and carefully and accurately executed.
Masonry guide
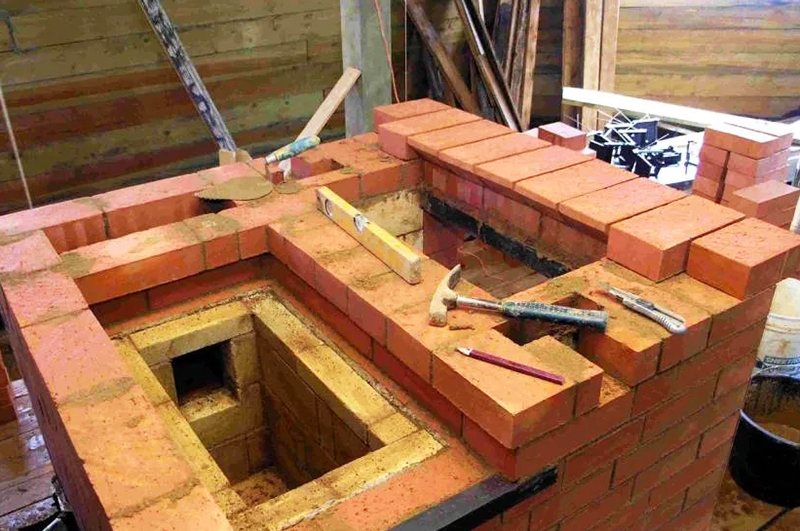
The first row in the masonry is laid dry, and besides, it is solid. It is checked, leveled and filled with masonry mixture. The rest are placed in order. Each brick is immersed in water for a few seconds before being put into place. Wet bricks improve adhesion with mortar. In addition, it does not draw water out of the solution.
In the required rows, doors, grates, and an ash pan are installed. For the combustion chamber, where the temperature is especially high, highly refractory fireclay bricks are used, and the binder mixture is made from clay and sand in equal quantities.
For pipe laying, oily clay of increased plasticity is used. Gaps are left between the metal parts and the brick to compensate for the uneven thermal expansion of the metal and the brick. The gaps are filled with asbestos cord.
In the place where the pipe passes through the roof slabs, a brick thickening is built around the body of the pipe. It is at the request of fire safety rules that a protective heat-insulating belt is created between hot flue gases and wooden structures of the house. The pipe is laid only from whole bricks, no halves or quarters. An increase in the number of seams between bricks worsens traction. The gap between the pipe and the wall of the house anywhere must be at least 40 cm. The entire pipe must be at least three meters and rise above the roof ridge by 60 cm.
Product testing
After the construction of the furnace is completed, it cannot be immediately melted, and even at full capacity. The oven must be dry. Drying is first carried out naturally, and in the second stage - forced. Natural drying consists in the fact that all doors and valves are opened near the oven and natural draft sucks out all the moisture from the oven space. Forced drying removes moisture from the body of bricks and mortar. This stage lasts 1.5–2 weeks. Every day, 1.5–2 kg of aspen firewood should be burned in the oven - this tree produces little soot.
Drying is the first step in testing a newly built kiln. In the following weeks, you can add 0.5 kg of fuel per day and check the operation of the furnace at different positions of the mode valves and at different functions.
Typical errors
Inexperienced masons often make a mistake - a violation of the rules of dressing. The top seam will fall on the bottom. A crack is very likely to appear in this place. Therefore, the seams should not be too thin, the normal thickness is 3–5 cm.
Another common mistake is an excess of cement in the solution. This may cause the brick to break.
Also, you can not bandage a refractory brick with red. They have different expansion ratios.
And another mistake is that some unfortunate stove-makers do not know how to install doors, and over time they simply fall out.
Preventive measures to maintain normal operation
Violation of the laws of physics in the furnace business is unacceptable. The fact is that if the stove was not heated, then at the first kindling after a break, the smoke will not go into the chimney, but into the room. And all because it is colder in the oven than outside. In order to properly melt the stove, you need to open the cleaning door in the pipe, put a few newspapers in there and burn them. When it becomes warmer in the pipe, draft will appear and the smoke will go where it is supposed to.
Conclusion
Swede is a good oven. Developed in a smart way, based on the knowledge of the laws of physics, the practice of furnace business and human needs. With good and competent execution, it will bring a lot of benefits to the owner and decorate the house.
Especially with the insulting hint that not new yarn was used in my product, but ...
Hello. It is very unpleasant that you use other people's photos in articles without asking ...
With my own hands, I can't build very well. My wife and I decided to buy a bath from the tower ...
Partly, I liked the interior, I was impressed by the estate, I started to smile, only …
In my opinion, going to the village is too much, if there are no plans to take care of the household. Could…
It looks more like Lerchek bartered furniture, renovations, décor, and clothing. And there h...
When Buryatia was included in the Far Eastern Federal District, housing prices jumped more than 2 times due to this ...
It's a pity we don't have such a program as in the Far East. I had to buy a country ...
I've been looking at buying a sauna for a long time. I recently found exactly that one at an exhibition in Zyablikovo ...
A friend designed a garage for me. It remains only to find a team for implementation. Well on…
Guys, it's not complete. You do not mention Domorost, but still these guys have a problem ...
Hello, thank you for the informative information. Health to you and your loved ones. Sk…
From strong winds, fences sometimes fall if they are installed unreliably. We have our own at Terem-p ...
We bought a summer cottage with a dilapidated country house. They restored it through the tower. AND …
The tm film and the zebra have nothing to do with PLEN, do not mislead people ...
We need this Vodonaeva with her cats like fifth leg dogs.
