
- What is a mixer?
- Mixer construction
- Mixer types
- Materials
- How will it be fixed?
- If the mixer is separate
- The common mixer
- The shower mixer mixer
- The washbasin faucet
- The mixer on the
- stand The installation of the
mixer Regardless of the style of your bathroom, there is a certain set of items that must necessarily be in it. Without them, the very existence of a special room for hygienic procedures loses all meaning. You can carry a washing machine and cabinets to the kitchen or corridor, but without a bath, a sink and a mixer, it will be difficult to do. It is very important that the plumbing equipment is located as conveniently as possible. What should be the height of the mixer above the bathroom? Read our article.
to the contents ↑What is a mixer?
At its core, the mixer is a part of the water supply system. With this element:
- hot and cold water is supplied;
- is adjustable head;
- temperature is regulated;
- directs the flow of water to the spout or shower bowl.
There are a lot of functions for the mixer, it is necessary to use it often, therefore it should be set so that all family members are comfortable:
- In a large bathroom there can be even several similar devices - above the bathroom and above the washbasins. Separate mixers are very different in design, because the one above the sink is not connected to the shower.
- In small rooms usually put one tap, it is located above the bathroom. If necessary, which occurs several times a day, it is turned to the sink.
Depending on which option you prefer, the choice of the mixer installation height above the bathroom will also change.
to the contents ↑Mixer design
In the sanitary ware shops, a wide variety of cranes are sold. But in the design they have a lot in common. Each such device has:
- case;
- handle;
- sidewalls;
- sleeve;
- union nut;
- mobile cone;
- gasket;
- spout;
- seal;
- holder;
- supply pipes or flexible hoses.
Mixer types
Depending on how the water supply is regulated, the mixers are divided into three types:
- single-lever;
- thermostatic;
- are two-ventilated.
Single-lever
Single-lever models have appeared relatively recently, but have already become very popular. They do not have an established name yet, they are called in the instructions in different ways:
- articulated;
- with joysticks;
- monocomand.
Single-lever valve consists of two spheres or plates made of special polymer. Spheres or plates are tightly connected, each has a hole. The strength of the water flow depends on how much elements fit together at a given moment.
Important! The main advantage of the single-lever mixer is that it can be turned with one hand, and it takes an instant to close the water. In this case, almost no leakage.
Having decided to acquire such a device, first of all see who did it. Reliable single-lever mixers are produced by many European companies, including well-known ones. Such a model should be chosen."Joystick" can not be very cheap, so refrain from buying cheap penny Chinese models. They, most likely, will not last even a few weeks. 
Thermostatic
Its main advantage is the possibility to obtain a constant water temperature at the outlet. This is especially important where the parameters of hot water entering the final consumer( that is, your apartment) fluctuate. Thermostatic equipment avoids fluctuations.
Important! If you take a shower, and at that time the pressure of hot water has decreased, water of the set temperature will still flow from your watering can.
The design of this miracle of technology is quite simple, which allows it to be used for a very long time. Managing it is also quite easy. Thermostatic mixers are divided into two types - mechanical and electronic. The advantages are obvious:
- does not need to rotate the valves;
- can once adjust the optimum temperature, and next time the "smart" tap itself will supply water, according to the entered parameters;
- is a safety system that prevents unexpected supply of boiling water or ice water.
Important! To obvious shortcomings is the price. For now, these are quite expensive devices, however, many apartment owners, appreciating the advantages of "smart" technology, prefer it to her.
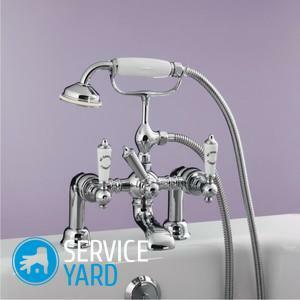
Two-valve
It is also called "herringbone".This model is still popular, you have seen it more than once. It consists of two cranes, marked in red and blue( or other markings).In many homes, such devices have been standing for decades, they rarely break, if the owners do not forget to change the gaskets in time.
Important! They are less convenient than single-lever ones, they do not look as effective as thermostatic ones, but they are cheaper than both, while reliable, which explains their great popularity.
"Herringbone" can be of two types:
- with ceramic discs;
- with rubber gaskets.
Temperature and water pressure monitoring is performed by means of valves. If you decide to buy this one, do not forget to check how well all the parts work, as well as the quality of the fastening.
Important! If you get a defective faucet - you can not avoid troubles, the water can not be completely blocked. As a result, you will receive not only a space bill for water consumption, but the tap itself will quickly fail completely quickly. There are situations when the cranes are scrolling - this option will not work for you either.
to the contents ↑Materials
On sale you can find mixers having a very different appearance. Of silver metal, gold-plated, with handles for pottery or marble - in general, choose the right option and install a mixer over the bathroom can be fans of a variety of styles. However, the gilded crane is not made of gold. For the production of such equipment, two metals are most often used;
- brass;
- stainless steel.
Brass plumbing
Brass is a traditional material for the manufacture of cranes and other sanitary equipment, which must be made of metal. You can say that this is the classic of the genre. Brass, that is an alloy of copper and zinc, has a mass of useful properties:
- strength;
- durability;
- is a noble appearance.
A decorative galvanic coating is usually applied over the brass base. The brass surface is usually yellow, but the coating can be both greenish and reddish.
Important! The drawbacks are that the mineralized deposits settle inside the brass parts very intensely. It is because of this that buyers often prefer steel.
Stainless steel
Stainless steel is a cheap, practical and very reliable metal. Manufacturers of sanitary ware are especially fond of it for the fact that it is not corroded or deformed. In addition, on the details of this material, the deposits are formed more slowly than on the brass ones.
to the contents ↑How will it be fixed?
The height of the mixer installation in the shower depends to some extent, including on how it will be fixed. Mounting can be;
- on the wall;
- on the rack.
On the wall
In most bathrooms and showers applies the first option. It is especially convenient in small rooms. In addition, no additional plumbing work is required - all the bends have already been made during the construction of the house.
Important! Unfortunately, in order to change the height of the mixer installation, serious repair work will be needed - very often the pipes are walled in, so they have to be released and repositioned, so that welding can not be avoided. In addition, you have to hollow the wall, and then repair it again.
Fastening on a rack
Very convenient option for large rooms, where the bath is not at the wall and not in the corner, but in the middle. The installation height of the bath mixer in this case is easily adjustable: the portion of the supply pipe must be removed or welded. 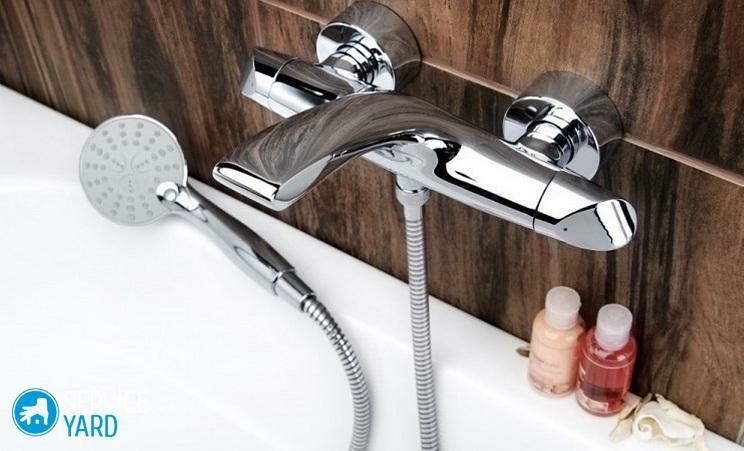
How to determine if the mixer is not comfortable?
Normally, all plumbing equipment is installed according to standards, and almost everyone is comfortable with it. Plumbing has to be rearranged if there are adults in the apartment who are very tall or too short, or if the builders screw things up. For a medium-sized person, the standard installation of the mixer above the bathtub is quite convenient, it does not have to lean heavily or reach to turn on the water.
How to understand?
- With a standard mixer height, the jet of water under high pressure enters the bath without excessive spray or too much noise. If the mixer is installed too high( and this happens, if the construction firm does not pay enough attention to standards), quite a lot of water is on the floor.
- Too low installation of a common mixer does not lead to an additional water flow, it is simply inconvenient - for example, the tap common for a bath and washstand constantly touches the edge of the sink. But even in this case it is better to rearrange the wash basin or even a bath.
If the mixer is separate
In this case, the height of the bath from the floor plays some role. The standard for installing the mixer is 80 cm from the already lined floor surface. This is a very convenient option, if only the font is set to the standard height. Usually it happens, in the vast majority of manufacturers of such equipment make the legs of the same height. But there are exceptions. If the legs are too high or the bath is almost on the floor - it is easier to change its height, and not to put or cut the tubes embedded in the wall.
Important! By the way, in baths and saunas the same standard is adopted - 80 cm from the floor. And this means that you should not muddle and rearrange the faucet, unless you have very good reasons for this.
to content ↑General mixer
The water that is supplied to the tub and sink from the same tap is a fairly common phenomenon. If the total mixer is put at the same height as the individual one, the sink can not be used, because it is placed above the bath. In this case, another standard is used for the height of the mixer installation - 1 m. The count is again from the floor, on which the coating already lies.
Important! Regardless of whether you have a mixer or a separate bathtub, the height above the ledge should be approximately 20 cm.
to the table of contents ↑Shower mixer
The shower is usually used by a standing person. And it's very inconvenient to bend too low if the tap is at the same height as above the bathroom. And the standard for a common mixer is not very good. Therefore:
- The crane needs to be placed above - at a height of 1.2 m from the floor.
- The holder for a watering can best be raised to 2.15 m - but here, as they say, options are possible.
Important! The lowest of adult family members should reach the holder freely. By the way, watering can be removable.
to the contents ↑Sink for a sink
If there is a washbasin in the bathroom, on which it is possible to put a separate faucet, this is best done. The room for fantasy in this case is larger - the shells are of different depth and height. It is important that the distance between it and the mixer is approximately 20 cm.
And if the bathroom is very large and each member has a personal washbasin? In a large apartment or a private house, this is quite possible. Then:
- We need to determine also the distance between the axes. It can not be less than 65 cm.
- As with a single sink, the height is 20 cm.
Important! When installing plumbing, do not forget that the water flow should not break against the side of the font or shell, that is, the branch pipe must be long enough.
to content ↑Mixer on
rack In elite apartments with large bathrooms the mixer usually stands on a special column. The area allows you to place the font somewhere in the middle. The height of the rack itself is different - it depends entirely on the model. But in any case, it is necessary to consider the following considerations:
- water under pressure should not be strongly sprayed;
- it should not fall on the ledge;
- the height of the mixer installation must be such that the tap is convenient to use.
Important! Trying to calculate distances, you most likely will come to the same results - 20 cm above the border and 80 cm from the floor. The result may not be exactly accurate - if your crane is at a distance of 82 or 78 cm from the tiled floor, nothing terrible will happen, on the water flow this will not affect in any way.
to the contents ↑Mixer installation
If you do not need to change the length of the pipes, installing a mixer in the bathroom will not cause any special difficulties. The main thing is to carefully read the instructions.
Materials and tools for operation
You will need:
- actual mixer;
- set of keys( adjustable, sanitary, end, carob);
- sealant( linen tow);
- sealing grease;
- ribbon FUM;
- flexible hoses.
Important! Any plumbing equipment that you buy should be fully equipped. On the packaging and in the instruction it is indicated what should be in the box. Do not forget to check all this, otherwise - you can expect unpleasant surprises.
In the sanitary ware shop you will find a seal - most often a linen thread is used, it is quite cheap. Ftoroplastovaya costs a little more, besides, it is difficult to regulate. There you will also find a sealing paint - sellers call it "dirt" or "plumbing mud".
Beginning the dismantling of
In order to remove the old mixer, you need a set of keys:
- adjustable:
- plumbing;
- front.
Further we proceed to work:
- As with other plumbing, it is necessary to turn off the water first, that is, to close the taps on the supply pipes of hot and cold water.
Important! With parallel wiring this is enough. If the wiring is sequential, it is necessary to block the water in the entire apartment( using a valve installed at the inlet).Sometimes shut-off valves in the apartments are missing, in this case, without a utility company can not do - will have to cover the pipes in the entire entrance.
- Relieve residual pressure - just open the taps and wait for the water to drain out.
- Disconnect the mixer from the water supply.
Important! To dismantle the mixer it is necessary extremely accurately not to damage already available in the bathroom the equipment.
Installing
Where to start? Of course, with instructions. Quite often the mixer is already sold partly assembled. If not, you need to collect it, and then:
- Make sure that the gaskets are pressed tightly enough.
- Make sure that all parts, with the exception of valves or lever, are fixed firmly and stand still.
- Wind the seal on the thread.
- Lubricate linen thread with a sealing paint.
- Screw the centering bushings( first with your hands, then when you feel that they are caught - with a key).The bushings should be screwed to the end, but without much effort, because they still have to be adjusted.
- Screw the mixer using the union nuts, not forgetting the sealing washers.
- Centering bushings turn to the desired angle.
- Tighten the nuts.
- The mixer is assembled.
In this article, you learned all about how to choose a bathtub faucet, what should be the height of the mixer installation above the bathroom with different variations of sanitary ware, and how to perform all the installation work. We hope that our information was more than enough to ensure that you did everything neatly, reliably and competently.


