
In the light of recent events, people are increasingly paying attention to the need for air disinfection in apartments or private houses. The most common equipment used for this purpose is an ultraviolet lamp. However, its use is not very safe. What other device can be used to sterilize air? The answer to this question is known by an author from one YouTube-channels. And in today's article, we will consider how to make a sterilizer for home use with your own hands.
Read in the article
- 1 What is required to make an air sterilizer emitter
- 1.1 Emitter manufacturing
- 2 More details required for the manufacture of the sterilizer
- 3 We start manufacturing the sterilizer
- 3.1 Installing the emitter
- 3.2 How to connect the emitter
- 3.3 Some additions to the wiring diagram
- 4 Connecting electrical elements: nuances
- 5 Installing the internal reflector
- 6 Sterilizer performance check
- 7 Small refinement of the device
- 8 Finally
What is required to make an air sterilizer emitter
In order to make a sterilizer, a minimum of materials are required. The main unit of the unit is an emitter that can be easily made from any mercury lamp (DRL). Naturally, you cannot turn it on directly, which means you need to prepare a choke for it.

Emitter manufacturing
Everything is simple here. It is necessary to carefully break the outer flask of the DRL and remove the glass. Inside there will be a small flask with mercury vapor, which emits ultraviolet light.
When disassembling glass, you should be extremely careful. It is necessary to wear gloves and goggles here.

For example, flasks from two lamps were broken (one had a different marking and was positioned by the manufacturer as an analogue of DRL). It turned out that there are no differences in the design of the lamps, which means that both of them are suitable as an emitter of a home sterilizer for air.

More details required for the manufacture of the sterilizer
It is also necessary to prepare a fan that will drive air through the emitter, providing it with the necessary circulation, and a check valve, through which the supply will be carried out. He will also protect the eyes from dangerous radiation.

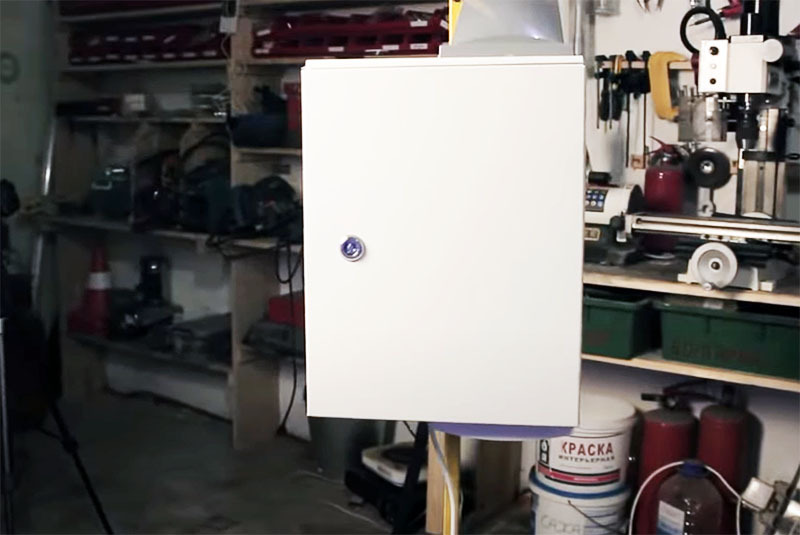
Well, in order to give the sterilizer a neat appearance, you can use an electrical distribution board. Here you need to understand that it must be not only durable, but also, preferably, lockable. After all, access to live parts should not be free.

You will also need to purchase a check valve for ventilation.
We start manufacturing the sterilizer
First, you need to mark and cut two holes in the upper and lower ends of the metal box. One of them will be used for installing the fan, and the other for the non-return valve. This can be done with a grinder or jigsaw.

We install the fan in the cut hole, after which we mark the places of its attachment. We fix the fan using ordinary self-tapping screws or even hot melt glue.

Installing the emitter
In order to install the emitter, you will need to cut off a strip of galvanized metal. It needs to be bent in the shape of a bracket. Subsequently, we will fix this bracket on the inside of the cabinet. You need to fix the ceramic cartridge on it. Anyone will do, even the cheapest.

How to connect the emitter
There is nothing complicated in wiring. Here one of the wires will go directly to the cartridge, and the second through the choke. The diagram below clearly shows the order of commutation.

Some additions to the wiring diagram
It is not always convenient to turn the device on and off all the time. Therefore, it makes sense to include an adjustable time relay in the electrical circuit. The most convenient option would be to use a model in the form of an outlet.

Connecting electrical elements: nuances
When wiring such equipment, you should take care of the grounding. It can be thrown directly onto the body. Power supplied to the cabinet is switched to an outlet. It is in it that the timer will be located, and already through it you can connect the emitter and the fan.

Installing the internal reflector
After the emitter is installed inside the cabinet, the reflector can be mounted. It is convenient to use an aluminum corrugated hose as it. It needs to be cut a little lengthwise so that you can put it on the cartridge. Next, we put one side of the sleeve on the back of the fan, and the other on the check valve. All connections are glued with metallized tape.

Sterilizer performance check
When all the equipment is installed and connected, you can apply power to the device and check how it works correctly.

Small refinement of the device
To prevent the choke from overheating, ventilation holes should be made from the bottom and top of the case. There is simply nothing more to heat in the sterilizer.

It remains to place the sterilizer on the rack. The height of such devices should be about one and a half meters.
Finally
Despite the fact that you will have to invest financially in the manufacture of such an air sterilizer, the total cost will be several times lower than if the device was bought in a store. Manufacturing will not take much time, and such a device will work no worse than a factory one. Well, health is the main thing to pay attention to, especially in light of the recent events with the coronavirus pandemic.
We hope that our dear reader will adopt a similar method of sterilizing air in an apartment or private house. HouseChief editors will be happy to answer all your questions, if any, while reading the article. You just have to ask them in the discussions below. There you can also comment on what you read, express your personal opinion on whether it is worth making such devices with your own hands.
If the article was interesting, do not forget to rate it. And most importantly - take care of yourself, your loved ones and be healthy!