What could be more enjoyable than cycling outdoors on a fine day? Right. Cycling without having to pedal. But an electric bike is a costly purchase. Therefore, you should think about how to make it yourself from improvised means. And the author of the YouTube channel will help with this. Sergei. Let's make a reservation right away that only the base will be described. The rest of the little things home craftsmen can finish on their own, for themselves. But making such a bicycle with an electric drive will be extremely simple.
Read in the article
- 1 What it takes to create an electric bike
- 2 Preparing the electric bike drive
- 2.1 Fastening the engine to the bracket
- 3 Bracket for attaching the electric motor to the bike
- 3.1 A persistent foot, and what it is for
- 4 Assembling an electric bike from an old screwdriver
- 4.1 Installing the motor on the bracket
- 4.2 Adjusting the chain to length
- 4.3 Chain tension adjustment
- 4.4 Installation of electrical equipment
- 4.5 Installing and connecting the battery
- 5 Checking the performance of an electric bike
- 6 Epilogue
What it takes to create an electric bike
A screwdriver that fell from a heightwhose body crashed is not uncommon. Typically, such electrical equipment is sent to the scrap or on the shelf "until better times." Less often, if the case is not too badly damaged, they glue it together, rewind it with tape or tape and continue to use it for some time. But in today's article we will focus on a completely broken case.
To make an electric bike you will need:
- working motor with a button;
- bike sprocket;
- plumbing clamp;
- two nuts to match the screwdriver drive shaft thread.
And, of course, the bike itself, which will be altered. The rest of the small parts required to assemble the engine mount bracket will be identified as the work progresses.

Preparing the electric bike drive
The first step is to dismantle the chuck from the remains of the screwdriver. It is extremely simple to do this, and therefore it makes no sense to describe this action. Then a thrust nut is screwed onto the shaft. It serves to prevent the installed sprocket from touching the body. By the way, it makes sense to immediately rearrange the position of the power regulator to the "drill".
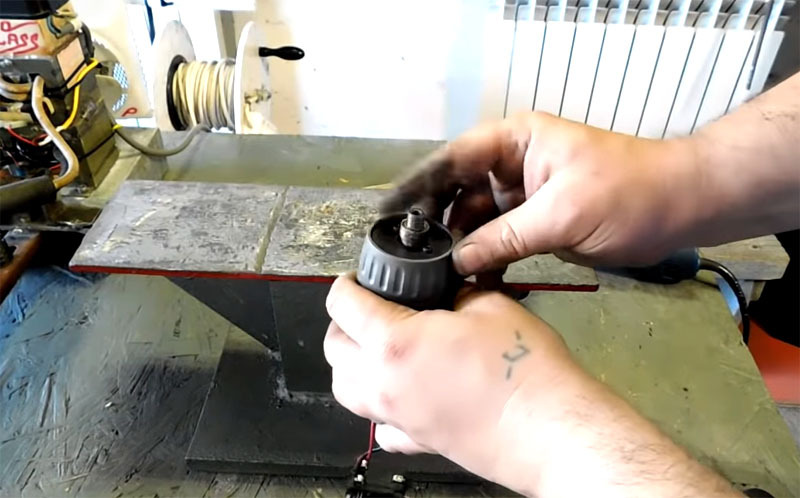
Next, you need to put an asterisk on the drive shaft of the engine and fix it with a second nut, which can be removed from the chuck. But if everything is left as it is, the lock nut will loosen when moving. Therefore, at first it is thoroughly pulled, after which a screw with a reverse thread is screwed into the internal thread of the shaft. Such a system will ensure that the sprocket is fully secured and eliminates the risk of the outer nut loosening while driving.
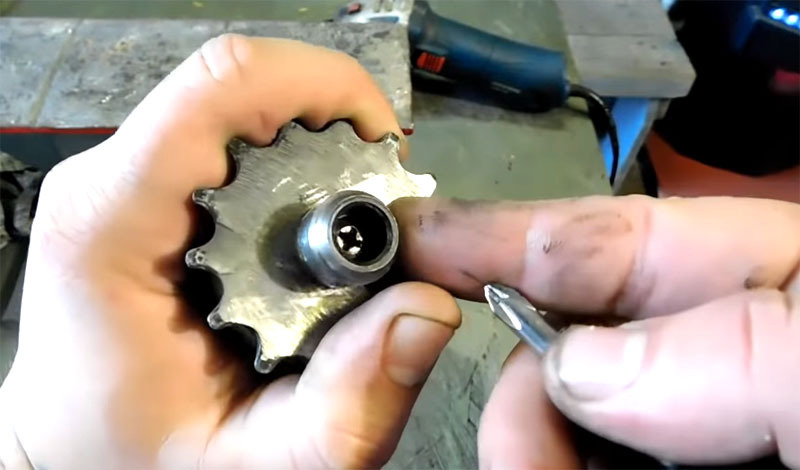 PHOTO: YouTube.com
Fastening the engine to the bracket
Now it remains to understand how the electric motor will attach to the bracket that will be installed on the bike. Everything is extremely simple here. For this, a conventional plumbing clamp will be used, designed for sewer plastic pipes with a diameter of 50 mm. From it, unscrew the stud with the anchor, and put the clamp itself on the motor housing. The photo example below shows how this is done.
 PHOTO: YouTube.com
This completes the preparation of the electric motor, you can proceed to the manufacture of the bracket.
Bracket for attaching the electric motor to the bike
For the manufacture of this part, you will need a metal plate and a section of a channel. Finding similar parts is easy in garage or at any metal acceptance.
 PHOTO: YouTube.com
These parts must be welded together, after which a slot must be made in the plate using a grinder. It will serve to fasten the electric motor with a bolt. A regular hole will not work here, the mount must be movable so that you can align the drive and driven sprockets. If you do not set it up, the chain will fly off, not allowing even a meter to pass.
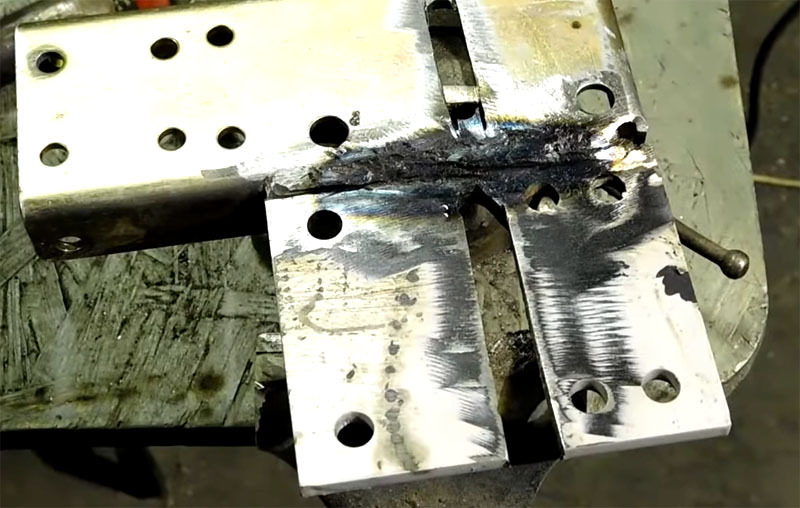 PHOTO: YouTube.com
A persistent foot, and what it is for
The manufacture of the support foot of the bracket is a purely individual process for each model and brand of bicycle. In the photo example, a similar detail will be shown so that the reader understands how it looks. And it will serve to adjust the chain tension. The thrust lug is attached to a bolt with a nut, the connection remains movable until fully tightened.
 PHOTO: YouTube.com
Assembling an electric bike from an old screwdriver
When all the parts are prepared, you can go directly to the assembly. But first you need to prepare the bike itself.
Some details are removed from it, namely:
- pedals (they are no longer needed);
- trunk (will be rearranged forward);
- chain (you still have to work with it).
Now the bike is ready, and you can start. The bracket is fastened to the "ears" on which the trunk was fixed. In this case, the foot should rest against the frame.
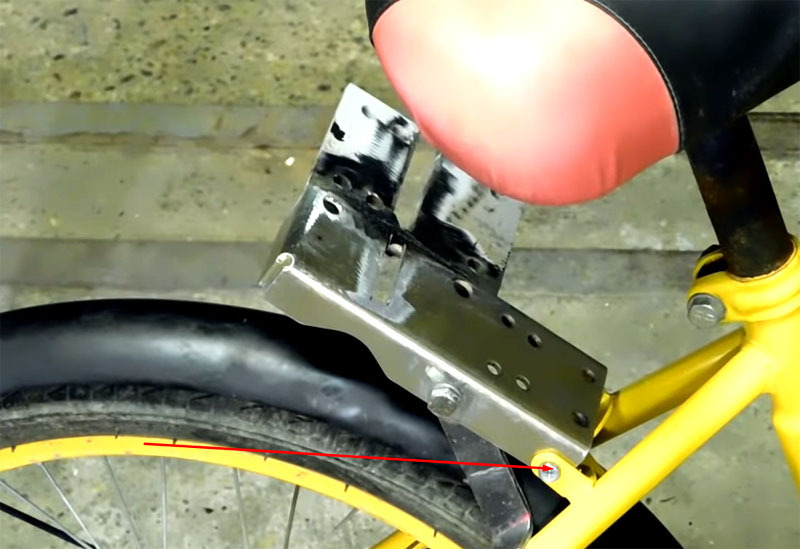 PHOTO: YouTube.com
Installing the motor on the bracket
Everything is simple here. The motor is fastened to the platform through the slot with a suitable bolt. You do not need to stretch the connection at this stage.
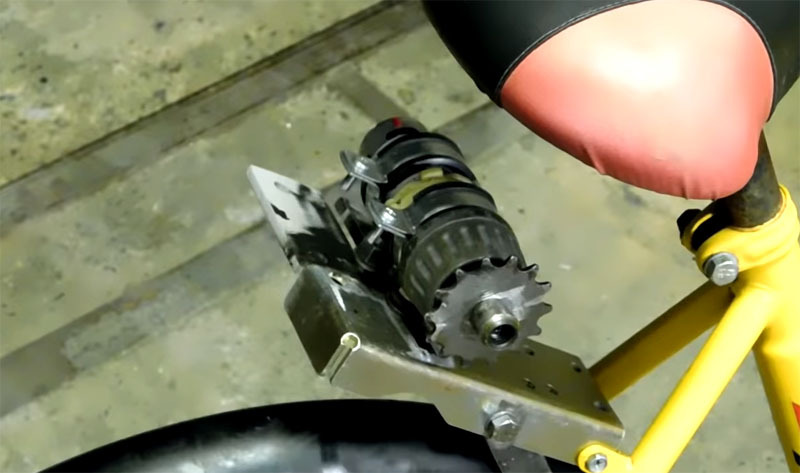 PHOTO: YouTube.com
Adjusting the chain to length
The chain removed from the bike will have to be adjusted in length by removing the extra links. In the end, it should sag a little for the possibility of improvements.
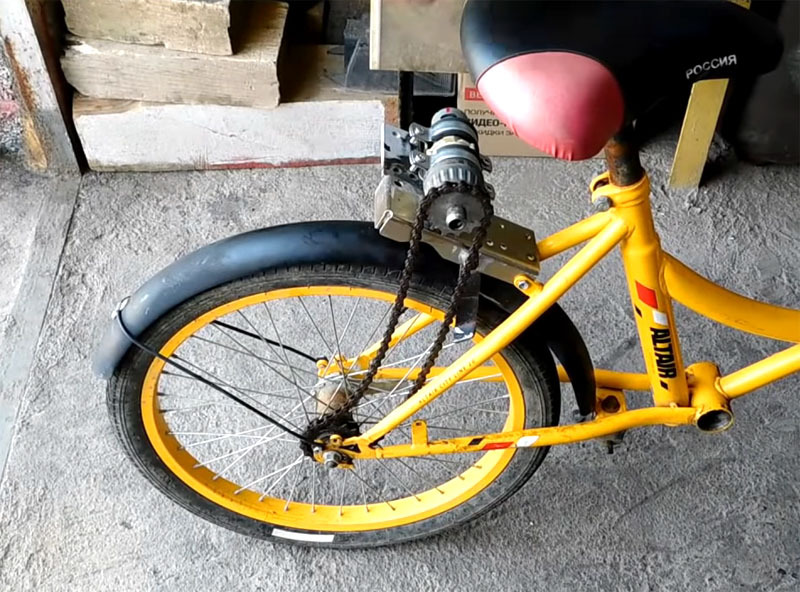 PHOTO: YouTube.com
Chain tension adjustment
The bracket is movable, so you need to lift it up, move the stop tab and fix all connections in the desired position.
 PHOTO: YouTube.com
Installation of electrical equipment
The button for turning on the electric motor must be installed on the steering wheel, which means that you will have to lengthen the wires. To do this, you can use a conventional soldering iron. The conductors themselves should be routed in a corrugation for protection.
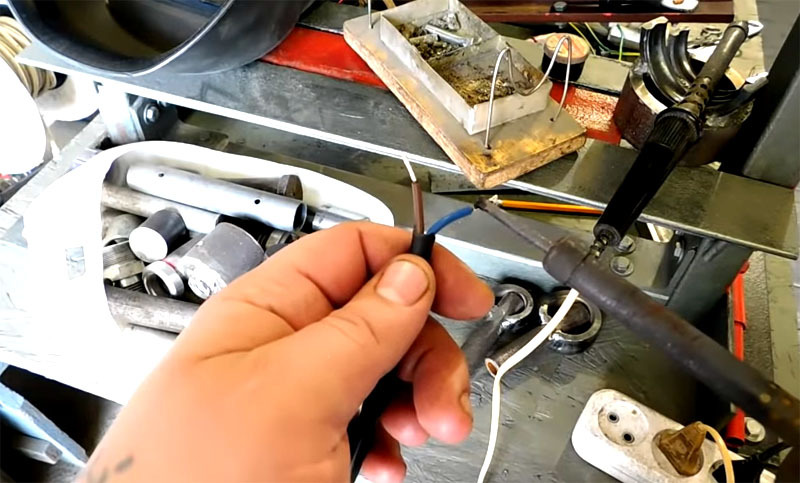 PHOTO: YouTube.com
The button should be located so that it is easy to press on it. Here, everyone decides for himself how this will be done. It is better to fix it with a clamp. Of course, this does not look very nice, but it should be noted that we are talking about an experimental version. If anyone has any thoughts on how to do everything more accurately, write about it in the comments.
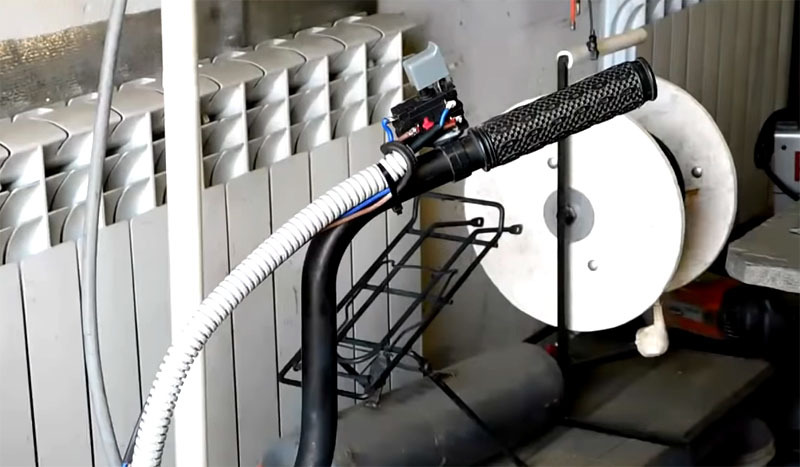 PHOTO: YouTube.com
Along the way, the power wire is also removed, which will go to the battery.
Installing and connecting the battery
It's time to install the trunk. It is needed to house the battery. It is easy to place it over the front wheel, just screw in 4 fixing screws. Almost all bicycles have such a reinstallation.
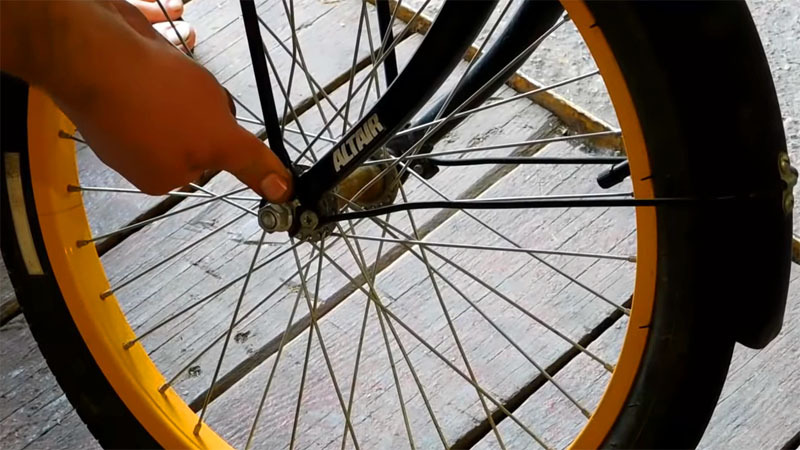 PHOTO: YouTube.com
A car battery is placed on the installed trunk, to which the wires from the button are connected. The battery itself is securely fixed with brackets so that it does not slip while driving.
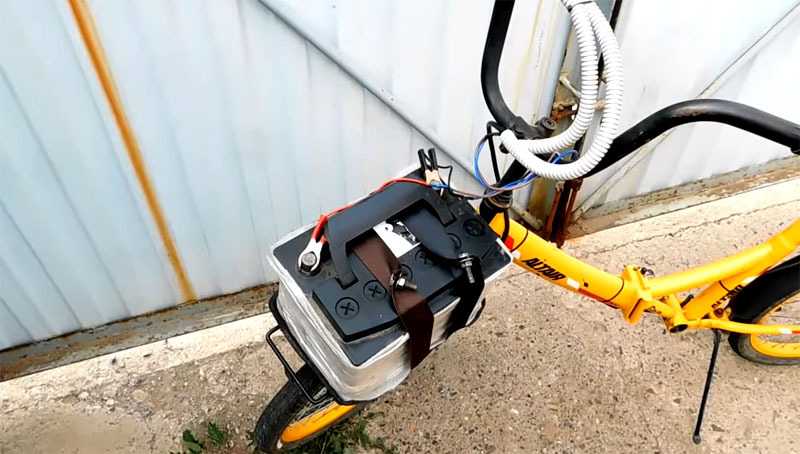 PHOTO: YouTube.com
Checking the performance of an electric bike
Now you can check what happened. For a start, it's best to do it in place by lifting the rear wheel. If everything is in order, you can take a little ride near the garage or house. Well, then it remains to finish some little things like engine protection, footrests and, of course, checking the quality of the front brakes.
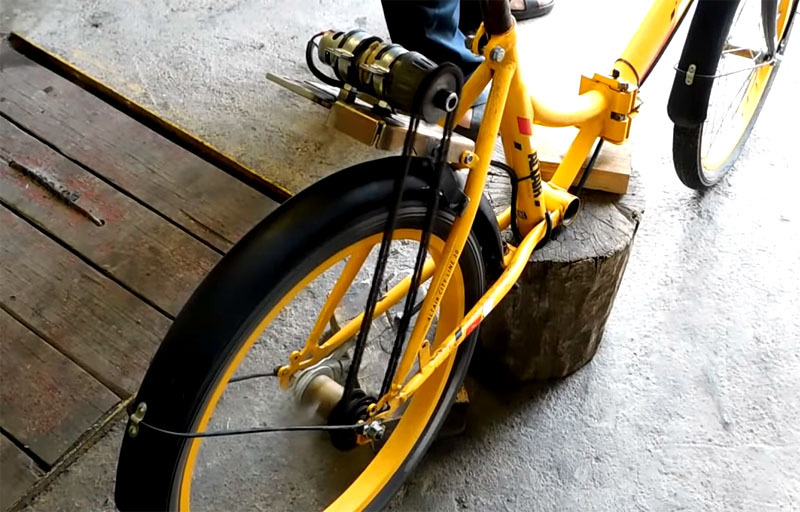 PHOTO: YouTube.com
Epilogue
This is how you can assemble an electric bike at no cost. Of course, additional work is needed here, but the foundation is already there. It's fun to watch people react when they see such an interesting vehicle. Still, it is not clear what is moving along the road. In fact, if you work on a bike for a couple more days, it will not be inferior to expensive factory products in almost anything. Considering that all the work is done "on the knee" in one day, without financial investments, it is safe to say that the idea is very good.
We hope that the material presented today will be useful to the dear reader. If you still have questions about what you have read, you can ask them in the discussions below. HouseChief editors will be happy to answer each of them as soon as possible. There you can also comment on the article, express your opinion about the rework. Tips for improvement, as well as pointing out wizard errors, are welcome. And we have one request. Please do not forget to rate what you have read. Every opinion, both positive and negative, is very important to us. Enjoy your bike ride!
