The connection of wood "in a mustache" is quite common among craftsmen. However, when using only a hacksaw, it is not always possible to make a perfectly straight cut, which leads to the appearance of cracks, a loss of strength and an unpresentable appearance of such a connection. Therefore, today we will talk about how to assemble the perfect frame with a similar connection of elements using the bottom.
Read in the article
- 1 What is "bottom", and is it difficult to make it
- 2 What is required for self-manufacturing of the bottom
- 3 Manufacturing of fixture parts
- 4 Assembling the bottom from prepared elements
- 5 Refinement of the support bar
- 6 How to work with a manufactured bottom
- 7 Summing up
What is "bottom", and is it difficult to make it
The bottom is a special device that allows you to straighten uneven cuts at different angles. If we talk about the assembly of frames, then here you need an angle of 45 °, which is quite simple to set. As for making the device with your own hands, everything is done very quickly and without unnecessary problems. And a minimum of material is required. Now we will analyze step by step how to make such a bottom and forget about uneven connections forever.
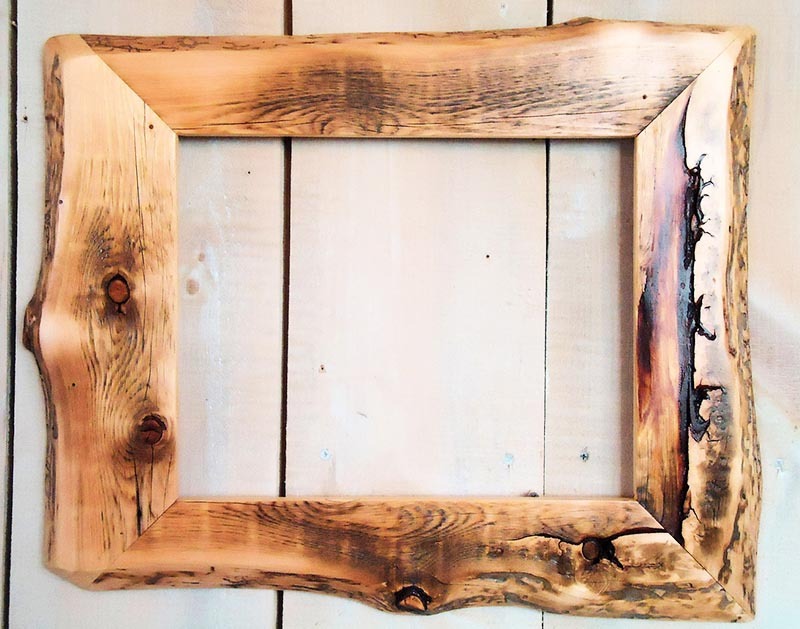
What is required for self-manufacturing of the bottom
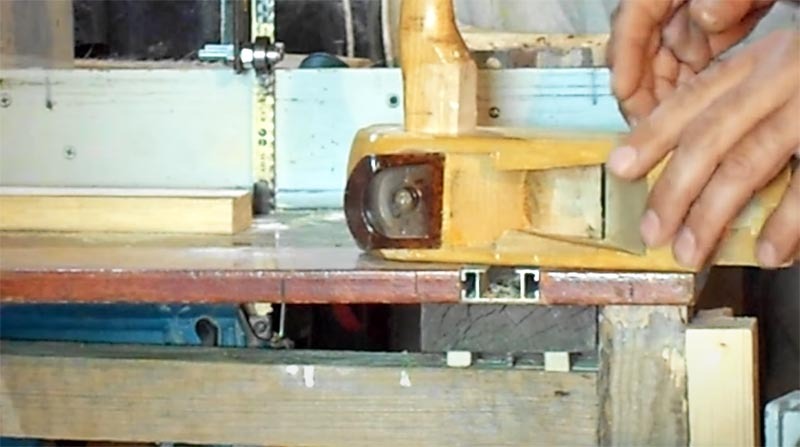
The main working tool of this device is an ordinary wooden plane. However, in order to work comfortably, it needs to be slightly modernized.
The planer upgrade will be to move the handle from the back to the front, positioning it to the side. As a result, when working with a plane, its cutting part should be on the side. In the photo example below, this is clearly visible.
Manufacturing of fixture parts
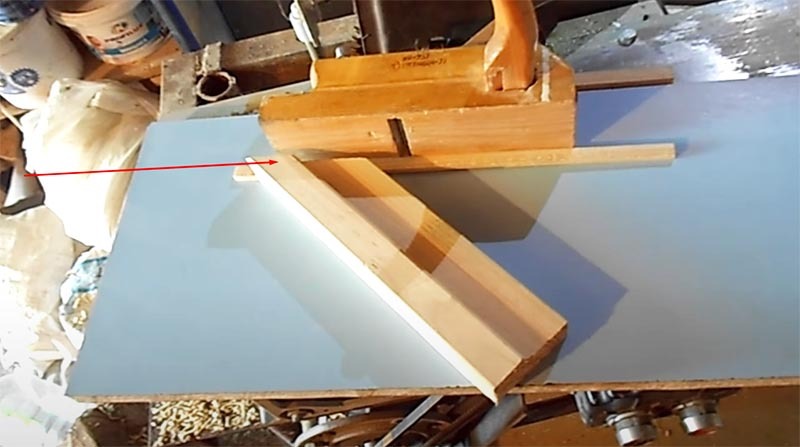
For further work, you need to prepare a small piece of a bar (you can use a part of the door frame), one edge of which is cut off at an angle of 45 °. You will also need a pair of wooden slats and a piece of laminated chipboard to be used as the main platform. It is on it that all the elements will be located.
Assembling the bottom from prepared elements
The first step is to fix a pair of slats on the chipboard so that they turn into guides for the plane. The distance between the runners is measured along its width, and then they are fixed with self-tapping screws.
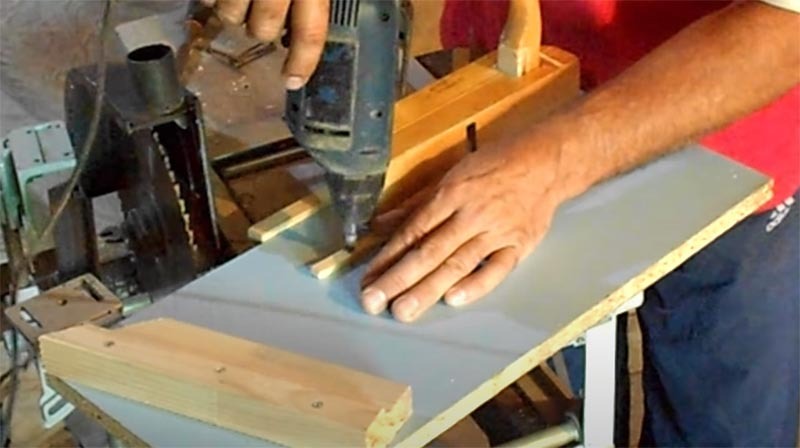
Do not think that if you use a self-tapping screw, you can do without drilling. Such a mistake can lead to the fact that the timber of the guides simply splits along the fibers. Therefore, it is better to spend a couple of minutes of time.
Refinement of the support bar
In order to prevent chips from appearing on the wood when working with a plane, it is necessary to install it on the chipboard so that the edge cut at an angle is flush with the guide rail. Also, in the bar you will need to make a couple of cutouts for the clamps - without them, the bottom will be useless. In order not to boggle the reader's head with various sizes and unnecessary explanations, we suggest just taking a look at the photo example below.
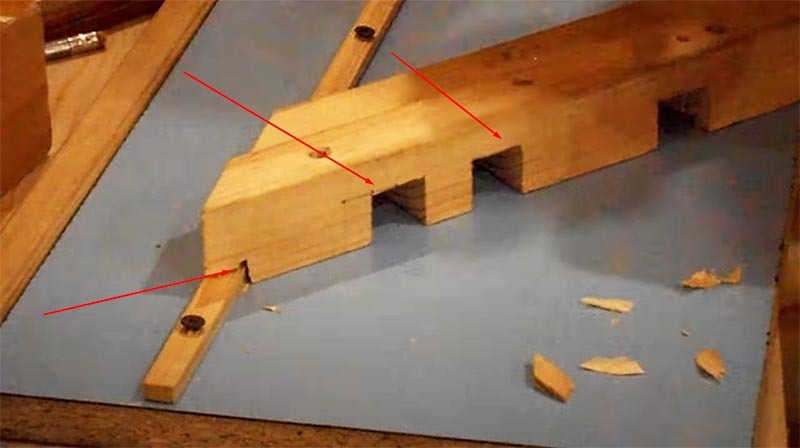
After the final adjustment, you can fix the bar with self-tapping screws, and then proceed to check its performance.
How to work with a manufactured bottom
In order to test the manufactured device, you need to take a couple of rails and try to file them at an angle, collecting the frame. When joining, you should pay attention to the gaps between the elements. It is unlikely that it will be possible to perfectly dissolve the rail evenly, which means that further processing will be carried out using the bottom.
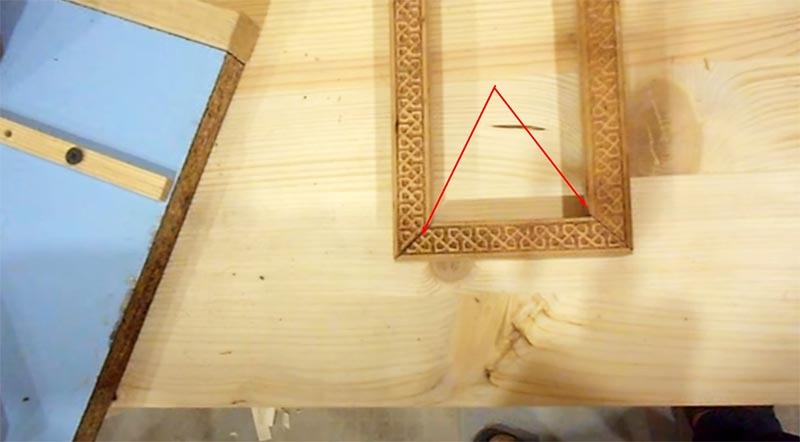
Now you need to lay the frame element that needs to be processed on the bar and fix it with clamps. It remains to make a few movements with the plane, and the corner of the element will be perfectly drawn.
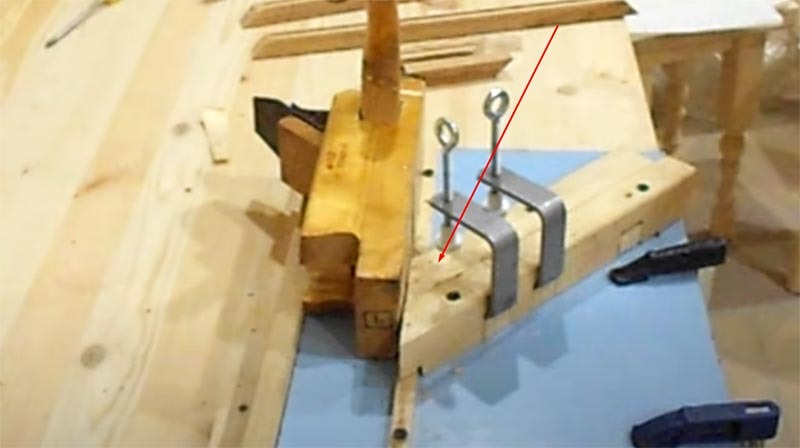
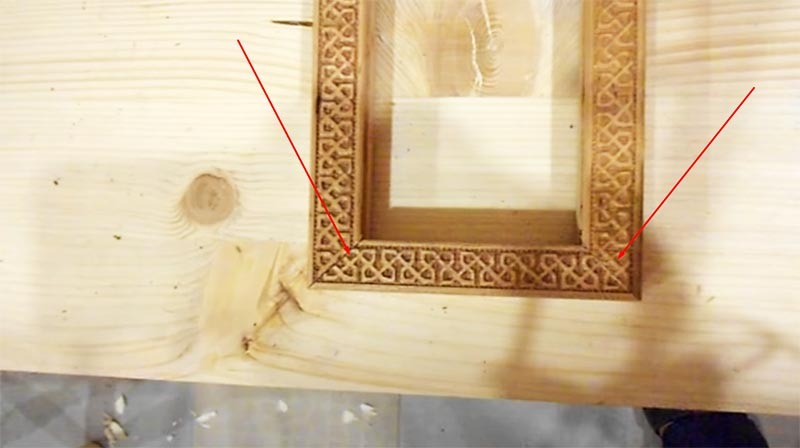
Here, in fact, are all the actions that need to be performed.
Summing up
Making various frames for paintings or photographs is a simple process. But often it is impossible to do without such a device as the bottom. This is especially true for wide elements. But the simplicity of making such a device and the minimum material requirements for this indicate that it is worth making the bottom for personal use. This is especially true for those who have decided to change their type of activity during a pandemic and start making various crafts with their own hands. As for the plane, the handle can be rearranged at any time to its original position, which will allow it to be used for its intended purpose.
We very much hope that the dear reader was interested in reading today's information. The best reward for us will be if you learn something new for yourself from the article. HouseChief editors will be happy to answer any questions on the topic, if any. You just need to state them in the comments below. There you can also express your personal opinion on whether such a device is useful in a home workshop. We would be grateful if you rate today's article, regardless of whether it made a positive or negative impression on you. And most importantly - take care of yourself, your loved ones and be healthy!
